5 Intro to Instructive Writing
Week 5 Lecture
Hey associates, this lecture is an introduction to presenting instructions and various command-focused documents in technical writing. An instruction manual or user guide is one of the most common and classic forms of technical communication to use as an example when someone looks at you confused about this technical writing field. It is those step-by-step explanations of how to do things with strong, commanding verbs: assemble, operate, repair. Today’s content focuses on building more useful, useable, and enjoyable commands and instructions for your readers to accomplish the tasks. The note-taking guide can help organize your thoughts and concepts (Google Slides).
You can also listen to the podcast as you read.
The lecture is broken into three core sections.
- First, I will explain the rhetorical situation–that is our base CAMP for the general context, audience, message, and products that align with the need for instructional materials.
- Section 2 describes the standard sections and content you should expect to find or write in technical instructions.
- The last section covers some grammar and editing concepts that you are expected to follow.
Recap Sections
I will list the topics and key points you need notes on in these blue boxes. This box doesn’t replace reading the section; it is just a guide to help you check your notes.

Your notes are personal to your learning preferences and creative style. Try to make something you can enjoy to engage in the writing process. For this chapter, you might try writing your notes as a procedure or reference guide to help you complete the tutorial eBook project.
Section 1: Rhetorical Situation for Instructions
A rhetorical situation for a document is the fancy word for our CAMP site. It is the general context, audience, message styles, and products that apply to command and instructive writing. I will explain the broad elements of CAMP, and you will need to establish the specifics and variations for your given situations where instructions are needed.
1.1 Context
This is our WHAT, WHEN, and HOW for a project that starts the analysis.
The WHAT is your writing purpose: the “what is the point, goal, and need” here. A set of instructions or commands typically have a purpose to “guide users through a standardized set of tasks that will accomplish a standard output.”
✨We can break that purpose statement down into its meaning: We write down instructions so that everyone does the same thing to get the same outcomes. Instructions are common in all workplaces because companies generally want consistent practices and outcomes across teams.
People usually turn to instructions WHEN they don’t know what to do, obviously. If they did know exactly what to do, they wouldn’t be reading or watching your content. Users often reference the instructions when they are actively working on the tasks or at least in a short period. Sometimes, we read the instructions or watch the tutorial before we start a project, but usually, it is within a small window to start the work. This pattern of reading means that we can be granular–or very small, detailed, and specific in the chunks of info–because they don’t need to understand or remember a BIG picture. Instead, they need individual steps and pieces of information.
The HOW people use it is often in small bursts and segments with a lot of pausing, scanning, returning, and rereading. More than any other document type, instructions get skipped and scanned as people look for the step they are stuck on or the error message in troubleshooting. Once folks find the step, they actually read that section more than skim because they are actively attempting to follow the information.
✨The other consideration for the context is clearly identifying your materials’ outcome. Instructions and commands build to something being accomplished directly. This is the thin difference between the instructions for this unit and the descriptions of the last unit. Descriptions have a purpose in defining what something IS, what it DOES, and how it WORKS. The outcome is focused on learning, gaining insight, and general understanding of the equipment, software, process, or product. Instructions are about guiding action to reach that uniform outcome. So, suppose your writing focuses more on describing the features, benefits, updates, and general uses. In that case, you are writing a technical description rather than a set of instructions, tutorial, operating procedure, workflow, or other command. Descriptions absolutely help and are included in user guides, but try not to confuse the purpose of a description section with the overall purpose of instructional materials.
In other terms, and as a quick example: I recently got a new mouse with programmable buttons. The page from Cherry that describes the customization options and features has an outcome of explaining what the buttons CAN do and HOW they work. They don’t tell me what to do to for my own mouse, just that it is possible to map the buttons as a general feature. That first page is the technical description of my new equipment. Then, I read the user guide on how to program my mouse. The outcome of that page is a standardized task–no matter who reads that, if they follow the steps they will have the outcome of a programmed mouse. Of course I programmed my mouse with the Cut, Copy, Paste shortcuts while someone else would do other mapping, but the outcome is same: a mouse with all the buttons mapped to shortcuts.
1.2 Audience
Besides the general context of guiding to the standardized outcome you want every reader to achieve, we have to think about the primary audience for most commands and instructions. Recall from past lectures that the primary audience is the reader who needs, cares, values, and benefits most from the work we create. That is the audience persona we imagine and cater to when creating projects. We also have secondary and tertiary audiences who might interact with the work, but it isn’t created FOR them directly.
We can use the User Persona sentence to analyze and think about the audience–remember that sentence goes: As a [key role, title, or descriptor], I need this information to [the purpose] because [the reason].
With instructions, your sentence is usually something like– As a [product user], I need this information to [run the specific feature] because I [need this completed correctly, efficiently, and to standards].
Within that general persona, every audience situation is a little different. So you fill in the type of product user (it is usually a product, though), the purpose (which is almost always task-based to complete a specific outcome), and reasons that specific outcome is important for them to achieve.
The primary audience reflected in your user persona sentence will tend to have a few other qualities when reading instructions.
✨For their knowledge and role background–the WHO are they: The primary audience for instructions will have less background, knowledge, and confidence in that exact topic….or else they wouldn’t need to read the instructions. Remember: people look at the instructions because they don’t know exactly what to do and will skip to the parts they are stuck on.
This audience might have a background in the field–so SOPs in your lab, of course, assume all the techs have a background and some experience in your lab’s niche, but they don’t know exactly what to do on the new standard or process. They might also know a prior version of the equipment or software, so again, your lab techs used the past version, but things have changed that are now unfamiliar. That unfamiliarity with the new change or tweak is the knowledge your instructions must provide. Since we usually assume the target audience has a lot of questions and doesn’t know how to complete the task exactly, we need to give them detailed tips, notes, tools, and actions for each step. It might seem “easy” or “obvious” to you, but you are writing the instructions so you know and understand how to complete the task. Anyone with your knowledge and background won’t be the target audience reading your document. It is for those who are missing that knowledge and need it now.

✨For their attitudes, remember that they might be frustrated when they reach your instructions because they got stuck and now need the information. They might be inquisitive if they read the instructions to determine how to start a project. They may be nervous if this is their first time doing the work or if it is a really important task that must be done exactly and correctly. Emotions shape how people read, pay attention, and interact with the content, so be mindful of this.
Quick example: I often find Reddit more useful when I’m troubleshooting something in Premiere or Resolve (when I’m editing content) because the threads are more exact to my issue, with responses that seem to empathize better with my frustration or confusion than the official Adobe help center. Often, the original poster, which has the same issue question that I do, uses the same language and keywords, so it comes up in my search. When I search the Adobe Help wiki and forum, I usually am not using quite the right keywords so I can’t locate the page. OR if I do find the right help page, it ends up being more of a features description than instructions on how to fix my specific issue. The outcome there is often more on reporting the issue than helping me fix it at that moment. One gets me more frustrated (reading general guides on the tools), and the other makes me feel less… honestly silly, stupid, and confused because other people have the exact same issue with relatable, specific, helpful steps for the work arounds.
1.3 Message
The context and the audience lead us to the message portion. This is when we determine what to include and how to deliver that content with our styles.
Remember.
We can present any topic in a scholarly, functional, interpretive, or affective style. Most commonly, the message of instructions will be functional/interpretive– walking the line between those two forms. The functional style focuses on exactly how and why the topic works with heavy jargon…that style is appropriate for audiences internal to your company, such as the lab techs who need to understand both exactly what to do with the equipment but also notes and contexts on how it works or why they need to do it that specific way. The interpretive style focuses more on general, relatable language that tells people what to do but with less emphasis on why to do it. This style is more appropriate for general audiences and consumers of products.
Instruction documents also tend to have higher reading scores–that means they are easier to read with short, direct sentence structures that can be understood literally. Generally, aim for a 50-80, depending on the more functional (a little harder to read) or interpretive (a little easier to read) style. We don’t usually expect advanced literacy scores–meaning we don’t write it expecting the audience to analyze, compare, and think critically about the meaning. We want them to read it and process exactly what it means on the surface.
Independent of the exact style and reading score you aim for to serve the audience, instructive documents share a similar structure and qualities in the message.
- Most are structured in chronological order using numbered steps. The chronological organization pattern–remember from the past lecture– is most appropriate and effective when our content has a time-based series. Sometimes, a spatial pattern can work or be combined with the chronological order… for example, you are writing the operating procedures for maintaining a piece of equipment. You might organize it spatially, starting with the top to bottom of the machine and then chronologically with the steps to maintain each component.
- Instructions rely heavily on graphics–especially simple line drawing diagrams and photographs. People tend to understand the required actions when they see the pieces or have a model. This tendency is also why video demos are so popular. In writing instructions for learning a new software program or digital-focused task, you might use screenshots as a form of photograph.
- Last, instructions will have warnings, notes, and other special emphasis content to enhance the task. Usually, these are tagged with symbols, borders, and other font changes to draw attention to the tip.
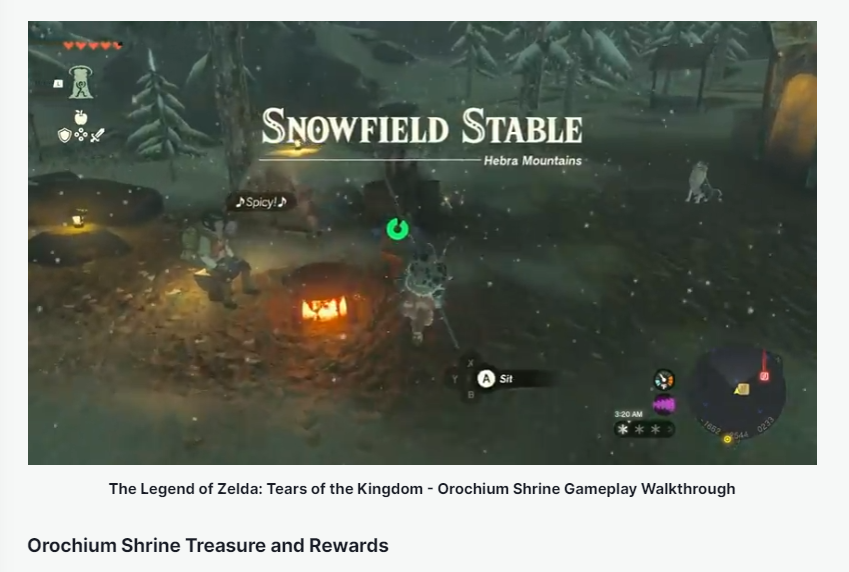
As a quick example, I needed to read a lot of tutorials for Shrines when playing through Breath of the Wild and Tears of the Kingdom because I wanted to unlock them all (I’m still chasing the 100% on both!). Sometimes, I just got stuck and was not seeing the steps needed. Usually the content–or the message–of those tutorials was organized in chronological order beginning with activating the Shrine (usually I skipped that because I was already IN the Shrine location). Then they went action by action in the order needed to solve the puzzles. They included screenshots from the game so how the angle and placement. Additional hints and tips were included such as items to pull from the inventory– a fire fruit or red chuchu jelly to light the arrow– with options to assist general gameplay. Sometimes a YouTube video was linked with someone actually completing the puzzle. I usually skipped just the step I was stuck in and then tried to figure it out from there rather than fully reading every single step. The order, graphics, hints, and overall structure let me skip to what I needed and then dip out to try finishing it on my own.
Within the instructions’ content, we have two big categories for “process texts” or framing your message.
- ✨Explanatory Frame: While there is still a clear and standard outcome, this framework is more reflective and open. The explanatory frame is a perspective to write instructions that allow the reader more interpretation and connection to the author with more reasoning or value statements. Classic example: recipe blogs. If you complete all the steps, you get a standard outcome, and before or weaved within the steps is a long personal narrative and explanation of how and why they suggest baking the cookies this way. It is more explanatory of the process while leaving more options for you to adjust.
- ✨Prescriptive Frame: these are more direct and authoritative. The prescriptive frame is a perspective to write instructions that dictate rules to be carried. These are the most common ways to write instruction documents, especially in STEM and business fields. For example, any standard operating procedure is prescriptive because it tells all the employees exactly what, when, and how to complete the work. However, things like a Lego set booklet are prescriptive because they show exactly one way and order to assemble the build correctly.
As with most things in writing situations, these categories are not mutually exclusive. You can blend each frame within a single document depending on how strict the actions and steps need to be.
The last element in the message and choice you need to make as a writer is the breakdown of procedures, tasks, and steps.
- ✨Procedure refers to a series of actions conducted in a certain order or manner. That means your procedure is the overall result that your instructions guide someone to complete.
- ✨A task is a group of actions within the procedure. So, tasks are like major stages someone works through before changing things like tools, components, or mindset.
- ✨And a step is the individual action that the user takes.
Example: At the end of the semester, I follow a PROCEDURE for submitting final grades. That procedure is broken into three TASKS: exporting from Canvas, importing into the grading system, and approving final submissions. Each task has a series of STEPS, so I take specific actions to export my grade book. Then, I take different actions to import the grades. And I take a last set of actions to get everything approved and done.
So— steps are individual actions. Multiple steps create a task. A group of tasks is what we call a procedure. Not every set of instructions has to have tasks, especially if it is quite simple. For our technical fields, things will almost always be broken into task groupings…or at least it can be quite helpful to create task groupings in the same way that organizing your writing into core topics with headings and subheadings is helpful.
The message for instructions is usually chronological because of the importance of order as we move through the tasks and steps. Each step can have a visual to help people complete the action. We can write it more explanatory or prescriptive; however, in STEM situations, it tends to be prescriptive because you tell people exactly what to do for maximum consistency and standards.
1.4 Product
Finally, the types of products you might use to communicate the message with the audience to serve the purpose. There are many potential products–or genres of documents– to create that can meet your CAMP goals.
- ✨Manuals: Generally, manuals are longer documents that contain multiple procedures along with compliance, warranty, and other legal or product-specific information. A manual has a higher blend of instructions and descriptions because it aims to explain what is expected and how to use or complete tasks. It is becoming less common to ship a complete manual with a product. Instead, we tend to provide digital versions on the product website because they are expensive to print and often go unread (until someone needs it 🫠).
- We can have product manuals for physical goods
- Software manuals for programs
- Employee manuals for business procedures and policies. The employee manual is different because it contains more policy descriptions than explicit instructions. Within employee manuals, we tend to find specific training manuals based on job placement and responsibilities focused on the procedures for that position.
- ✨Reference Guides: We usually create hyper-focused reference guides on procedures since manuals are long and thorough. It is possible to take sections of the manual and parse them into individual reference guides with some editing for usability. These are far more commonly read and used since they are more tailored. When you get a new product, a “quick setup” guide that links back to the full manual is often included.
- We can have those quick start guides with products and software
- You can break out the Troubleshooting steps into a Troubleshooting Guide
- You may be given a Maintenance Guide for expensive equipment
- We also have interactive guides like an installation Wizard for downloading and setting up new programs.
- ✨Standard Operating Procedures (SOPs) are the rulebooks for organizational processes. They outline the exact steps to follow for a specific task to ensure consistency and quality in the workflow. They’re usually detailed and include safety precautions, quality control checks, and troubleshooting tips. The main goal of an SOP is to reduce errors, and they are most common in sensitive, dangerous, or heavily regulated fields.
- In healthcare, SOPs govern everything from how to sterilize equipment to how to administer medication. If you do not follow the SOP, people are at risk.
- In manufacturing, they ensure that products are always made to the same standard. Here, the SOP focuses more on efficiency and uniformity in the outputs.
- You might see them handling complaints or onboarding new employees in business. The HR type of SOP is usually more about setting expectations across teams and efficiency; however, they do help with compliance for all the paperwork required when turning over positions (hiring and firing).
- SOPs are also common in military work, including civilian contractors and government sectors, because specific actions are required to comply with regulations and approval structures.
- ✨Interactive and Media Products fill in the gaps. Manuals, reference guides, and SOPs are typically written genres, so we can edit, reprint, archive, sign, share, and generally document them. However, people like and often benefit from following along with more interactive and dynamic formats, which are more resource-heavy and challenging to develop.
- You could create several types of video, such as a demonstration of you completing a physical procedure, a narration of you explaining the steps, or a screen capture of you talking through a software-based procedure. Video can be as complicated as you make it–though higher-quality videos require some skill, background, and resources in scripting, producing, and editing. But we see “DIYers” making solid and often helpful content on YouTube for how to create stuff.
- Interactive tutorials or simulations, which allow users to practice the procedures in a safe environment, are a more expensive but cool form of instruction. This is becoming more prevalent in online classroom labs, pilot training, and medical training. These are difficult and require specialized software to create.
- Incorporating virtual reality or augmented reality experiences could offer a more immersive and engaging way for users to learn and practice the procedures. These are not widely integrated–they are more of a testing phase right now–and offer something interesting to watch as we move forward. In one of my internships, I helped test and write documentation for a VR program to interact with growing a flower garden to teach both the procedures in horticulture and the technical process of photosynthesis. It had a long way to go, and I did experience some motion sickness and disorientation… but potential applications exist. I think AR is a more feasible path now, as we use our phone screens to interact with procedures.
1.5 Questions to Guide the CAMP
Now, there are a few questions you can ask yourself that can help you narrow down the product that best fits your instructions’ context, audience, and message.

Are there time constraints or urgency the user might encounter when reading the instructions or performing the process? If yes, a reference guide might be better than a manual since guides are more focused and faster.
How will your audience gain access to the instructions? This is similar to our answer about the field techs compared to the sales folks in previous lectures. Generally, physical procedures should be printed (so someone is working with a tangible product). In contrast, digital procedures can be electronic (so someone looking at software guides is probably in a desk-type environment). But there are exceptions and reasons in both directions here.
Consider the actual environment because digital instructions are not always accessible (like those working on job sites) or useable, like if you don’t want to put your phone or computer at risk in the garage (what if you drop a hammer on it or spill oil…I’d much rather ruin a booklet).
What is your project timeline and skillset? Most instructions are written documents because they require fewer resources, and more people can create them in a shorter timeline. While a video or an interactive site might be valuable and helpful to the CAMP, the value-to-cost ratio could be a little off if you have to learn editing software or contract out to programmers to make it. Even within professional technical writers, the training and skill set for multimedia and interactive content varies greatly as most programs focus on text-based work.
Will the instructions change, or are there key variations in the procedure? If you are writing help guides for something that will be updated more than twice a year–such as software with significant versions and updates–then you need to pick products that can be edited and redistributed without redoing the WHOLE thing. Guides and SOPs are much easier to update, and things like SOPs even track changes/revisions within the larger approval and standards process. Full printed manuals, videos, and interactive content is harder to update and will usually need to be completely redone.
Cool—so products depend on who, how, and when the information will be used, with reference guides, shorter, more focused versions, and SOPs common in STEM and business fields. After that, you might need full manuals for new products and could invest in new media forms if you have the resources.
Before we wrap this section, a keynote and a breakdown of the CAMP for our classroom materials. While some people will call project explanations “the instructions,” I find that most professors use misleading and incorrect terms. They usually don’t write “instructions” for you based on these key campsite qualities and instead create something closer to technical descriptions. Here is why:
Context: professors need to describe the projects’ expectations, requirements, and grading so that you can complete the work. The purpose is a standardized outcome; that part fits for instructions, but the assignment sheet’s true goal isn’t telling you step-by-step how to achieve that work. It reflects more documentation for what needs to be accomplished than how you meant to accomplish it. Why? Because you are supposed to think harder and connect the dots yourself as a method of learning.
Audience: As a student, I need to see the expectations of the work outlined to demonstrate what I’ve learned to the person grading. In the classroom, we assume that the primary audience has the knowledge, experience, and skill to figure out the project steps and complete the work without explicit tutorials because they’ve been processing the class content. We also design the project sheets to test your critical thinking, problem-solving, independence, and creative skills.
Message: The project sheets must outline the required components and how you will be assessed. Anything more than general descriptions of the end product will infringe on how we assess your application of class concepts. However, we usually include some task areas for accessing specific tools, downloading templates, and submitting the work that needs to be followed for some standardization. Usually, that aspect of the message is more about the logistics of the product than how to do the work itself.
Product: The project sheets don’t fit the common products of true instructions. They are a genre that combines descriptions and some instructions for a very niche situation. Just remember that most academics–just for school–don’t follow all the practices of solid technical communication to help users (you) because education needs to focus on learning, growing, and proving you’ve learned it…. Education isn’t typically about making things as easy as following step-by-step instructions. You need to do more thinking work than that, which is the point.
Recap
We reached the first full recap as we ended section 1 on the rhetorical situation for instruction writing. Check your notes that you have information on the following areas:
- The context of instruction, along with the purpose and need they serve.
- The qualities of the primary audience for instruction with the knowledge and attitudes they usually possess.
- The styles and framing for the message in instructions and why they are usually written this way (with examples)
- The four different common types of instructional products with examples that relate to your careers.
Take a Break! Seriously. Take a little break, get a little snack or treat, and when you are ready, hop into Section 2, which dives deeper into the typical content sections for procedures.
Section 2: Standard Organization and Content
Welcome to section 2, where we will get more specific about the typical content of procedures. This content tends to exist no matter what your CAMP site details are…so this section contains the headings and details you include and tailor to fit the context, audience, message, and product.
✨You do need a title to start that is easy to understand. It might be a title page, a statement at the top of your guide, labeled as the video title, etc. But craft a specific, action-oriented title that identifies the outcome and key materials. For example, some good titles would include:
| Title | Core Action Listed | Specific Context and Audience |
| “How to Dose a Saltwater Aquarium” | Dose | saltwater tank owners (different from freshwater needs) |
| “Operations and Maintenance Manual for the 2017 Chevrolet Spark” | Operate, Maintain | car owners with that specific year/make/model |
| “Cleaning a Bathroom: Instructions for Shower, Sink, and Toilet Hygiene” | Clean | bathroom-specific cleaning on showers, sinks, and toilets |
After the title, the basic building blocks of instructions are the introduction, the procedure (numbered steps divided into tasks or phases), and the ending resources. These building blocks can be scaled up into front matter–title page, summary, and table of contents– and back matter with glossaries and appendices in things like a full manual booklet or scaled down to a single-sentence introduction and conclusion in your video demo. Everything is flexible as long as you 1️⃣introduce the topic, purpose, and required items for the procedure, 2️⃣provide the tasks of the procedure, and 3️⃣wrap up with a signal that the procedure is complete with any additional support.
2.1 The Introduction
The introduction explains the purpose, background/context, and versioning history, and value statements or the importance of the procedure. You will also include an explanation of who should carry out the task, the materials needed, any precautions the user should take (safety tips or other warnings), and an estimate of how long the process will take.
The user statement can be very explicit in SOPs, where you might label what job positions are approved to complete the work (and anyone without that job title literally should or cannot carry out the tasks for regulation, compliance, or safety reasons). They can also be more general guidance for the knowledge and background needed for the information. Be clear about whether your instructions are appropriate for a novice–a new user–or if they need an understanding of advanced processes first. It is FINE to realize your CAMP situation is creating instructions for advanced users as long as you make it clear in the introduction and link or reference where the novice-level materials can be found.
It is also helpful to explain why the user should follow the instructions, especially for more novice user content. For example, instructions for changing the oil in a car may explain why the task is necessary for the vehicle’s proper functioning. Most introductions are a few paragraphs to a couple of pages long, depending on the size and complexity of the procedure.
The introduction is where the purpose statement lives. That is the goal of the document you pinky swear to the reader you will accomplish in the work. Be literal. Be honest. And be direct with what gets done in your instructions. Most of the time, the strong verbs for the purpose statement (though not exclusively…pick the word that best makes your promise) are instructing, guide, lead, direct, train, or any synonym of “teach.” Your purpose statement in the introduction will be something like
“This handbook guides you through every step of starting a podcast on Anchor, from producing and distributing to growing and monetizing.”
That tells the reader of “How to start a podcast: The creator’s step-by-step guide” that the information will walk through the tasks of producing, distributing, growing, and monetizing content on the platform.
After finishing the purpose statement and audience introduction to the procedures, we usually include two more content areas in the introduction. These can be tied into the paragraphs or set apart with Support Headings–those are Level 2 or ### words because these support the core topic heading of the “Introduction.” We also see these sections in textboxes highlighted in the upper or lower third of the page. Don’t overthink it–you have options. Just make sure I can skip and scan to find warnings and tools.
Precautionary Statements
Instructions must alert readers to the possibility of damaging the equipment, botching the procedure, and injuring themselves or others. We have standard names, symbols, and colors to use for the notice, caution, warning, and danger notifications. Please don’t rely on color alone to draw attention here since 1) instructions might get printed in greyscale and 2) digital accessibility (we have a whole lecture on what that means soon). In this case, printing, color blindness, and other vision impairments require a word, a symbol, and a color combination to convey this KEY safety information).
![]()
- ✨The “Notice” precaution is the lowest risk level statement. The standard notice color is blue, with an exclamation point inside a circle. Use it to indicate when there is a risk of damaging property, equipment, or other non-living things. You can also use it to draw attention to important operational considerations, again focused on the property damage. With a Notice, you are communicating that there is basically no threat to bodily harm.
- ✨A “Caution” statement should include the safety symbol of an exclamation mark within a yellow and black triangle ⚠️. The
OSHA standard 1910.145D describes a Caution Sign as “the standard color of the background shall be yellow; and the panel, black with yellow letters” to be official about it. It indicates there is a “potential hazard” for minor injury if you follow unsafe practices. So with this, you are saying… “hey if you don’t pay attention, you might need some stitches. You will be fine generally, but being unsafe here may get you or others injured.”
- ✨A “Warning” statement has the exclamation mark in a triangle with black and orange. It indicates that serious injury and possible death are likely if precautions and instructions are not followed. Use a warning if it is generally possible for someone to lose a limb, break an arm, or bleed out… things that are a “Hopefully you will live but possible might not” situation.
- ✨A “Danger” statement is the highest-level precautionary statement and should appear in a red, black, and white triangle with the exclamation point. It indicates a situation with an immediate hazard that will result in death or serious injury. Basically a Danger screams at people.. “If you are unsafe, you will probably die… maybe not… but chances are pretty high you will.”
So. Pay attention in your writing and reading.
If any part of the procedure merits a precautionary statement or warning, you must include a statement at the beginning of your instructions, either as part of the Introduction/Opening or as a separate section before the tasks begin. You should also remind the reader of the specific task or action where Danger and Warnings occur to reinforce that it is serious safety time. And in all seriousness–jokes aside– technical fields that work with chemicals, heavy machinery, sharp objects, and power tools must take safety in high regard. When you read an SOP with a precaution tagged, read it, process it, understand it, and follow the procedures because there is an actual risk of costing 1000s and more in damage, seriously hurting yourself or others in the area, and risking actual lives.
Parts, Tools, and Supplies
Help your readers be prepared with the parts, tools, materials, equipment, and supplies they need. If the instructions are part of product packaging, this helps them determine if everything is present–so all the pieces of the furniture and hardware.
- If it is a job site SOP, this ensures that the person has everything needed to complete that procedure efficiently and correctly.
- Including images or line drawings of the equipment can be helpful for public audiences, especially those who may not know the difference by name for a Phillips vs. Flathead screwdriver or estimate the size of the nuts and bolts well.
- For digital products, the equipment might include files and formats that need to be prepared, whether a mouse vs. the trackpad is useful, whether other programs need to be installed, the amount of RAM and Storage required, webcams, etc.
Just tell people what they need before they start because it is super annoying and frustrating to be halfway into a procedure and realize you need to stop and get something.
In instructions, these are typically listed in a simple vertical list or in a two-column list.
If you create the documents in Microsoft Word, you will use the “Layout” tab to access your page setup tools. You can type your list of parts, highlight them, and select the Columns menu for “2 Columns.” The text before and after your parts list should remain as a single column–the default page setup. Alternatively, you could insert a two-column table and remove the line formatting for the same visual effect–keep in mind that tables create other steps for digital accessibility and will not adjust as smoothly if you need to add or remove parts from the list. With the two-column approach, Word pushes content up and down your page layout without you manually adding or removing rows. If your parts list includes graphics, I find the table option easier to control because you can insert the graphics (a small photo, diagram, or icon) into a table cell that will line up with the text you write in the next cell. Since the graphic will increase the row height, you should set your text to align with the “middle” of the row so it stays even and aligned with your graphics.
If you create it in Google Docs, you will use the “Format” tab to find the columns option. Otherwise, it is the same steps as Word: write your list with bullet points, highlight the content, and set the two-column option. Again, you could use a table in Google Docs as well with the insert tab and formatting tools. Use a table for graphics and set the text to align with the middle.

2.2 The Actual Instruction Section
Following this introductory material is the sequence of step-by-step instructions, divided into tasks as appropriate. We will discuss strategies to make your steps more useful to the reader.
Remember: they are only reading your instructions because they don’t know how to do them. This is not the time to skip steps or assume that something is too obvious. Our primary audience doesn’t know and will skip any parts they already understand or have completed.
Within the instruction section, the work is most often in the chronological or spatial organizational pattern because things need to be done in a linear, specific order. One step depends on the prior being completed. That is the most common and is called a Fixed-Order Procedure. For example, if you are changing a car tire, you have to set up the jack before you can remove the old one before you can fit the new one. The format and style are usually numbered, with steps from 1, 2, and 3. In the Fixed-Order, you could have the Tasks (the groups of steps) being 1, 1,2,3, and the steps numbered within for 1.1, 1.2, 2.1, and 2.2 to indicate that the tasks are fixed order AND the steps to complete the tasks are fixed as well. That is called a “Nested Procedure” and is common for more complicated, technical work that you may see.
BUT! Guess what?!?! We do have other forms of procedures, so write down these three additional organizational categories:
✨First, Variable-order Procedures are when the steps can be completed in any sequence. It doesn’t matter as much that people go in the linear order you write. Because documents have to have some form of an order, you will pick from alphabetical, spatial, difficulty, or commonality for your content while indicating to the reader that the steps are independent of each other.
The core example of this is a troubleshooting guide. I should be able to scan around your troubleshooting procedure and could try the fixes in any order that I want. Another example–though this might hurt the souls of any hardcore bakers out there–is a recipe. Really, it doesn’t actually matter if I add the wet ingredients to the wet bowl first or if I focus on the dry ingredients in the dry mix first or decide to prep baking sheet first. All those tasks need to be completed at some point, but I can focus on whichever I want first and even simultaneously complete tasks with whoever I’m cooking with. When you have a variable order, you should use bullet points and NOT a numbered list because bullet points signal that things are in no particular order.
✨Second is an Alternate Steps Procedure when two or more ways to accomplish the same thing are presented. These usually happen with conditions that change the user’s actions. Think of it as branching timelines.
And an example could be instructions for a medical monitor. The standard procedure involves placing the monitor on the patient’s finger; however, some patients might have an alternative site approved by their doctor. In this case, an Alternative Step Procedure would clearly outline how to affix the monitor to the alternative location. Or if you write user guides for video chat software, you probably need alternate steps for Windows, Linux, and IOS users. And then within the alternate steps you probably follow the fixed-order pattern–so once they branch off into the appropriate condition set.
✨And last are “Stepless” Procedures, which are a little controversial as a pattern. Some technical writers define them as highly visual and intuitive procedures that don’t require written steps–but I argue that definition is misleading because even Lego sets have a fixed order to build even though there isn’t writing. Other technical writers define stepless as so generalized that there isn’t an order, and they will state that user guides focused on explaining the features of a program as an example. I lean more into that conception of them–like how Microsoft has guides explaining everything that can be done in a program without necessarily having a step. However, I also argue that those general feature guides are not procedures because they do not have a clear, actionable outcome…instead, they serve as a technical description with a few steps to access that tool.
I find that the primary use-case for stepless instructions, the procedures that have tasks to be completed but lack any form of direction and sequence, most common and almost exclusively created in education environments. This goes back to the example from section 1 where I said most project “instructions” are really descriptions. Well that is because descriptions and stepless procedures are two sides of the same coin meant to guide your actions and explain generally what to do without actually telling you exactly how to accomplish the goal.
✨A little confusing, so for most of your careers, the procedures the Fixed Order, Variable Order, and Alternate Step patterns are the ones actually to worry about. And from there, provide the actions–with strong descriptive verbs– and direct, active sentences.
✨The last thing about the standard organization and content to include in the actual instruction section is Supplemental Information. Often, our primary audience will need additional explanations that accompany the actual action and step. I’ll keep saying this: the person actually reading the instructions is only spending their time and energy because they don’t know what to do.
So, in your instructions, think about adding things like:
- Before-and-after pictures: Show them what things should look like at each stage so they know they’re on the right track.
- A note: Explain why the step matters and what could go wrong if they skip it.
- The mechanics behind it: Give a quick explanation of the underlying principle – it helps them understand the why and makes it easier to remember.
When including supplementary information, it should be formatted as a “Note” or “Tip” in a similar way to the “Notice” information–usually a textbox with an accent color and symbol. The notes and tips don’t have the same standardization since they don’t deal with health, safety, and damage. Your notes and tips could also provide personal narratives or examples you found while completing the tasks, like if you write less formal procedures for the intern–pass along the knowledge to help them out.
Supplementary information can hide the actual step. We must ensure our readers can still skip and scan around the steps and notes.
So when you make your procedures, generally avoid dense paragraphs of explanation on the page and instead split the information into chunks with borders–use the “Weight” setting to make a border on your textboxes in Word, Docs, and any information design platform or use bolded font to bring the scanning back to the core instructions.
Don’t write everything in bold because that is harder to read (it lowers the letter distinctions). Instead, just make the key verb or the number of the step bold so readers are drawn back to the steps when scanning. This can also be avoided by making the steps a numbered or bullet list and the special notes the only paragraphs on the page.
You have options. Just focus on Skip, Scan, Skim.
2.3 Conclusion Formats
The conclusion section is the last area of our three-part core structure for all procedures. Similar to the introduction, this section varies depending on the formality and medium.
A super important and formal SOP for the multi-million dollar equipment will probably have more extensive conclusion information including a glossary, troubleshooting, added resources and cross-linked versions, and maybe emergency protocols. But a YouTube video tutorial will probably just conclude a sentence about “And now you have an X thing complete” and ask you to like, subscribe, and watch similar demos. The thing both forms have in common though is a signal that you are finished with the instructions and a way to find additional information.
Conclusions for technical instructions and procedures are designed to provide audiences with additional facts, resources, or information that may be outside the scope. The options are endless, but write down these 7 most common ways to wrap up your instructions.
✨Clean-Up Information: This section is perfect for outlining the proper disposal of materials, cleaning tools or equipment, or even general tidying after the procedure. If hazardous materials are involved, provide explicit instructions for safe handling and disposal. Include relevant warnings or precautions. We also often see notes for recycling on consumer product packaging and such.
✨Maintenance or Service: This area anticipates the user’s next steps, advising on routine upkeep or future servicing. You can provide a clear maintenance schedule or recommended service intervals, which can also help your company with warranty disputes (if you wrote the schedule and the customer didn’t follow it, your company is protected…on the flip side, as a consumer be aware of those maintenance tables that might void your warranty or be used as a reason you are at fault for any issues). You can also include contact details for authorized service providers or customer support in case of more complex issues, especially with expensive equipment at work.
✨Frequently Asked Questions: Brainstorm users’ potential questions and address them proactively. You might try to group related questions for easy reference and then provide clear and concise answers without as much technical language. If you wrote your procedures at a functional level, you might pull the FAQ section back to an interpretive presentation since your reader clearly didn’t quite understand.
✨Troubleshooting Advice: This is your problem-solving corner. Offer solutions to common issues users might encounter during or after the procedure. Provide clear, actionable steps to resolve each issue, especially for minor things. Save your reader the time and process of contacting customer service.
✨Sources of Additional Information: Point users towards further learning. This could be other manuals, websites, or contact information for support. These are usually digital links so that we can update the information without reprinting all the manuals. You can also include contact details for customer support or technical assistance here.
✨Product Specifications: Provide technical details like dimensions, power requirements, or compatibility. This is probably more helpful or common with assembly procedures because you can conclude with how the assembled things should look and the dimensions as a last check for the reader to know they did it correctly.
✨Tips and Tricks: Share insights for optimizing the user experience. If it doesn’t feel or work well to include your tips inside the instructions as supplementary information, you could add them to the concluding materials instead.
You can also combine these different ideas to fit the user’s needs, so don’t stress about picking just ONE or the other. No matter what you pick, include something to tell the reader this is over. If you stop writing after the last step…it can open up confusion about whether the video was just cut out, whether the last pages didn’t print, and general uncertainty.
👻Don’t ghost the reader; you need to give them closure that things have ended.
Recap
time for the section 2! You should have notes on the following areas:
- What to put in the title with examples of helpful and less descriptive strategies
- What should be included in the introductory materials, with specifics on purpose statements, background, tools, and precautionary notes? Those precautionary notes are important.
- The organizational patterns for the instruction section with examples of each type
- Here are some ideas and examples for what to include in the conclusion section and materials. These tell the reader they finished and point them to additional, helpful content.
Take a break! The last section is on the writing, editing, and final polish. Very riveting content (says sarcastically), so make sure you are in the headspace to focus on these details.

Section 3: Editing and Polish
You are starting the final section in this lecture on an Introduction to Instructional Writing. We need to talk about the language and style expectations with voice, word choice, and consistent structure.
3.1 Imperative Mood
Instructive writing is typically a command or directive to the reader. We want them to do the exact thing we wrote into the steps literally. The most concise and efficient way to share that information is by using the imperative mood or command voice. You can write your instruction in the standard active voice–just the regular old sentence structure we covered in previous lectures–and your overall procedures will have a mix. But when you get down to the actual steps and actions, we usually expect (and it is faster for you to write) in commands.
So, what does it look like? It is when you address the audience directly as if you are talking right to them. You will start with the verb, the action you are commanding them to do, instead of starting with the subject like a regular sentence.
- “Plug in the red wire to the red audio jack.”
- “Press the ‘Start’ button to initiate the sequence.”
- “Restart the device as the installation completes.”
See how those sentences are straightforward and action-oriented? That’s the power of the imperative mood. It cuts right to the chase, leaving no room for confusion. When talking to people directly and verbally, that voice comes across as demanding and possibly rude–but we don’t worry about that so much in written instructions. Audiences expect to see this format and are looking for that action upfront. If you are recording a video tutorial, you can soften the voice by adding phrases like “We will press the start button next” or “You should restart your device.” That uses the standard active voice construction by adding the “We” and “You” back as a formal subject. Videos will use the collective “We” because the person on camera usually demonstrates the task as the viewers follow along.
✨Because the command voice emphasizes the action, you must select strong verbs. Here are a few ideas of weak verbs that could be swapped for stronger ones to get you thinking:
- Move turns into Rotate or Align
- Place turns into Insert, Attach, or Secure
- Look turns into Inspect or Verify
Now, even with those examples, the context matters.
For example, Inspect is a very strong verb in programming because “Inspecting” a page or an element means pulling up the code or the metadata (so we can replace the phrase opening the file propertities on the document with just inspect the document). In a physical environment, Inspect generally means to closely view a component while comparing the standards. Again, telling someone to Inspect or Verify the calibration settings points them the detailed, double-checking behavior.
Remember
Strong verbs have limited interpretations that describe the action on their own. Weak verbs can be completed in many ways. For example, our example was “study” because the action of studying can look like highlighting notes, teaching others, quizzing with flashcards, etc. If you used a term like “Study the keywords” in instructions for new students to be successful in their classes, it wouldn’t be clear what you meant. Procedures are all about standardization and similar outcomes for everyone who reads them. Be strong with your verbs.
3.2 Additional Word Choice
Apart from the verbs you select, we consider word choice to be more concise and descriptive.

Four things are key in all your instructions:
✨Define complex terms. Even in a technical environment where you are writing functionally for knowledgeable people in your field, the primary audience of your instructions is not familiar with the specifics of your topic. Otherwise, they wouldn’t waste their time reading it. Confusion is inevitable unless you clearly define the terms tied to your procedure.
Anticipating where your audience might need clarification is easier said than done. It is a skill that becomes easier the longer you write in a specific job (because you start to learn the common knowledge for that field, company, and niche compared to the new terms). But when you start, I suggest flagging the names of parts specialized to the equipment or task, names of novel features or methods used in the development, and terms specific to the language you are coding in. Over-defining and providing a glossary in your conclusion materials is usually better than skipping potential words. You can also ask the people around you to define a term: if they don’t get it completely right, that word is probably worth your written definition. When you define the term, use our three-part formula of Term, Class, and Characteristics.
✨Spell out acronyms on first use. Acronyms are a form of short-hand writing that takes the first letter from each word in a title or phrase to create a label. They are helpful, but only if people know what they stand for. Again, don’t assume everyone knows (or knows it correctly). The first time you introduce an acronym, spell it out fully and then follow it with the acronym in parentheses. Writing that into a sentence takes hardly any time or space. For example, “The World Health Organization (WHO) recommends…” That is fast, easy, and stops any miscommunications.
There are so many acronyms on this college campus for example that are used in emails or forms that I and my colleagues don’t actually know what they mean– like what department handles this? You might experience it with the Course Names… if you don’t know what TCID stands for then the course title TCID 2090 doesn’t make as much sense.
✨Avoid figurative language. Figurative language uses words in a way that’s not meant to be taken literally or doesn’t strictly adhere to their actual definition and meaning. We don’t use figurative language in technical writing because it requires the audience to interpret and decode what you mean in the expression.
One of the most common in everyday conversation is the word “literally” as it is usually used figuratively. You might hear or have thought to yourself.. “I’m literally never going to finish all this homework.” Yes, you are going to finish the homework. It isn’t actually an unfinishable amount. You are figuratively expressing that the workload feels overwhelming and taking a long time to complete.
There are four big categories for figurative writing to avoid:
- ✨Similes: draw a comparison between two typically unrelated things. They usually use “like” or “as” in the construction.
As an example in a medical precdure you are writing: If the patient’s skin feels cold as ice, take their temperature and complete steps 3.a through 3.c. This simile opens up issues because no living patient’s skin should reach 34 degrees or colder (the literal interpretation). Instead say the actual action you mean with any key metrics: If the patient’s skin feels cool to the touch, take their temperature using the thermometer. Complete steps 3a for temperatures above 98 and steps 3b for those below 98.9 degrees. Now there are clear standards to track and clarity.
- ✨Metaphors: A metaphor also creates a comparison, but it does so more directly, stating one thing is another. Sure, it’s a powerful way to convey a concept quickly and memorably, but again, it doesn’t convey your actual meaning precisely.
If you were writing the employee manual with an introduction like..The CEO’s office is a fortress, impenetrable to most employees. First…what in the toxic work culture is this?! And second, what are the steps to get a meeting then? Instead say.. “The CEO has a carefully managed calendar, so all meetings must be scheduled in advanced. Contact… NAME with the purpose of the meeting and so on.” Now we actually explain why you can’t just drop in a bit better with room to provide useful information.
- ✨Personification: This figure of speech attributes human characteristics to non-human entities. It can add a touch of whimsy or drama to your writing, which is not usually an idea for technical work nor instructive writing.
For example don’t say… “When running the python script, the data wil dance across the screen.” This one is a little bit of trick because we have two personifictions yet only one is a problem. While ‘running’ is a human-type characteristic, it is also a term used in programming to describe the step of initializing your code. So that one is okay since it, in this context, is a technical term. Data doesn’t dance, however. Instead yuo would say “When running the python script, the data will populate in your table.”
- ✨Idioms are a more common issue in technical writing: These are phrases or expressions whose meaning cannot be deduced from the literal meaning of the individual words. They’re often culturally specific, which makes it even more confusing for readers and difficult for translators working with your company to make different language versions of your manuals.
Something like “Get the ball rolling” is an idiom meaning to start something, to initiate an action. While it’s a common phrase in casual conversation, in a user manual for a new machine, you’d want to use a more direct phrase like “Press the ‘Start’ button to begin the process.”
Same with “Cut Corners” to mean quickly or cheaply completely a task in conversation, but in the manual for the construction site writing “Don’t cut corners when laying foundation” can be confused with the real meaning on proper materials and techniques.
Your goal is to communicate clearly and exactly. Big Picture here: don’t assume the reader will interpret the cultural or contextual meaning of your words. Instead, assume they will take what you say literally–by the precise definition of the terms. Say what you mean and want them to do.
3.3 Consistency
Consistency and Parallelism are other key editing issue that causes miscommunication in instructions. Consistency creates a pattern and recognizable features for the reader, especially for readers skipping and skimming around. Maintaining consistency in language, formatting, and structure creates a sense of order and clarity that makes your documents easier to understand and follow.
Key areas where consistency matters most:
✨Terminology: Refer to components, tools, and processes using the same terms throughout your document. This helps your readers build a clear mental model of what they’re working with. Things get confusing if the software manual refers to the same button by two different names. This can be a challenge–even when I write the scripts for these lectures and chapters, I have to catch myself (and don’t always succeed 🫠) in swapping terms… things like Graphic and Visual… that are super close but not the same (refer back to the graphics lecture).
✨Style and Tone: Maintain a consistent voice and level of formality. Avoid switching between technical jargon and casual language, as it can disrupt the flow and confuse your audience. It signals that maybe they aren’t reading the right level of information. Also, switching between commands, such as active and passive voice, randomly is confusing. When we get used to reading in command voice, our brain starts to expect that action and verb as the first word. When you suddenly switch to passive voice in step 3, the brain has to recognize the pattern break and then search for the verb at the end of the sentence.
We like patterns. They make it easier to process content quickly. Don’t break the pattern.
✨Formatting: Use consistent headings, fonts, and spacing to create a visually appealing and organized document. This enhances readability and makes information easier to locate. It’s the same reason as the style and tone. We like patterns. They make it easier to skip and scan for the right information. Don’t break the pattern by suddenly having a different color and font on the heading for Task 2 and another totally different look for the heading on Task 3.
Pick a style and stick to the pattern.
✨Numbering and bullet points: Follow a consistent system for numbering steps or using bullet points. This helps readers track their progress and stay on track. The numbering system you choose doesn’t matter as much as sticking to that pattern: you can pick 1.1, 1.a, A.a (that would be atypical, but as long as you always stick to it, people will follow along). With the bullet points, we can customize the symbol–
- In Word, under the Bullet Point drop-down (the little carrot/arrow), you can “Define New Bullet Point” and pick from uploaded symbols and a vast library.
- Google Docs doesn’t have the same customization.
You can pick whatever fits the topic, but then stick with it. Don’t change the symbol unless there is a clear meaning attached to the new symbol, as the reader will see that and try to find the new meaning.
One more time. We like patterns. They make things easier. Don’t break your pattern.
Remember, consistency fosters trust and confidence. When your readers know what to expect, they can focus on the task at hand without getting sidetracked by inconsistencies or unclear language. When you break the established pattern, readers search for the meaning because you are (even if it is unintentional) signaling to them that something has changed.

3.4 Parallel Structure
And sticking with our theme of patterns, we also worry about parallel structure. Parallel Structure arranges a series of related words, phrases, or clauses in a grammatically similar or identical form. It represents your writing pattern, usually with verb tense and formatting of the list items. So, that all means that you should match the form of your verbs and the structure of your list items.
Let’s see it in action. Big picture with parallel structure is just to match the style and order of your parts of speech so people can read the pattern and not work so hard to find the actions.
| ✅ Parallel | ❌ Non-Parallel | ✨Reason |
| You need to collect the data, analyze the results, and interpret the findings. | You need to collect the data, analyzing the results, and then you should interpret the findings. | In that statement we have “collect” and “analyzing” with the -ing ending and then back to “interpret.”
You broke the pattern and changed the meaning because the verb tense goes from infinitive to progressive (basically something to be done compared to something actively happening in the moment). |
or
|
|
A non-parallel list jumps from imperative to passive to active structures. Each bullet point places the verb in a different location, making the reader work harder to identify the step. |
✨And as a last thought or note: these editing and polish aspects of mood, word choice, and consistency build on all the other writing and editing aspects from prior lectures. So, you will need to consider your ethics, the qualities, the general structure, the general editing, and the notes on graphics. Revisit those materials as you build your work in this specific context.
Recap
Okay, recap time! You should have notes with examples on:
- What does the imperative mood mean, and how do you write sentences in that style
- Considerations on word choice with examples of terms, acronyms, and figurative language
- Examples and strategies for style, formatting, numbering, and structure consistency.
Final Summary
We’ve reached the end of the lecture on an Introduction to Instructive Writing. Look over your total notes and ensure you have details, examples, and key points on what we covered today:
- Instructions are step-by-step explanations of how to do things, and technical writing strives to make them useful, usable, and enjoyable.
- The rhetorical situation for a document (CAMP) is the general context, audience, message styles, and products that apply to command and instruction-focused writing.
- The context of instructions is a project’s what, when, and how. Instructions typically guide users through standardized tasks to accomplish a standard output.
- The audience for instructions typically has less background knowledge and confidence in the topic than the writer and may be frustrated, inquisitive, or nervous when reading.
- Instructions usually contain functional/interpretive messages, are written at a lower reading level, are organized chronologically, rely heavily on graphics and include warnings and notes. They can also be explanatory or prescriptive.
- Instructional products include manuals, reference guides, standard operating procedures (SOPs), and interactive and media products.
- Standard sections and content in technical instructions include a title, introduction, procedure, and ending resources.
- The introduction explains the purpose, background, versioning history, value statements, intended audience, materials needed, precautions, and estimated time.
- Precautionary statements alert readers to potential dangers and should be included using standardized symbols and colors when relevant.
- The list of parts, tools, materials, equipment, and supplies helps readers prepare and can be presented in a list or table, sometimes with images.
- The instruction section contains step-by-step instructions, often organized chronologically or spatially, using a fixed-order, variable-order, alternate steps, or stepless procedure.
- Supplementary information, such as before/after pics, reminders, and explanations, can be included to help readers understand and follow the instructions.
- Conclusion formats provide additional information and signal the end of the instructions, including clean-up information, maintenance/service details, FAQs, troubleshooting advice, sources of additional information, product specifications, and tips/tricks.
- Editing and polishing for instructions focus on using the imperative mood, strong verbs, clear definitions, spelled-out acronyms, avoiding figurative language, and maintaining consistency and parallelism.

With that, I’m signing off. Thanks, associates. Vibes.
Credits and Sourcing
Content in this lecture is derived from a combination of the following sources and the creator–my–personal experiences in education, technical environments, and professional roles. This content is licensed under the Creative Commons Attribution-NonCommercial-Share Alike. You are free and encouraged to distribute and remix any part of any new medium for your goals. Please ensure your creations are available under the same license to keep the information spreading.
Technical Writing Essentials Copyright © 2019 by Suzan Last is licensed under a Creative Commons Attribution
Technical Writing for Technicians Copyright © 2019 by Will Fleming is licensed under a Creative Commons Attribution 4.0
Chapter 8: Technical Instructions Copyright © 2019 by Michael Beilfuss is licensed under a Creative Commons Attribution-NonCommercial-ShareAlike 4.0
Additional brainstorming, outlining, recap summaries, and examples were generated using Google Gemini with a “Gem” trained to the general prompt: Act as a technical writing mentor helping new students. Every prompt should provide examples and explanation for STEM, medicine, and business contexts.
