1 Objective 1: Climb a Power Pole
Section Information
Outcome/Competency: Climb a power pole.
Timing: TBD
Rationale:
Why is it important for you to learn this skill?
Climbing is a major task for a powerline technician. It could be expected that you are climbing every day and in all types of weather, so you need to be completely comfortable and competent. This is to ensure your safety, the safety of your coworkers, and your enjoyment of the job.
Objectives:
To be competent in this area, the individual must be able to:
- Select proper climbing equipment.
- Demonstrate fit and use of climbing equipment.
- Assess and mitigate potential hazards.
- Climb a power pole using proper technique.
- Climb over / around obstacles.
- Install basic powerline equipment.
Introduction:
This section will cover types and fitment of climbing equipment, safety issues, and the theory of climbing technique.
Topic: Climbing Equipment and Fit
Instructions
Cover the following content as a group (either reading out loud or independently) then give an opportunity to answer any questions.
Student complete practice exercises, go over answers.
|
The following are good video resources for fitting a body belt:
Figure 1 https://youtu.be/67N_jS7kVrA |
The following manufacturers website is a good resource for fitting body belts:
Figure 2 https://buckinghammfg.com/products/adjustable-buck-mobility-belt-20182cm/ |


Body Belt
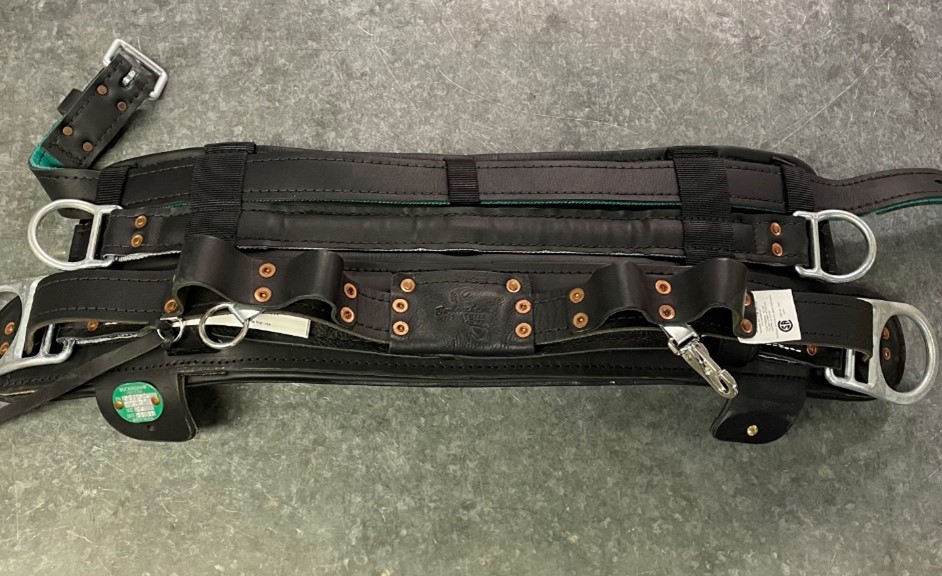
Figure 3 Body Belt |
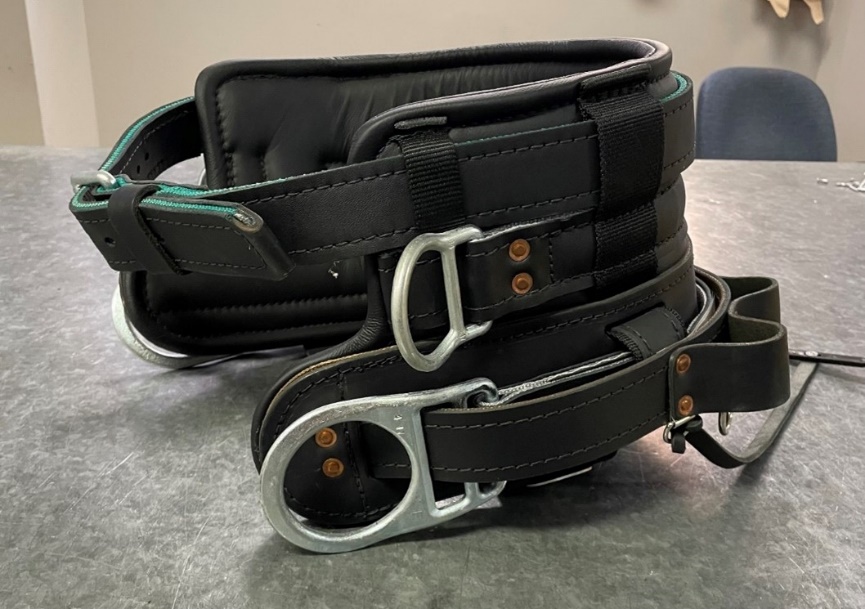
Figure 5 Body Belt |
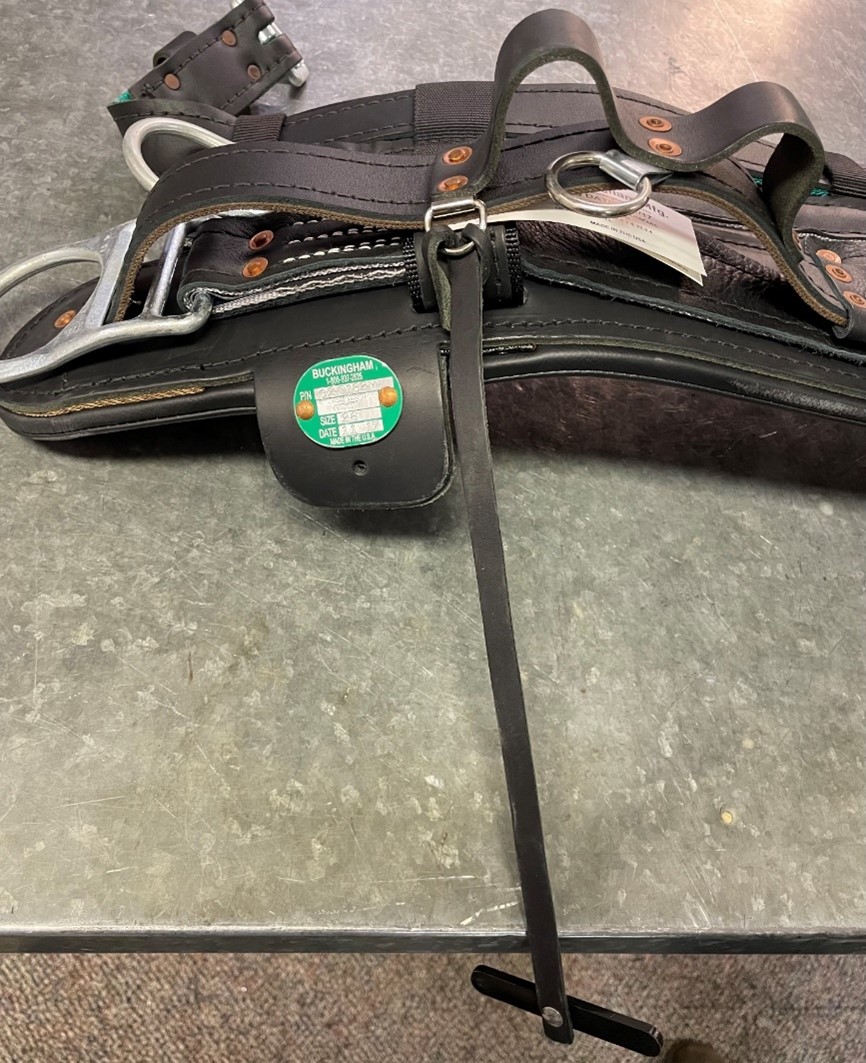
Figure 4 Body Belt |
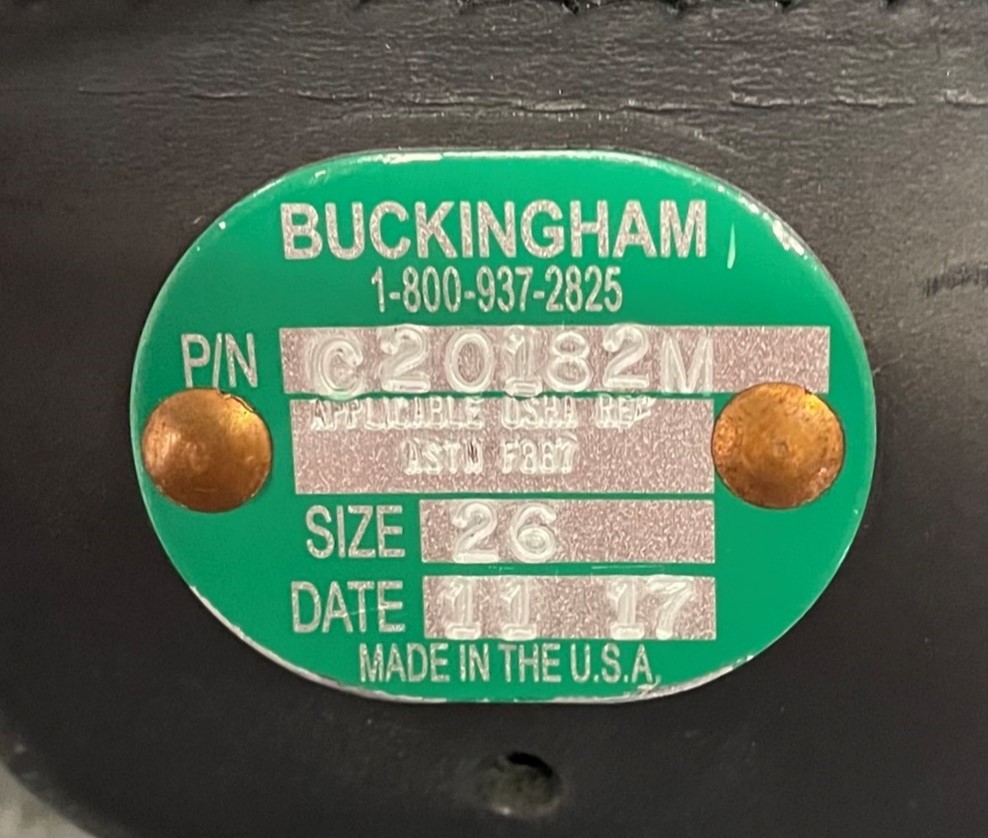
Figure 6 Body Belt Certification Tag |
To determine your size, measure your waste from hip bone to hip bone and add two inches. Examine the physical condition of the belt:
- Carefully check the seams on the inside of the belt. The leather should not be cracked or cut.
- Ensure the D rings are solidly fastened to the belt. Any missing rivets should be replaced.
- Inspect the buckle and the buckle tongue holes to ensure they are in good condition.
Try on the belt for fit. It should sit firmly but comfortably on your hips.
|
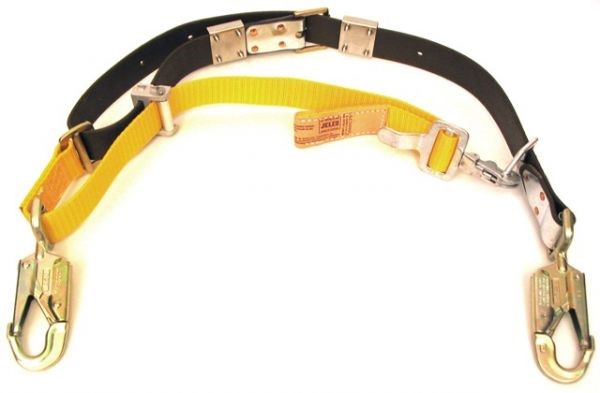
Figure 7 Pole Strap Attr. Jelco |
Pole StrapPole strap is used for climbing and is designed to choke around the pole to prevent falling. It also supports the powerline technician securely at the work location, allowing the worker to reach out and work with both hands. The pole strap is to be inspected thoroughly for frays, cuts, and exposure of the red cotton core lining. |
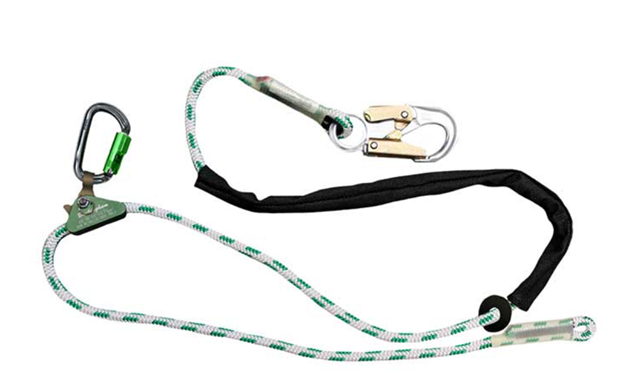
Secondary Pole StrapThe secondary pole strap is to be used in conjunction with the pole strap and should never be used as a primary pole strap. The secondary pole strap allows the climber to mitigate falls by placing the secondary pole strap above obstructions allowing the primary pole strap to be undone and placed over the obstruction as well. By using this method and these tools, the climber is always tied in. As with all climbing equipment, the secondary strap needs to be inspected regularly for fray, and bent or damaged safety latches. |
Figure 8 Secondary Pole Strap Attr. Buckingham |
Spurs and Climbers Kit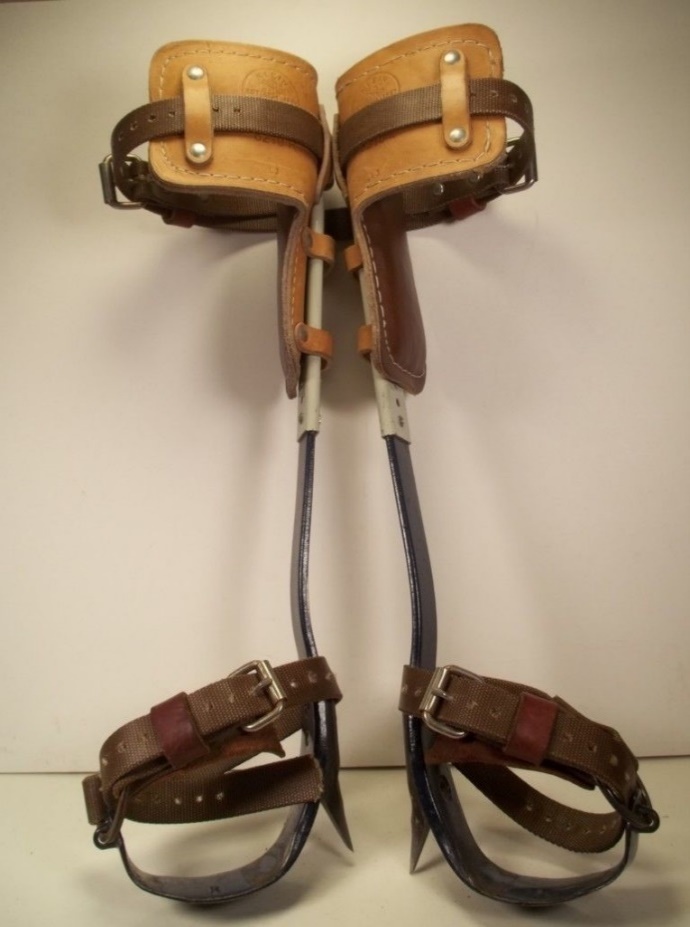 |
The following video is a good resource.
Figure 9 https://www.kleintools.com/videos/learn-how-adjust-your-klein-tools-climbers-perfect-fit
|

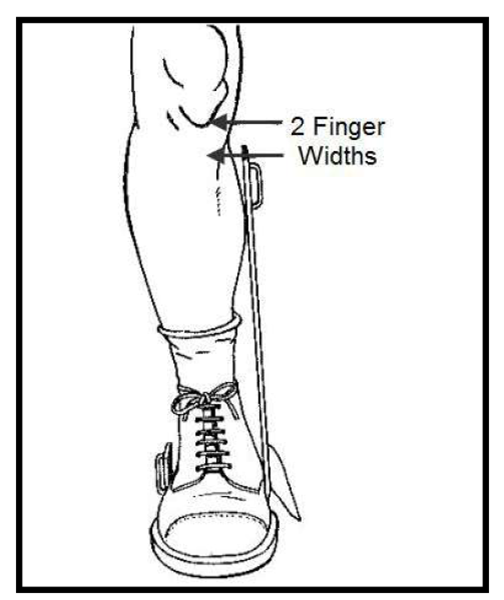 |
1. Assemble the climber. A. Remove adjustable sleeves and sleeve fasteners from the box. B. With climber gaff and strap loop facing outwards, insert climber shank into sleeve. C. Step into the climber, placing the adjustable sleeve to the inside of the leg. D. Adjust sleeves to the most comfortable position, about 1″ (25 mm or 2 finger widths) below knee. Insert screws into the two (2) aligned holes of each climber and tighten the supplied nuts on the screws to secure the adjustment.
|
2. Inspect the climbers. Before each use, visually check that:
(1) all buckles are properly closed;
(2) climber straps and pads are free of burns, cuts, broken stitches or excessive wear;
(3) rivets are not bent, loose, or missing;
(4) buckles are not distorted or cracked, tongue does not bind on buckle, and buckle holes are not damaged.
(5) If climbers do not pass inspection, remove them from service, destroy and discard them, and replace them immediately.
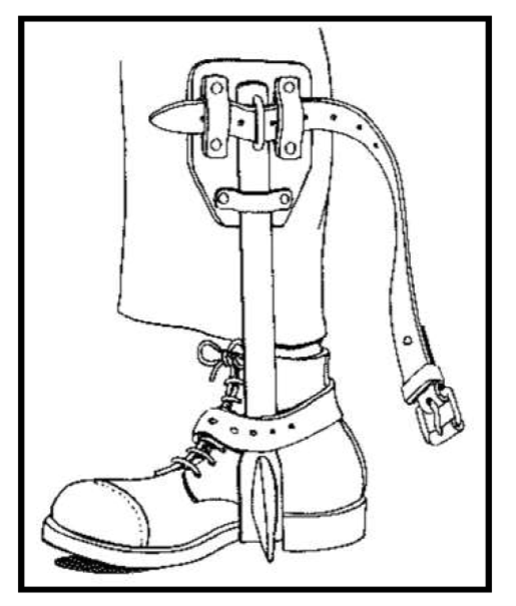
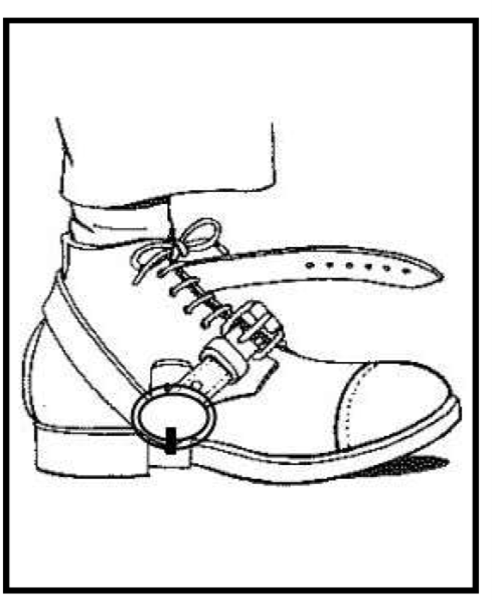
Figure 12 Upper leg strap Figure 13 Lower boot strap
Topic: Hazards and Mitigation Techniques
Instructions
1.Cover the following content as a group (either reading out loud or independently) then give an opportunity to answer any questions.
2.Student complete practice exercises, go over answers.
The following videos give a good overview of climbing. (Choose one.)
|
Lineman Training: Climbing Techniques for a Beginning Student |

Lineman Universe: Introduction to Climbing Poles |

https://youtu.be/0C_8TfmA5UA
High Side vs Low Side
When approaching a pole, a visual inspection should be completed. A pole will have a high side and a low side. Climbing on the side of a leaning or raked pole may cause you to lose your balance and possibly fall. For this reason, it is recommended to climb on the high side of the pole whenever possible. To describe what this means, imagine walking on stairs. The high side of the pole is like walking up stairs. The low side of the pole would be like walking underneath the stairs!
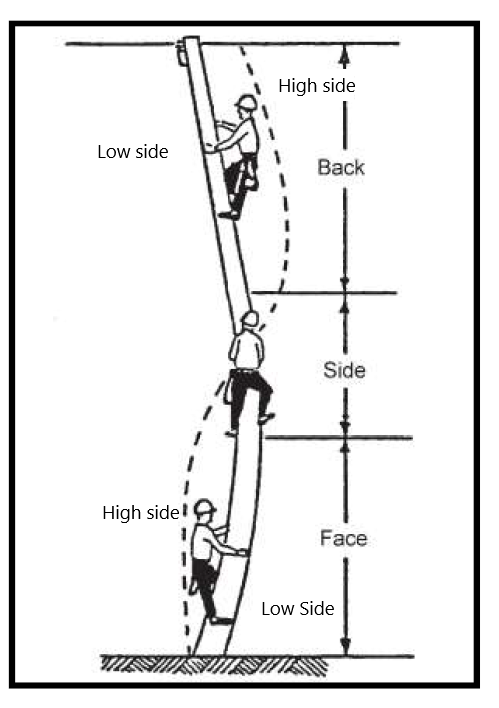
Make a habit to visually examine the pole as you approach it. Determine the high side, as well as the clearest path to follow when ascending to the working position. On a crooked pole with a large sweep, you may be required to move from one side of the pole to the other.
General Considerations
Before climbing a pole, there are a few hazards to consider. Many poles with powerline equipment attached are constructed with ground wires. It is important to stay clear of ground wires with climbers. You could you damage the conductor and create a point of contact for electrical shock.
Make sure the area at the base of the pole is free of any workers, tools, and equipment that could be the cause of injury in the event of a fall.
As a new climber, once you reach your working position, a bid habit to avoid is holding on to hardware such as pins, crossarm braces, or other pole hardware. The only items that should support you are your pole strap, your climbers, and the pole itself.
Only one worker is permitted to climb a pole at the same time.
Topic: Climbing TechniqueInstructions 1.Cover the following content as a group (either reading out loud or independently) then give an opportunity to answer any questions. 2.Student complete practice exercises, go over answers. 3.Instructor demonstrates proper technique on pole stub in classroom. |
 |
Setting your pole strapThe proper method for identifying the correct distance your body should be from the pole is approximately the length of your forearm as measured by placing your elbow against your belt buckle and making a fist, your arm should fit in between your body and the pole. By using this method, you will place your body in the correct working position. Notice that the lineman’s body belt is around the hips and the toes are angled up to insure proper gaff angle for optimal penetration into the wood. Remember straight lines insure good body position. This will become even more important as you begin to work on the pole, particularly lifting conductors and moving material, equipment, and devices from one side of the pole to the other. |
 |
|
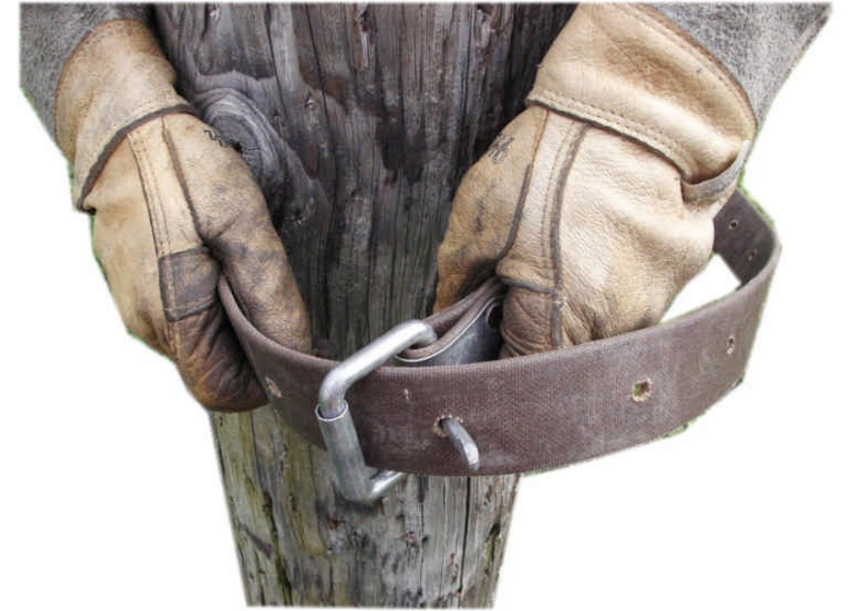
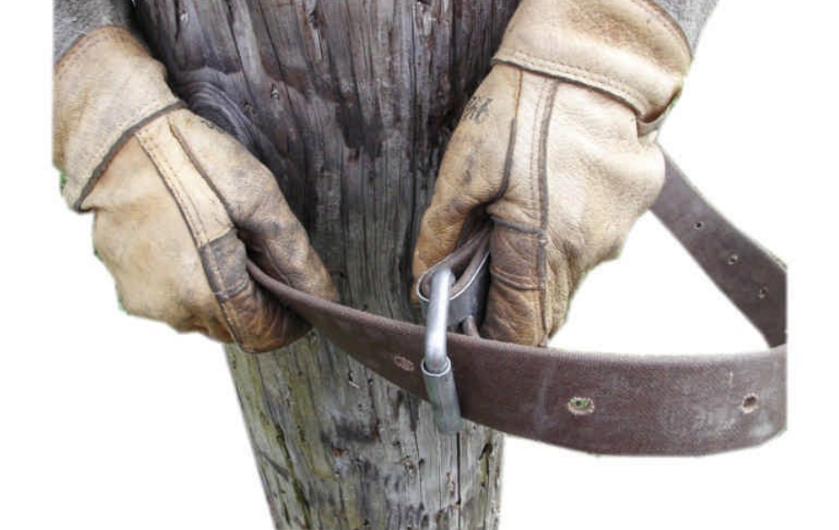
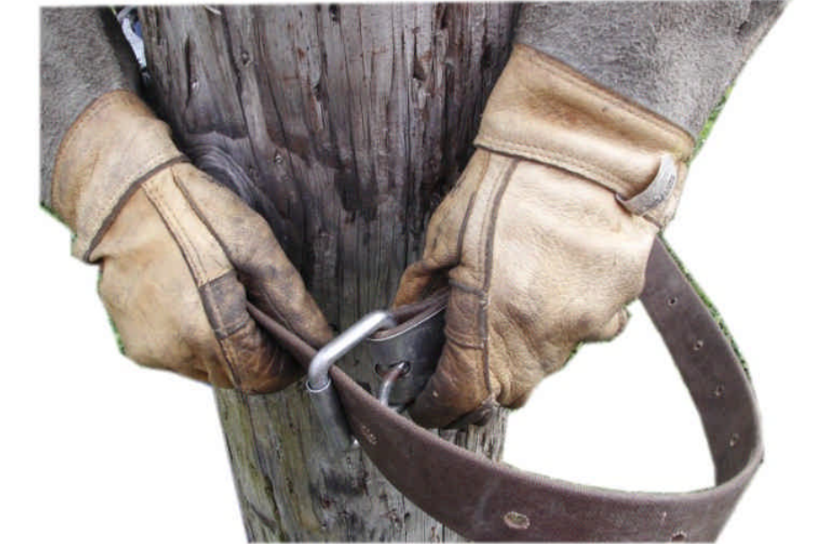
Poles vary in diameter, as you are ascending; the diameter of the pole gets smaller. Therefore, it is necessary to be able to adjust your safety at different levels where the diameter of the pole changes. When you reach the work location and you discover that it is necessary to adjust your safety, to attain the proper length from the pole, you need to use the hand that is on the double side of the safety to make the adjustment. The adjustment hand splits the belt and disengages the buckle by throwing slack into it enabling the climber to slide the buckle for more or less belt. When adjusting the safety, the climber MUST maintain the proper gaff angle to prevent gaffing out and falling. The climber must pull himself into the pole to throw slack into the safety. When the climber does this, they must keep their legs locked and toes up to insure the proper gaff angle. |
 |
Ascending
A common mistake that new climbers make is that they feel they need to take a large first step onto the pole. This is not required. Dependent on your height typical steps will be between 8 and 12 inches apart. The right arm and the right leg move in unison, as does the left side, The toes are up, and the knees are locked. The hands and arms keep the climber on the pole. They do not assist in the upward motion of the climb. The hands “slide and glide” up the pole.
When ascending the pole, it is imperative to look up. A beginner climber will tend to look at their feet. It is imperative to look where you are going because there are obstacles like cracks or checks in the pole, existing equipment, ground wires and energized equipment. This may not come easily but has to occur.
 |
 |
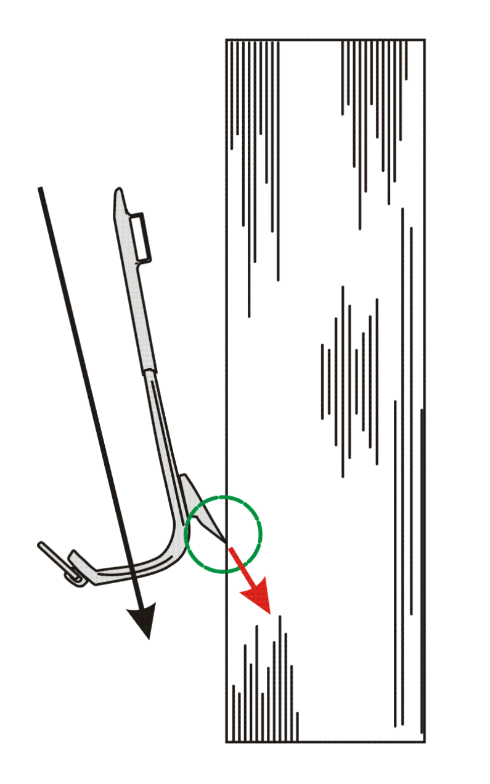 |
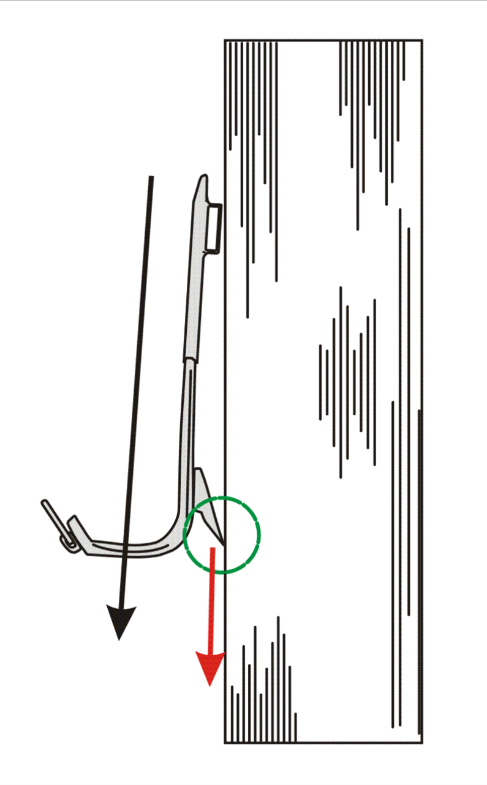
Figure 18 The climber’s body weight is typically enough to supply the force necessary to allow the gaff to penetrate the pole. It is not necessary to “stomp” the pole.
Figure 19 Knee too close to the pole. Weight slides gaff parallel to surface of pole. Minimum penetration, plaining effect
Figure 20 Moving the knee away from pole approximately the length of a fist between the knee and the pole optimizes the gaff penetration
Climb the QuartersIt is imperative that the climber climbs on the quarters of the pole. If you were to look down the top of a pole it would be circular, now imagine two lines splitting the middle of the pole horizontally and vertically. You would have four quarters. You must ascend and descend in these areas in order to maintain a safe and correct climbing technique. If the climber starts to climb on the halves of the of the pole they will not be able to maintain the proper knee distance away from the pole and this will affect your ability to keep your toes up, which in turn will affect the gaff penetration. Conversely, if you climb with your feet too close together, heels close, this will also affect your ability to maintain proper technique. Additionally, when the heels are close the potential of you gaffing yourself increases. |
||
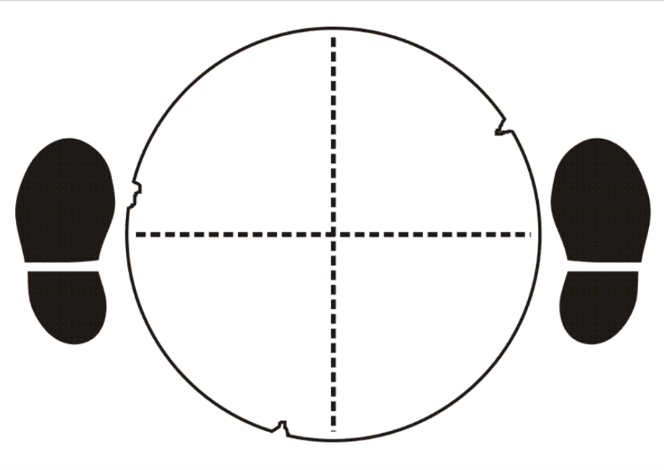
Figure 21 Climbing on the sides of the pole will compromise correct and safe technique. Attr. Fuentes 2006 |
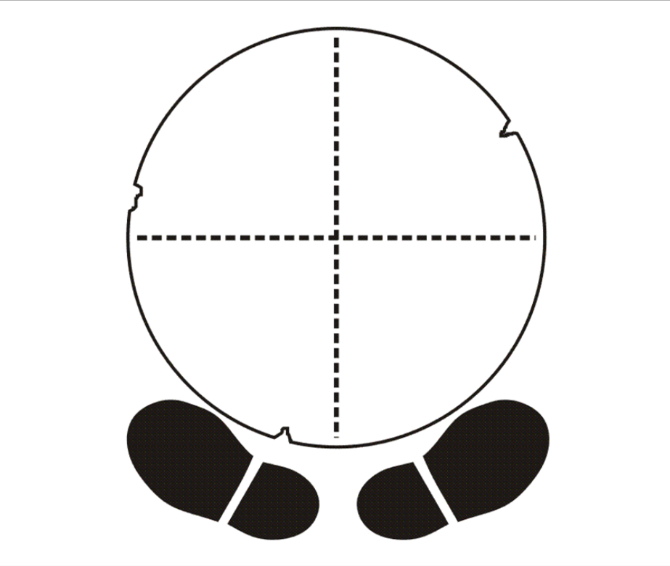
Figure 22 Feet too close together. Heels are too close, potentially gaffing yourself. Attr. Fuentes 2006 |
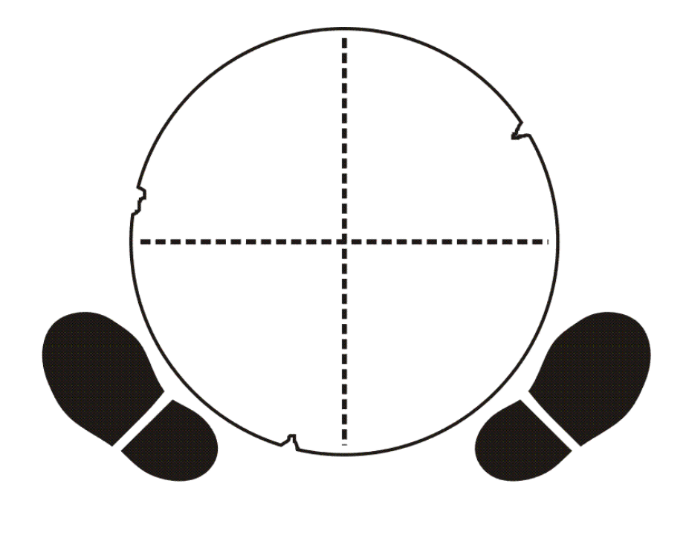 Figure 23 Correct. Attr. Fuentes 2006. Figure 23 Correct. Attr. Fuentes 2006.
|
Descending
Descending the pole involves the same skill sets, with a slight change in the mechanics.
When descending the pole, it is necessary to take a longer step down allowing your body weight to drop into a “locked leg.” As stated earlier, you must look where you are going. If you are ascending-look up. When descending-look down.
- Roll the knee out; do not let the gaff drift away from the pole.
- The gaff should only disengage far enough away from the pole so that it can reengage as the climber drops into a straight leg
- The gaff should only engage long enough to allow the other leg to roll out and drop into a straight leg.
Descending the pole requires the climber to take a longer step down than when ascending. Ascending is a 8”-12” step, whereas descending is an 18”- 24” drop into a straight leg. Of course, these are general rules, depending on your size, the length of your legs, etc, you may have a longer or shorter climbing stride.
When descending and rolling the knee out, simultaneously drop the same arm, also the shoulder will roll/travel down too. The lineman will look down and aim his gaff at the appropriate quarter of the pole and drop into a straight leg. The leg is straight momentarily, enough to ensure the proper gaff angle and to penetrate the wood. As the gaff hits the wood the lineman must continue his descent by repeating the same technique on the other side.
Summary
- Keep your toes up
- Climb on the quarters
- Climb with your legs, not your arms
- Keep your knees away from the pole
- Look where you’re going
- Drop into a straight leg
- Roll your knee out
Topic: Powerline Tasks
Students should be guided through the following exercises when climbing power poles.
Move Bolts
Students demonstrate dexterity by using basic tools to move bolts. Tools may include a crescent wrench, hammer, and screwdriver. Students should climb to different heights while stowing bolt in climbing belt.
Climb Over/Arround Obstacles
Ensure that climbers are planted firmly into the pole. Ensure a clear path to pass the secondary strap/belt behind the pole and into the other hand. Connect the strap/belt to the opposite D-ring on the climbing belt. Hazards can exist when passing the strap, for example, open secondary connections. Depending on the secondary strap/belt weight, this may or may not be applied to the secondary strap/belt.
Basketball Exercise
From varying heights, pass a basketball to each other while aloft. This helps with dexterity, confidence, and moving on the pole without the use of hands.
Use of Handline (Basic Knots)
Hang a handline with a screwdriver. Lower and raise bolts and hardware by using a handline and basic knots (half hitches, and linesman knots).
Three Way Communication
Good communication will be used when working in situations where there are workers or students aloft, and workers or students acting as groundmen. When entering a three metre radius of the pole, groundmen will let the worker aloft know they are in the work area (“in the hole” or “out of the hole”). Extra precautions will be taken to avoid dropping things when groundsmen are “in the hole”.
Hot Stick Tasks
Students climb to the height of the cut-out, remove/open the fuse and remove the hot-tap from the line using a hot-stick. The hot-stick functions and uses are practiced on the ground before operating at heights.
Quiz
1. ( True / False ) To inspect your body belt properly, inspect the belt thoroughly for frays, cuts and exposure of the red cotton core lining. Locking snaps must be in perfect working condition.
2. When assembling your climbers, a tubular sleeve telescopes over the leg iron and may be adjusted to the length desired. The top of the climber should normally extend to about how may finger widths below the inside low point on the knee joint.
a) 11
b) 4
c) none because fingers are all different sizes
d) 2
3. ( True / False ) A climber will find it easier to climb on the low side of the pole.
4. What is the hazard of climbing above objects on the ground such as a shovel, exposed ground rod or fence?
a) a hoist line could get tangled in the objects below.
b) If the climber above drops a tool, it could damage the items below.
c) If the climber slips and falls down the pole, he/ she may damage the object below.
d) If the climber slips and falls down the pole, he/ she may be injured on the object below.
5. ( True / False ) Safety glasses are worn when climbing to keep wood chips and other debris out of the eyes.
6. A good reason to look both up and down when climbing the pole is
a) To see if there are knots in the wood to step around.
b) Look for cracks in the pole to step around.
c) So the climber doesn’t climb into above equipment or energized line
d) all of the above.
Answer Key
1. T, 2. D, 3. F. 4. D, 5. T, 6. D,
