Sketching and Relations
Geometric relations (also known as sketch relations) are constraints that you place on a sketch to specify design criteria that isn’t dimensional. These constraints are things like being on center, square, symmetric, in line, equal, etc. You will recognize geometric relations as the little green boxes you see in a sketch. Each geometric relation has its own icon indicating what it is.
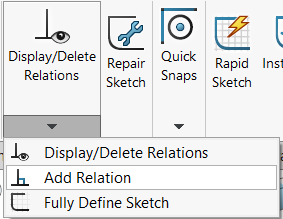
Geometric relations are added by activating the “Add Relation” command in the Sketch tab of the CommandManager (Figure 2.28).
You can also hold CTRL on your keyboard and select entities and relate them using the in context toolbar.
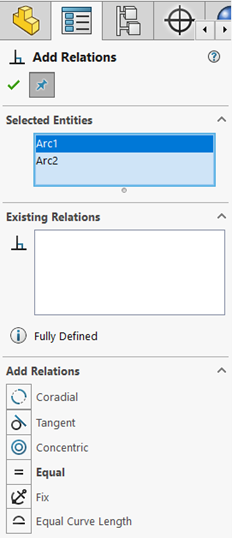
As you select entities in the Add Relation command, different relations automatically become available for selection in the property manager for the command based on what you are selecting (Figure 2.29). You can also see that SolidWorks will suggest a relation for you to use (in bold font) based on your current design and what you have selected.
You can also delete relations from sketch entities’ property manager (every entity has a relations section of their property manager) or by simply left clicking the green relation box, right clicking and selecting “Delete” (the delete key on the keyboard also works).
There are so many geometric relations as can be seen from following the link attached to “Geometric Relations” at the beginning of this paragraph. You can see what the icons look like and what it looks like when the geometric relations are applied through SolidWorks Help: Geometric Relation Icons. Many of them are inferred through other commands and many of them are only used for special cases; we will observe those most used:
|
|
Exercise 2.11: Exploring Geometric Relations
Spend some time experimenting on your own with the different relations you can add to entities. Use the video below as a reference. Note you can quickly add relations by holding CTRL on your keyboard and selecting entities, choosing relations from the in-context toolbar.
Clevis Plate Example
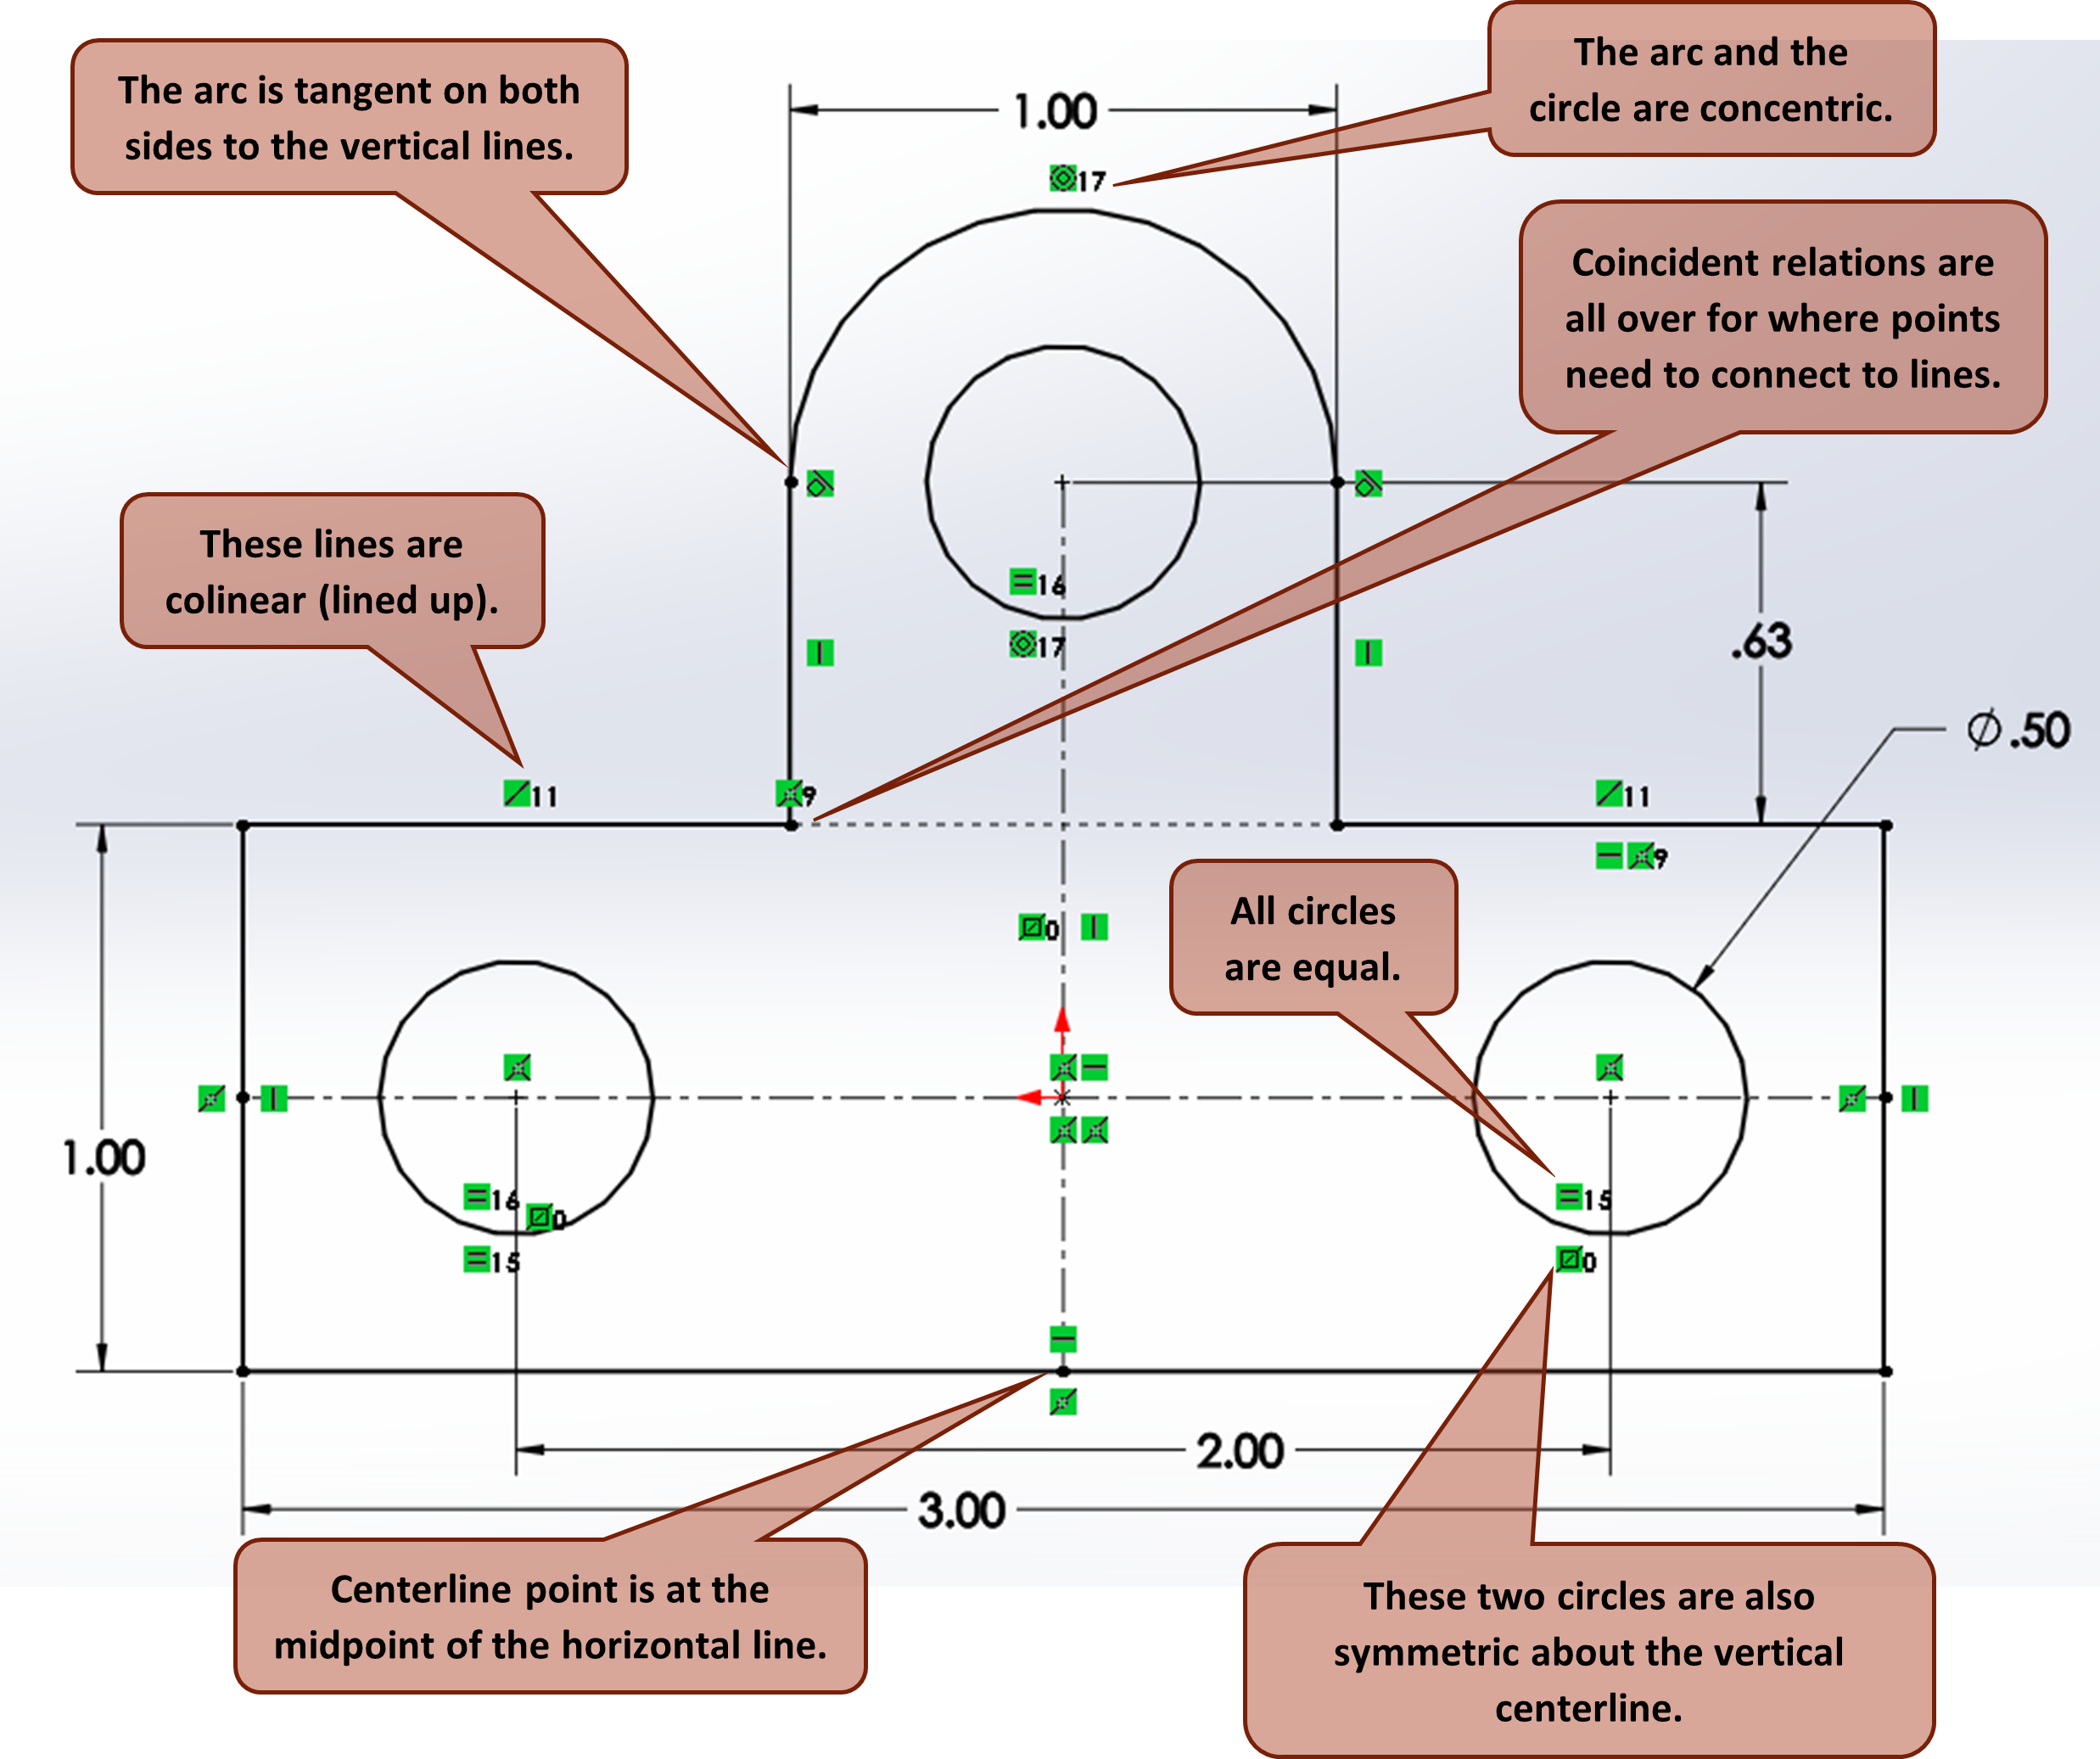
“Merge points” is a common option in the “Add Relation” property manager but it doesn’t have a little green box to go with it. The upper point of the vertical center line was merged with the center point of the upper circle and arc. Therefore, there aren’t any relations near that point.
Something else you might notice is the greyish dashed line connecting the upper left line to the upper right line. This dashed line is showing that the two solid lines are colinear. This can be helpful in more complicated sketches.
To create the symmetric relation, both circles and the vertical centerline had to be selected. When making the tangent relations, you want to make sure that when you select the tangent arc and line, you are clicking near the desired point of tangency. Not doing this can lead to an unexpected tangent result.
Some things you will notice about the image above is that there are a lot of coincident relations. Coincident relations are usually added by SolidWorks automatically when you begin a base point on an entity that is already in the sketch. You should also observe that coincident relations look a lot like midpoint relations, so to be sure of which is which, you can hover over the relation to get the pop-up identifier.
Cylinder Gasket Example
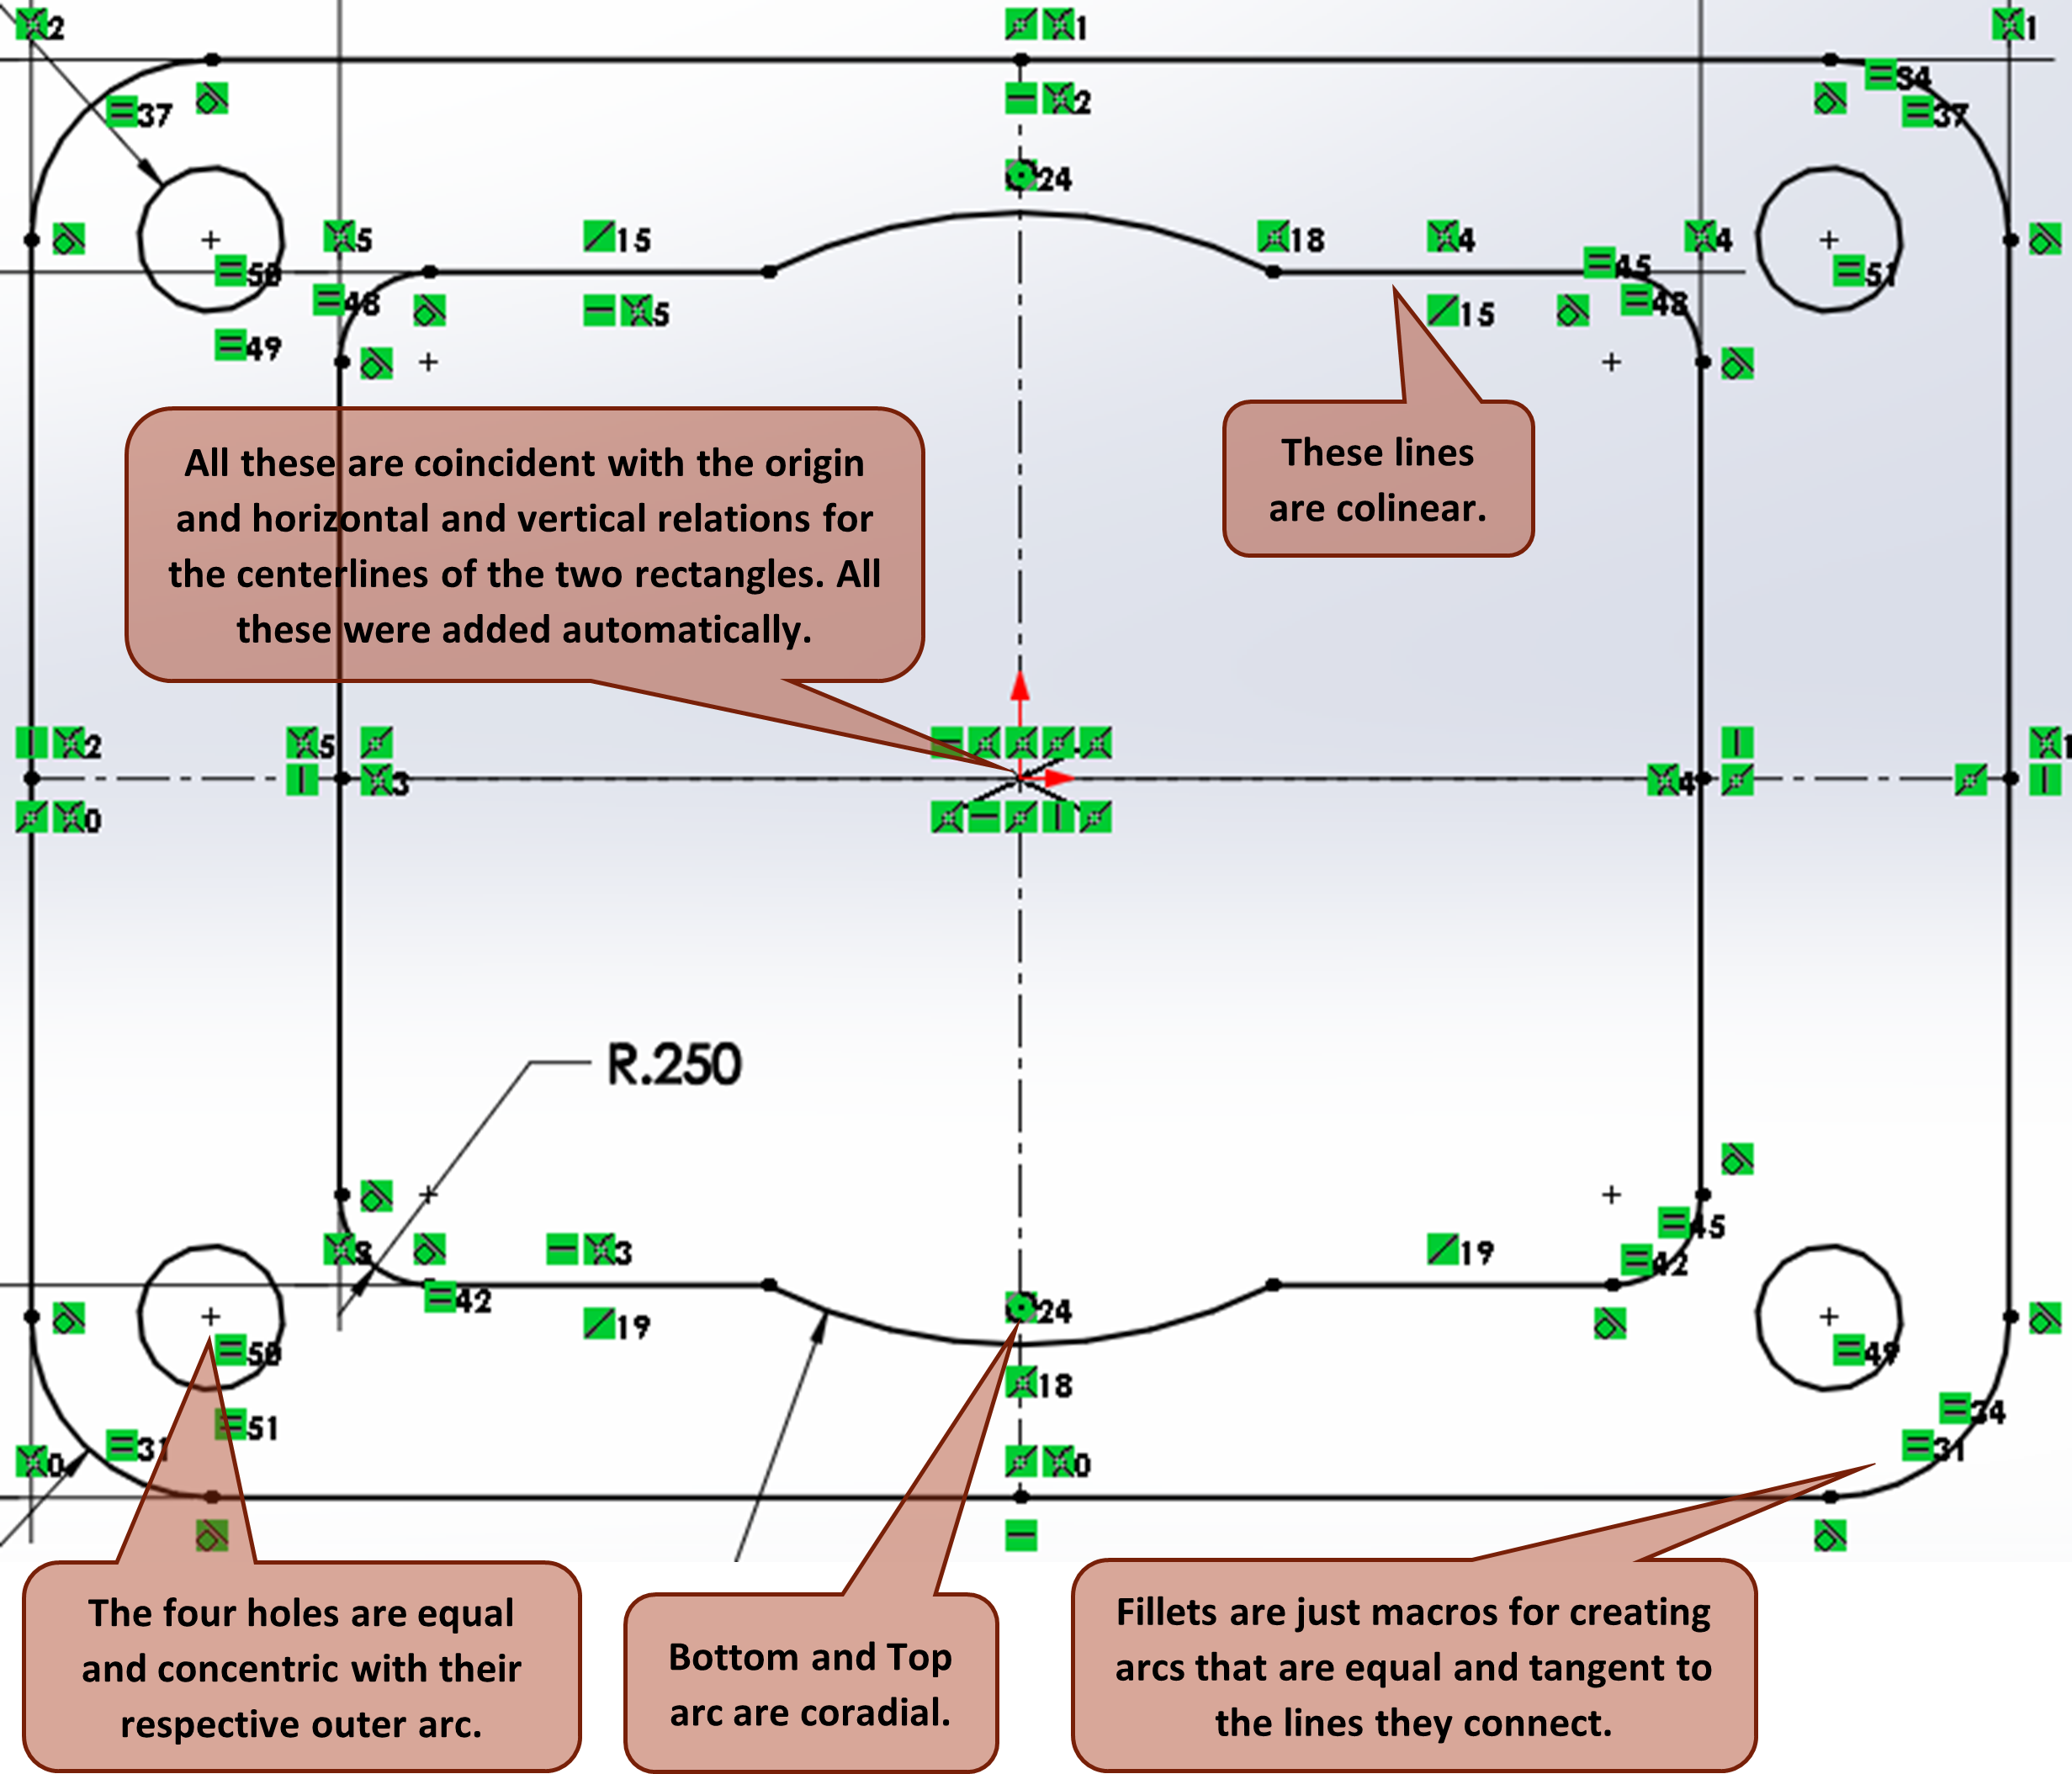
To create this sketch, the two center rectangles and a circle placed at the origin to the diameter of the middle arcs shown were drawn. Power trim was used to leave just the upper and lower center arcs. A quick way to fully define the four holes at the corners were to create the fillets before the holes so that the center of the holes could be placed on the center point of the fillets, resulting in automatic merging of the points.
You will notice that when the fillet tool is used, it just makes arcs and adds a lot of relations. For this reason, heavy use of the sketch fillet or chamfer tool can lead to slower running of the software. This is primary argument for why many designers choose to stay away from the sketch fillet/chamfer tool altogether and use the feature fillet/chamfer tool instead. The same also goes for linear and circular sketch patterns. The feature versions of these tools are much less taxing on the software. These are tools we will learn in future chapters.
Make sure to spend LOTS of time practicing with sketch relations. They are one of the most important aspects of SolidWorks!
Simple Extrudes
When we create a sketch, the purpose is to then apply a feature to it to make the 2D sketch 3D. The most common feature used to make a sketch into a 3D feature is the Extruded Boss/Base command on the CommandManager.
You can apply a feature to a sketch inside the sketch environment or outside the sketch environment. When inside the sketch environment, when you have finished the sketch, switch to the features tab of the CommandManager and click on Extruded Boss/Base. When outside of the sketch environment, select the sketch you wish to extrude from the FeatureManager Design Tree (it will become highlighted) and then click on the Extruded Boss/Base tool on the CommandManager. These techniques apply to all single sketch features.
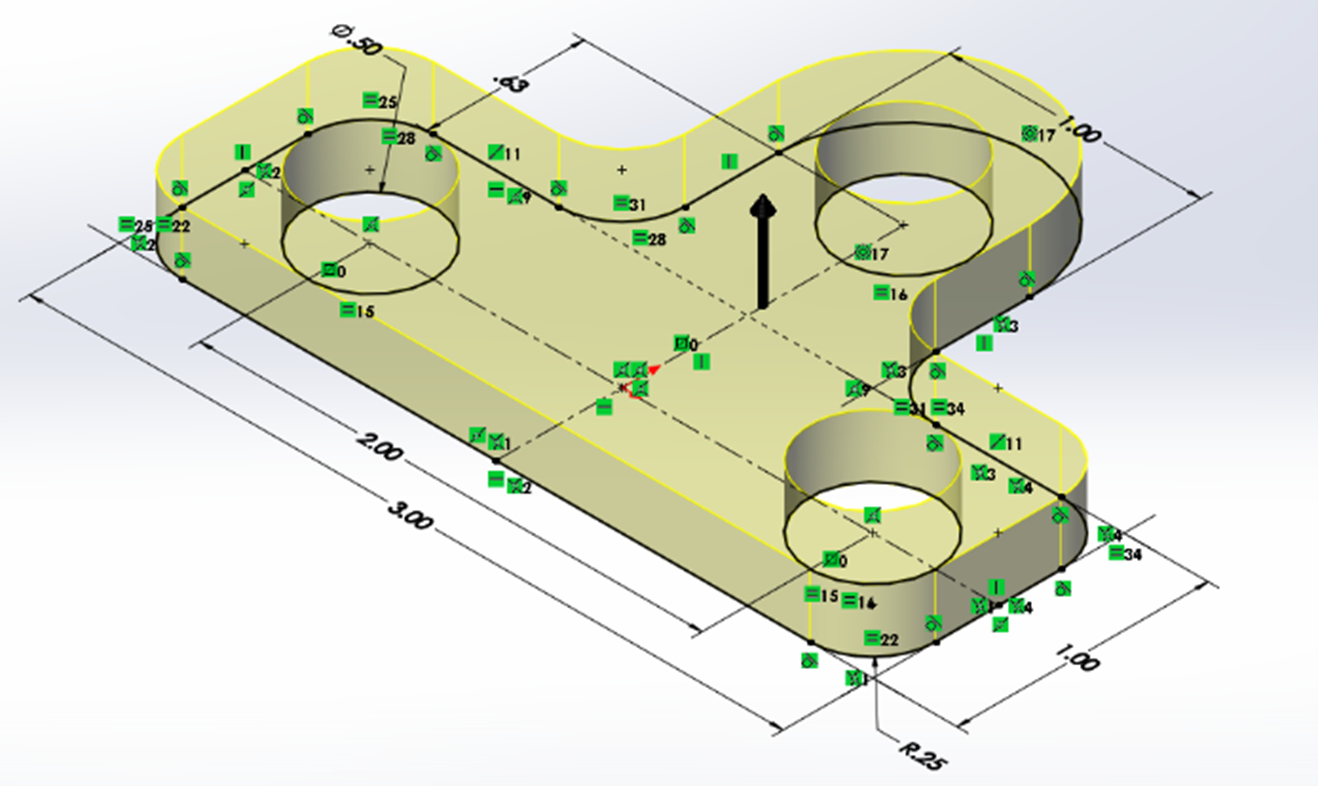
Once the Extrude tool has been activated, the property manager will open, and a yellow preview of the feature will appear (Figure 2.33). The property manager is where you will specify the depth of the extruded feature (thickness you will apply to your zero-thickness sketch). There are other options as well to help with design intent and to give you more control over your feature. We will explore these more in the next chapter.
Sketching and Relations Review
Sketching and Relations Practice Drawings and Tutorials
Below are three drawing examples with the drawing PDF’s for you to use to model the parts shown and tutorial videos to help you model the parts shown. Watch the videos one by one trying to model the part from the drawing after each video. If you need to, feel free to follow along with the video step by step.
Constraints based on geometry conditions such as parallelism, perpendicularity, tangency, coincidence, symmetry, etc. See SolidWorks Help: Sketch Relations.
Creates a 3D feature from a 2D sketch by adding a specified thickness to the sketch in one direction. See SolidWorks Help: Extruded Boss/Base.
