Complex Shapes
Reference geometry is geometry that we create to be used as reference for the creation of new sketches and features. The types of reference geometry that exist are planes, axes, coordinate systems, and points. We will save axes, coordinate systems, and points for you to learn on a case by case basis when you get more familiar with SolidWorks. Reference planes are certainly the most commonly used reference geometry (besides reference sketches). There are many types of reference planes but here we will focus on the commonly used.
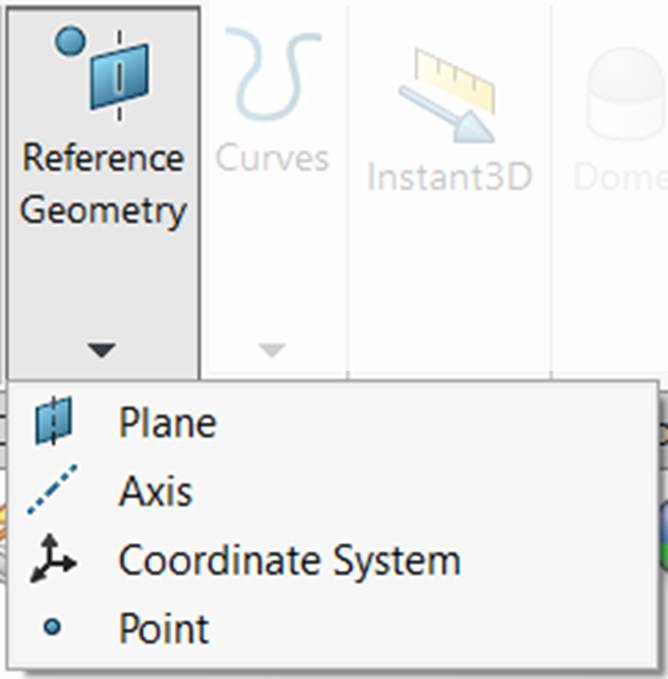
The reference geometry tool is located to the right of the Features Tab of the CommandManager. When you choose the dropdown of the command, you will see icons for each of the types of reference geometry that you can select.
Planes
As was noted earlier, reference planes are the most common reference geometry used in part creation. You need reference planes for extruding anything at an angle, for creating lofts, and usually for creating sweeps. Reference planes also help in speeding up the modeling process.
For example, sometimes you need to create a reference plane to be the mirror plane for a mirror feature; mirroring the features instead of recreating them is of course much faster. When you have offset extruded or revolved features, it is very quick to create a reference offset plane to be your sketch plane for extruding the offset feature.
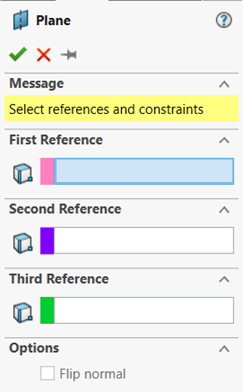
How the reference planes work is as soon as you activate the reference plane command, the property manager appears with three selection boxes for a first reference, second reference, and third reference. You can have up to three references to create a reference plane, but some reference planes may only require one or two references. As you select references, options become available for how to constrain the reference plane based on your references. Below, we will walk through the most practical ways to use reference planes.
Offset Plane
The offset plane option is selected by default if you select a plane or face for a first reference. The most common use of offset planes is for creating features that are offset from one of the default planes, for loft, wrap, or swept features.
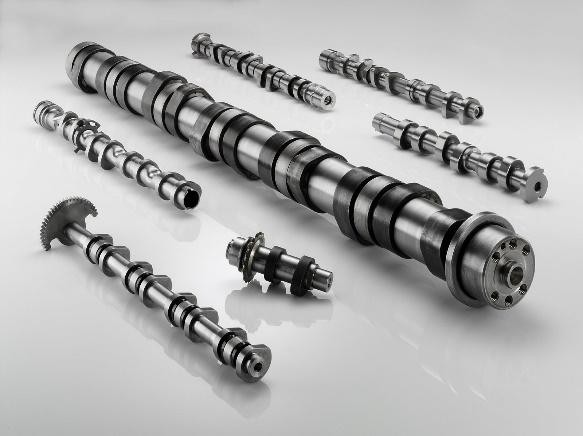
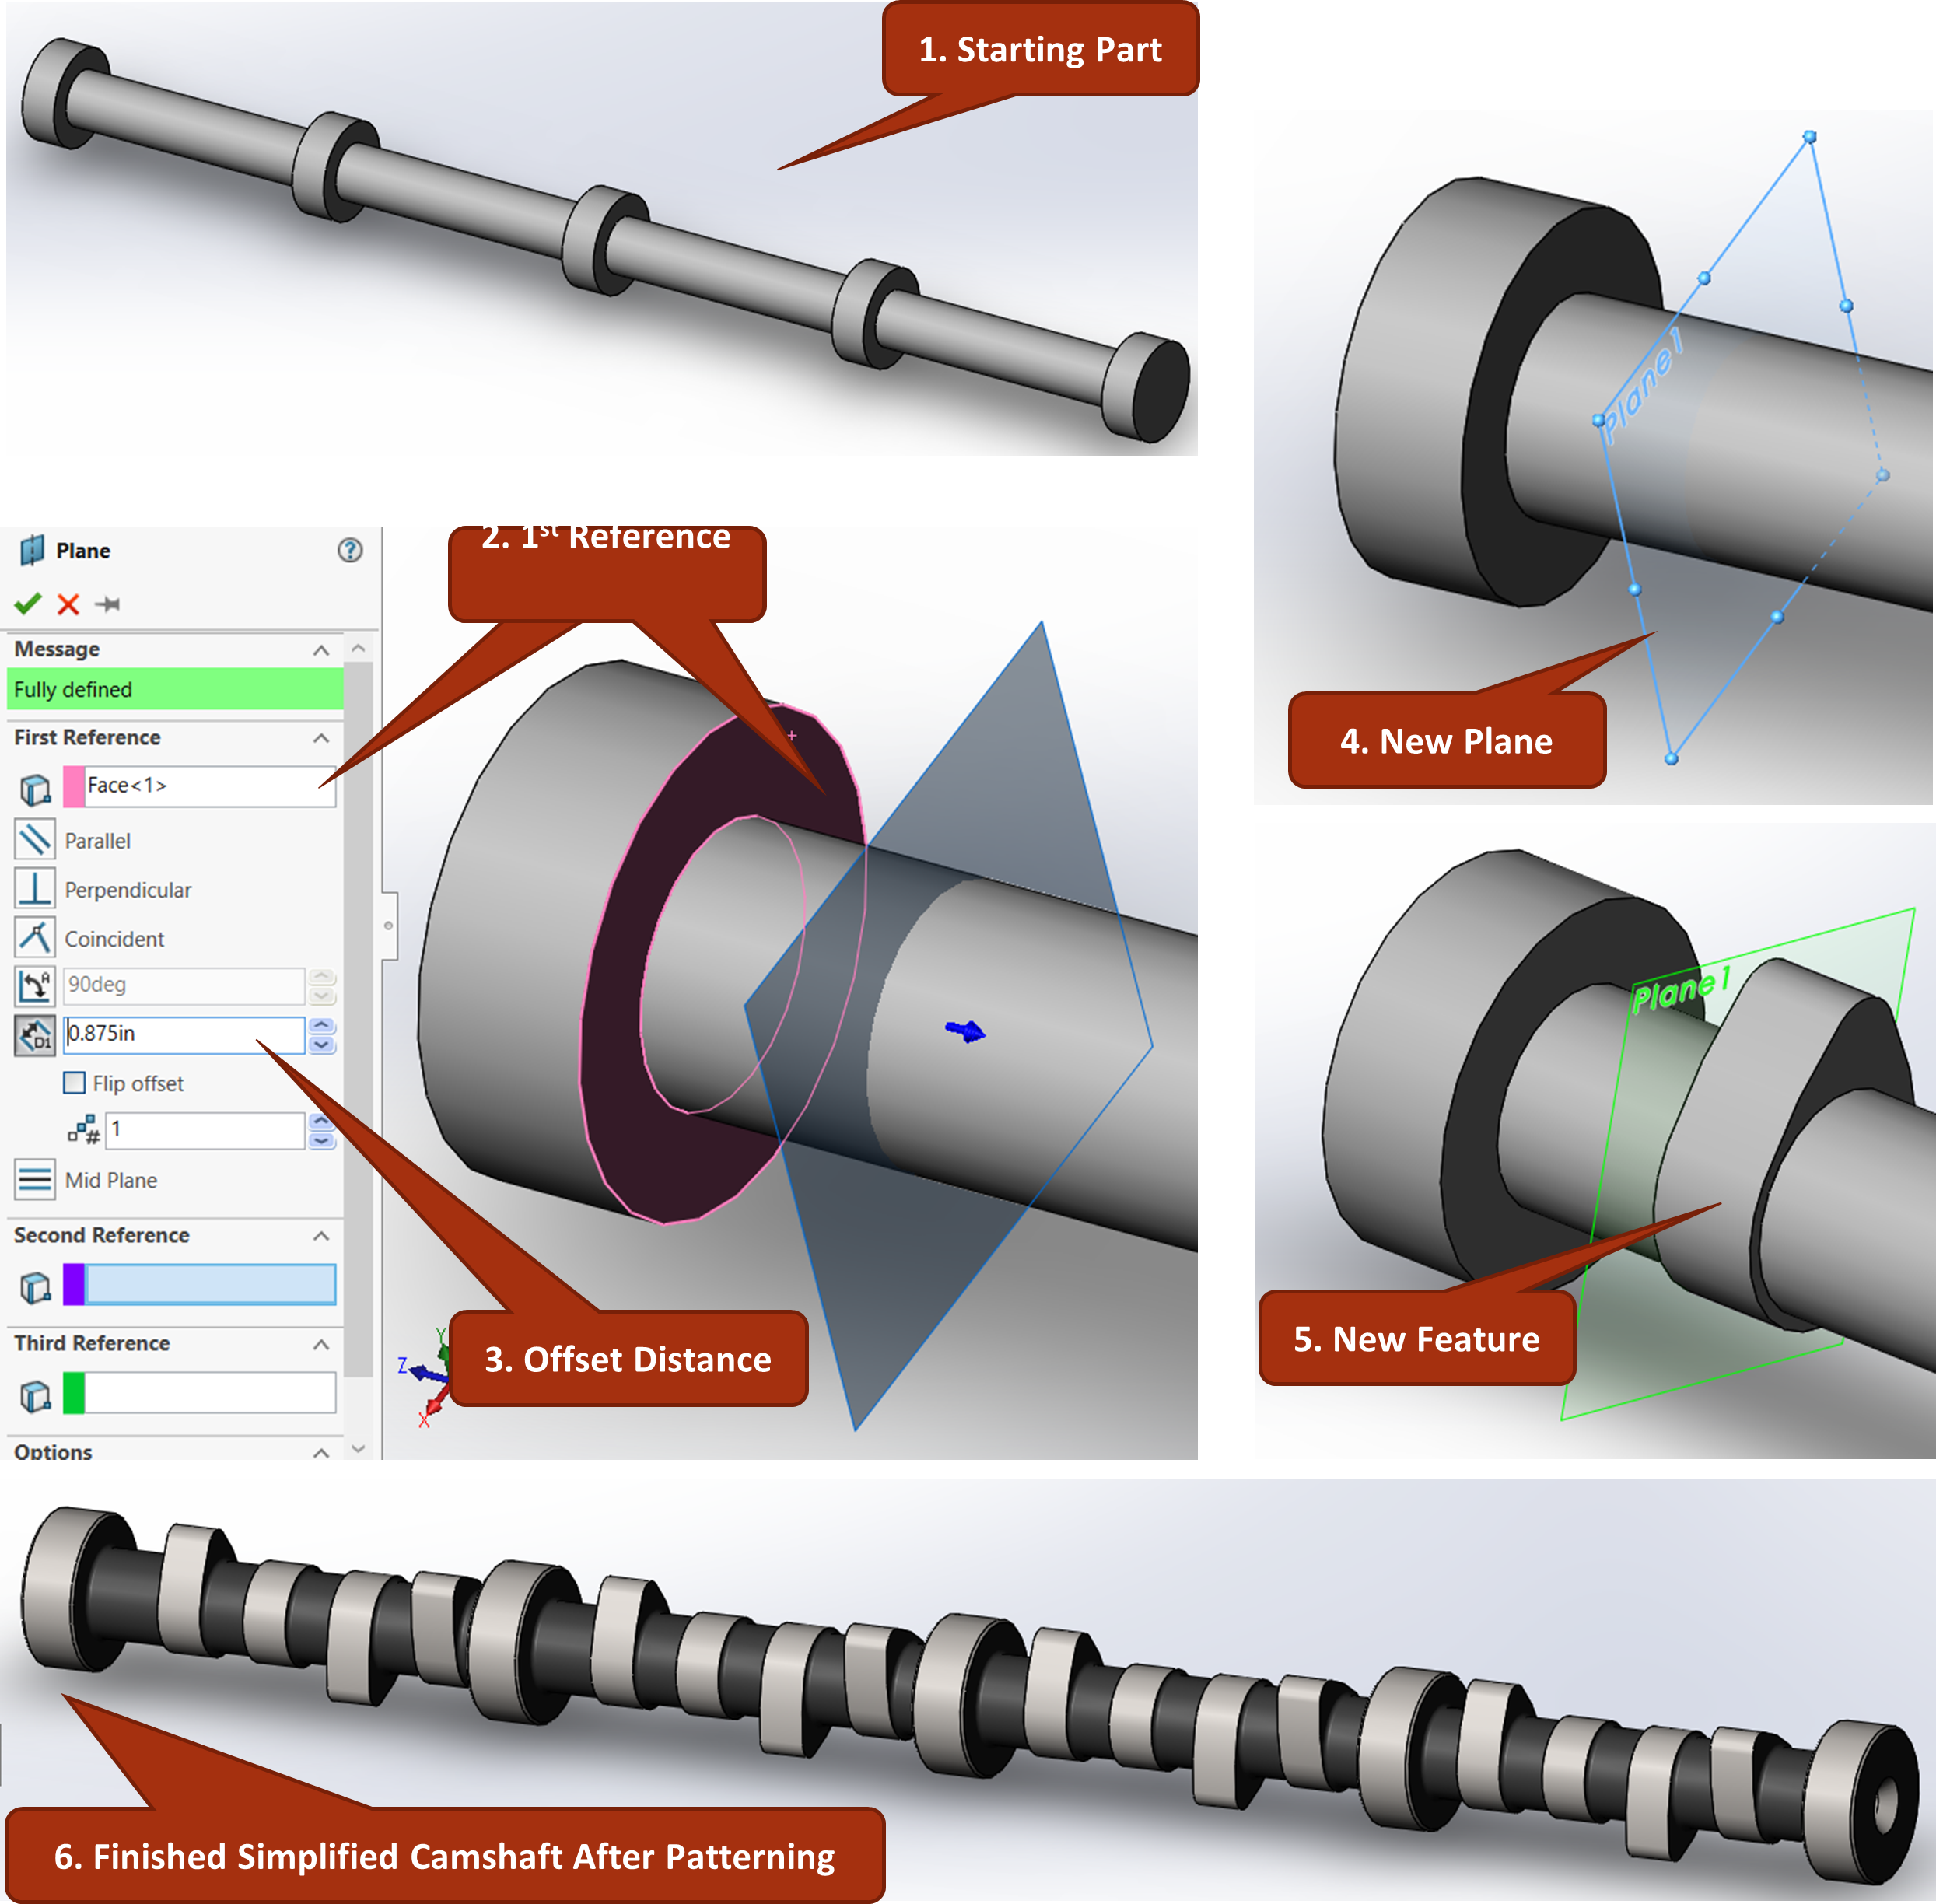
A great example of using an offset plane is in the modeling of a camshaft. When you first revolve the bearing surfaces and main body of the camshaft, you then need to locate a point where the first lobe will go. This is done with an offset plane, where a profile sketch can then go.
MidPlane
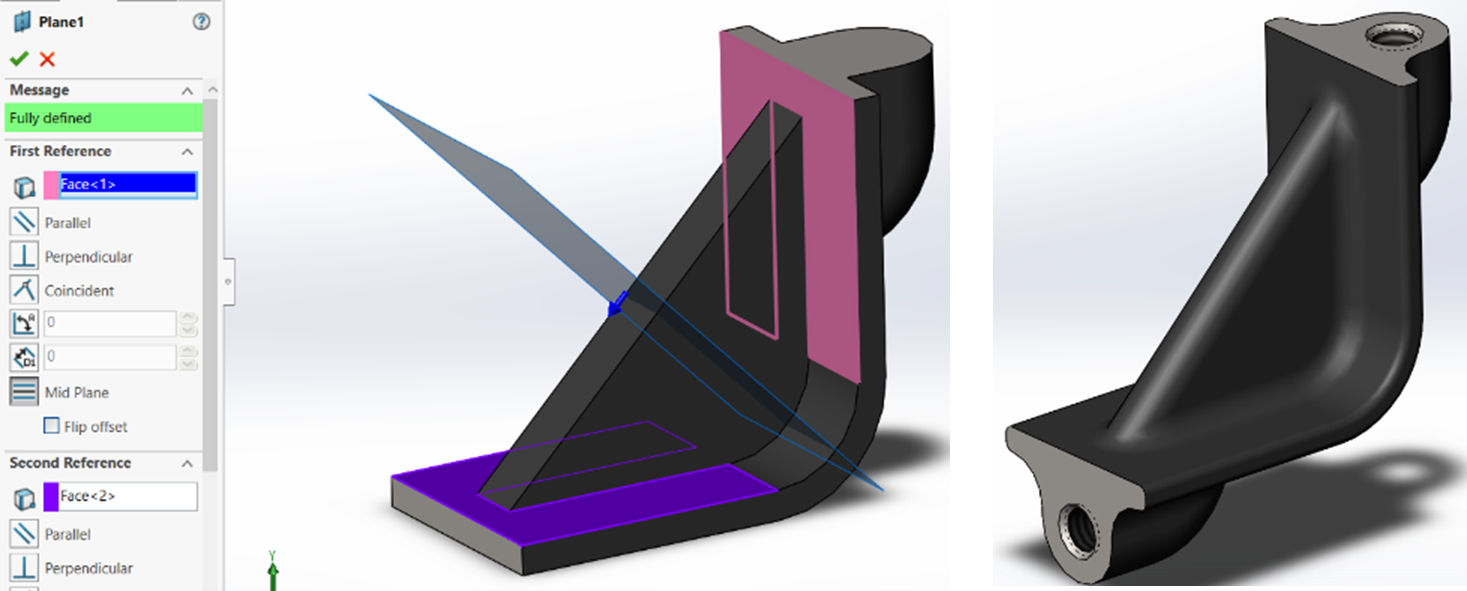
The midplane option for the reference plane is most commonly used to create a mirror plane for when you want to mirror something that isn’t symmetrical across the default planes. To specify a midplane, you choose two opposing surfaces as the first and second reference. As shown in Figure 6.5, they don’t even have to be parallel or planar. As soon as you select the second reference, the reference plane property manager will automatically switch to midplane. It will show as an offset plane until the second reference surface is selected.
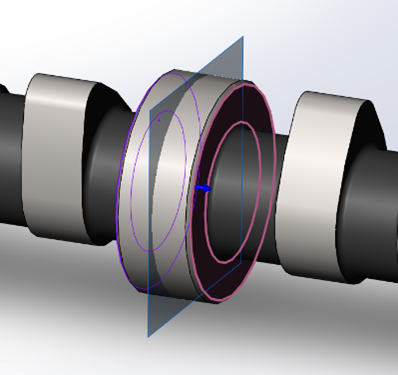
Let’s look at the camshaft again to see how the midplane option of reference plane was used in this part. The origin is set at the left most point of the part due to geometric dimensioning and tolerancing schemes so the middle of the shaft’s main body is not lined up with the default planes. Therefore, to mirror the countersunk hole on the right side to the left side, it is required to create a midplane feature at the center of the shaft main body.
Exercise 6.1 Creating Offset and MidPlanes
In this exercise, we will practice creating offset planes and midplanes as well as exploring the different options of each.
- Create an 2 inch offset plane from the Front Plane.
- Try the patterning feature and flip offset as well to see how you can make multiple offset planes that are an equal distance apart.
- Create a midplane between two of the offset planes that you have just created.
- Create a midplane between the Front and Top Plane and flip the offset to see the impact to the reference plane.
Planes Using Reference Sketches
To create models where there are different shapes coming from all different directions, such as piping or a bicycle frame, creating planes oriented to reference sketches brings the seemingly complex task down to simplicity. To create a plane that uses a reference sketch, the sketch must of course already exist. So, the first step to creating this type of plane is creating the reference sketch first, which is usually one or more centerlines that define the direction of the extrusion you desire. After having the reference sketch, you select different parts of the sketch to base your reference plane from, such as being perpendicular to a line and going through a vertex.
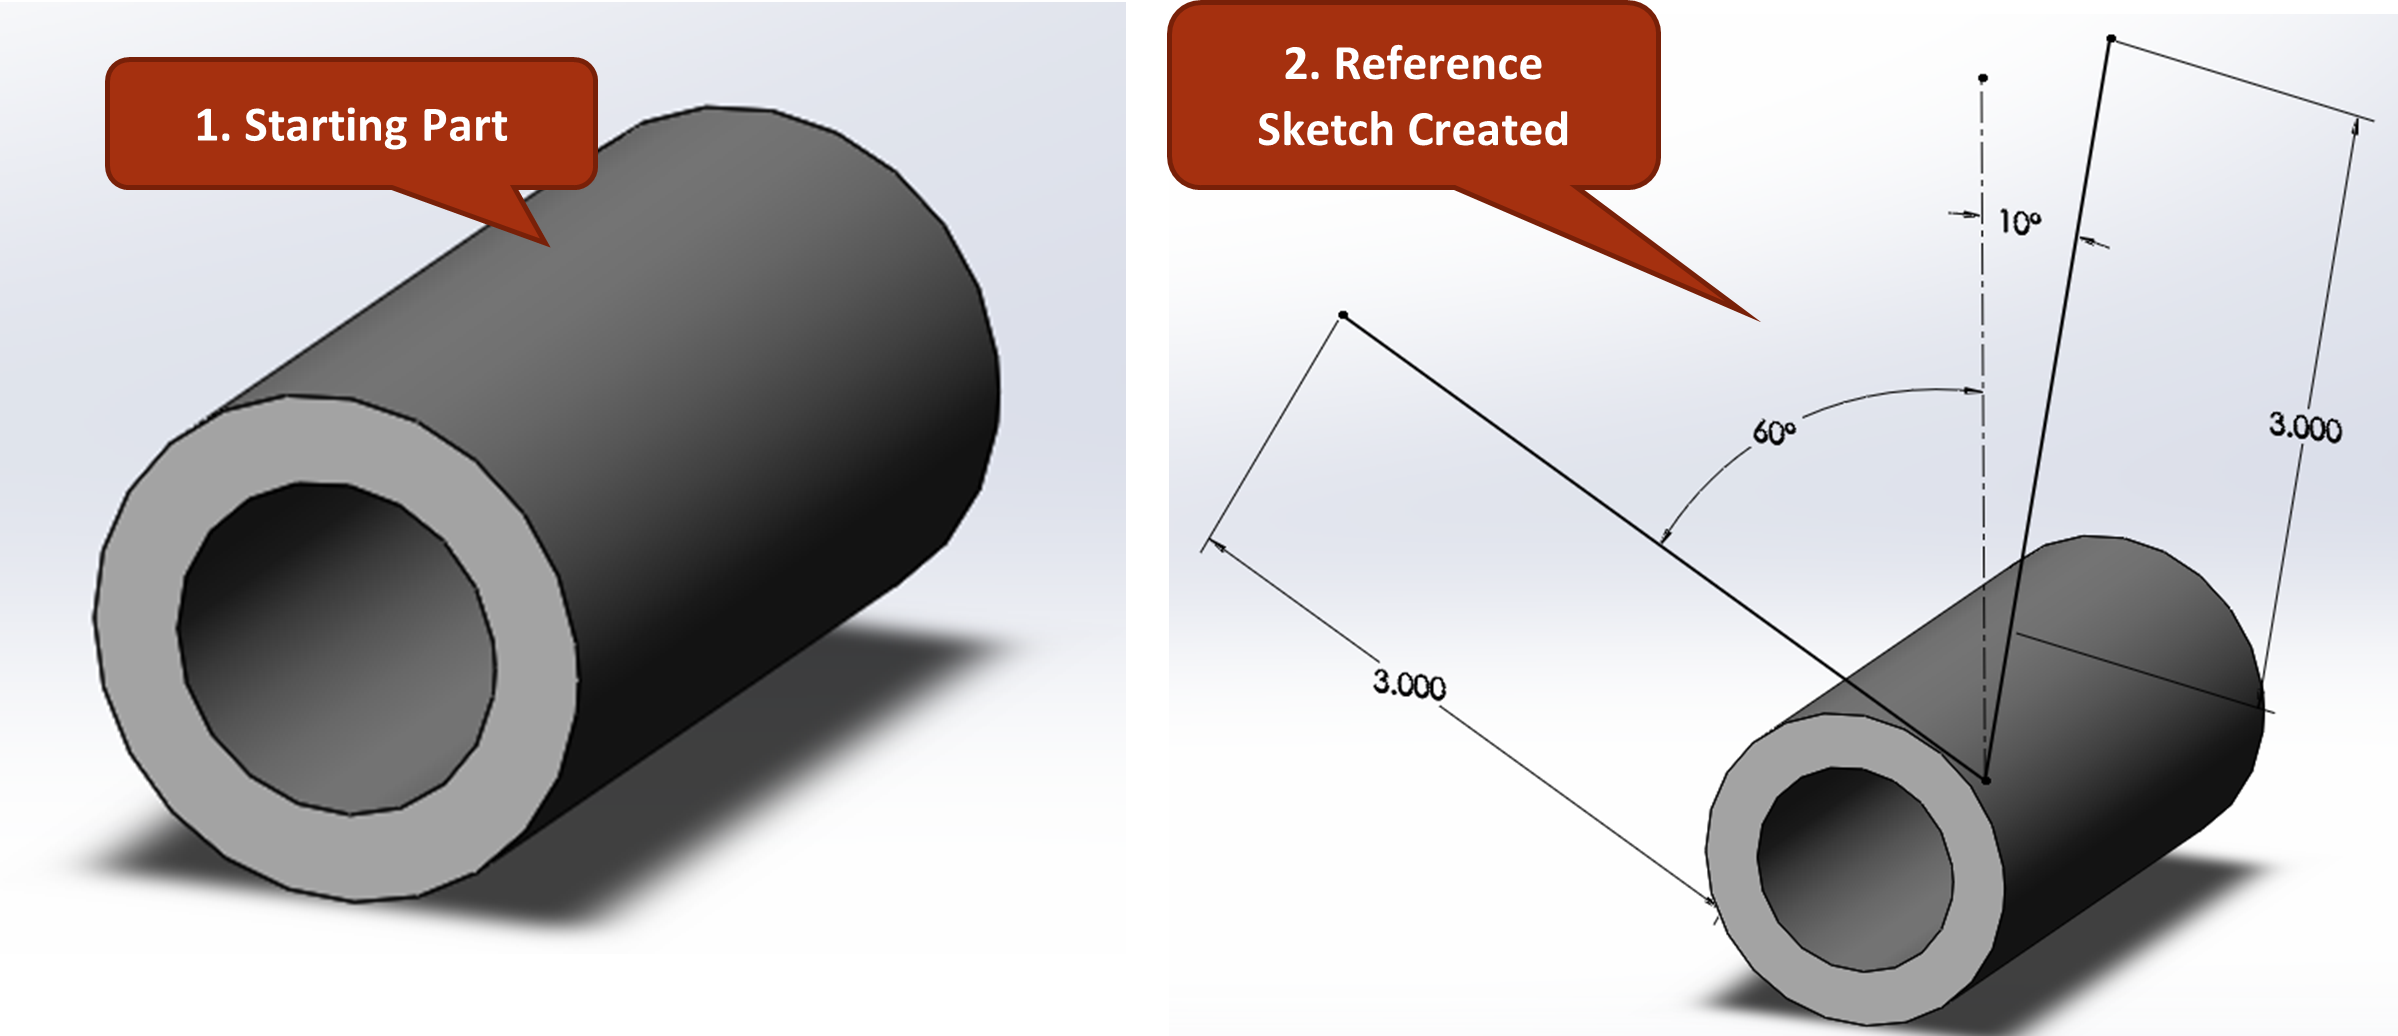
As noted previously, a bicycle frame is an excellent example where the directions of the tubing are at different angles. The base part is first created, then a reference sketch on a default plane that contains reference lines that will define the direction and length of the tubing members. After the reference sketch is made; the reference planes are created to pass through each end point of the reference line of the reference sketch as well as be perpendicular to the reference line. With the two new reference planes created, boss-extrusions can be made in the profile shape of the tubing (two concentric circles) extruded up to the next surfaces (using the Up to Next) option.
Exercise 6.2 Creating Planes from Reference Sketches
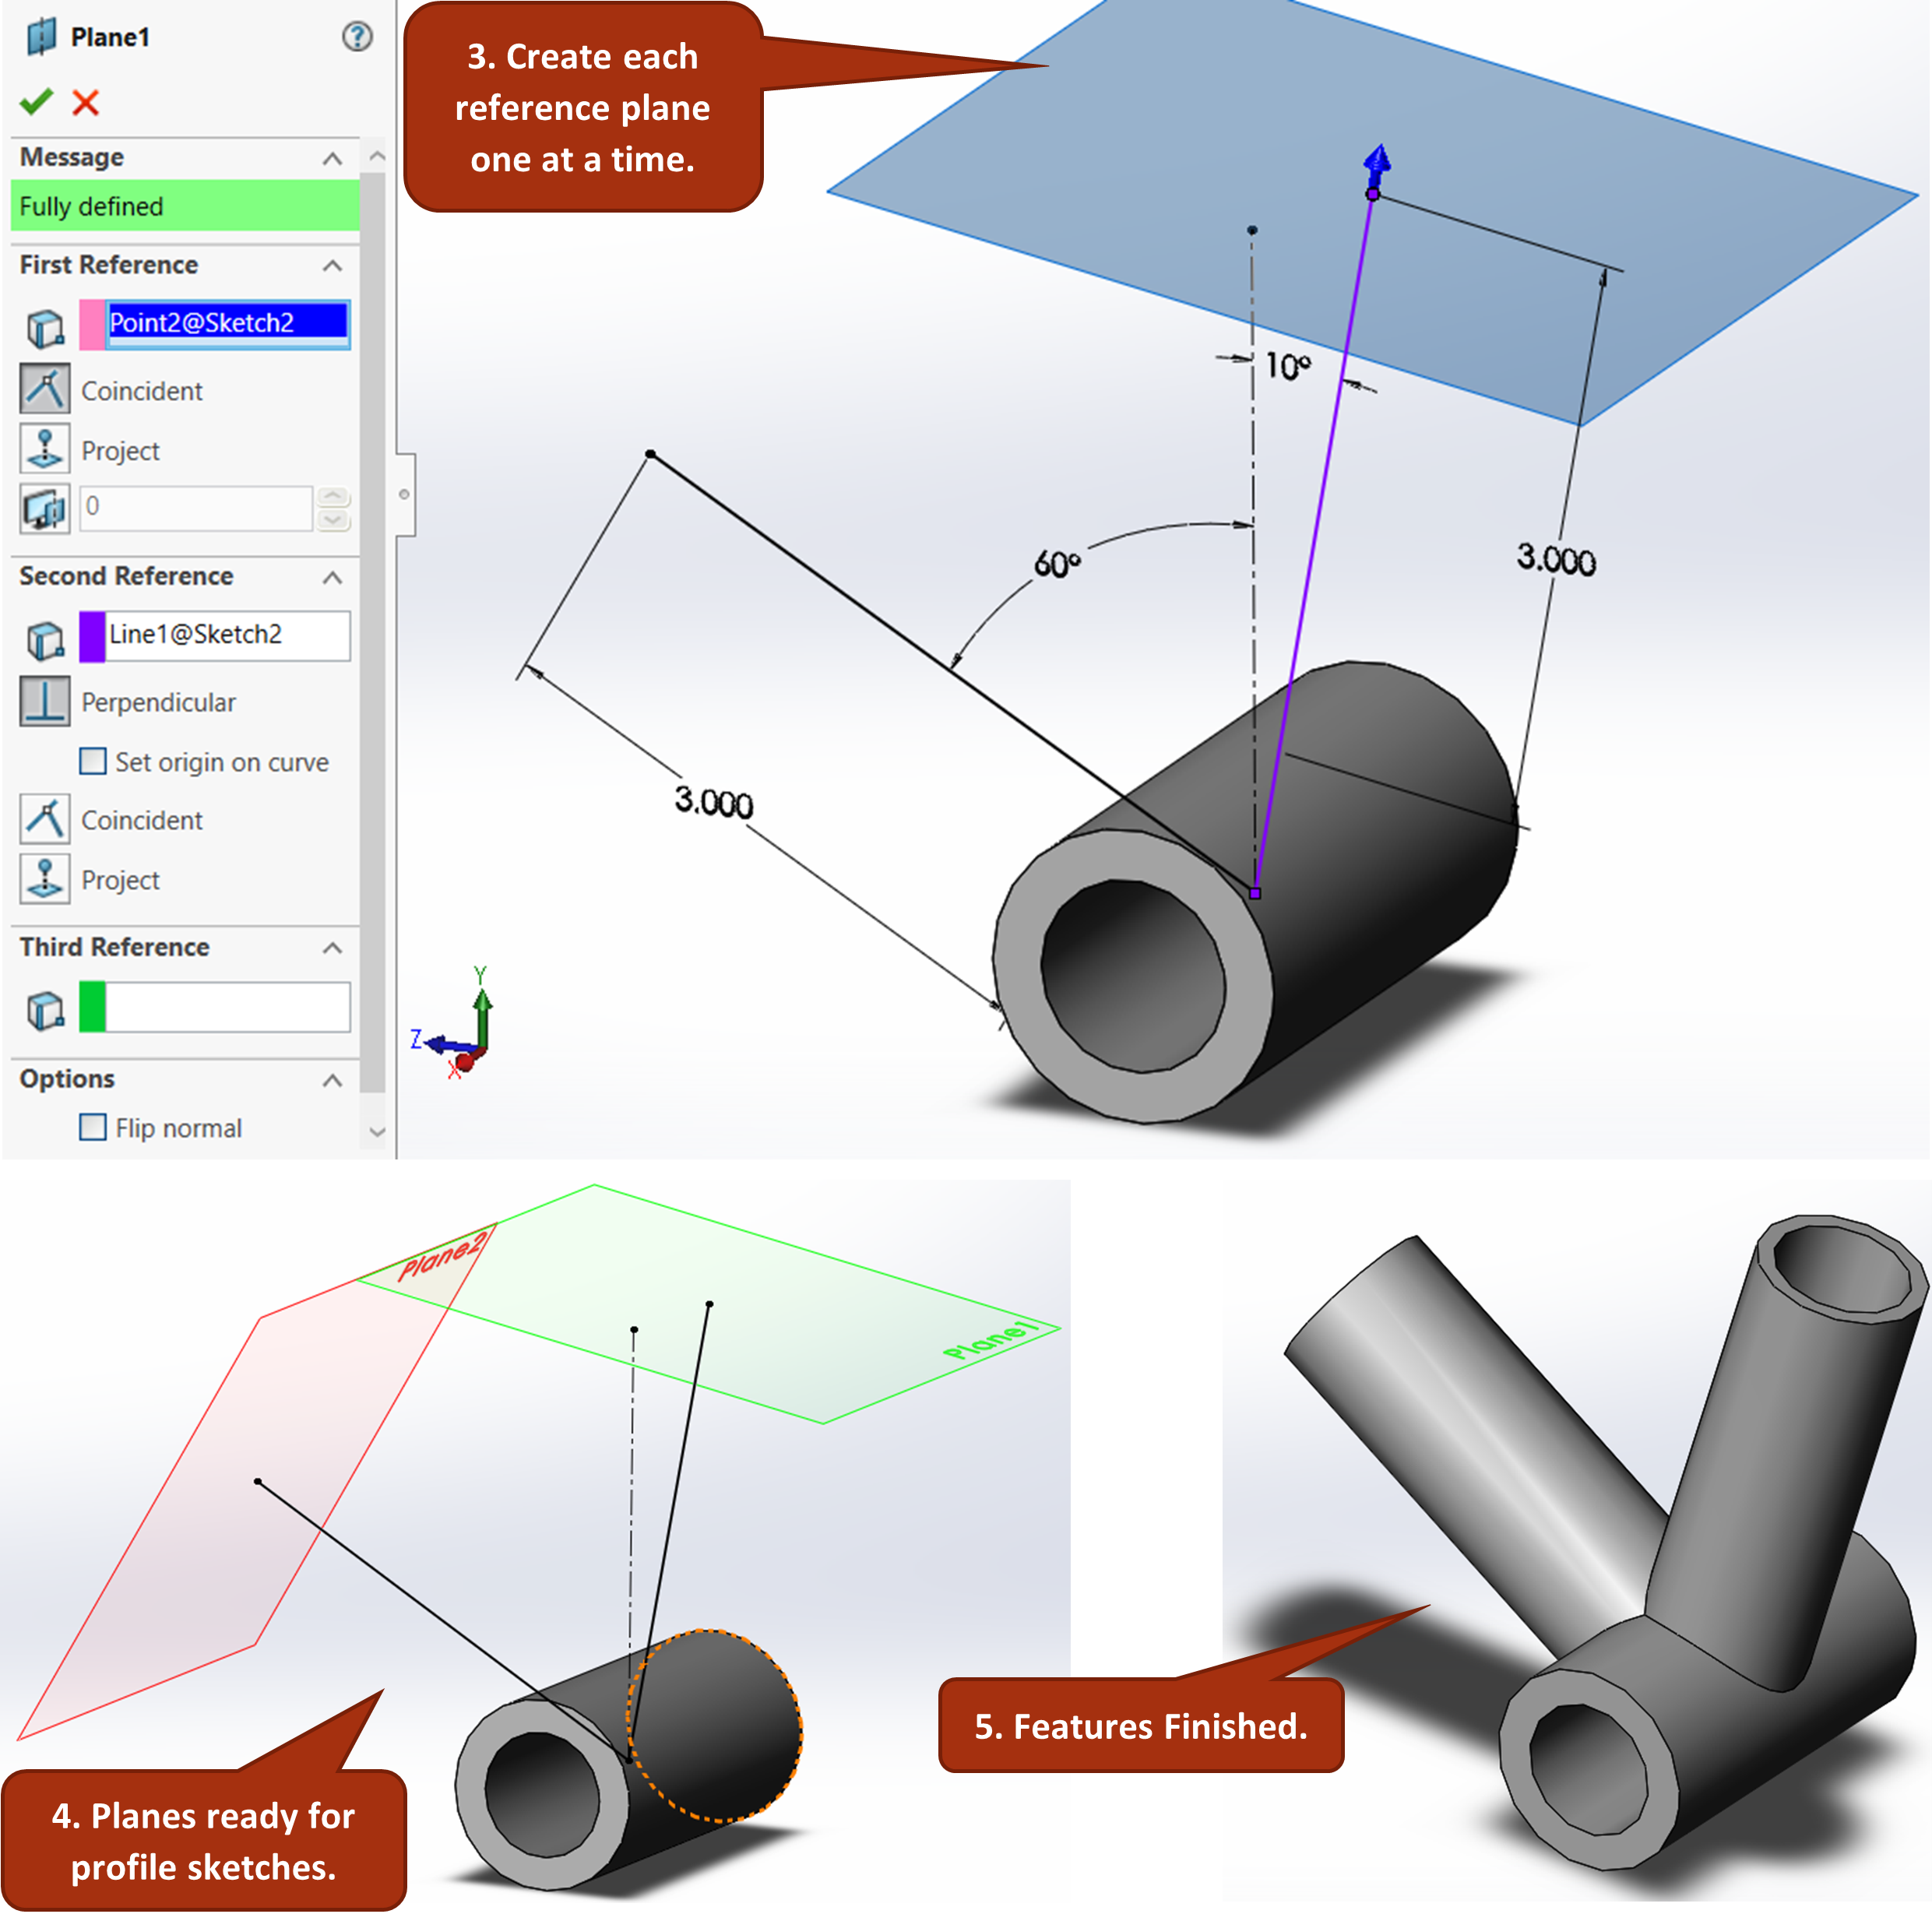
In this exercise, we will create a simple reference sketch such as the one shown above and then create reference planes from them.
- Create a sketch of at least one angled line on the front plane and exit the sketch.
- Activate the Reference Plane tool and create a reference plane by selecting the end point of the line and the line itself and confirm the reference plane.
Reference geometry is geometry such as planes, points, and axes that is used for construction of other geometric features but don't actually represent geometry of the model. See SolidWorks Help: Reference Geometry.
Geometric dimensioning and tolerancing, or GD&T, is a system of defining and communicating engineering tolerances in terms of the functional requirements of a product. It allows for clear definition of engineering dimensional and geometric constraints through a symbolic language scheme.
