Revolve and Other DFM Tools
Thin Feature
Thin features are an option for most sketch-based features such as Boss Extrudes, revolves, sweeps, etc. Rib is automatically a thin feature because it creates a 3D solid from an open sketch. Thin-features are features that extrude in 2 directions: the first direction is perpendicular to the sketch, which is normal for any 3D sketch-based feature, and the second direction is offset from the original sketch giving the sketch a thickness to be extruded.


To create a thin feature, you create a new sketch, sketch the open sketch profile of your object, activate the feature you wish to create, and be sure to check the “Thin-Feature” Option near the bottom of the property manager for the feature.
Exercise 5.4 Creating a Thin Feature
ere you will explore creating thin features from Extruded Boss Base as well as Revolved Boss Base.
- Start a new part file in SolidWorks,
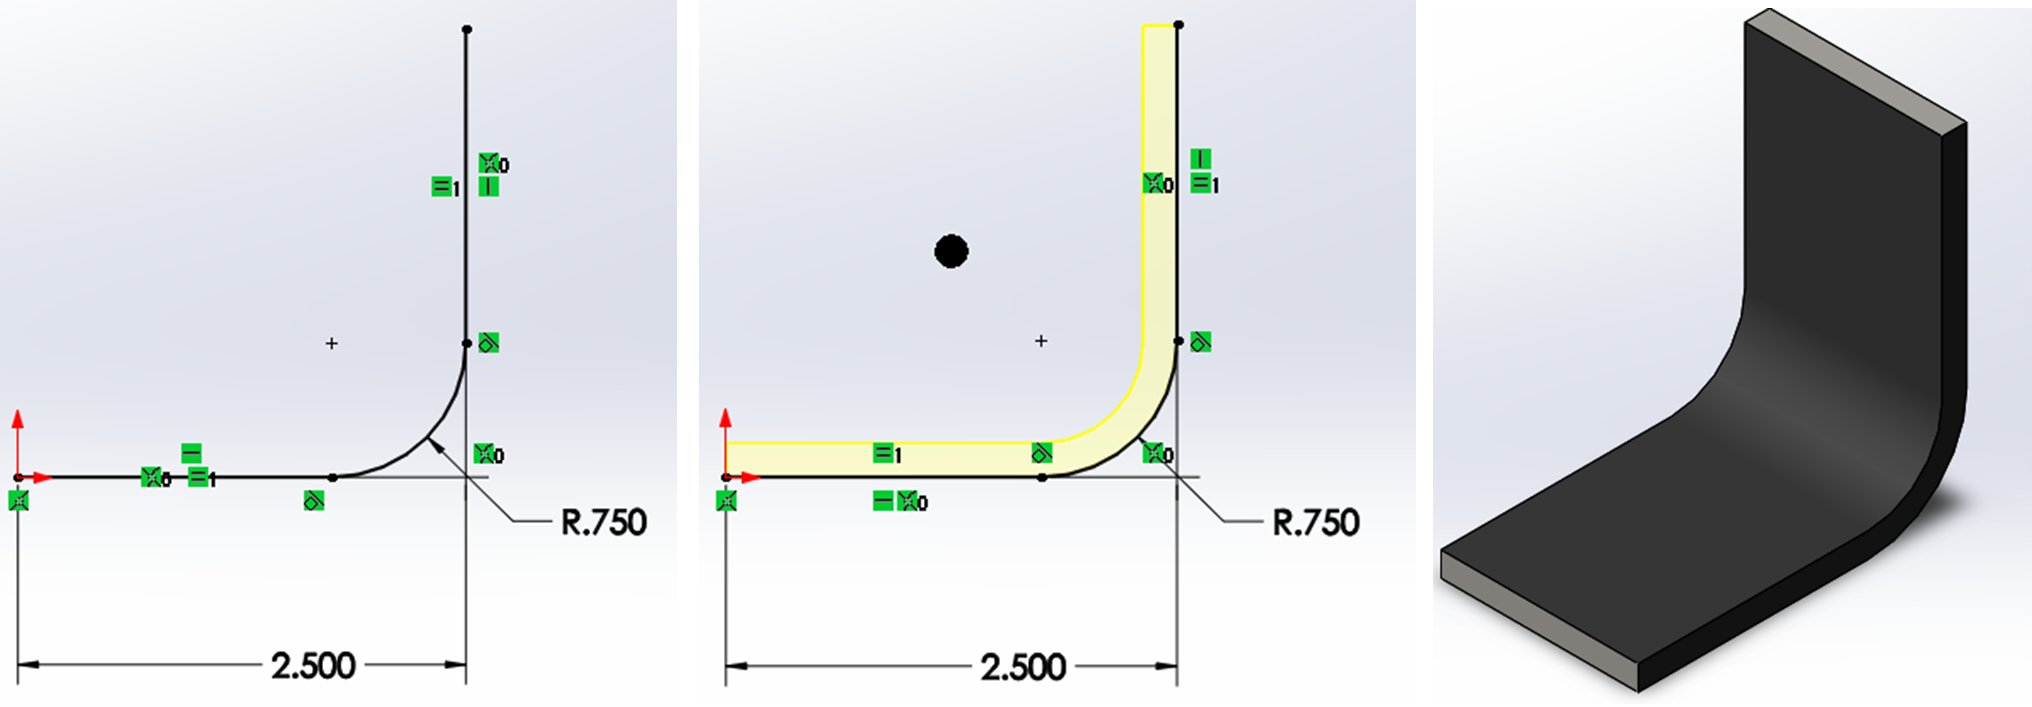
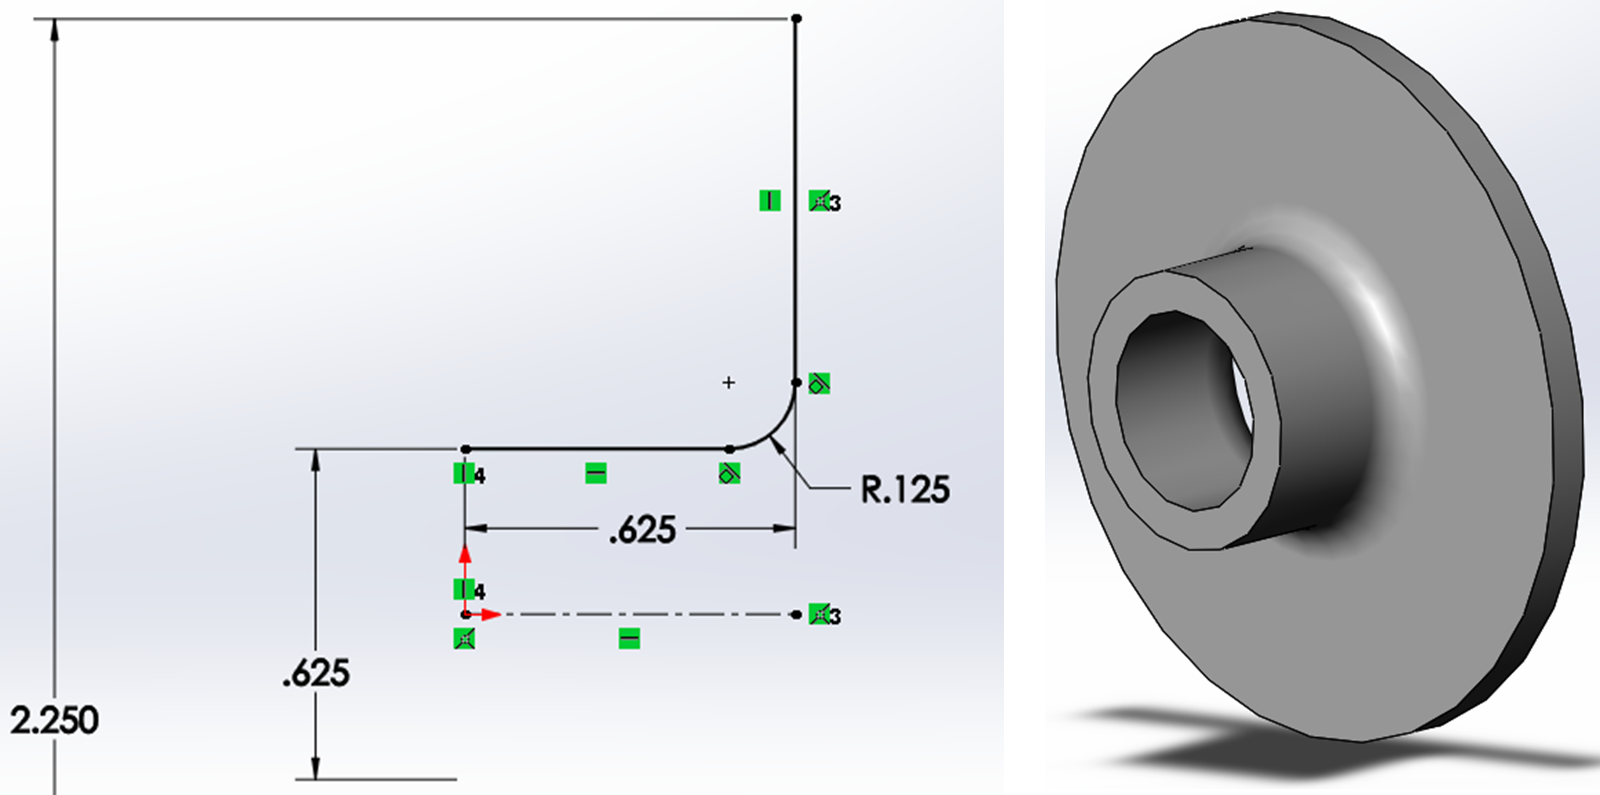
- Sketch on the Right Plane a fully-defined profile such as is shown in figures 5.9 and 5.10.
- Activate Extruded Boss/Base and choose Thin Feature. Specify the thin feature parameters, along with a MidPlane end condition and confirm.
- Move the Rollback bar before the Extruded Boss/Base and now try with Revolved Boss/Base and the same sketch. Cancel when you have finished experimenting with the different options.
Rib
Rib is a sketch-based feature like the Extrude and Revolve tools but extrudes in 2 directions at once to create a support feature for unstable shapes. Ribs are very common in cast and injection molded parts because adding them better allows for maintaining a uniform wall thickness throughout the entire part, which is good for casting and injection molding manufacturing processes.

To create a Rib feature, you start a sketch on a plane that is located at a point where you want to place the rib, draw a open sketch of the shape you want to make a rib from and then activating the rib feature creates the rib with the specification of thickness, extrusion direction, and other advanced options.
Exercise 5.5 Creating Rib Features
Using your same sketch from the last exercise, create a thin feature using Extruded Boss Base and then add a rib feature to reinforce the bracket. See the finished product as well: 2130004_RibEx
- Create the bracket part from Exercise 5.4 with a Extruded Boss Thin Feature using the midplane option for extrusion.
- Create a new sketch connecting the faces of the bracket on the Right Plane.
- Activate the Rib tool straight from within the sketch and specify the rib parameters as shown in figure 5.11.
