Assembly Modeling
2
When creating assemblies in SolidWorks, the purpose is to document how everything goes together and troubleshoot/identify potential problems with the current design allowing for design changes later. We can do this through many tools on the Evaluate Tab of the CommandManager of a SolidWorks Assembly. There are many tools, but we will only cover interference and collision detection here.
Interference Detection
Interference detection will check the entire assembly model for any components that are interfering with each other. For example, if you have a pin that should have clearance with a hole, but the pin size is too big, you can run interference detection to quickly find this error so that you can correct it.
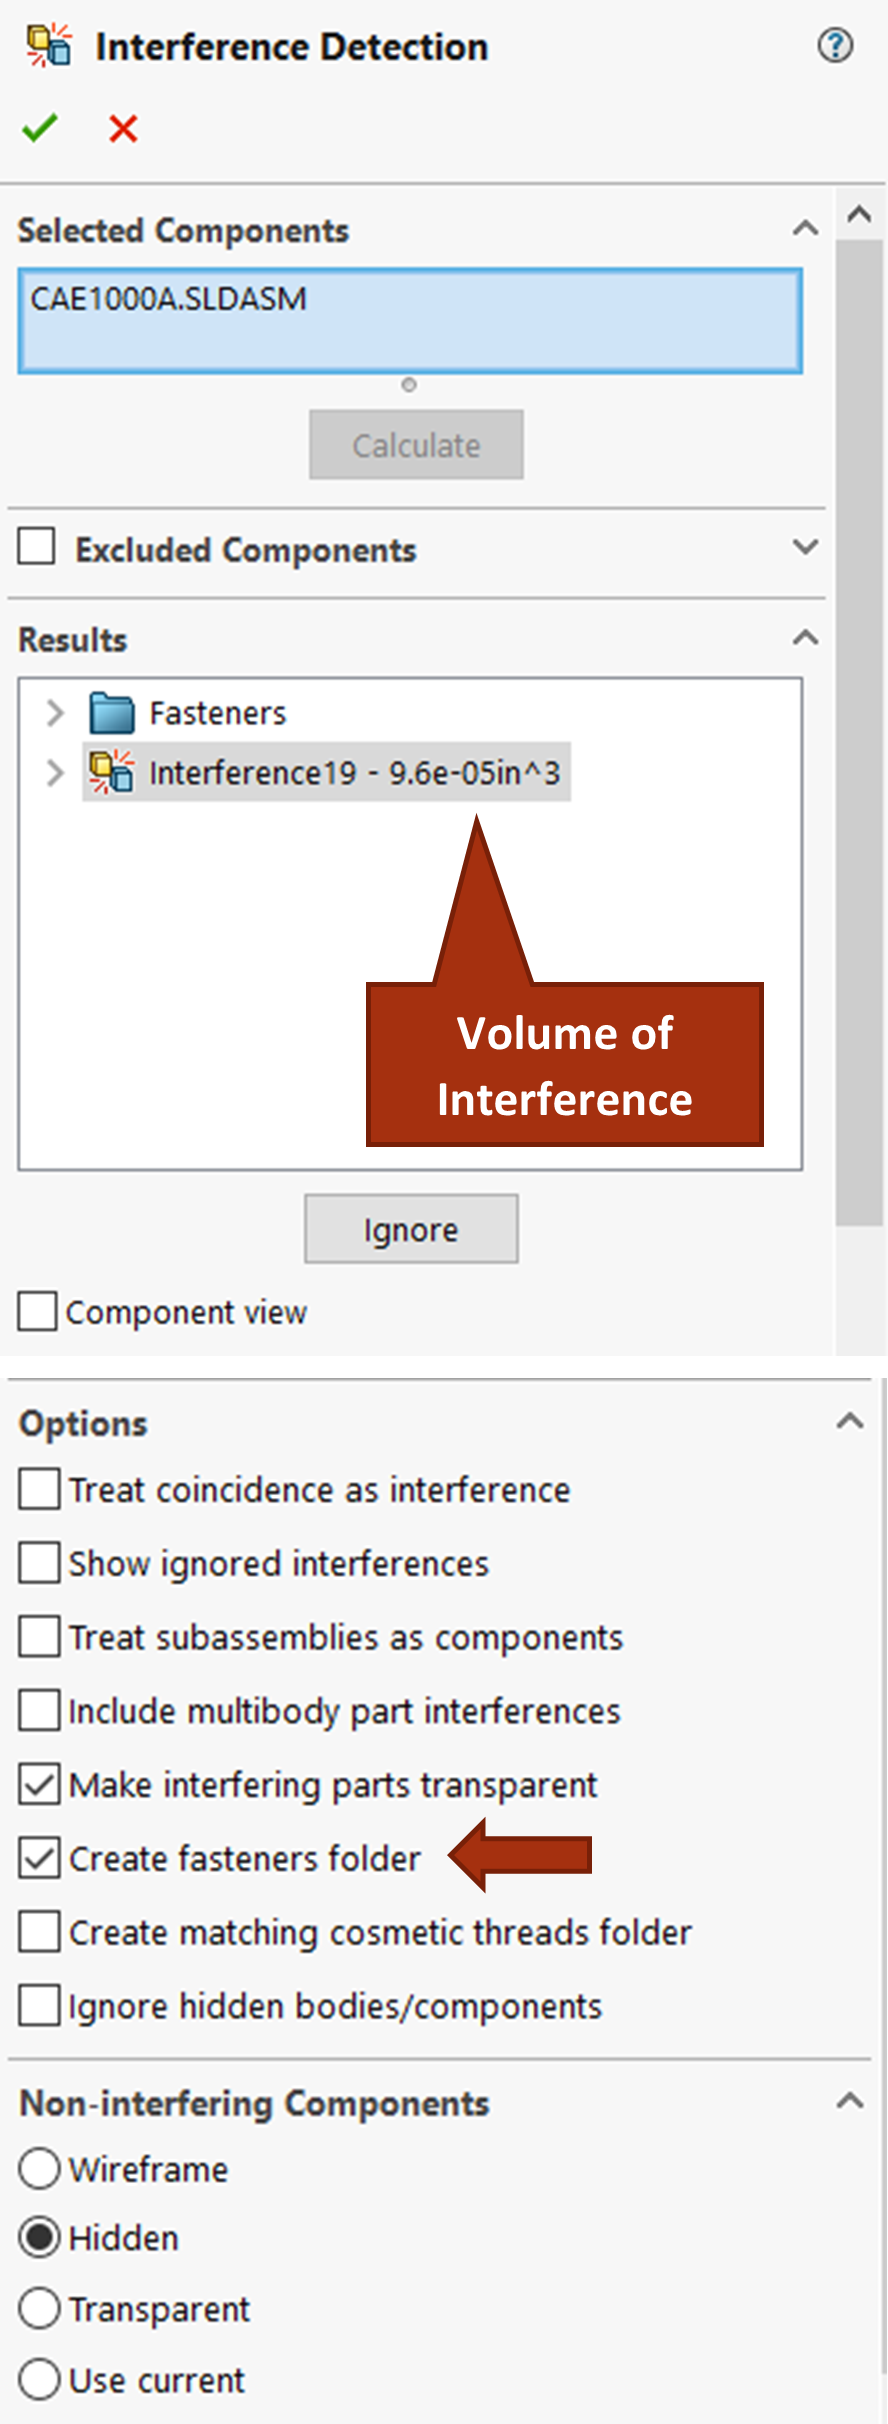
To use this tool, you activate it from the Evaluate tab of the CommandManager, set your options in the Property Manager, and then click “Calculate”. If there are interferences in your assembly, they will show up in red as you select them in the property manager list and the volume will show next to it in the property manager. You can analyze interference within the entire assembly or between specific parts. You can also choose to sort fastener interference into its own folder because fasteners will always show as interfering due to the fact that SolidWorks doesn’t model the threads or position fasteners exactly aligned with thread profiles when mated.
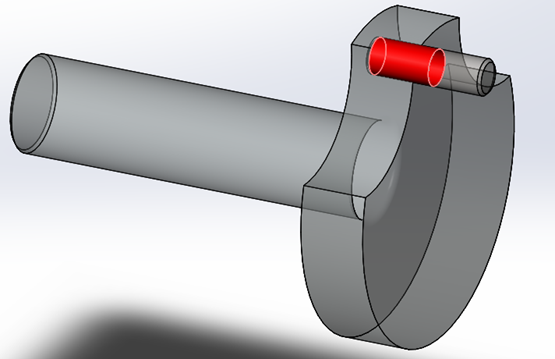
When you have many interferences, it can be difficult to identify them so you are able to control how non-interfering components appear in the property manager. In the figure below, all non-interfering components are hidden to really bring out the interfering components. The interference shown however is designed for, representing a press fit. Interference detection is really useful for finding those interferences that aren’t designed for.
Collision Detection
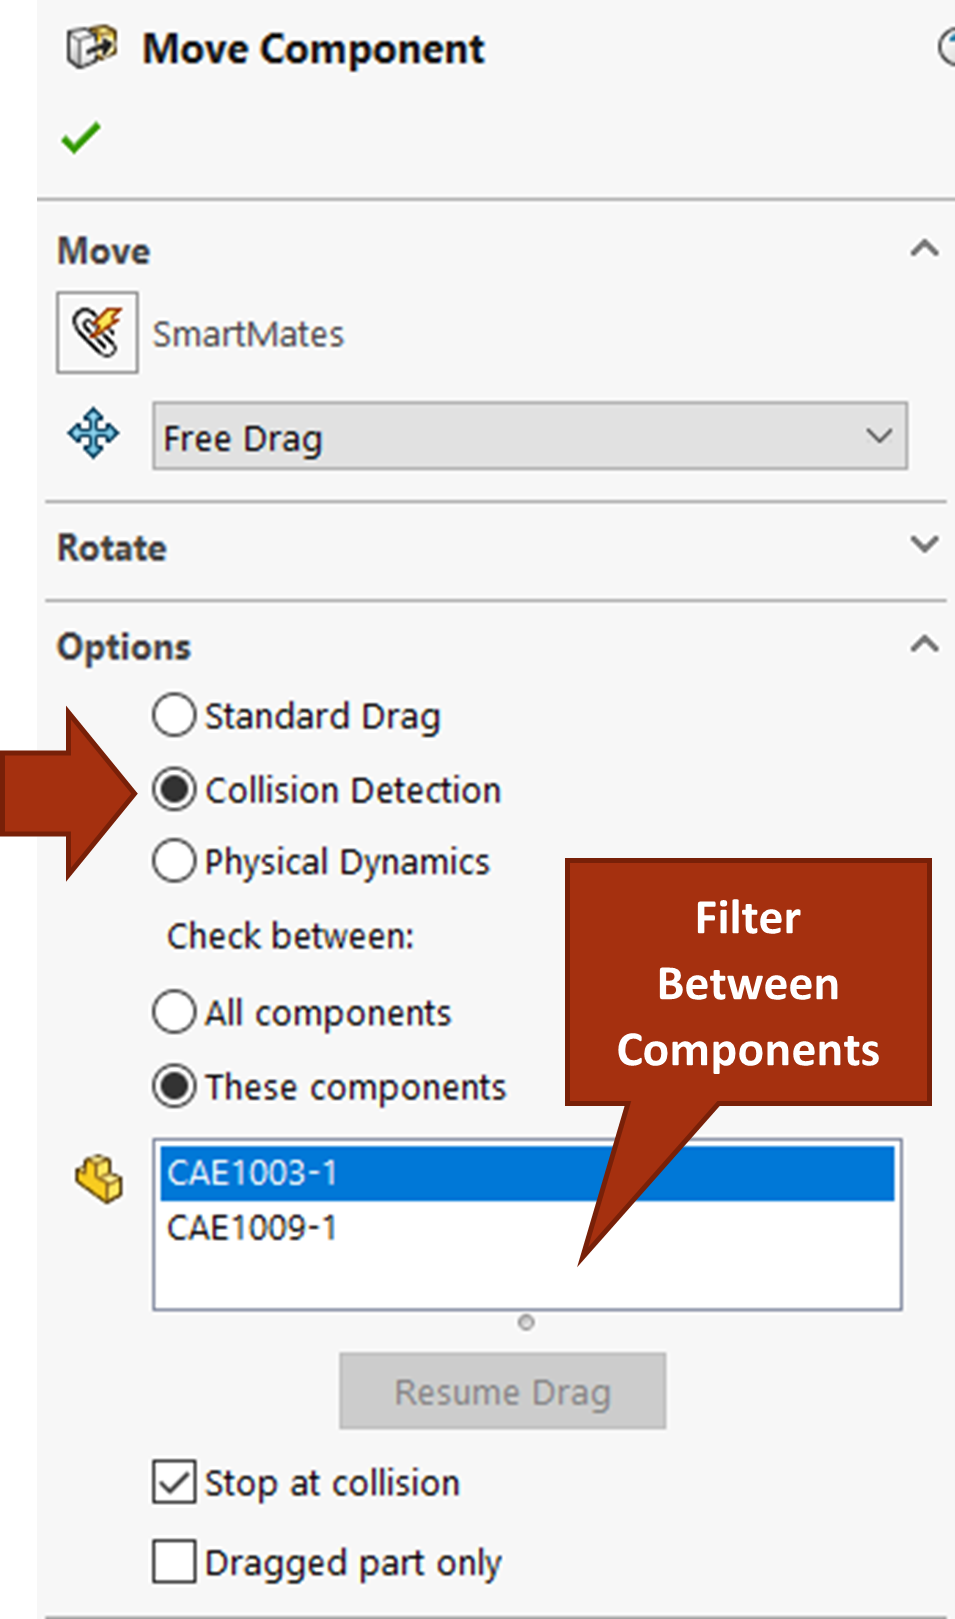
Collision Detection is another tool you can use specifically for assessing moving parts and how you will assemble the assembly in practice. Collision detection is nested within the Move Component command. To use collision detection, you activate Move Component from the CommandManager, select the Collision Detection option from the Property Manager, assign other desired settings, and then move the components. You can specify only a couple components to be included in the scope of the test or test within the entire assembly.
Most likely when testing assembly, you will need to suppress mates in the assembly because you’ve already fixed them. Imagine testing how CAE1009 fits around the rest of the assembly; you need to suppress the mates that are fixing the component in the assembly before you can test it by moving it with collision detection active.

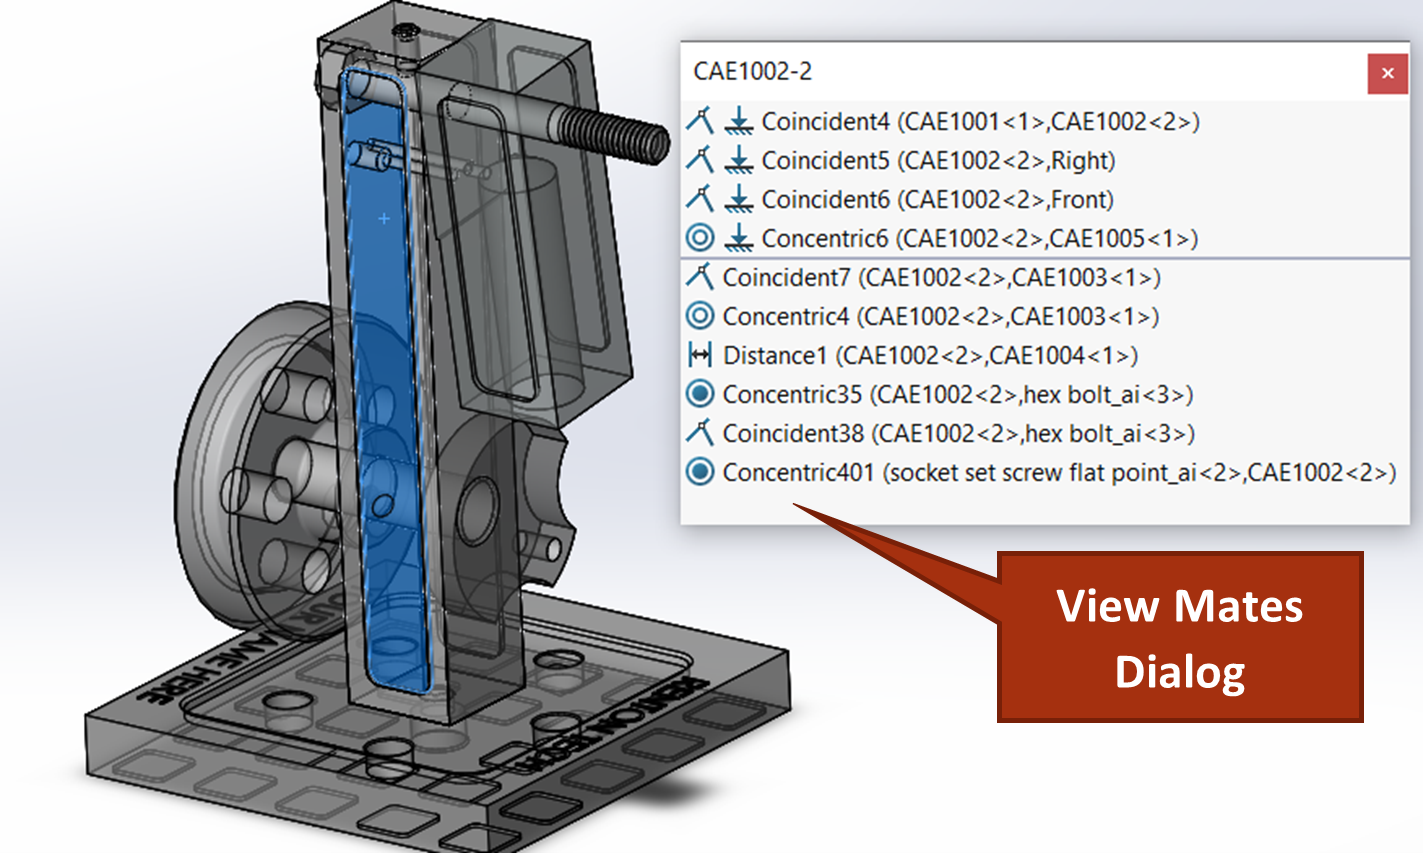
You can suppress mates of a single component by right-clicking the component and choosing “View Mates” (a mate icon with an eye icon) in the context toolbar will show all the mates involving that component in a separate dialog box. You can select the mates you need to suppress from the dialog and suppress them.
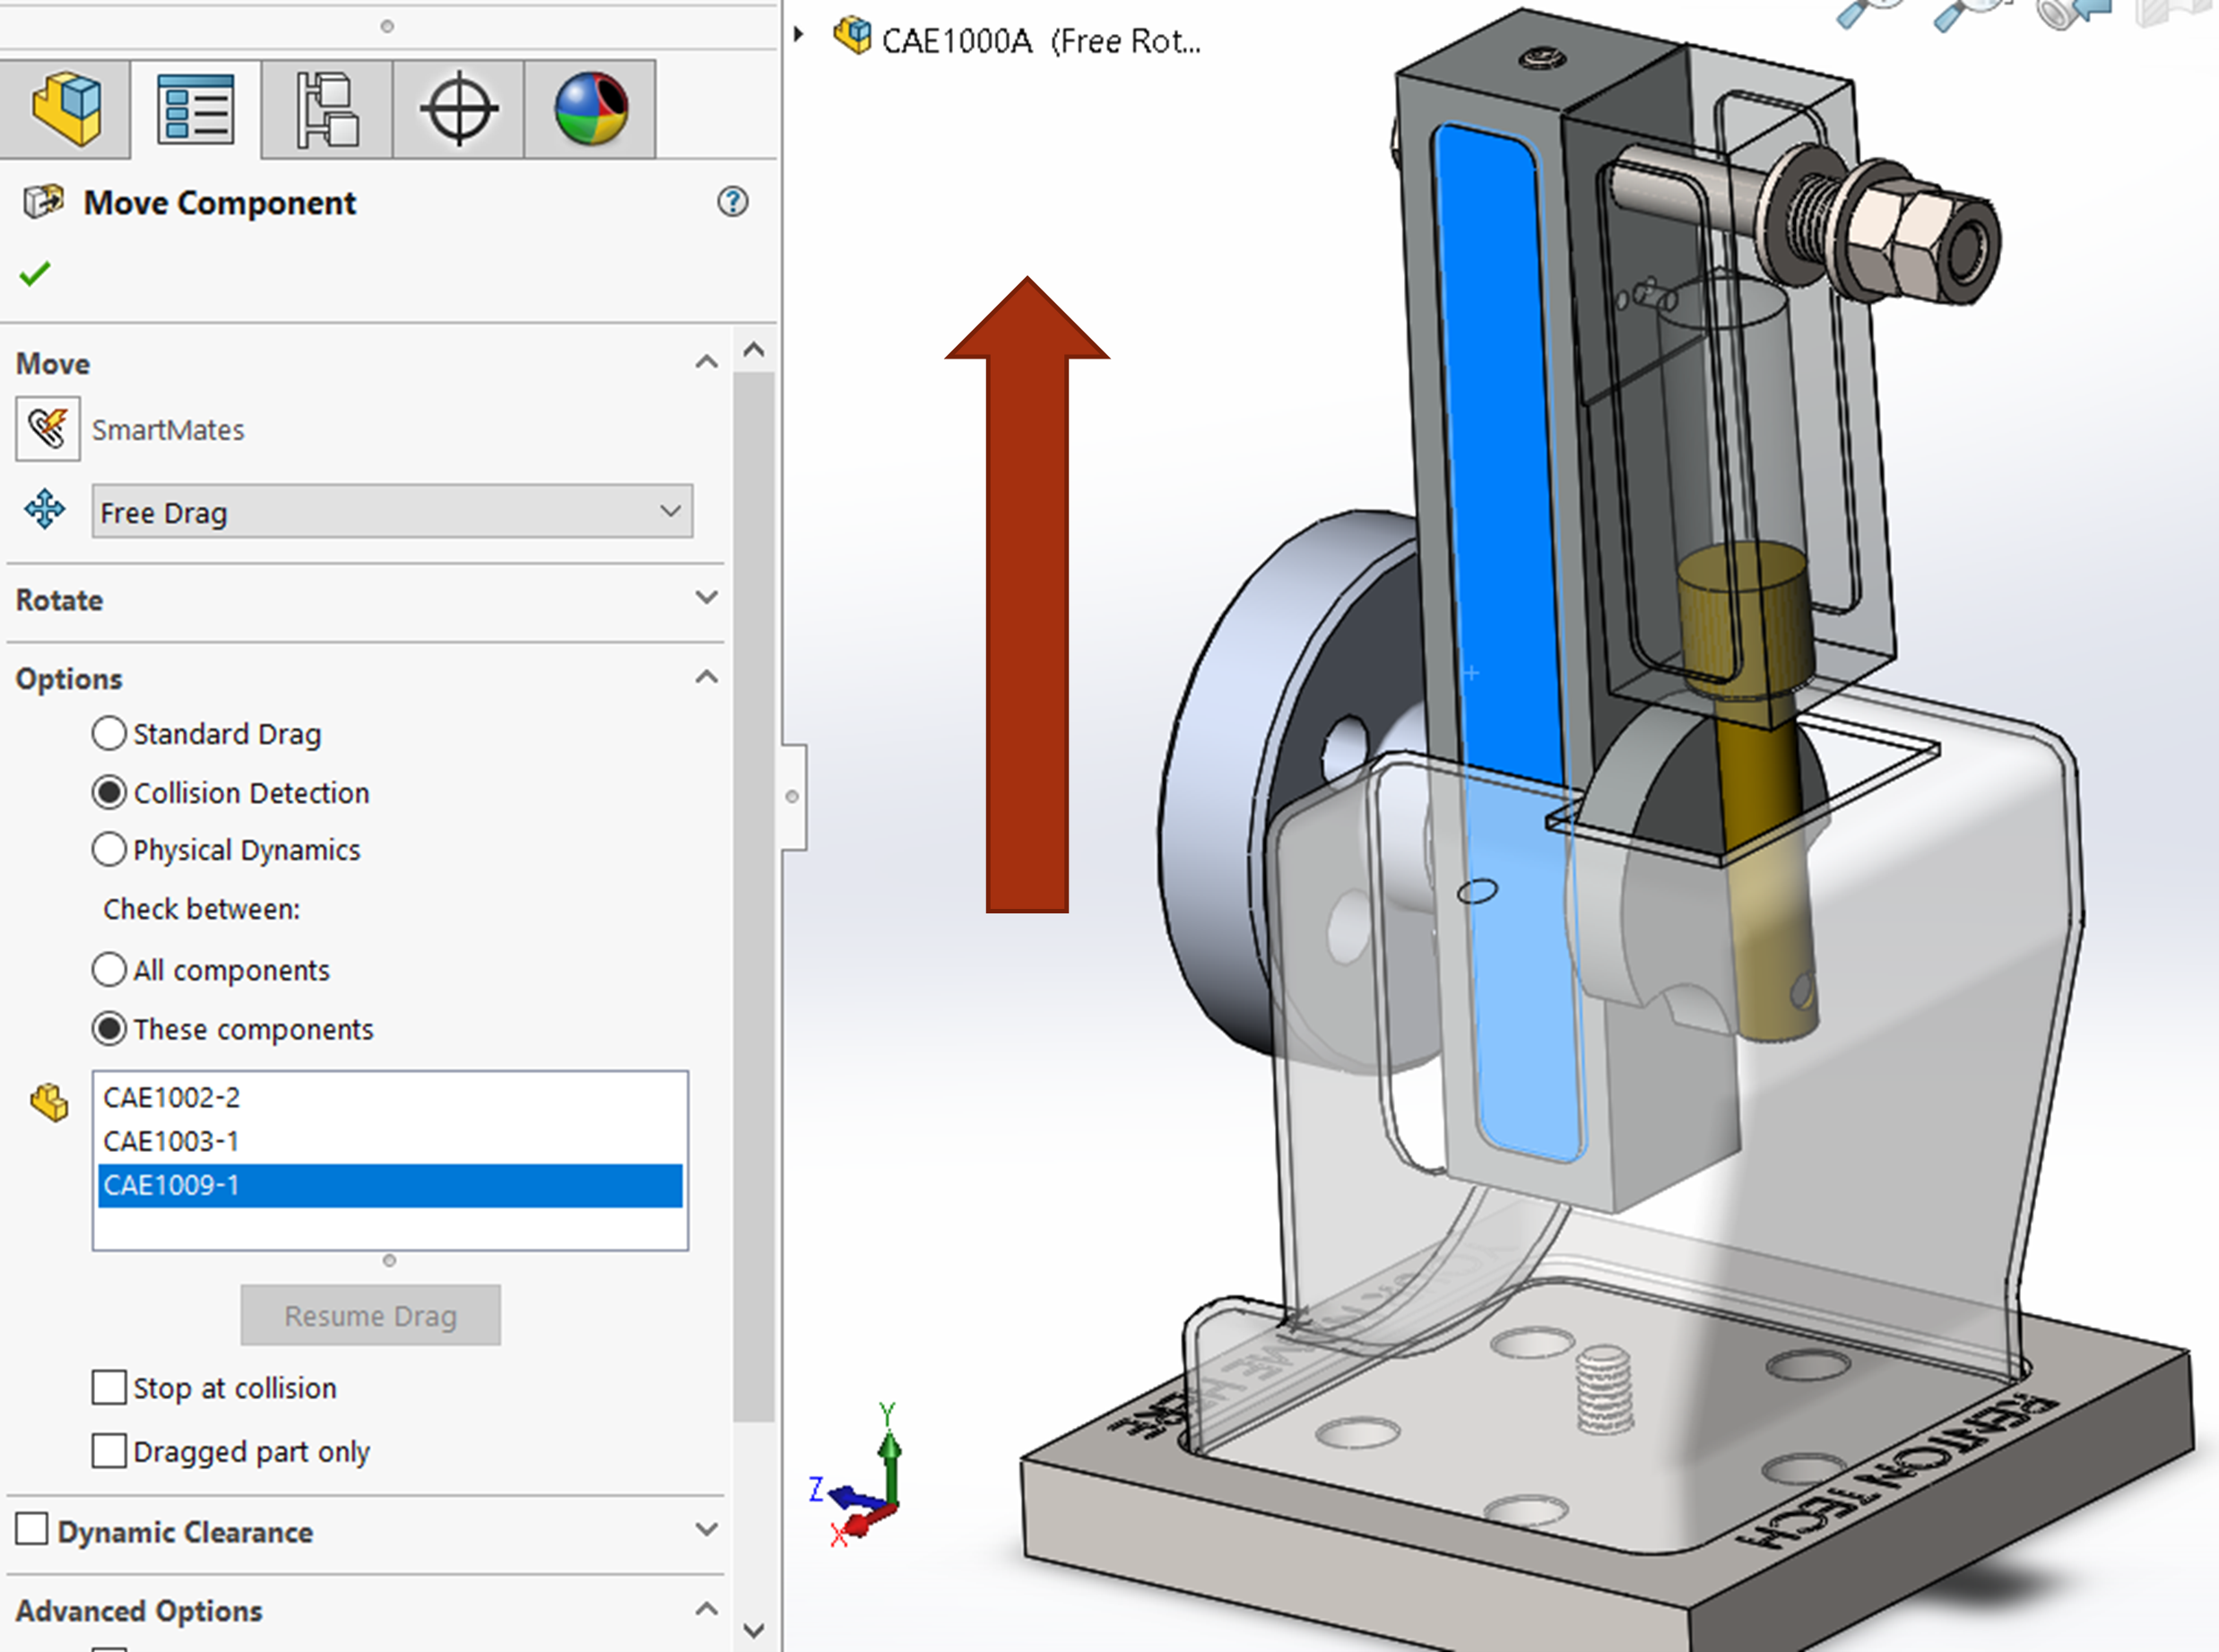
Exercise 7.7 Using Interference and Collision Detection for CAE1000
In this exercise, you will learn how you can use two assembly evaluation tools to determine if your design needs adjustment or if it will function in terms of its design intent. In CAE1000, perform interference detection and evaluate any interferences in the model and also run collision detection to see if the parts can be assembled or if assembly order will be important for this design. You will need to suppress a mate on CAE1002 to run collision detection.
Checks for part models that are taking up the same space in an assembly. See SolidWorks Help: Interference Detection.
Collision Detection helps you make sure that parts in an assembly don't run into each other or to see when components with collide. See SolidWorks Help: Collision Detection.

