Topic 3 – Install Bracing or Sheathing and Erect Exterior Walls
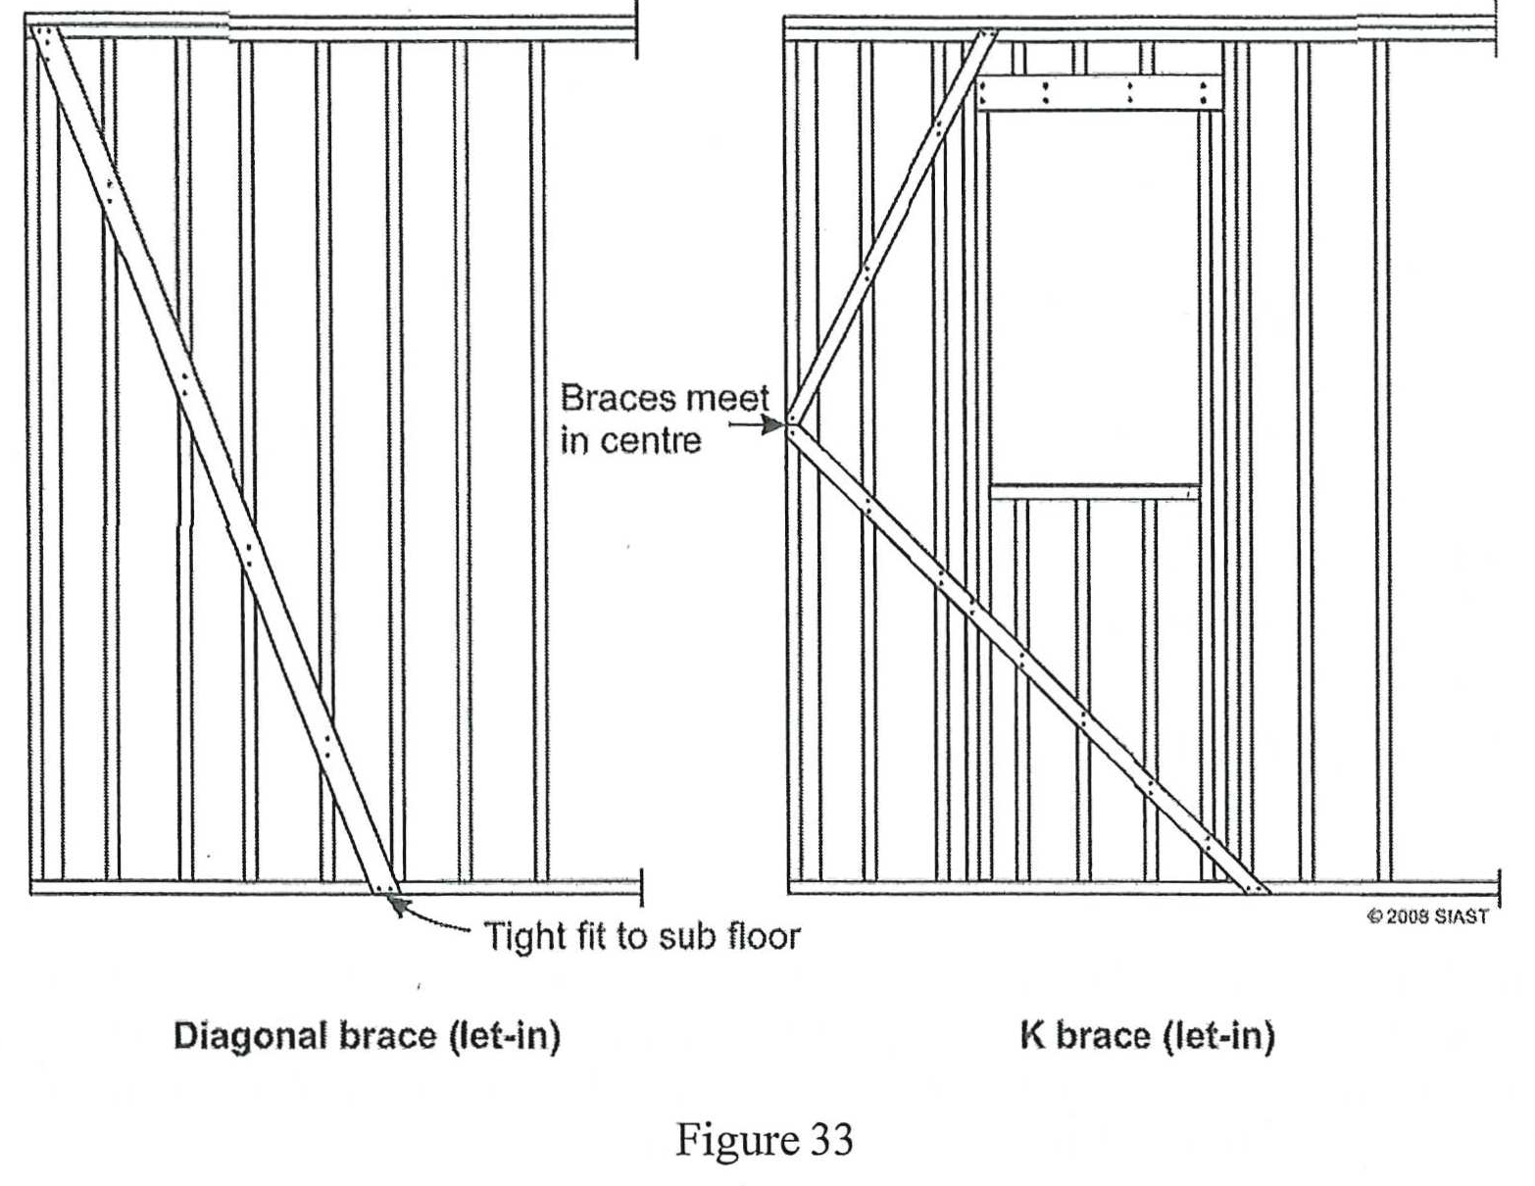
In order to provide lateral strength to a wall, a form of sheathing or bracing must be applied. This provides the rigidity required to withstand pressures from the wind and prevent the wall from racking. In most cases, sheathing is applied to exterior walls, although bracing is also acceptable and may be required in some circumstances such as:
Types of Wall Bracing
Wall bracing comes in a few different forms:

When installing bracing, a number of guidelines should be followed:
Types of Wall Sheathing
There are four most common forms of wall sheathing used:
Installation of Sheathing
- Routers are fast and accurate, but wear out quickly
Calculating Sheathing Quantities
In order to calculate sheet quantities, the total wall area is required. The total wall area is calculating by multiplying the perimeter of the building by the wall height. We then divide the total wall area by the area of a sheet (usually 32 SF) and round up to the nearest sheet:
For example, we will use a house that is 36’ x 40’ with 8’ walls to find the number of sheets required (no waste):
***Try the following:
- Calculate the amount of sheets required for a building 29’-6” x 38’-0” with 9’ high walls.
Erecting Exterior Walls
After sheathing is applied and all opening cut out, the wall can be erected
After walls are stood, the bottom plate is nailed into place on the chalk line, and the wall is braced. Walls should be braced at least 6’ up and the wall plumbed.
If the floor was installed level, and the walls sheathed straight and square, the corners should be plumb when tied together. After all the walls are erected and corners are tied in, the wall is straightened using a string line and braces. The braces added during erection may need to be removed during this process but should be replaced as the wall is straightened.
Review Questions
- What two important steps must be taken before the wall sheathing is applied?
- What minimum thickness of plywood wall sheathing is required with supports at 24” O.C.?
- What are the nailing requirements for plywood sheathing on exterior walls?
- What is the reason for allowing clearance between courses of sheathing?
- According to the NBC, when is diagonal bracing required in an exterior wall?
- True or False:
- The bottom row of sheathing is usually installed before the top
- Plywood sheathing should be butted tight between rows
- The windows should be cut out before the walls are stood
- When panel type sheathing is applied horizontally, the vertical joints should be staggered.
- Calculate the amount sheets required for a building 28’-3” x 39’-0 with 10’ high walls and sheeted with 4’ x 8’ x ½” sheathing.
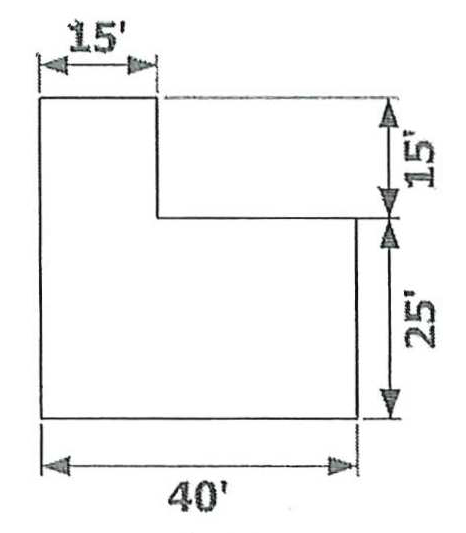
- Calculate the number of 4’ x 8’ x 3/8” sheets required for the following structure:

- L-shaped building with 9’ walls
- 3 walk-in doors (18 SF each)
- 12 windows (150 SF total)
- Add 5% for waste
- What must be done prior to standing walls?
Answers:
- Ensure wall is straight and square, fill voids that will be covered by sheathing with insulation
- 7.5 mm (9.23.17.2)
- 150 mm (6”) along edges and 300 mm (12”) along intermediate supports (9.23.3.5-B)
- Allows for any expansion that may take place
- When there is no exterior sheathing, or exterior sheathing is insufficient for bracing (9.23.10.2)
-
- True
- False
- True
- True
- 42.03 or 43 sheets
- 48 sheets
- Remove nails placed for squaring, add blocks at floor edge, place blocks underneath to grab wall, have braces and nailers ready
