1. Sketch Engine Tutorial (using the British National Corpus)
Ingrid Veloso
Ingrid Veloso
Montclair State University
1. Logging In & Navigating the site
To use Sketch Engine, go to https://www.sketchengine.eu on your browser and click the LOG IN button at the top left corner of the website. With a free trial you can use Sketch Engine for 30 days. Some institutions have free access to Sketch Engine, you might want to check that with your institution.
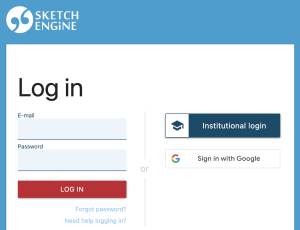
Figure 1 – Log in page
Once you are logged in, the site will bring you to the SELECT CORPUS page. On this page, you will select the language you would like to work with, so that it can narrow down your searches to the corpora in that language only. For the sake of this tutorial, we will be focusing on the use of English in the British National Corpus (BNC). Click “English” on the homepage to narrow your search to English corpora.
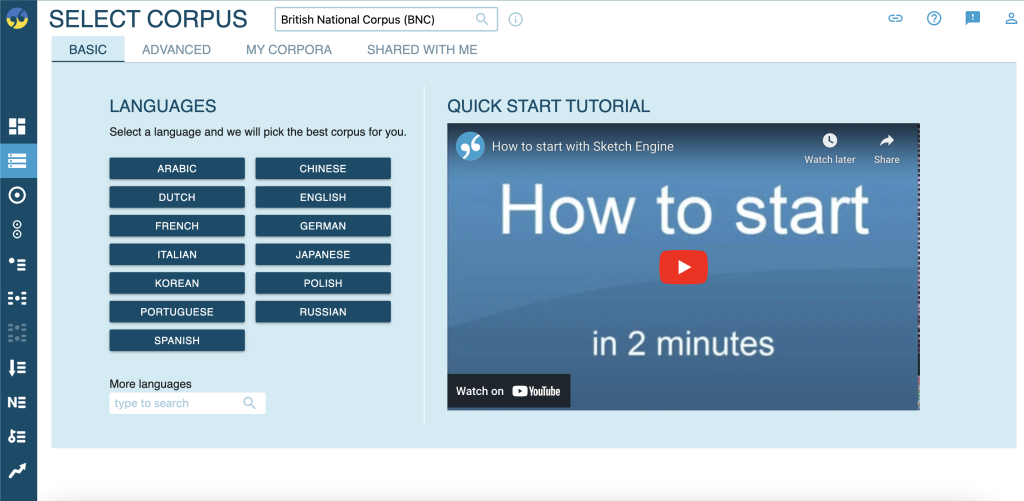
Figure 2 – Select Corpus page
Sketch Engine will then take you to the DASHBOARD page, where your default corpus for English will be the English Web 2020 (enTenTen20) corpus.
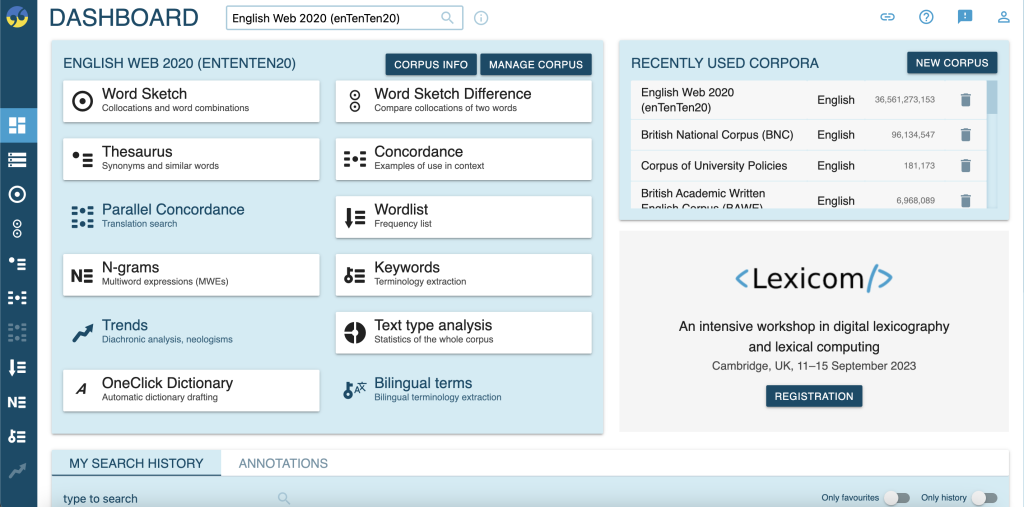
Figure 3 – Sketch Engine Dashboard page
To use the British National Corpus, type in the search box where “English Web 2020 (enTenTen20)” is displayed and type “British National Corpus.” Click on the first result given with the corresponding name.

Figure 4 – Corpus search and selection
This will then load the corresponding corpus for you to perform your searches on. The search features listed in the DASHBOARD menu will be explained in the following section.
2. Search Features on Sketch Engine
The Sketch Engine Dashboard provides a list of functions you can use to explore a corpus and provide relevant data for your research with features that narrow your search. The list of functions can be found on the DASHBOARD page in the first light blue rectangle of the page with the selected corpus name as the title: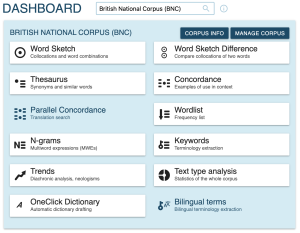
Figure 5 – Dashboard corpus features display
The following sections will provide information on how to perform basic searches with each of the search features pictured.
2.1 Concordance
The concordance feature on Sketch Engine allows users to see a keyword in a given contexts. To perform a concordance search, click on the “Concordance” button on the dashboard page. This will lead you to a page where you can perform simple searches through the selected corpus.
2.1.1 Basic Search
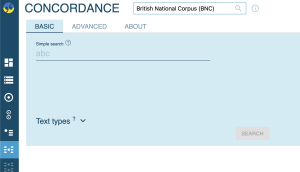
Figure 6 – Basic Concordance search page
To narrow down search results, you can click on the caret next to “Text Types” found below the simple search text entry bar. This will list the various features to the text/corpus that you can specify to narrow your search.
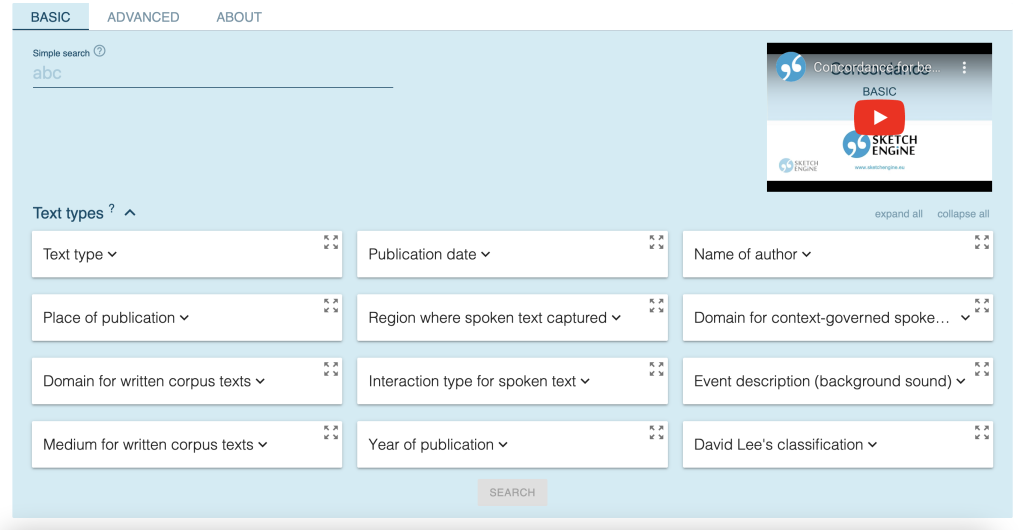
Figure 7 – Text types options expanded on Concordance basic search page
The Text type option (first option under the Text types section) allows you to select what kind of text searches can be pulled from, such as “Written books and periodicals” or “Written-to-be-spoken” texts (texts written for speeches, etc.). The search bar in this section allows you to search all of the text type features that you can add, including the ones not immediately listed underneath as defaults. To add any listed text type feature to your search criteria, simply click on the option provided. You can also use this option to find results that start, end, contain, or exactly match a word, morpheme, letter, etc. by clicking the arrow symbol pointing left and right next to the search bar. Other options under the Text types section include “Publication date,” “Place of publication,” “Year of publication,” and more.
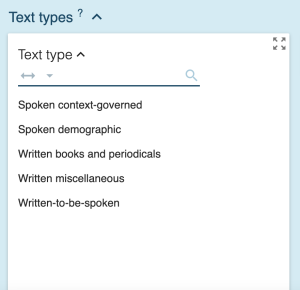
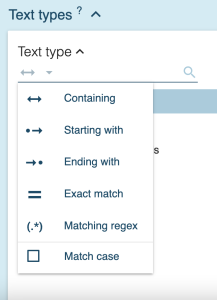
Figures 8 and 9 – Text type options and constraints list
Once you have entered your keyword into the simple search bar and selected the criteria for your search under the Text types section, click the “Search” button at the bottom of the page to see your results.

Figure 10 – Concordance line results for the word “car”
The results will default to the Keyword in Context view (KWIC), which displays your searched word highlighted in red within a left context and a right context. This allows users to view the word in various contexts and make observations based on the left and right sides of the word. To see the type of source each example is from, check the text after the information symbol, and the text highlighted in gray is the source tag:

Figure 11 – Hovering cursor over source of concordance line
Another viewing alternative to the KWIC view is the Sentence view, which you can switch to by clicking the blue-highlighted “KWIC” button towards the top right corner of the page. This will trigger the drop down menu, which will have “Sentence” as the alternative option to KWIC. Click this option and the resulting view will appear:

Figure 12 – Sentence view for Concordance line results
This view focuses on the complete sentence construction that contains the word as it is rather than lining up the searched word in one row with incomplete sentences.
2.1.2 Advanced Search
To narrow our Concordance line searches even further, we can switch from the Basic Search tab to the Advanced Search tab, which can be found on the main page of the Concordance feature. Directly below the title “CONCORDANCE,” you will find the tabs for basic and advanced searches titled “BASIC” and “ADVANCED” respectively. Click on the “ADVANCED” tab to start your advanced search.
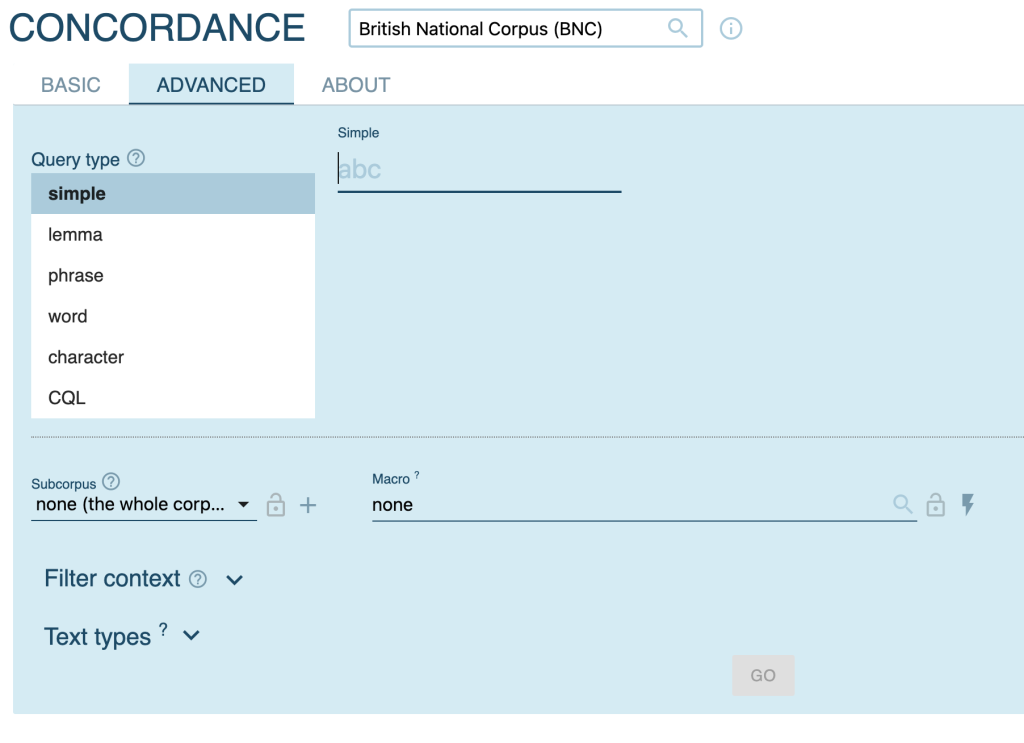
Figure 13 – Advanced Concordance search starting page
On the left hand side of the screen, we are given a list called “Query type” which allows us to choose what form of our search entry we would like to see in the results. The “simple” option is the same as the BASIC tab’s search defaults. The “lemma” option returns results for all word forms of the word in the search bar. The “phrase” option allows users to find a multi-word phrase as it is typed into the search bar. No lemmas are considered for any of the words in this option. The “word” option searches for a word form as it is inputted in the search bar with no alternative lemmas considered. The “character” option searches for tokens that contain a specific character or group of characters as typed into the search bar. Lastly, the “CQL” option allows users to make searches with the Corpus Query Language, which has features to enable more complex searches regarding lexical structures and grammatical formation. For the sake of this tutorial, CQL will not be discussed, but resources will be provided at the end of the tutorial if you wish to learn more.
Below the Query type list is the “Subcorpus” drop down menu, which allows us to pick which part(s) of the corpus (if divided into subcorpora) we would like to retrieve results from. For example, in the BNC corpus, we can narrow our search to corpus entries according to given year ranges as well as mode of collection (eg. “Audio sentences mp3” vs. “Written Academic”).

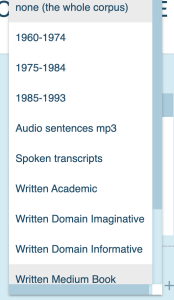
Figures 14 and 15 – Subcorpus drop down menu closed and expanded
Below this feature is the “Filter context” option, which allows us to filter our results according to the number of lemmas in our search and their parts of speech. There are three options for this feature. The “DO NOT FILTER” option is the default option, which allows the search to produce results as normal. The “LEMMA CONTEXT” option returns results of only lines that contain or do not contain certain lemmas if one or more lemmas are entered into the search bar. You can also specify the distance these words have to be from the KWIC. The “PART-OF-SPEECH CONTEXT” option returns only lines that contain or do not contain certain parts of speech given a specified distance from the KWIC.
___________________
Exercise 1: Using the Concordance advanced search in the BNC, search for “kick the bucket” with no additional lemmas considered, but only in Spoken transcripts from the corpus. How many results do you find for this phrase?
___________________
2.2 Wordlist
The Wordlist function allows users to view the frequency of a given language component (words, lemmas, verbs, etc.) in a given corpus. To use this function, click on the “Wordlist” button on the dashboard and the following page will appear:
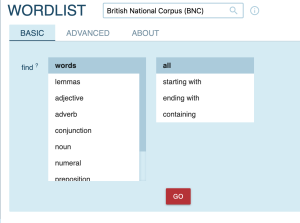
Figure 16 – Wordlist basic search starting page
2.2.1 Basic Search
To see the most frequent words in the BNC, select the “words” option in the first scroll-down menu and “all” in the second scroll-down menu. Click the “GO” button and this will bring you to the following results page:
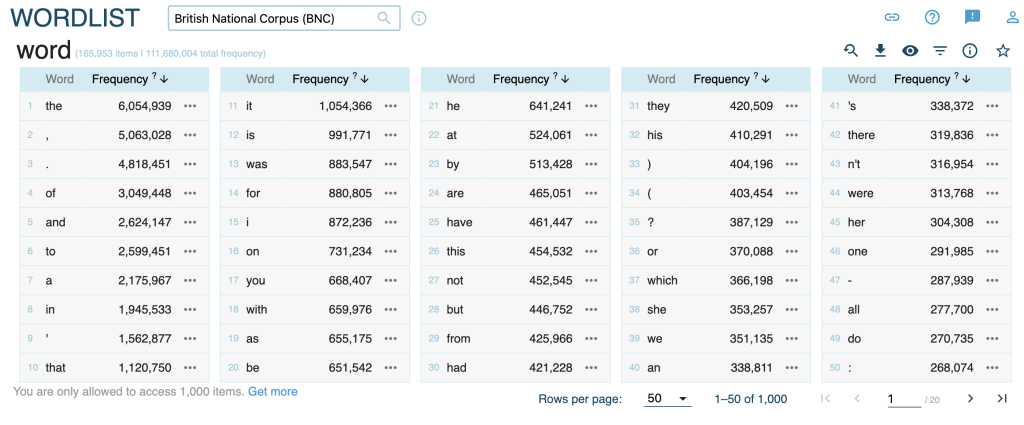
Figure 17 – Wordlist basic search default results
This page presents the most frequently used words in the corpus according to frequency. You can find the ranking as listed in the chart along with the total frequency of the word within the corpus to the right of the word. The default number of words per page is 50 rows, but this can be adjusted with the Rows per page option near the bottom right corner of the page.
This feature also allows us to narrow our search even further with the “starting with,” “ending with,” and “containing” options in the second scroll-down menu in the main search page. When we click one of these options, an additional search bar will appear that will allow us to input the desired component we want to be a part of our search.
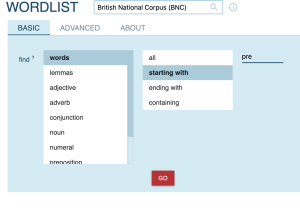
Figure 18 – Wordlist “starting with” option example
The results for a word starting with “pre” are given below as an example.
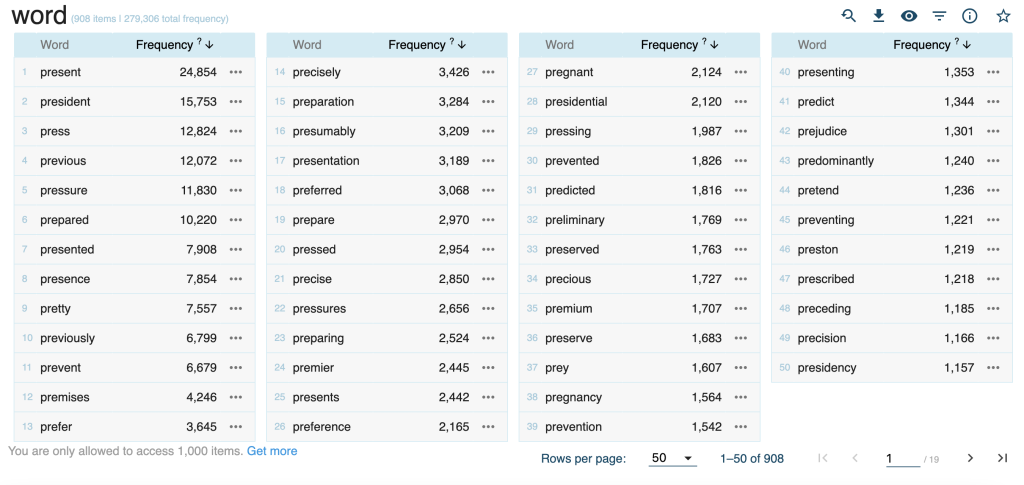
Figure 19 – Wordlist results for “starting with ‘pre’” example
2.2.2 Advanced Search
To narrow our search, we can also use additional functions provided on the Advanced search tab. Next to the “BASIC” search tab at the top of the page, click on the “ADVANCED” tab to see other search functions and filters.
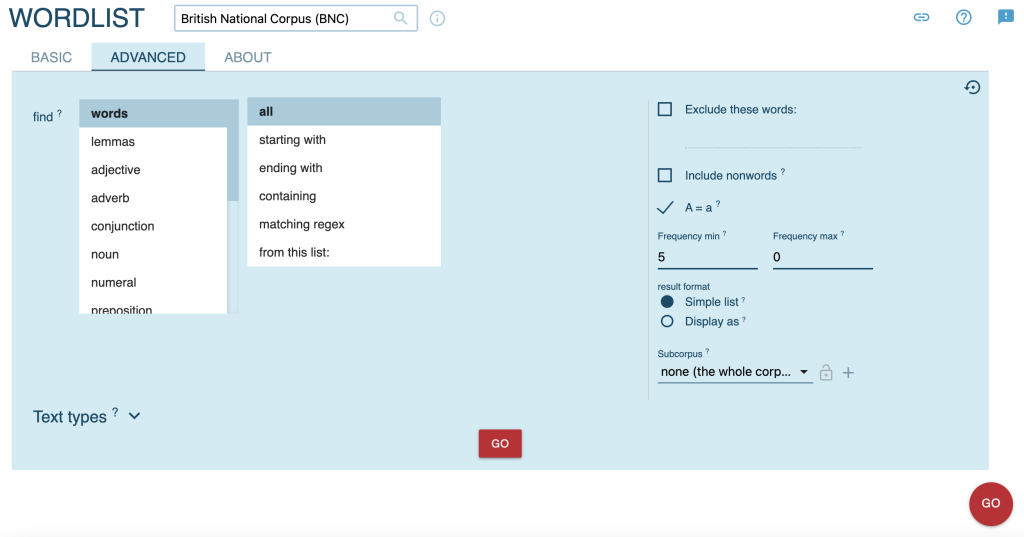
Figure 20 – Wordlist advanced search starting page
Much like the Concordance advanced search, we can use the first list of options from the left to ensure that results from our search only pertain to certain criteria (eg. only lemmas, conjunctions, nouns, etc.). You can only select one option from this list at a time. In addition to this list, the list to the right allows users to narrow their search further to more specific instances in the corpus according to a user’s input. For example, if we want to find words that start with “th” in the corpus, we would click “word” in the first list and then “starting with” in the second list. Clicking this option in the second list would open up a search bar to the right of it where you can then enter the delimiter “th.”
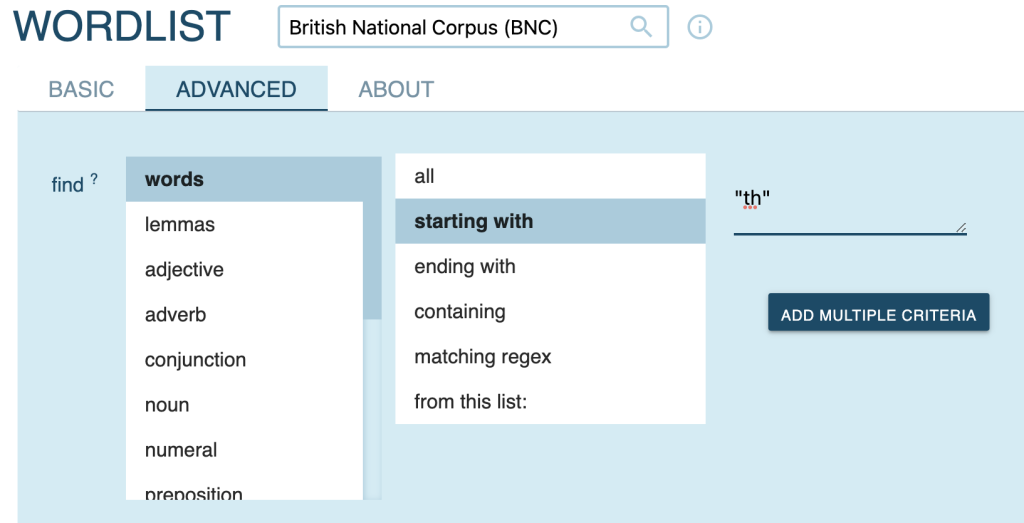
Figure 21 – Wordlist “starting with” option example for advanced search
We can also add multiple criteria using the options from the second list by clicking the “ADD MULTIPLE CRITERIA” button below the search bar. By clicking this, we are taken to a screen that shows a “+” button next to our first entered criteria. Click this plus button, and the screen will return to the original page with the first and second list options again.
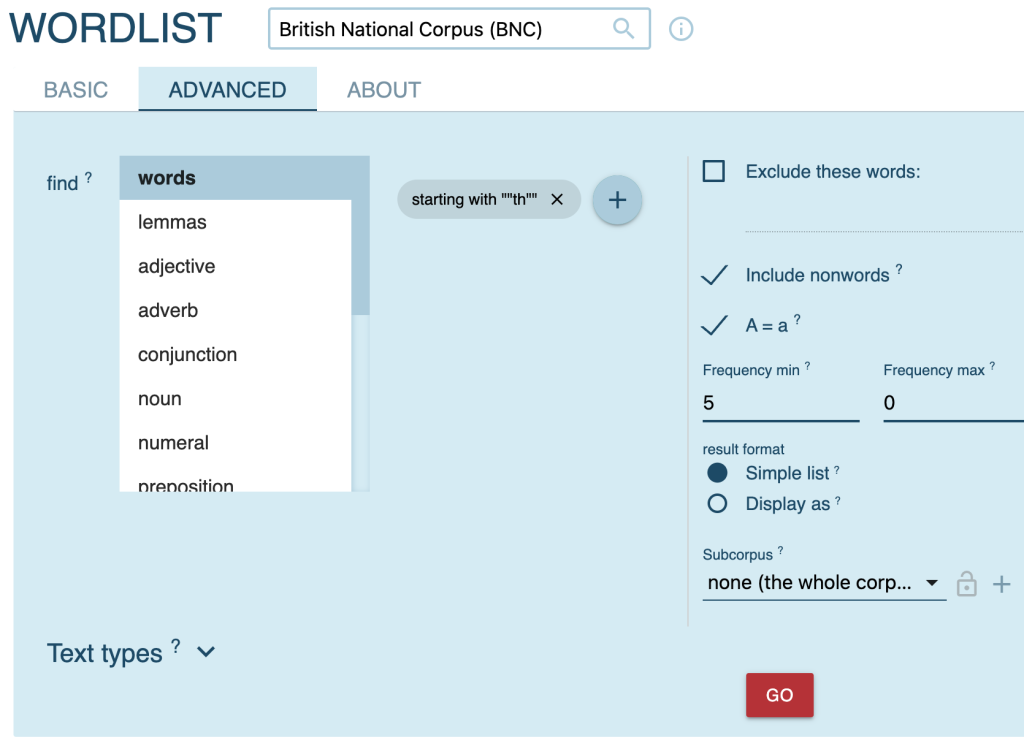
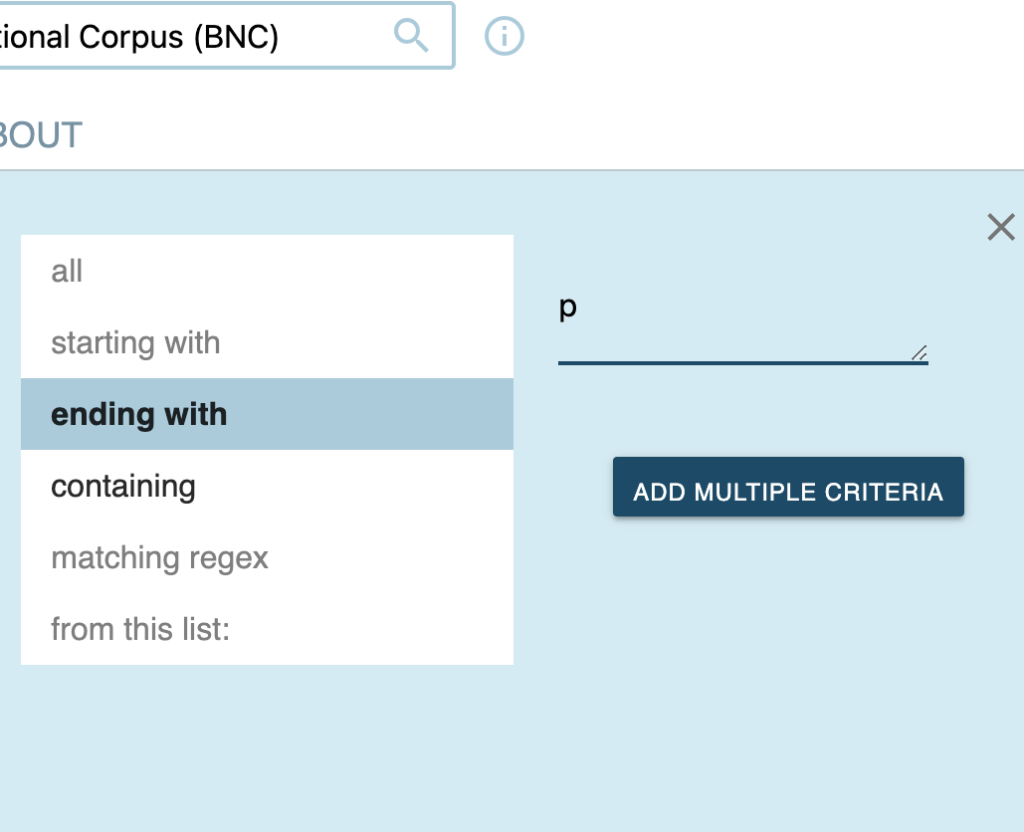
Figures 22 and 23 – Wordlist multiple criteria examples
It must be noted that using certain criteria may limit the use of other criteria as well (eg. “starting with” can only be used once and prohibits the addition of another criteria involving “all”, “matching regex”, and “from the list”). Once you are finished adding another criteria, click the “ADD MULTIPLE CRITERIA” again to return to the page that lists all of your chosen criteria.
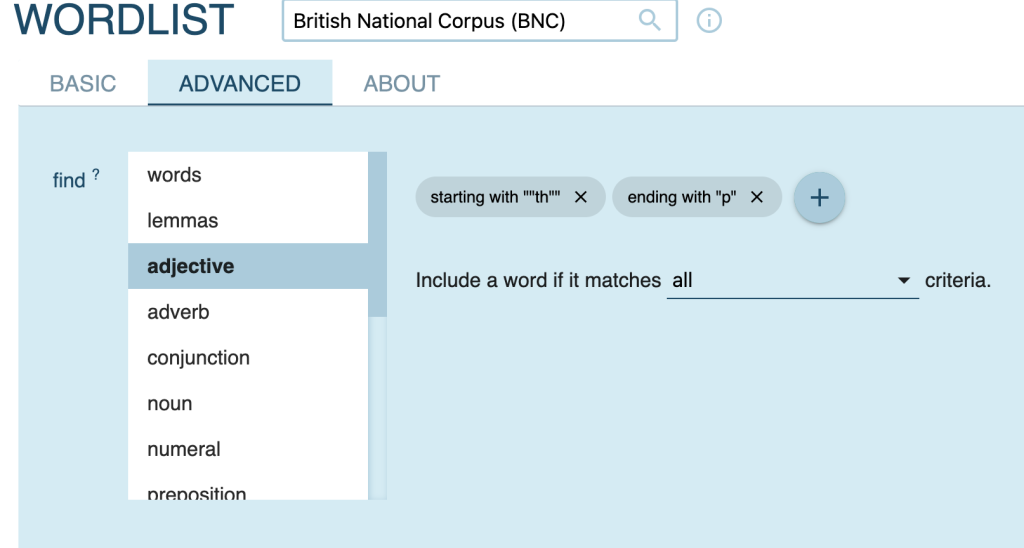
Figure 24 – Wordlist option for number of criteria that need to be met
Below your listed criteria is an option that allows you to narrow your results to corpus entries that include all criteria or just one of the criteria. The default for this option is to return entries that match all criteria. To change this to allow entries with at least one of the criteria, click the dropdown menu that says “all” and change it to the selection “any.”

Figure 25 – dropdown view of Figure 23
To the right of your criteria are additional narrowing features. The “Exclude these words:” feature allows you to list words to omit in the results of the search, which you can input into the text box below the option title. Be sure to click the checkbox to make sure your list of words to omit is applied to the search. For this list, put one word per line for the Sketch Engine to recognize each word in the list properly.
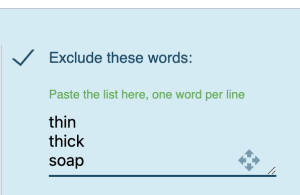
Figure 26 – Excluding words list
Underneath this option is the “Include nonwords” option, which is a checkbox that determines whether the results of your search include words that do not have a definite meaning in the dictionary. When checked, these “nonwords” are included in the search results.
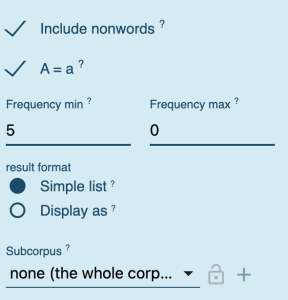
Figure 27 – Wordlist additional advanced features
Beneath the nonwords option is the “A=a” option which disregards capitalization when returning results for your search. If checked off, the results of your search will return items regardless of their capitalization patterns (eg. “Eat” and “eat” will both be returned when you search for “Eat”).
We can also adjust what words show up in our results by determining their corpus frequency minimums and maximums. Below the “A=a” option are the “Frequency min” and “Frequency max” options, where we can specify the minimum and maximum times a word can appear in the corpus to be considered a matching result for our search. The default for these options is a minimum of 5 and a maximum of 0. To adjust these, simply type the number frequency for each criteria.
The format of the results can be adjusted by the feature below called “result format.” This feature has two options. “Simple list” shows the results of your search in the frequency list default format (most frequent to least frequent). The “Display as” feature shows the results according to word type (eg word, lemma, tag, or lempos). You can choose up to three of these options in one search and check off whether you would like them to treat uppercase and lowercase characters the same.
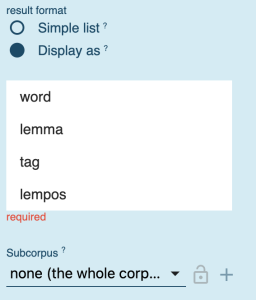
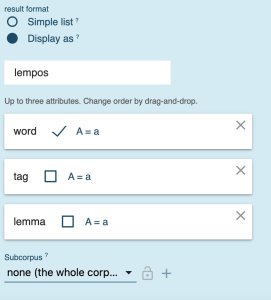
Figures 28 and 29 -Wordlist result format options
Lastly, we can also adjust the parts of the corpus we would like to search with the “Subcorpus” dropdown menu. Like the Subcorpus option in the Concordance feature, simply click the dropdown menu to choose which subcorpora you would like to consider as a part of your search.
___________________
Exercise 2: Using the Wordlist advanced search function, find the most frequent lemmas containing “in” but excluding the words “pint” and “point.” Exclude nonwords and treat uppercase and lowercase words the same. Keep all other options as default. What are the top three most frequently used words with these criteria?
___________________
2.3 Keywords
The Keywords function allows users to compare two different corpora to find unique and common traits between the two given a search.
2.3.1 Basic Search
To use this function, click on the “Keywords” button on the dashboard and you will be brought to a page that briefly explains this feature. Click on the “I KNOW WHAT I’M DOING: GO” button at the bottom of the explanation and you will be taken to the following page:
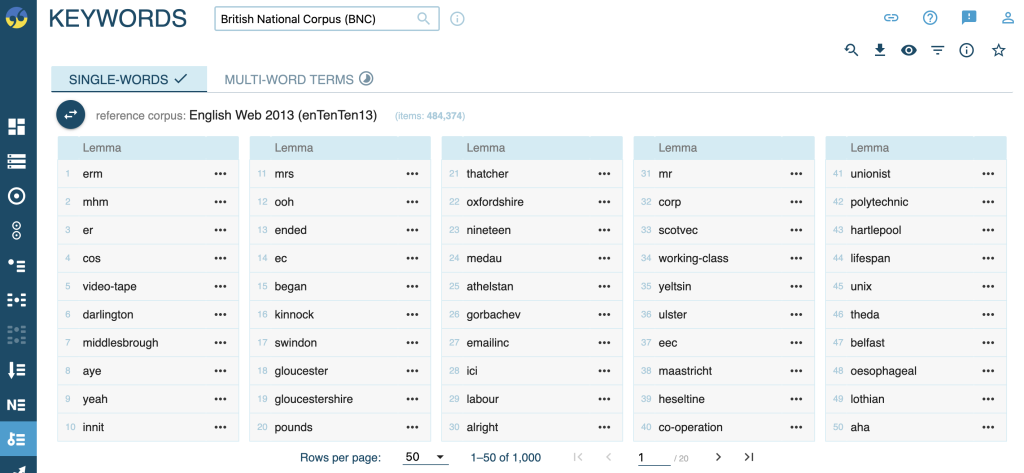
Figure 30 – Single-word results for Keyword function
The default of this function is to compare the current corpus you are using to another related corpus (typically based on language). This reference corpora will be listed next to the dark blue arrows button after “reference corpus.” The default “SINGLE-WORDS” tab shows the 50 most common words between the two corpora being compared. By clicking the other tab, “MULTI-WORD TERMS,” you can view the most common two-word clusters shared between the corpora.
The results of this search will vary depending on which corpus is designated as the reference corpora. In the above screenshot, we see that the reference corpus is the English Web 2013 (enTenTen13) corpus. Our currently loaded corpus, the BNC, is then compared against this reference corpus and the results are displayed accordingly. To switch the reference corpus to the corpus we chose (BNC), simply click the dark blue arrows button to the left of the “reference corpus:” text.
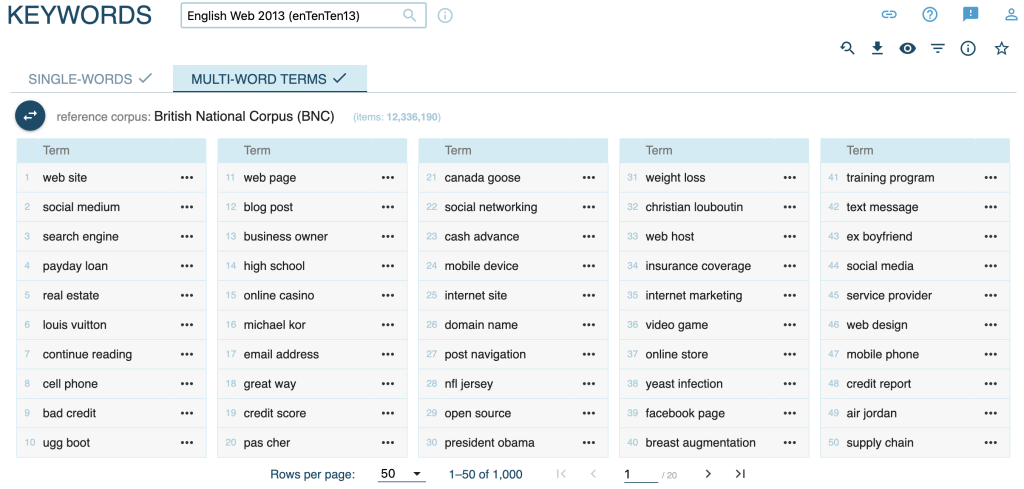
Figure 31 – Multi-word terms results for Keyword function
2.3.2 Advanced Search
The advanced search tab for Keywords allows us to adjust a few more things for our search. On the starting page of Keywords, click on the “ADVANCED” search tab next to the “BASIC” search tab.
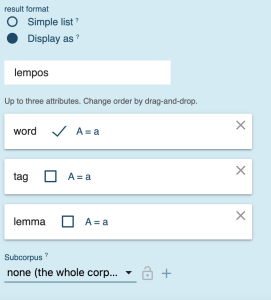
Figure 32 – Keywords Advanced search page
At the top left of the advanced search page are the corpus options. With the “Focus subcorpus” option, we can select which parts of our main corpus (the corpus selected and displayed in the search bar at the top of the screen) we would like to compare to the reference corpus. The “Reference corpus” option allow us to search and select from Sketch Engine’s database of corpora, a comparison corpus. The “Reference subcorpus” allows us to select which parts of the reference corpus we would like to compare to the main corpus.
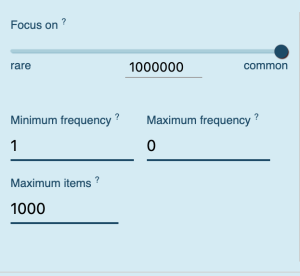
Figure 33 – Keywords Advanced search frequency options
To the right of the corpus options are the frequency options. The “Focus on” option is a sliding bar between “rare” and “common,” meaning that if we slide the bar closer to one side over the other, we will receive more results that are more frequent (common) or less frequent (rare) if the bar is closer to one option over the other. The common-ness or rare-ness is also visualized numerically below the sliding bar. When you adjust the sliding bar, the frequency is also shown numerically, with the most rare having a frequency of 0.001 and the most common having a frequency of 1 million. This tool simply changes which words will be focused on in the results based on the main corpus frequency when compared to the reference corpus.
We can also adjust the minimum and maximum frequency a word must have to be considered on the list with the “Minimum frequency” and “Maximum frequency” options below the “Focus on” bar. This item would be adjusted the same way as described in section 2.2.2.
The “Maximum items” option beneath these minimums and maximums also allows us to adjust how many keywords can be extracted for our results. The default for this option is 1000 words.
To the right of the “Focus on” options are general options we saw in the Advanced search of the Wordlist feature as well. Through these options we can check off whether we want to: 1) treat uppercase and lowercase words the same (“A=a”), 2) include results with one or more alphanumeric characters (“At least one alphanumeric”), 3) include only alphanumeric results (“Only alphanumeric results”), 4) “Include nonwords” (see section 2.2.2), 5) Exclude a list of words (see section 2.2.2), and 6) include certain words we want to show up on the list if they exist in the main corpus (“From list”). When checking off the “From list” option, we are given a text box to list our list of words, much like that of the excluded words list.
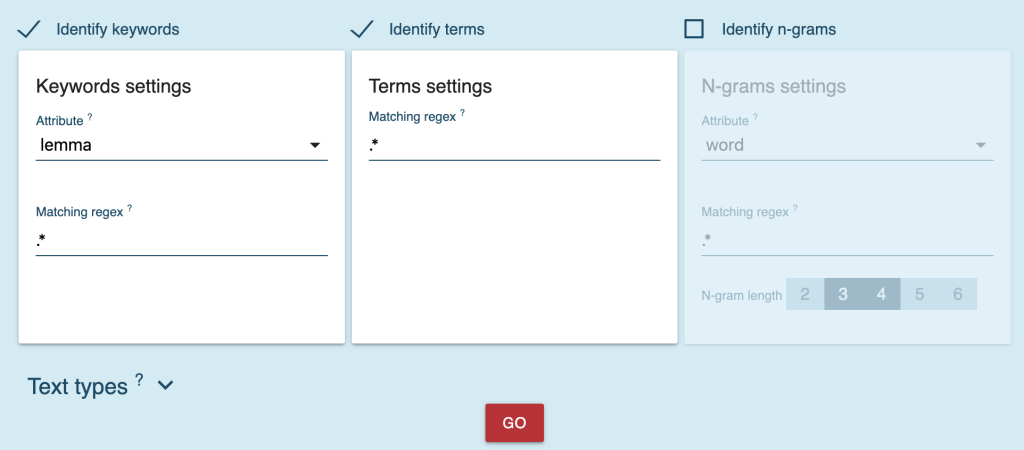
Figure 35 – Keyword Advanced search options: Identify keywords, terms, and n-grams and Text types
Towards the bottom of the Advanced Keyword search page are four more options. The “Identify keywords” option allows us to change the type of words we receive as results (eg. lemmas, tags, words, etc.). To use this, under the “Keyword settings” section, click the Attribute dropdown menu to view all word types and click the one you want to see in your results. Below this is the “Matching regex” text bar, which allows users to retrieve results that match a user’s typed regex. Resources on how to use regex for Sketch Engine can be found at the end of the tutorial. To the right, the “Identify terms” option gives user the ability to use regex to return results according to the regex limits the user types into the text bar beneath the “Terms settings” section.
To the far right of this row is the “Identify n-grams” section, which enables users to retrieve n-grams or common clusters of words given our criteria. We can adjust the type of word using the Attribute dropdown menu, as well as choose the n-gram length with the number bar next to “N-gram length” at the bottom of this section. We can also use regex in this section to narrow down the search even further.
Lastly, the “Text types” section operates the same way as the Concordance search page in section 2.1. Simply click the caret next to “Text types” to access these options and adjust accordingly.
___________________
Exercise 3: Using the Keywords Advanced search tab, find the keywords with reference to the English Web 2013 corpus (enTenTen13). Include nonwords, adjust the “Focus on” frequency to 1000, and keep all other items as default. Uncheck the “Identify keywords” and “Identify terms” functions. Adjust the search to include word bi-grams and trigrams. What are the top three results for this search?
___________________
2.4 Word Sketch
The Word Sketch function allows users to search for collocations and various word combinations for a given lemma. It serves as a handy tool when observing the usage of a word that can take on various forms and parts of speech depending on the context and grammatical requirements.
2.4.1 Basic Search
To make a search using this feature, click on the “Word Sketch” button on the dashboard and the following page will appear:
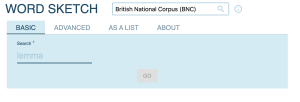
Figure 36 – Word Sketch basic search starting page
Type any lemma into the search bar and click the “GO” button at the bottom right. This will bring you to a page where you can view the different lemmas of the word according to different grammatical functions in the chosen corpus. The search results for the lemma “eat” as a verb are shown below:
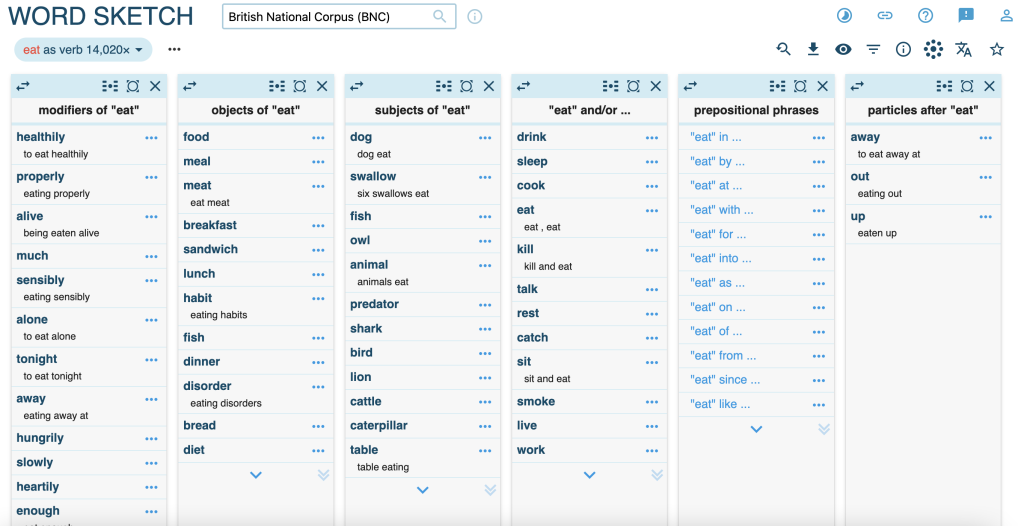
Figure 37 – Word Sketch basic search results page
In the image above, we are given collocations of the verb eat in various contexts, including its common modifiers, objects, phrases, particles, and more. To see more common results under a given category (eg. “modifiers of ‘eat’”), we can click the carat button at the bottom of the given list to reveal these additional results.
Sometimes our chosen lemma may take the form of different parts of speech. For example, the lemma “play” can be used as a verb and a noun. For this word, Work Sketch will automatically default to the word’s usage as a verb, but to view the results for “play” as a noun, simply click the blue bubble at the top left of the lists that says “word as verb [number of times this form occurs in the corpus].” Then, click on the part of speech form you want to view:
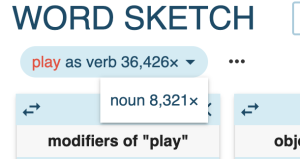 Figure 38 – Word Sketch part-of-speech dropdown options in results page
2.4.2 Advanced Search
Word Sketch also has an advanced search option, which can be accessed from the starting page of Word Sketch. Next to the “BASIC” search tab, click the “ADVANCED” search tab to view its functions.
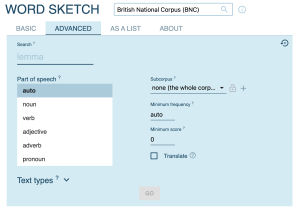
Figure 39 – Word Sketch Advanced search tab starting page
Below our Search entry text box, we can choose which part of speech we would like our typed lemma to be considered as. It must be noted that only one part of speech can be chosen from the list provided. Under the “Part of speech” section, simply click on the part of speech you want your text to be searched as through the corpus.
Next to the Part of speech option is the Subcorpus option, which allows us to select which part of our selected corpus we would like to consider for the search. Click the dropdown menu of this option to pick which subcorpus you want to include. The “Minimum frequency” option below allows users to specify the minimum number of times a lemma must appear in the corpus to be considered a result. The default for this option is “auto”, but this can be replaced with a number.
The “Minimum score” option beneath “Minimum frequency” allows users to choose whether or not they want collocates with a typicality score below the specified limit to be displayed. This number can be adjusted with the text bar below this option’s title.
Lastly, the advanced search also allows for a lemma to be translated into a different language based on another corpus of a different language. To use this, check off the box next to “Translate”, found below the “Minimum score” option, and select the corpus you want to retrieve this translation from.
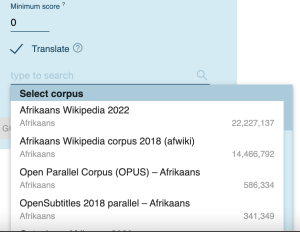
Figure 40 – Word Sketch Translation feature
The advanced search also includes the “Text types” options as seen in previous sections. They can be found at the bottom of the page towards the “GO” button. Adjust the settings in this category by clicking the caret next to the title just as you would in other features.
___________________
Exercise 4: Using the Word Sketch Advanced search, search for the lemma “walk” as a verb. What are the three most common subjects of “walk” according to the results?
___________________
2.5 Word Sketch Difference
Much like the Word Sketch feature described previously, the Word Sketch Difference offers the same features but for two different lemmas of the user’s choice. This allows us to easily view the collocations and word combinations of each lemma side-by-side.
2.5.1 Basic Search
By clicking on the “Word Sketch Difference” button on the Dashboard, we are taken to the following search page:

Figure 41 – Word Sketch Difference Basic search starting page
Under the “first lemma” tag is the search bar, where you can enter your first lemma of choice. The second lemma can be entered in the search bar underneath “second lemma.” Once both search bars are completed, click the “GO” button below them. We are presented with the following results page:
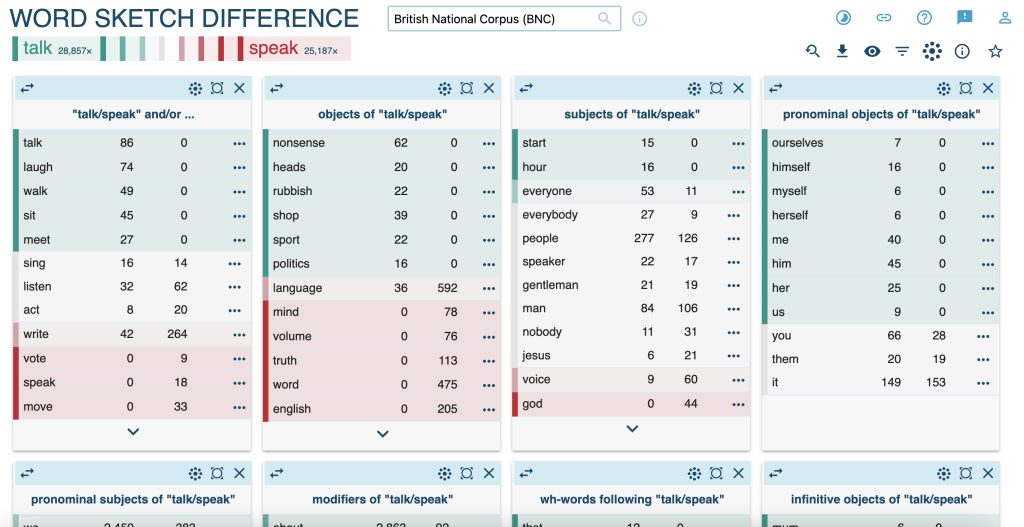
Figure 42 – Word Sketch Difference results page
Like the Word Sketch results, we are given examples of the lemmas’ contextual usage. However, in this feature, each lemma will be denoted with their own colors (see example above). The gradient bar at the top of the page denotes which color each lemma is being represented by, and their corresponding occurrences in the corpus are also displayed next to the lemma (eg. “talk” occurs 28,857 times in the corpus according to the above search result). This color coding is implemented to help us differentiate between what the most common contextual occurrences are for each lemma we gave. Darker, opaque shades of the color denote more frequently used contexts for that given lemma, and lighter shades of the color represent less frequent or slightly shared usages of the context between both lemmas.
In each contextual table, we are also given the number of occurrences each word appears in the given context. The leftmost number in a given line will represent the number of occurrences for the first lemma, and the rightmost number represents the second lemma’s occurrences.
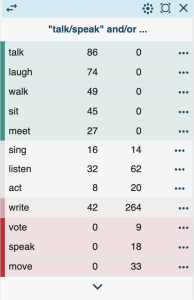
Figure 43 – “And/or” results section
In addition to the unique gradient feature of this function, Word Sketch Difference also has a visualization feature that allows us to compare the two lemmas distributions in a given context without the numbers of the tables in the initial result. To see the distribution in a given context (eg. one table in the results), click on the leftmost icon on the top right corner of the table with multiple dots. When you hover over this icon, the dots will become multicolor and a pop-up label will display “Show visualization.” Click on this icon, and you will be brought to a page with a gradient chart.
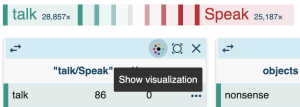
Figure 44 – “Show visualization” button
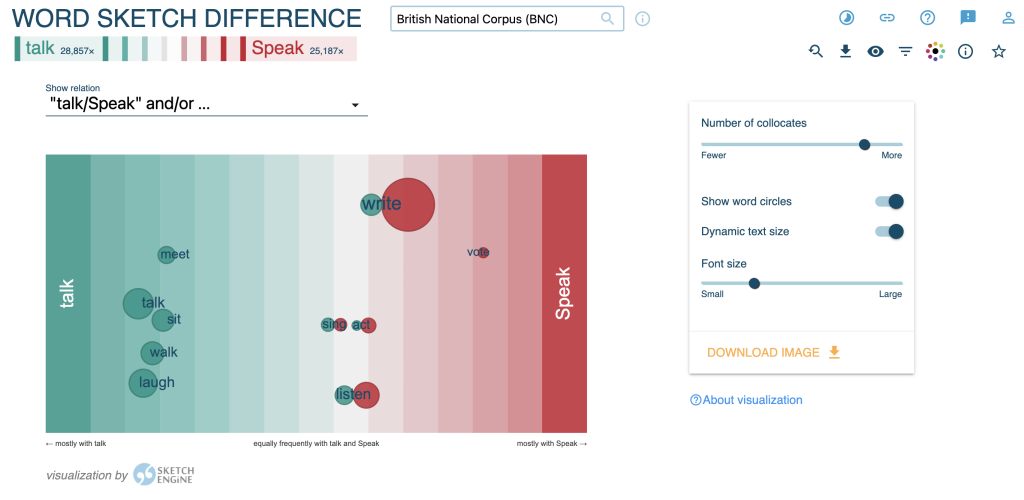
Figure 45 – Visualization chart
In this visualization, we can see which words occur most commonly with one lemma over the other by observing the words that appear closer to that lemma on the chart. Words that are used with both lemmas in more or less equal distribution will often appear towards the middle of the chart where the two lemma colors blend. Words with a large number of occurrences in the corpus will also have a larger bubble to denote this higher frequency. Lower frequency words will have bubbles that are smaller in size. For words that are in the middle of the chart, two bubbles will appear next to the words, each denoting the corresponding lemma color. The larger bubble of the two tells us that this word occurs more often with the lemma of that bubble’s color.
Lastly, this visualization chart also allows us to control the number of collocates we want to see in the chart by adjusting the “Number of collocates” slide bar on the right of the chart. Simply slide the bar left if you prefer to focus on more words that occur with the first lemma and want to get rid of more collocates between the two. Slide the bar to the right if you want to have more collocates listed on the chart for comparison. Both table and chart views in the Word Sketch Difference allow users to pick their preference for viewing these lemma comparison results, as well as give us an opportunity to visualize the data in different ways.
2.5.2 Advanced Search
With the Word Sketch Difference advanced search, we can utilize a few more options to narrow our search results further. From the starting page of Word Sketch Difference, click on the “ADVANCED” search tab to view these features.
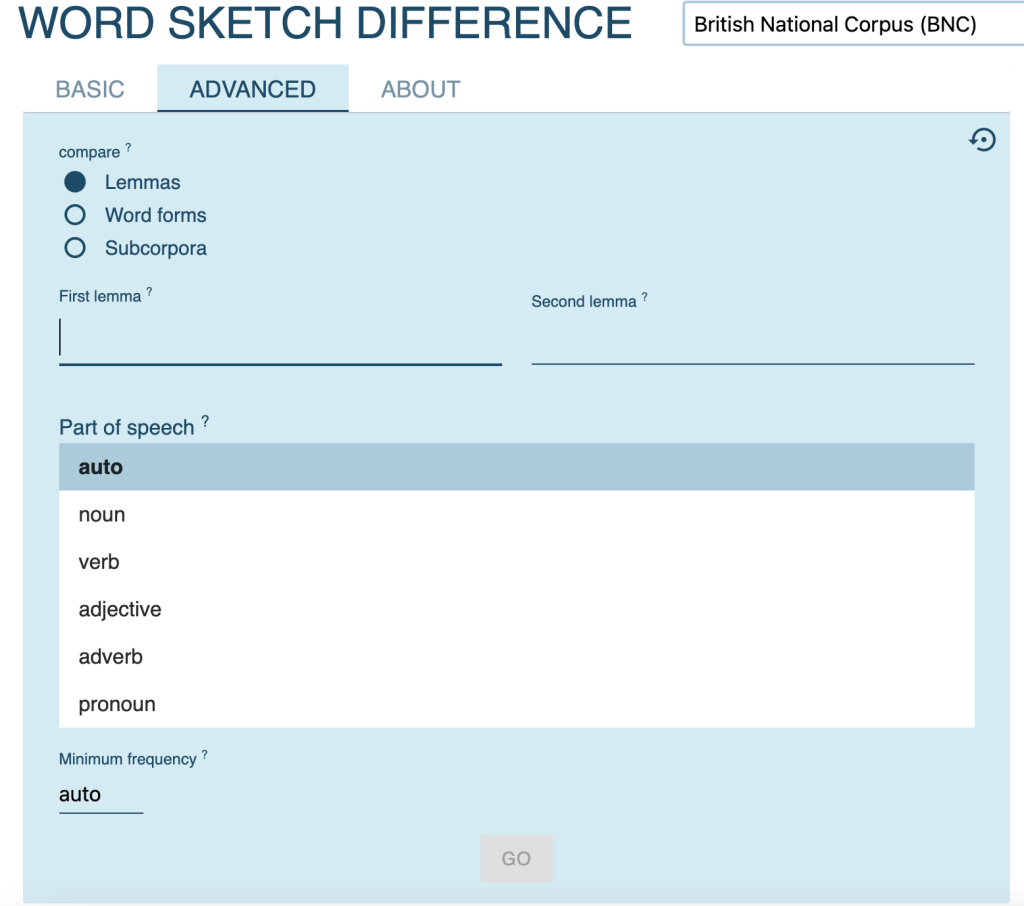
Figure 46 – Word Sketch Difference Advanced search starting page
The first feature we can adjust is the comparison type. Under the “compare” section, we are given the option to compare either “Lemmas”, “Word forms”, or “Subcorpora.” The “Lemmas” option compares the collocates of the two lemmas we give in the text boxes underneath as in the basic search.
The “Word forms” option compares the collocates of two different word forms that belong to the same lemma. When we click this option, we are given a “lemma” text bar where we enter the lemma we want to check. Beneath this, we are also prompted to give two different word forms for this lemma. For example, we can put “go” as the lemma, followed by “goes” as the first word form and “went” as the second word form.
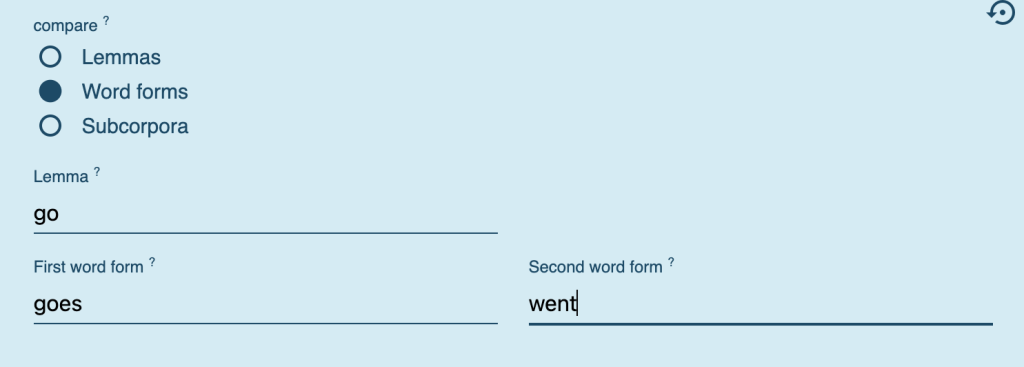
Figure 47 – Word forms example with lemma “go” and word forms “goes” and “went”
The “Subcorpora” option compares the collocates of the same lemma found in different subcorpora in our chosen corpus. This option will prompt us to enter a lemma and then select two different Subcorpora for comparison.
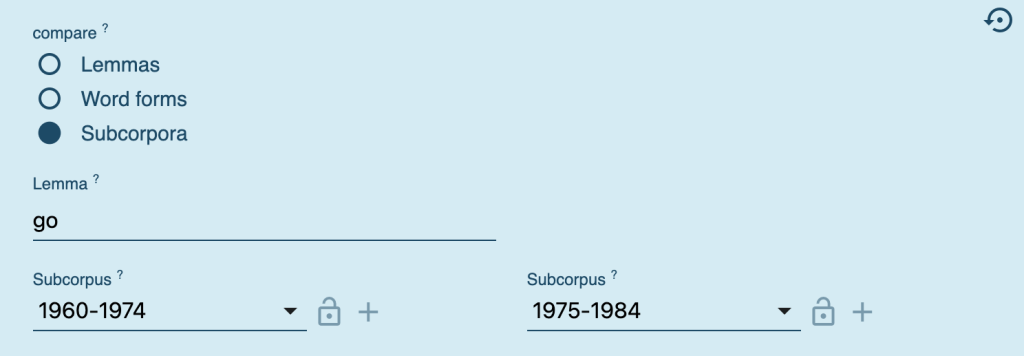
Figure 48 – Subcorpora example for the lemma “go” comparing entries from 1960-1974 (subcorpus 1) and from 1975-1984 (subcorpus 2)
Beneath these compare options is the “Part of speech” list, which allows us to specify which part of speech we want to observe the given lemma(s) as in the corpus.
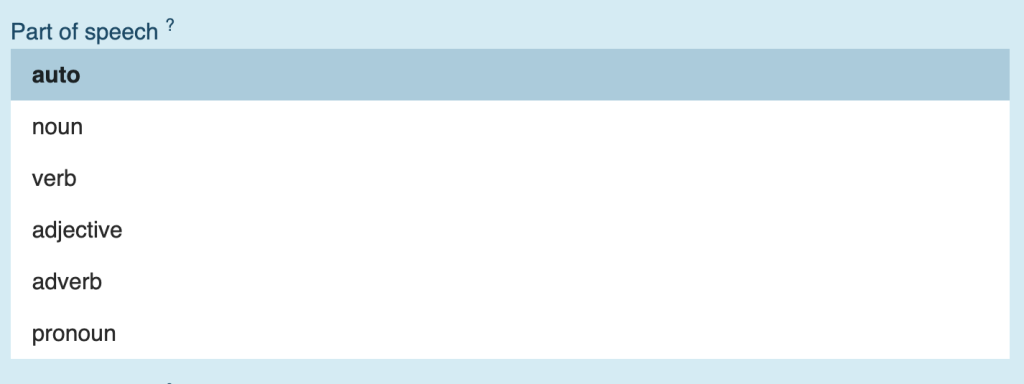
Figure 49 – Part of speech options
Lastly, the “Minimum frequency” option at the bottom of this page allows us to enter a minimum number of times a lemma can occur in the corpus to be considered a result. The default for this option is “auto”, but this can be replaced with a number minimum.

Figure 50 – Minimum frequency option
___________________
Exercise 5: Using the Word Sketch Difference Advanced search, search for the lemma “be” and find the difference between its word forms “was” and “are.” Leave all other features on their default selections. What subject is the most frequently associated with “was”? What subject is the most frequently associated with “are”?
___________________
2.6 N-grams
The last notable feature on the Sketch Engine dashboard is the N-grams feature.
N-grams are groups of words commonly found together, with “n” denoting the number of words in the sequence. For example, Bi-grams are groups of two words, tri-grams are groups of three words, and so on. This feature allows users to view the most common n-grams in the selected corpus, all of which can be controlled by the n-gram length options in the search menu.
2.6.1 Basic Search
To get to N-grams, click on the “n-grams” button on the dashboard, and you will be brought to this page:
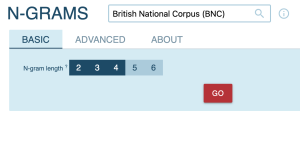
Figure 51 – N-grams Basic search starting page
This feature allows us to look at N-grams from 2 to 6, meaning a max of 6-word groups can be searched. To select the number of n-grams you want to look for, click on the corresponding number on the “n-gram length” menu twice. For example, if we want to find bi-grams, we would click on the “2” square. The results for this search are as follows:
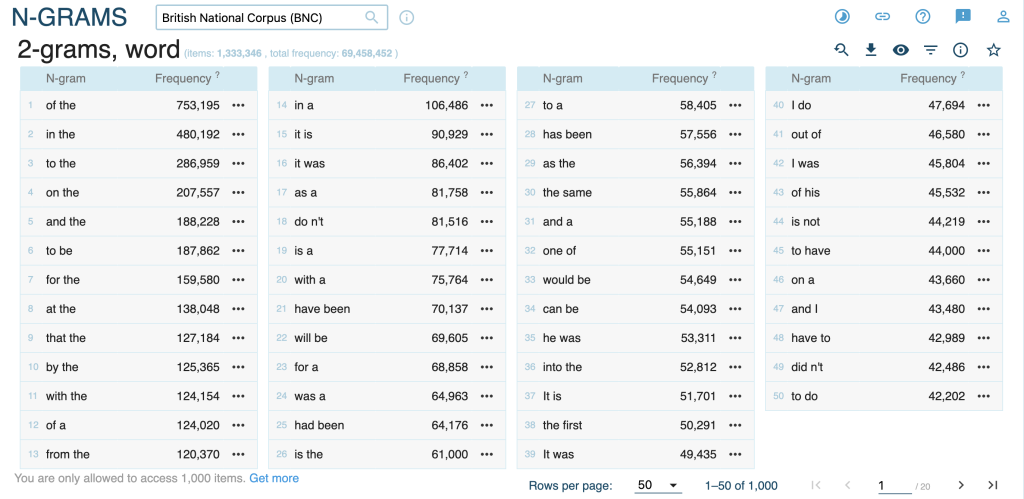
Figure 52 – N-grams results page
This page lists the n-grams from most frequent to less frequent. The frequency of each n-gram can be found to the right of the entry. You can scroll through the list using the arrows on the bottom right of the page.
The n-grams feature also allows us to search for more than one type of n-gram. If we want to search the most frequent bi-grams, tri-grams, and 4-grams, go to the initial page of this feature, click on the “2” square and then click on the “4” square. This will successfully highlight the “2,” “3,” and “4” squares dark blue to confirm your selection.
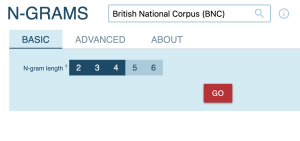
Figure 53 – N-gram length selection for bigrams, trigrams, and 4-grams
Click the “GO” button, and the following results will appear for your chosen corpus:
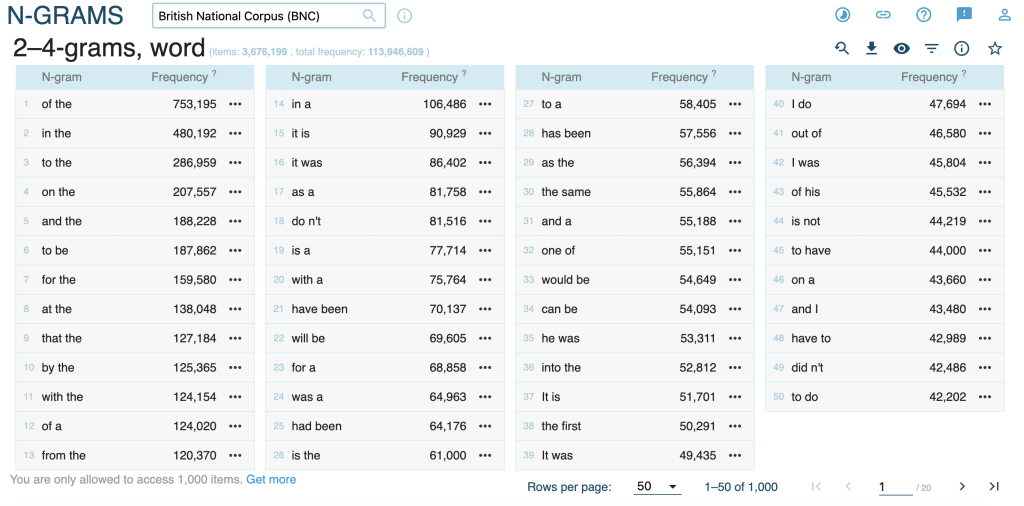
Figure 54 – 2-4-grams results
2.6.2 Advanced Search
We can narrow our search results even further with the n-grams Advanced search. From the n-grams starting page, click on the “ADVANCED” search tab to view these additional options.
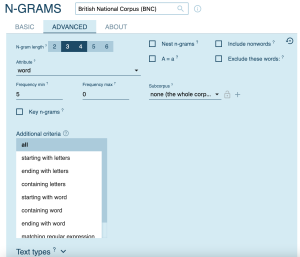
Figure 55 – n-grams Advanced search starting page
Like the basic search, we can adjust the kinds of n-grams we want to see in our results by adjusting the “n-grams length” option. Beneath this is the “Attribute” option, which allows us to select what type of words we want to see in our results. These options include “word”, “lemma”, “tag”, and “lempos.” Simply click the dropdown menu to view these options and click on the word type you want to see results for.
Next to this on the right are functions we have seen before in other advanced searches: “A=a”, “Include nonwords”, and “Exclude these words.” These three options operate the same way as explained in previous advanced search sections. However, an additional checkbox item “Nest n-grams” is also presented as an option in this section. When checked off, this option takes n-grams that are a part of a larger n-gram and groups them together with the larger n-grams. This is a great feature to check off to avoid identical n-grams that may already exist in another n-gram, especially when selecting a range of n-gram numbers.
Like other advanced search options mentioned previously, there is also a “Frequency min” and “Frequency max” option to specify the minimum and maximum frequencies a word must have to be considered a result. Next to this is the “Subcorpus” option, which also allows us to select a subcorpus in our chosen corpus that we want to retrieve our n-grams from.
Below the frequency options is the “Key n-grams” checkbox, which, when checked, identifies collocations that are typical of the focus corpus compared to the reference corpus. Using this option will prompt us to select a reference corpus and a reference subcorpus (if desired) to make these collocation comparisons. The “Focus on” function as seen in Keywords Advanced search is also present in the “Key n-grams” feature and works the same way as it does in Keywords.

Figure 56 – Key n-grams feature
Next, the “Additional criteria” found under the “Key n-grams” allows users to specify other attributes a result must have. For example, one can click on the “starts with” option in this list and will be prompted to enter what character(s) the results must start with.
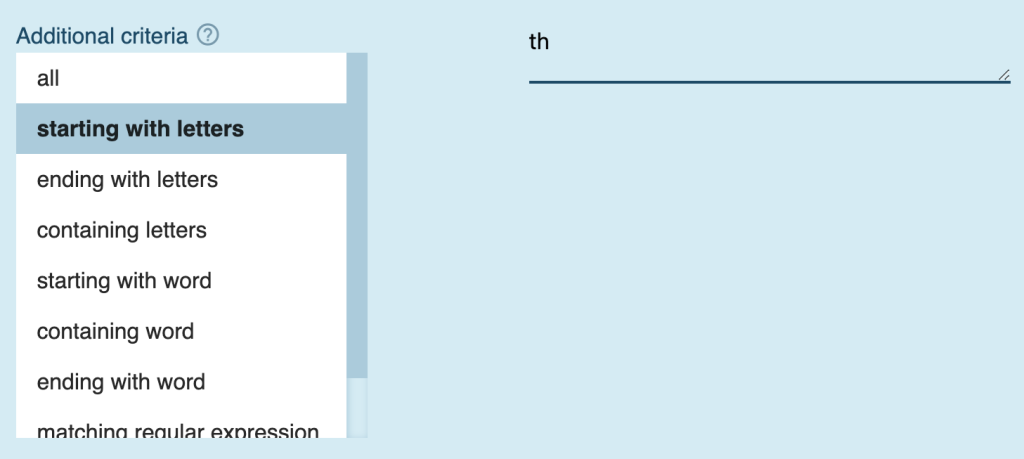
Figure 57 – Additional criteria example: “starting with letters: ‘th’”
Lastly, the “Text types” options underneath “Additional criteria” function the same way as in previously discussed advanced searches. Click the caret next to this section’s title to display these options and adjust them to your preference.
___________________
Exercise 6: Using the N-grams Advanced search, search for 3-4-grams for words. These words should contain the letters “ing.” Leave all other options as default. What is the most frequent n-gram for this search?
___________________
3. Resources for learning more functions
The following links are video suggestions for users who would like to learn more about how to use Sketch Engine in depth:
- Sketch Engine YouTube channel playlists [YouTube] (includes in-depth tutorials for Subcorpus, CQL, Corpus building, and more) https://www.youtube.com/@SketchEngine/playlists
- Short tutorials on using corpus tools for (trainee) teachers, students, linguists and anyone interested in corpus linguistics and corpus methods. – by Ellen Le Foll [YouTube, Playlist videos 5-8] https://www.youtube.com/watch?v=TMAXswf6l_Q&list=PLAq6uhS_0brxTW99jeZjxdslQ5BRy1Eb5&index=5
__________________________
Answers to Exercise Questions:
Exercise 1: 5 results
Exercise 2: “in”, “into”, and “think”
Exercise 3: “of the”, “in the”, and “to the.”
Exercise 4: “minute”, “man”, and “girl.”
Exercise 5: was: “voice”; are: “people”
Exercise 6: “going to be”
Veloso, I. (2023). Sketch Engine Tutorial (using the British National Corpus). In L. Goulart & I. Veloso (Eds). Corpora in English Language Teaching: Classroom Activities for Teachers New to Corpus Linguistics. Open Educational Resource. Montclair State University.
