Register your Pressbooks Network as an LTI Tool
In this chapter, we outline how to register your Pressbooks network as an LTI tool in each supported LMS: Canvas, Moodle, Blackboard, and D2L Brightspace.
Canvas
In Canvas
-
- Log into your Canvas account as an administrator and visit Admin > Site Admin > Developer Keys.
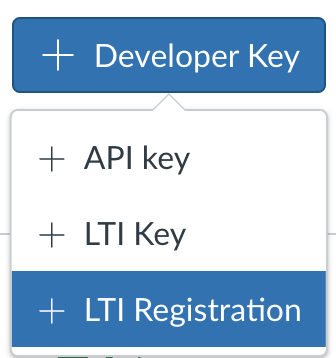
- In the top-right, click the + Developer Key button and select + LTI Registration.
- In the Dynamic Registration URL field, input the following URL:
https://[PRESSBOOKS DOMAIN]/format/lti/registration - Click Continue.
- You will see the following message:

- Click Register and you should see a success message noting that to use this tool registration, a network manager must activate the platform in Pressbooks.
- Click Close. You will be redirected to a view with settings for the App.
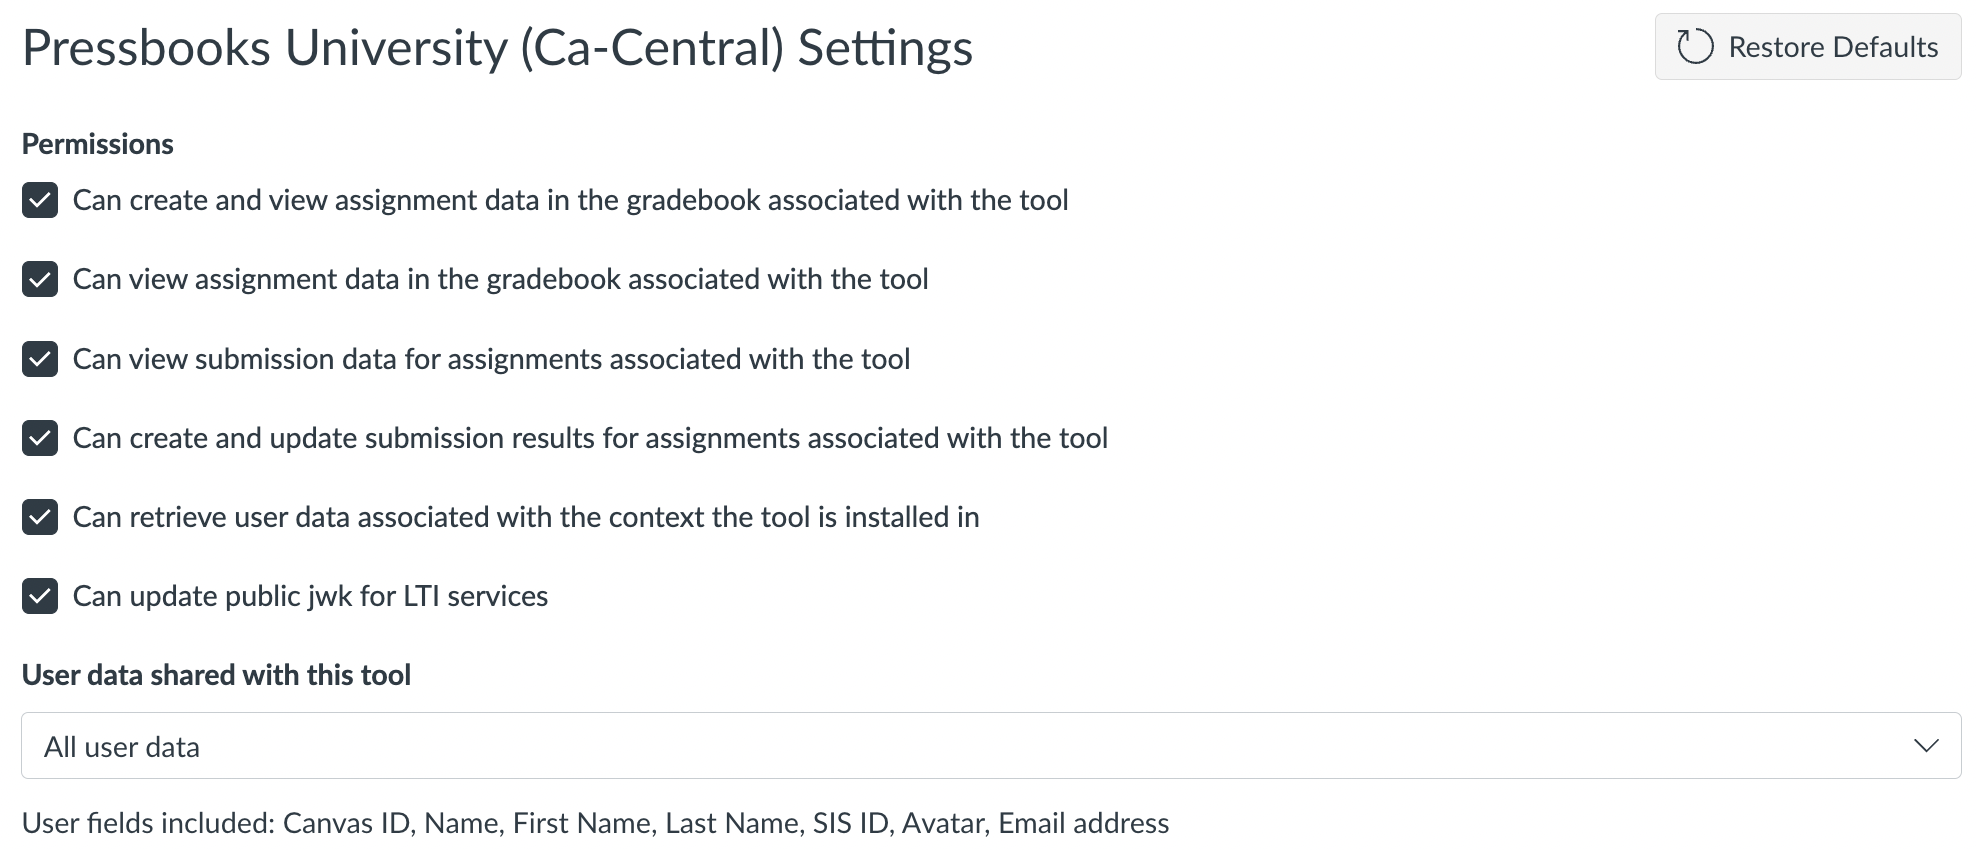
- Select your desired permissions here. Selecting all is recommended. (Our LTI tool requests and makes use of three pieces of information: Canvas ID, user role, and email address. Email address is requested and used solely to avoid creating duplicate accounts for preexisting users upon their first use of the Pressbooks LTI tool.)
- For the Link selection placement, we recommend inputting the title Pressbooks Content Selector. This will the tool name displayed when users select Pressbooks content for inclusion in their courses.

- Click Enable & Close.
- Make sure the state of the tool is set to ON. Store the client ID value visible in the Details column of your new key for the next step.
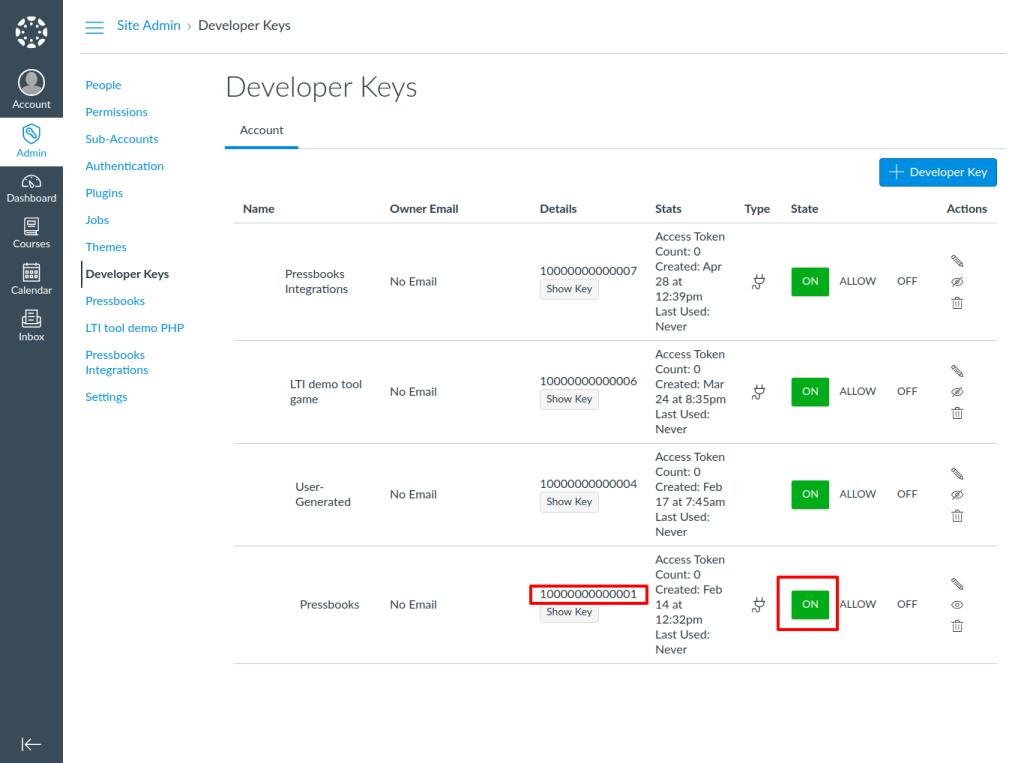
The Client ID value for an LTI 1.3 application (visible in Canvas under the ‘Details’ Column) - Navigate to Settings in the left sidebar menu.
- Click Settings > Apps > + App.
- Choose By Client ID as configuration type and enter the Client ID of the Developer Key (from the previous step). Click Submit.
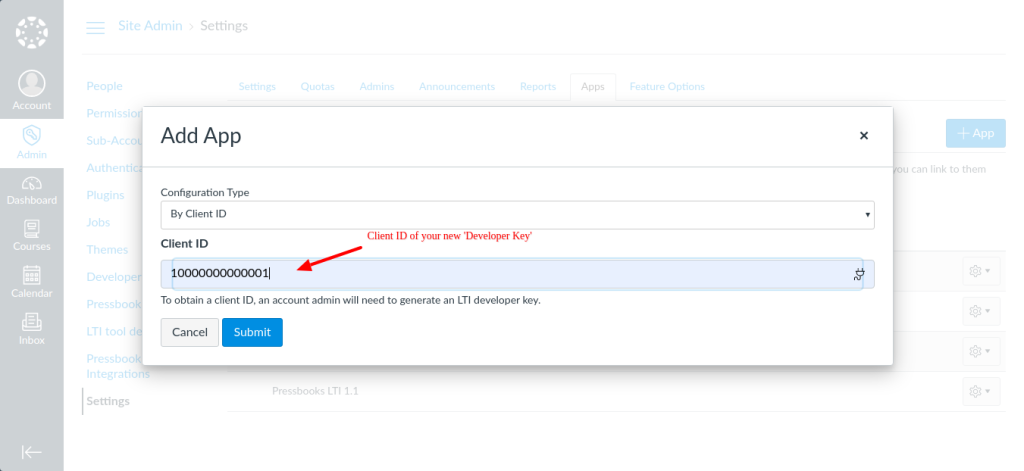
The location you should enter the Client ID of your LTI tool is shown above - Store and save your deployment ID for an upcoming step.
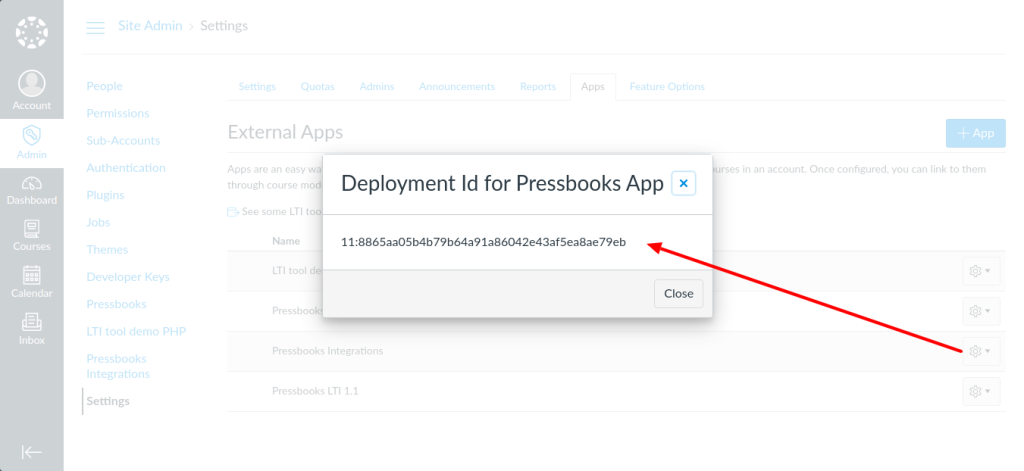
Sample Deployment ID for an LTI 1.3 app configured in Canvas
In Pressbooks
- In Pressbooks, go to Network Admin > Integrations > LTI 1.3 Platforms. Network managers can access this page directly at
https://[PRESSBOOKS DOMAIN]/wp/wp-admin/admin.php?page=pb_lti_platforms(replacing the domain with the domain of your Pressbooks network) - You will see an LTI Platform automatically added for Canvas during dynamic registration at the previous step. Click the Edit link to modify it.

- All form fields are complete except for the Deployment Id(s) field. Paste the deployment ID value that you saved here.

- Make sure to set the LTI Platform to Active.

- Click Save Changes. The connection is now configured.
Moodle
In Moodle
-
- Log as an administrator and go to: Site Administration > Plugins > Manage tools
- In the Add Tool box, input the following tool URL:
https://[PRESSBOOKS DOMAIN]/format/lti/registration - Then, press the Add LTI Advantage button.
- You will see the following message:
- Click Register and you should see a success message noting that to use this tool registration, a network manager must activate the platform in Pressbooks.
- Click Close and you will be returned to the ‘Manage Tools’ page.
- While still in Moodle, you also need to activate the newly added LTI tool. You will see the tool on the ‘Manage Tools’ page (with your Pressbooks network URL in the description):
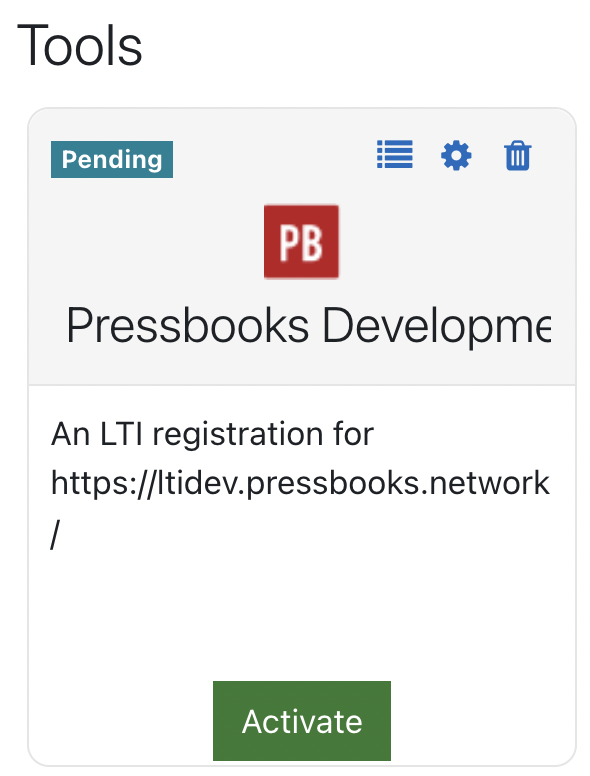
- Click the Activate button.
In Pressbooks
- In Pressbooks, go to: Administer Network > Integrations > LTI 1.3 Platforms. Alternatively, network managers can access this page directly at
https://[PRESSBOOKS DOMAIN]/wp/wp-admin/network/admin.php?page=pb_lti_platforms - You will see a new entry for your Moodle instance. Hover your cursor over it and click Edit.
- Check the Active checkbox.
- Click Save Changes. The connection is now configured.
Blackboard
Note: To configure Pressbooks as an LTI 1.3/Advantage tool with Blackboard, you will need a Client ID value, which will be provided by Pressbooks support staff. Contact premium support to receive this value if you do not already have it.In Blackboard
-
- In Blackboard, click System Admin > LTI Tool Providers > Register LTI 1.3 Tool. Enter the [Client ID] value provided by Pressbooks support staff and click ‘Submit’
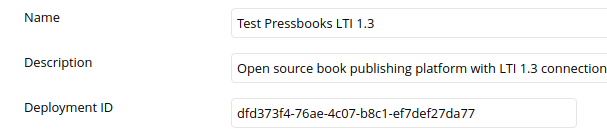
- Copy the Deployment ID value for the newly registered tool. You will need this value to complete tool registration in Pressbooks. A sample value is shown below (you should use the value created in your Blackboard instance).
- Make sure the following values are selected:
- Tool Status: Approved
- User Fields to Send: Check Role in Course, Name, Email Address.
- Allow Membership Service Access: Yes
- Click Submit
In Pressbooks
- In Pressbooks, go to: Administer Network > Integrations > LTI 1.3 Platforms. Alternatively, network managers can access this page directly at
https://[PRESSBOOKS DOMAIN]/wp/wp-admin/network/admin.php?page=pb_lti_platforms - You will see a new entry for your Blackboard instance. Hover your cursor over it and click Edit.
- Paste the Deployment ID value from the previous step in Blackboard into the Deployment Id(s) field.
- Ensure the checkbox for Active is checked.
- Click Save Changes. The connection is now configured.
D2L Brightspace
In Brightspace
-
- Navigate to the cogwheel icon in the top-right corner (‘Admin Tools’) and under ‘Organization related’ select Manage extensibility.
- Click LTI Advantage.
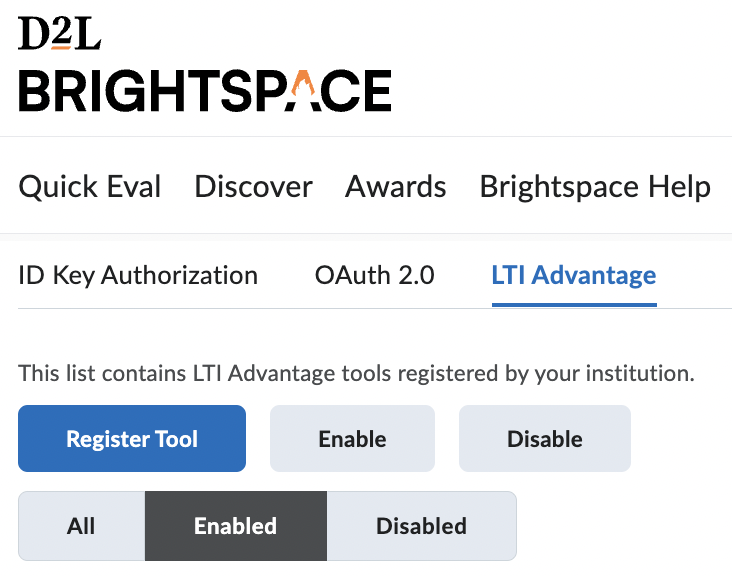
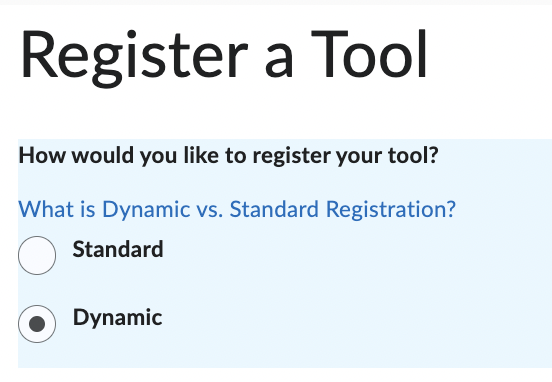
- Click the Register Tool button.
- Select the Dynamic option.
- In Tool initiation registration endpoint paste the following value:
https://[PRESSBOOKS DOMAIN]/format/lti/registration - Check the Configure Deployment box.
- Click Register.
- You will see the following message:
- Click Register and you should see a success message noting that to use this tool registration, a network manager must activate the platform in Pressbooks.
- Click Close and you will be returned to the list of LTI Advantage tools registered in Brightspace.
- Click the link to your newly added tool. Set it to Enabled and click the Save button.
- Click the View Deployments link at the bottom of the page (just above the Save button).
- Click the link to the (automatically added) deployment for your LTI tool.
- Under Security Settings, enable the following settings: Org Unit Information, User Information, Name, Email, User ID, Username, Org Defined Id, Link Information, Title, Description.

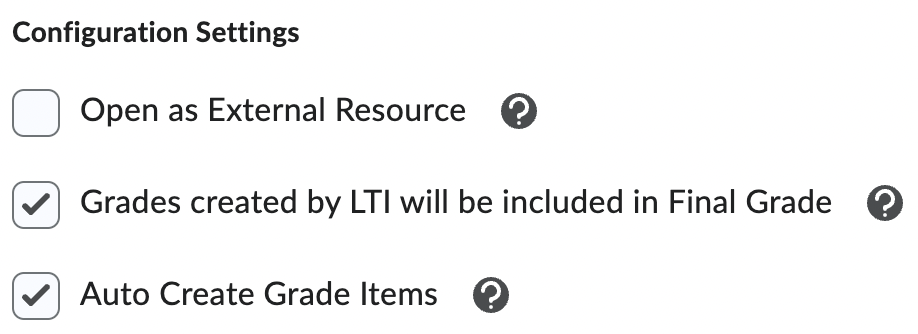
- Under Configuration Settings, enable the following settings: Grades created by LTI will be included in Final Grade, Auto Create Grade Items.
- At the bottom of the page, click Save and Close. The connection is now configured.
In Pressbooks
- In Pressbooks, go to: Administer Network > Integrations > LTI 1.3 Platforms. Alternatively, network managers can access this page directly at
https://[PRESSBOOKS DOMAIN]/wp/wp-admin/network/admin.php?page=pb_lti_platforms - You will see a new entry for your Brightspace/D2L instance. Hover your cursor over it and click Edit.
- Check the Active checkbox.
- Click Save Changes. The connection is now configured.
