Administer Users
As a network manager on a Pressbooks network, you have access to tools that allow you to add and delete users, search and filter your user list, and view detailed information about a given user on your network.
Register New Users
Network managers can select from a few different options for user registration as described in the Adjust Network Settings chapter of this guide. Depending on the settings you’ve chosen for your network, users may be added to the network via self-registration, through the use of our SSO or LTI integrations, by an existing user on the network, or by a network administrator. Here we’ll discuss how to add new users to your network as a network administrator. To add a new user:

- Login to your Pressbooks network as a network manager. Click the Add Users button in the top nav bar.
- From the ‘Bulk Add New Users’ menu, enter the email address(es) for the new user(s), then click Add users.
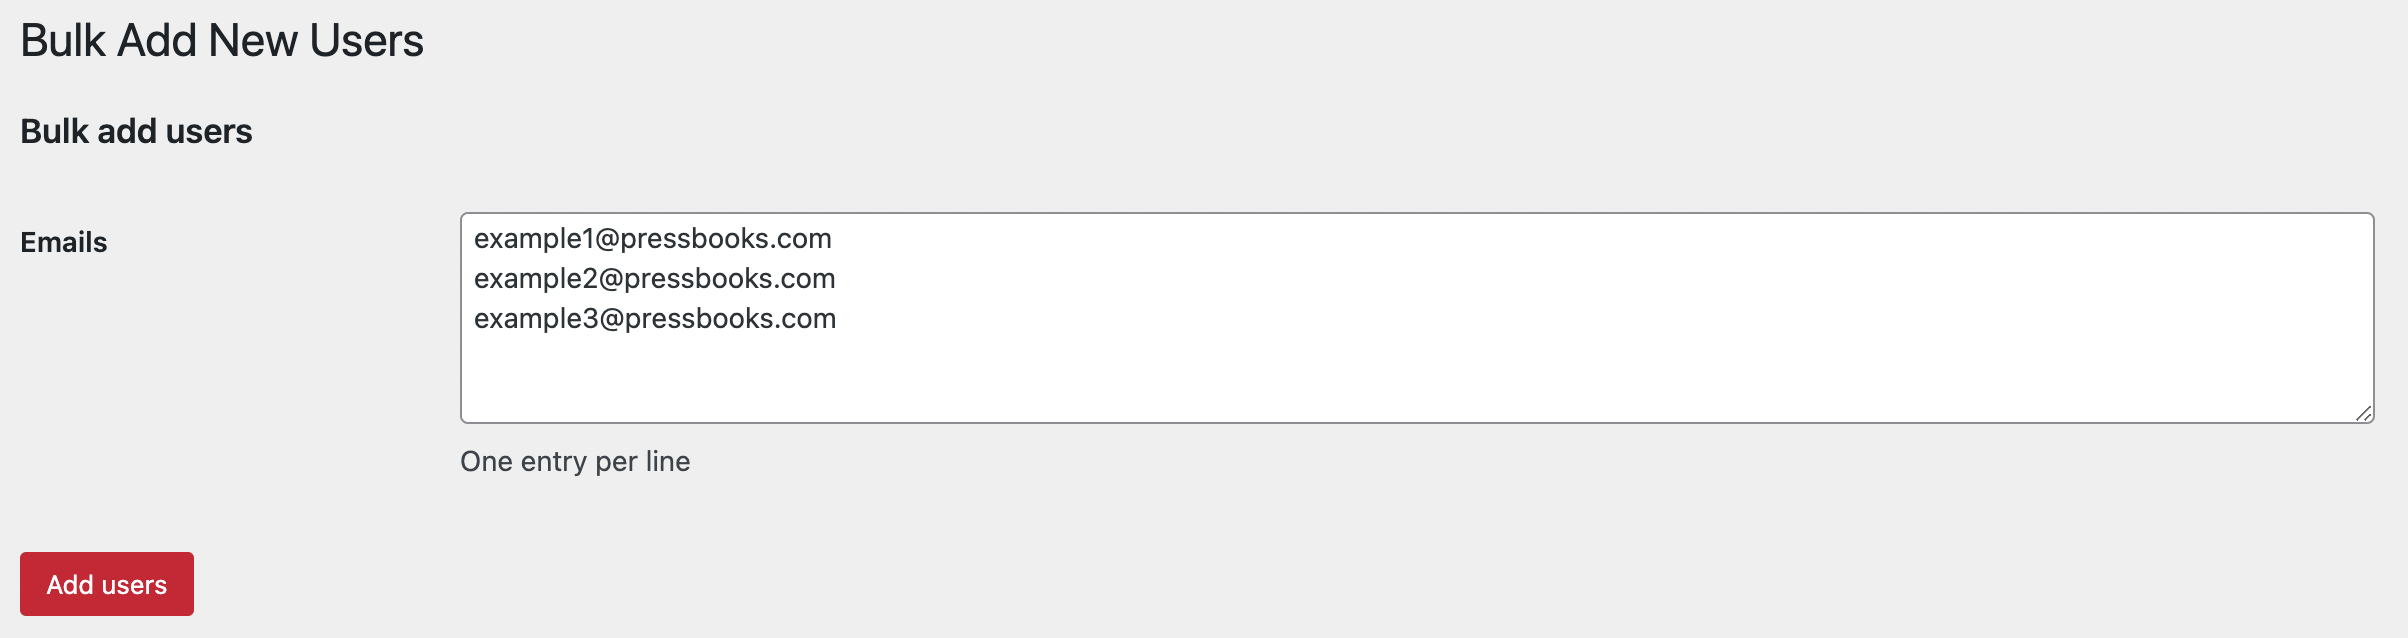
After you’ve clicked Add Users, a message will be sent to the email address(es) you entered asking the user(s) to reset their password. Any user added via this form will be asked to confirm their account to complete registration; after clicking the activation link in the confirmation email, they will appear in your network’s User List.
Use the User List
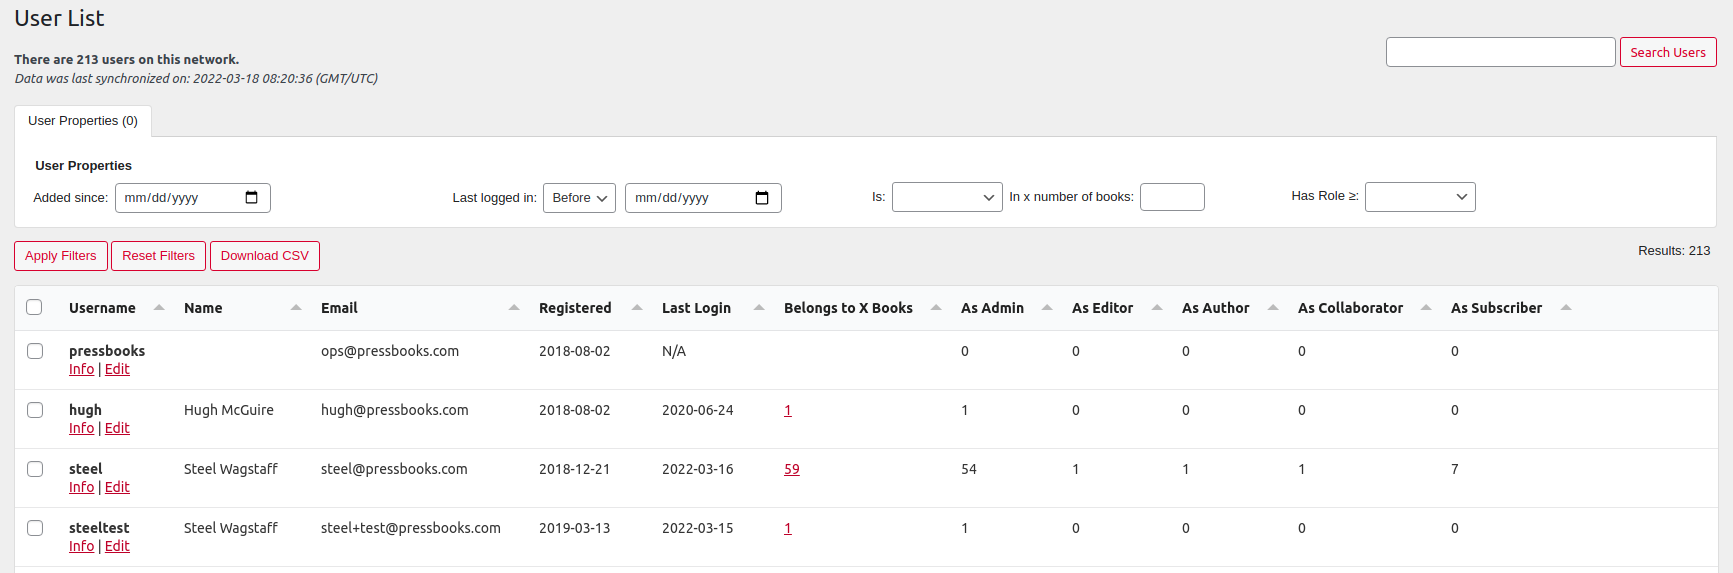
Pressbooks networks feature a User List, which provides you with a filterable, sortable list of all the users on your network. The User List provides quick insight into user identity, date of registration and last login, how many books a user belongs to, and what roles users hold in books across the network. To find the User List, access your Administer Network dashboard, then click Users in the left sidebar.
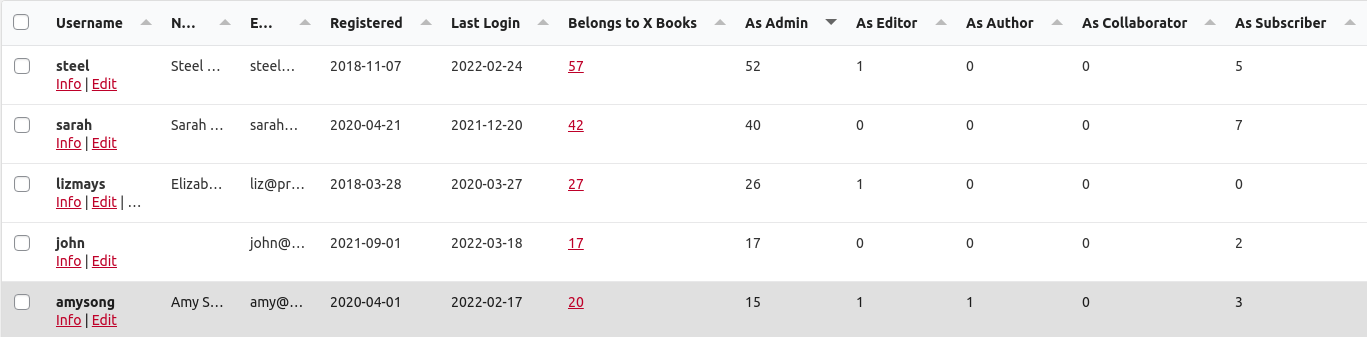
The first thing you’ll see is the exact number of users on your network and the timestamp for when the information in the table was last updated. You’ll then see a set of filters, and a dynamic table displaying all the users on your network sorted according to their registration date. For each user, you’ll see the following columns:
- Username
- Name (if available)
- Registered (date the user was registered on your network)
- Last login (date the user last logged into your network; if listed as N/A, the user has never logged in)
- Belongs to X books (# of books this user has a role in)
- As Admin (# of books this user has the administrator role in)
- As Editor (# of books this user has the editor role in)
- As Author (# of books this user has the author role in)
- As Collaborator (# of books this user has the collaborator role in)
- As Subscriber (# of books this user has the subscriber role in)
Each of the columns in the user list is sortable. To sort by a specific column, click that column’s title. The direction of the arrow next to the title shows the direction the results will be sorted. Click the column title a second time to reverse the sort order for a given column.
You can resize column width by clicking and dragging the ends of the column header. To increase or decrease the width of a column, hover your cursor between that column and the next. A left-right arrow will appear. Click and drag this arrow to resize the column as desired. You can also reorder columns by clicking and dragging their headings into a different position. Columns should be ‘sticky’ once moved. (NOTE: This behavior may be affected by your browser settings.)
Depending on column width and screen size, you may need to scroll left or right to see all the information available in the table. You can also choose to see fewer or more results by picking your page size. By default, the table will show 25 results at a time, and allow you to click through to subsequent pages of your results. However, you can also set the table to show 10, 50, or 100 results at a time using the “Page Size” drown down at the bottom of the display table.

Delete a User
Network managers on Pressbooks network can permanently delete users who no longer want or need their accounts on your network. To delete a user from your network:
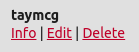
- Click the Delete link below their username on the User List.
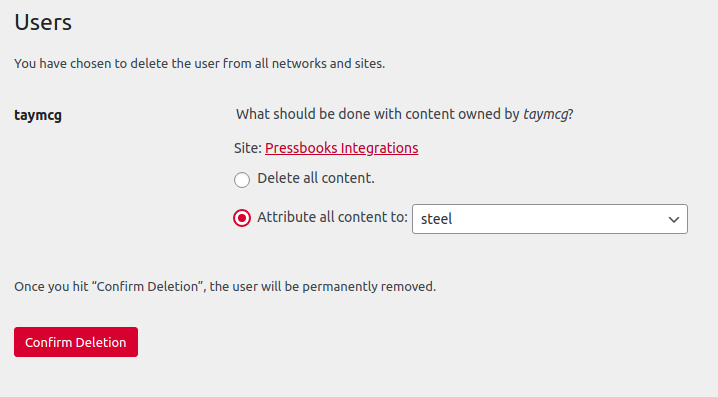
- You’ll be directed to a confirmation page. If the user had any existing projects on the network, you’ll be asked whether content they owned should be deleted or attributed to another user in that book. Please note that the “Delete all content” option has no effect: books are not deleted at the same time as a user is deleted. Books must be deleted separately (this is a known issue in the backlog to address). Make any selection here and click the Confirm Deletion button.
- The user will be permanently deleted from the network and will no longer appear in your User List.
Delete Users in Bulk
Network managers can also delete many users at once from the User List. To delete multiple users at once:
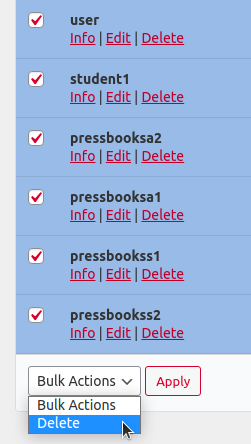
- Select the check box button next to all users you wish to delete. The rows containing these users will turn blue.
- Select ‘Delete‘ from the Bulk Actions menu at the bottom of the User List and click ‘Apply‘
- Confirm your choice on the subsequent screen
Filter the User List
You can search of filter the User List to view subsets of users on your network that satisfy desired criteria. Filters are cumulative, meaning that if you enter a date for both “Added Since” and “Last logged in” the Book List will display only those users which meet both of your specified criteria.
When you’ve selected the filters you want, click Apply Filters to display the results. To start over, select the Reset Filters button.
Added Since Filter
This filter allows you to view all users who have been registered on your network since a given date. To use this filter, enter your desired date and click Apply Filters. Click the X next to the date to reset/empty the value. Use the arrows to increase or decrease the year, month, or day. Use the triangle icon to open a calendar based date picker. The circle in between the left and right icons on the calendar will set the date to the current day.

Last Logged In Filter
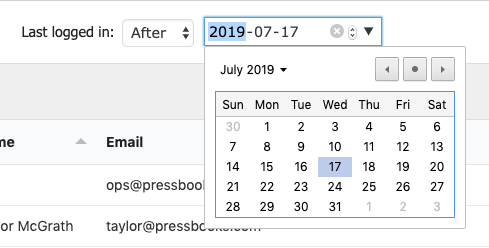
This filter allows you to view all users who have last logged in to your network before or after a given date. To use this filter, select either Before or After from the dropdown menu, enter the date you’d like to filter for, and click ‘Apply Filters‘. Click the X next to the date to reset/empty the value. Use the arrows to increase or decrease the year, month, or day. Use the triangle icon to open a calendar based date picker. The circle in between the left and right icons on the calendar will set the date to the current day.
Is [ROLE] in x number of books filter
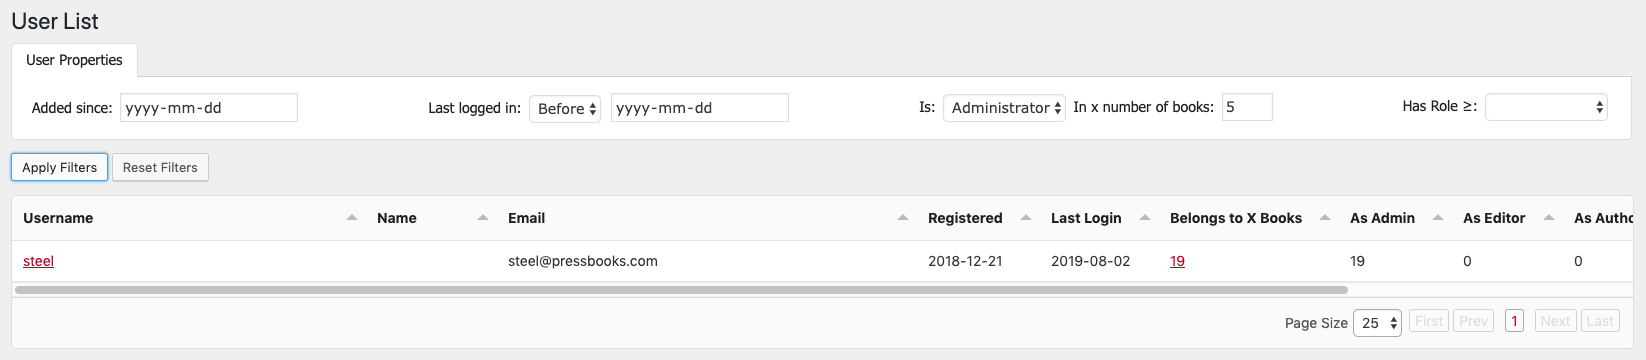
This filter allows you to view all users who have a specific role in at least a given number of books. To use this filter, select the desired role you’d like to filter for from the dropdown menu, enter a number in the empty field at the end of the prompt, and click ‘Apply Filters‘. The User List will be updated to show you all users who have the specified role in at least as many books as you have specified in the filter. For example, the screenshot below shows the User List when it is filtered to display all users who are Administrator in 5 (or more) books.
Has Role Filter
This filter allows you to view all users who have a given user role or higher in at least one book. To use this filter, enter the role you’d like to filter for which you’d like to begin excluding users, and click ‘Apply Filters‘. The user list will only display users who have this role or greater in at least one book on your network. For example, example, sorting by Editor would return all users who have the Editor or Admin role on your network and exclude any users whose highest role in any book was Author, Collaborator, or Subscriber.
Download User Lists as CSV Files
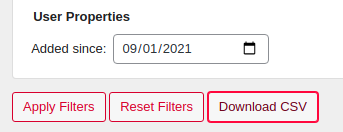 You can download a CSV file of your user list (with or without filters applied) to your computer to be viewed and sorted. To do so, apply your desired filters and click the Download CSV button.
View User Info
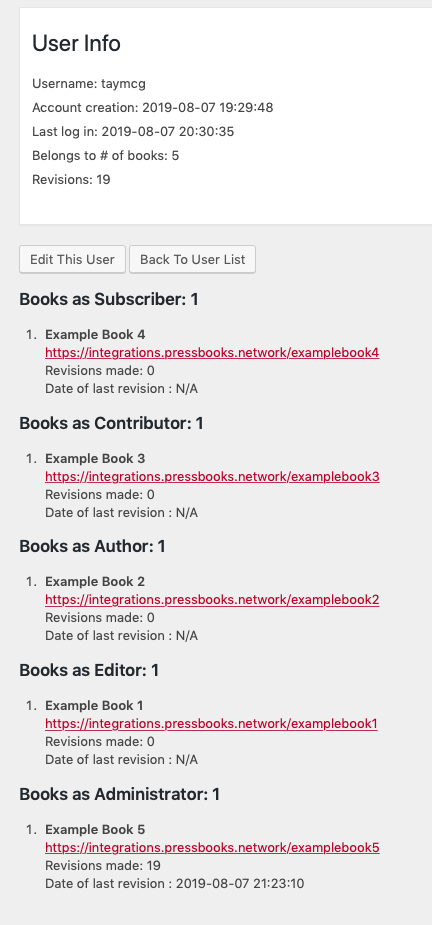
The User List also allows you to view additional information about a given user. To view user info, click the Info link below the desired user’s username in the User List.
The resulting User Info page provides you with additional details about the user, including their Account creation timestamp, the date of their Last login, the total number of books they belong to, the total number of revisions made by that user on the network.
In addition, each of the books that the user belongs to will be listed below, along with Title, URL, number of Revisions made, and Date of last revision for the given user.