Customize Your Network’s Appearance
Pressbooks networks typically use the Aldine theme as their network root theme. The Aldine theme allows network managers to customize the appearance of your network’s homepage in several ways.
To access the customization menu click Appearance from the Administer Network dashboard.
This will bring you into the customize interface with a live preview of your site. You will see a menu on the left with a variety of customizable elements.
You can click on each element to customize it. The interface displays a live preview so that you can see what your changes look like before saving. Once you’re done making your changes, click Publish to save your changes. This will make them live across your network.
Edit Site Identity
The Site Identity option allows you to edit basic site information, including the title and tagline (subtitle) for your Pressbooks network, upload your institution’s logo, and add a site icon.

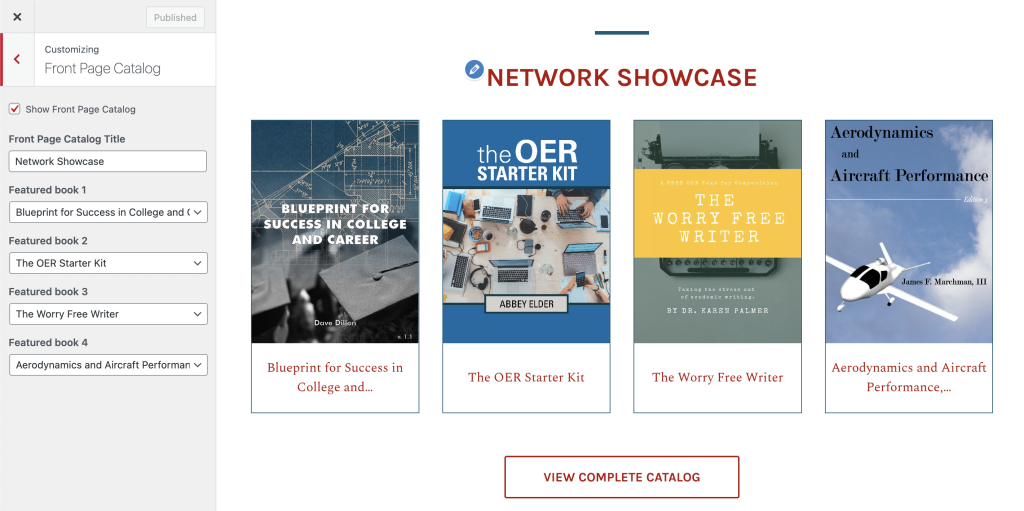
Display a Front Page Catalog
The Front Page Catalog section allows you to display a simple catalog carousel on the network’s landing page and customize its display title.
To show a catalog on the landing page of your network, click the Show Front Page Catalog checkbox. To change the display title for this catalog, enter the desired text in the ‘Front Page Catalog Title‘ field.
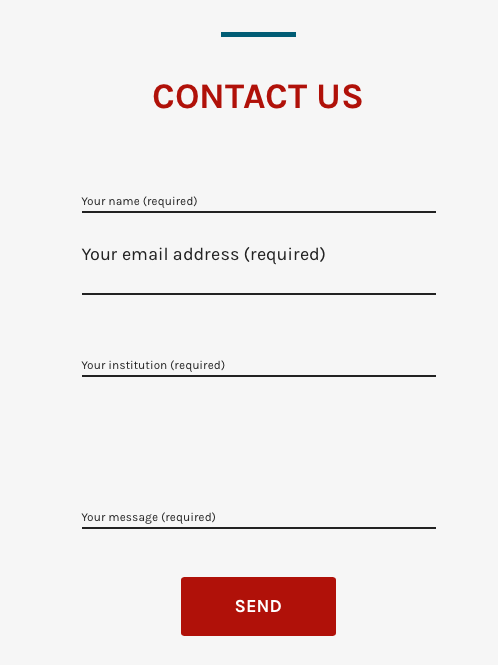
Display a Contact Form
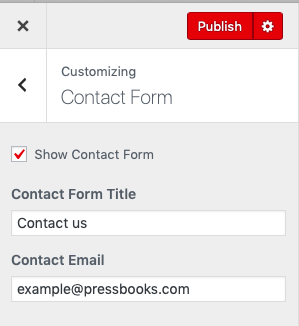 To enable a contact form on your network’s home page, follow these steps:
- Navigate to Appearance > Customize from the left sidebar menu of your rootsite dashboard
- Select Contact Form from the customization panel
- Select the checkbox next to Show Contact Form
- Enter your Contact Form Title and the email address you would like all messages to be directed to. This email address can be the email of a individual person (usually a network manager) or a service account/email list shared by many users.
- Click Publish to save
Once you’ve published your changes, a contact form will appear at the bottom of your Pressbooks network homepage.
Customize the Contact Link
Your network will always have a contact link in the footer. It will follow one of these three paths, depending on what changes you’ve made to your network website’s settings:
- You’ve set up a contact form for your network. The contact link points to the contact form.
- You have not set up a contact form for your network and have not entered a contact URL. The contact link points to the Pressbooks Contact page.
- You have not set up a contact form for your network and have entered a contact URL. The contact link directs point to the contact URL you’ve entered.
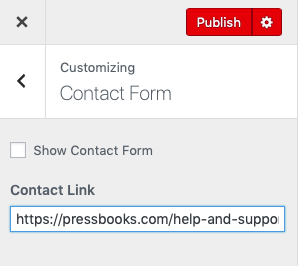 To enter a custom URL for the contact link, follow these steps:
- Navigate to Appearance > Customize from the left sidebar menu of your rootsite dashboard
- Select Contact Form from the customization panel
- Make sure Show Contact Form is unselected
- Enter the URL into the Contact Link textbox
- Click Publish to save
Display Social Media Links
You can display links to your university or publishing program’s Twitter and Facebook accounts, if relevant. To display links, enter the relevant URLs in the ‘Facebook‘ and ‘Twitter‘ fields. Please note that you must enter the URL in order for it to link correctly, not just the @handle (Example: https://twitter.com/pressbooks)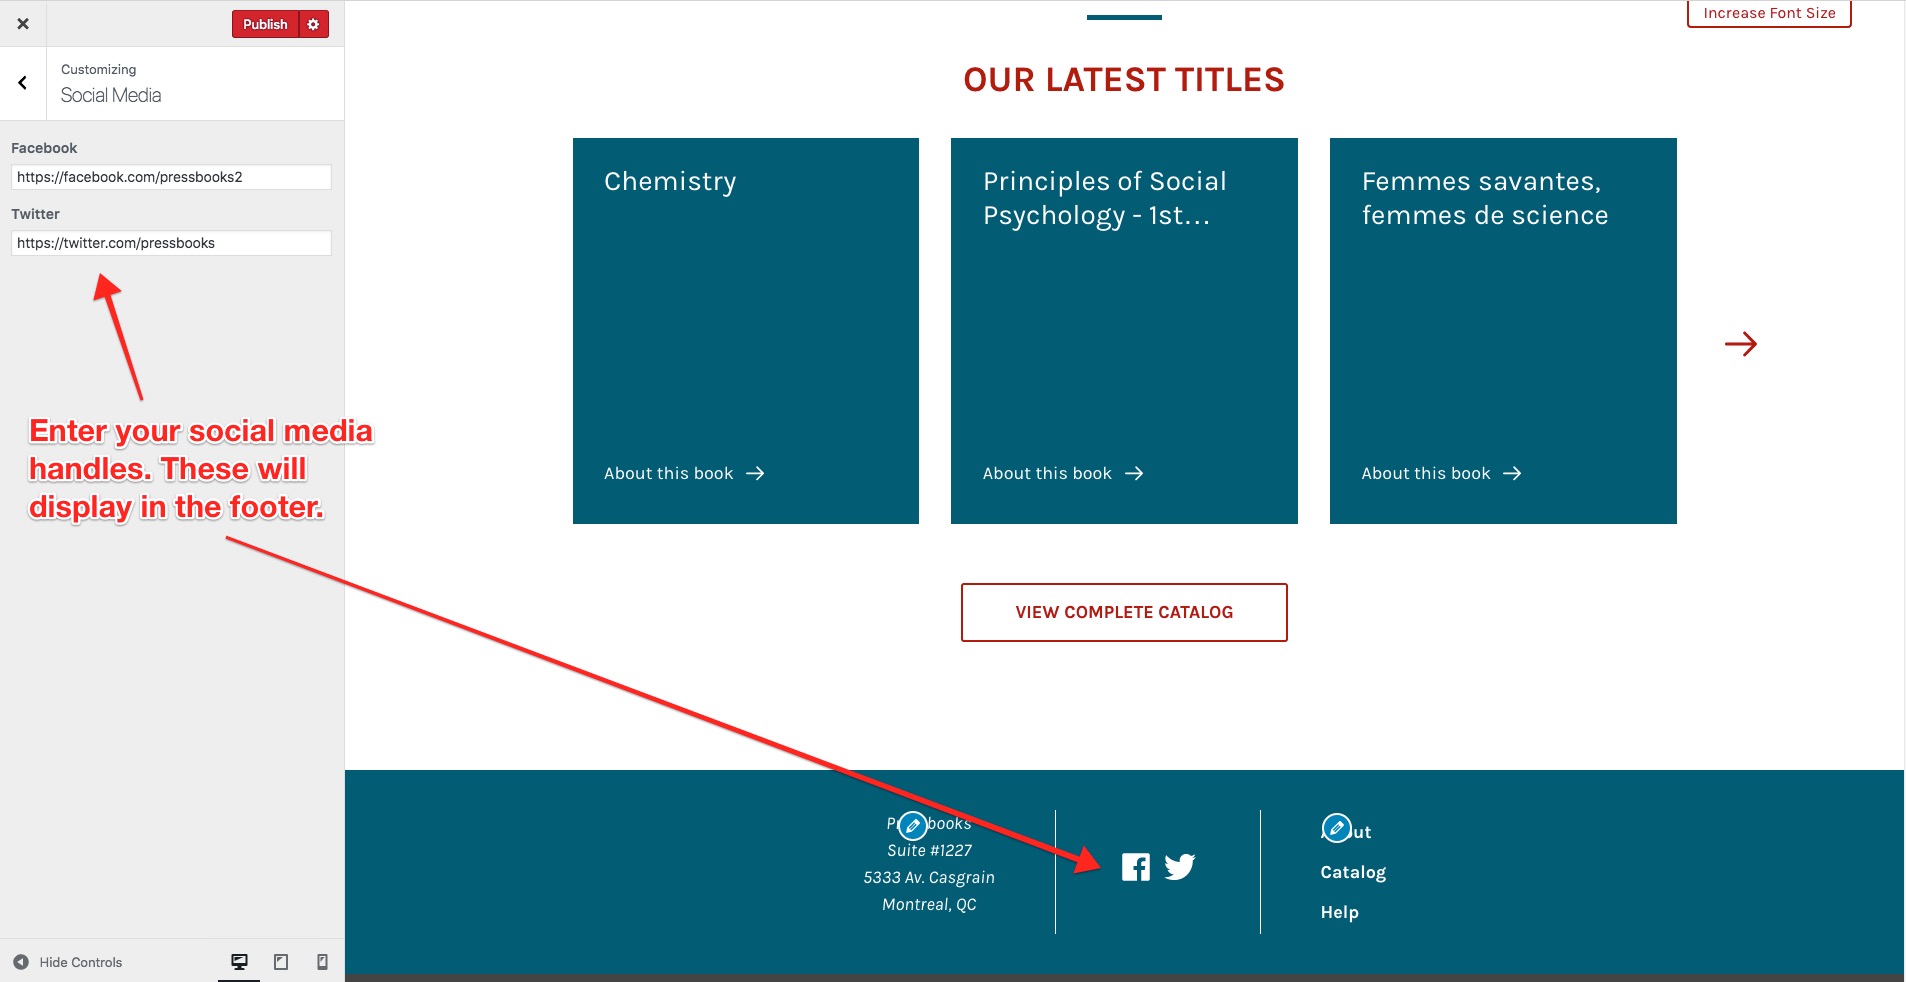
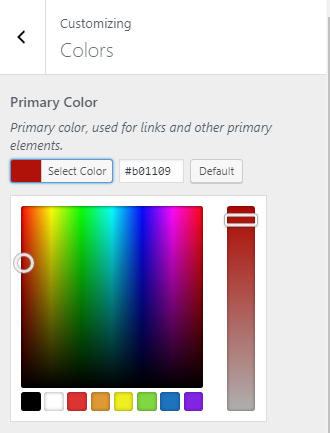
Customize the Theme Colors
 Using the colors menu, you can customize the colors for your entire network. These theme colors will be applied to your network root and the webbook reading interface across your network.
There are six colors you can change:
- Primary color: used for links and other primary elements
- Primary color (hover): Variant of the primary color, used for primary element hover states
- Accent color: used for flourishes and secondary elements
- Accent color (hover): Variant of the accent color, used for secondary element hover states
- Primary foreground color: used for text on primary color backgrounds
- Accent foreground color: used for text on accent color backgrounds
To change the color of any of these elements:
- Click Select Color
- Enter your brand’s hex color OR use the color picker and swatches to change the color of an element (NOTE: you’ll see these change in the live preview of your website)
- Click Publish
Change the Header Image
You can add a header image to replace the default image, or change the header images that have already been uploaded.
To change the default header image:
1. Click Add new image
2. Upload your file
3. Click Publish
Customize Your Menus
You can customize two different menus using the Menus section:
- The Footer Menu (appears in the network footer)
- The Primary Menu (appears in the top navigation bar)
The Aldine theme is built to support only these two menus, and we recommend that you don’t add others or change their locations.
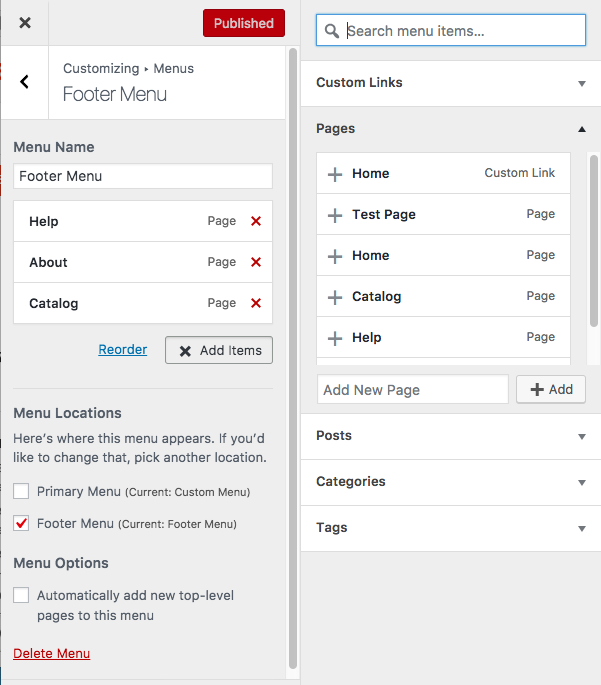 By default, the footer menu will contain links to the About, Catalog, Help, and Home pages, and the primary menu will contain a link to Home, along with a set of standard user-related options (which cannot be changed).
Click Footer Menu or Primary Menu to edit either menu. You’ll see a list of the pages currently on that menu. Menu items can be reordered by clicking and dragging. To delete an item from the menu, click that item, then scroll down and click Remove. You can also remove pages by clicking Add Items— a menu will appear to the right, and red Xs will appear next to each page currently on the menu. You can click the red X remove a page from the selected menu.
Menu items can be pages within your Pressbooks network site (see more on creating pages) or custom links to external sites/pages (i.e. your parent institution website, library website or other important information hosted elsewhere).
To add a page:
- Click on Add Item
- Click Pages
- Click to choose any of the network pages listed to add them to the menu.
To add a custom link:
- Click on Add Items
- Under Custom Link enter the URL and link text to appear in the menu
- Click Add to Menu
Once you have finished adding menu items, click Add Items again to save the order. Then, click Publish.
Click on the arrow in the top left corner to return to the main Menus panel.
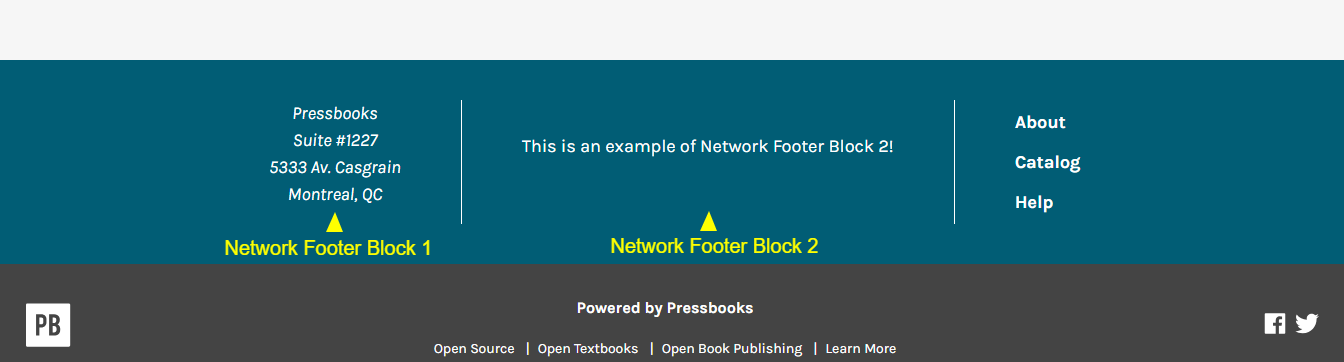
Add Footer Widgets
Widgets are used in Aldine to add content to the network footer block, alongside the footer menu described above. Network Footer Block 1 appears on the left of the footer menu, and Network Footer Block 2 appears in the center.
To add content to the footer widget blocks:
- select the block you’d like to include your content inside from the Widgets menu (i.e. ‘Network Footer Block 1‘).
- Click + Add a Widget
- Choose whether to add a Gallery, Image, or Text
- Provide a title (if desired) and insert your desired text or images into the editor
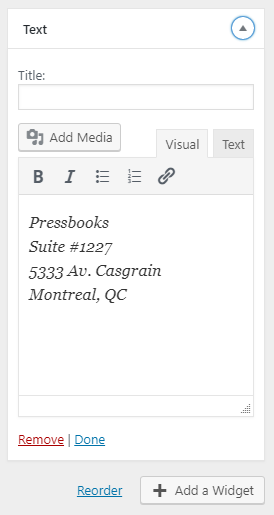
- Click Done
- Click Publish
Add Additional CSS
The Aldine theme also lets you define custom CSS which is applied to your network home page and any pages you’ve created in the root site. You can add any desired custom CSS code by opening Additional CSS from the Customization menu.
Watch the video below for an in-depth walk-through of the customizations described above:
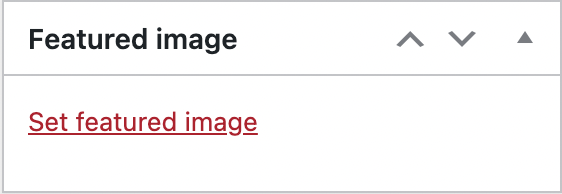
Add a featured image to your network catalog
You may want to add a header / banner image to your network catalog page, making it visually consistent with your network home page. This can be done by navigating to Pages in your network root site dashboard and from there, going to the Edit page for “Catalog.” On this page, there is a Featured image box on the right-hand side of the editor where you’ll be able to upload this image and save changes.