Add Content from Pressbooks to the LMS
We are currently rolling out a new version of the LTI Content Integration. This chapter applies to networks using the Pressbooks Results for LMS plugin. For networks using the new Pressbooks LTI plugin, please refer to this part of the guide.
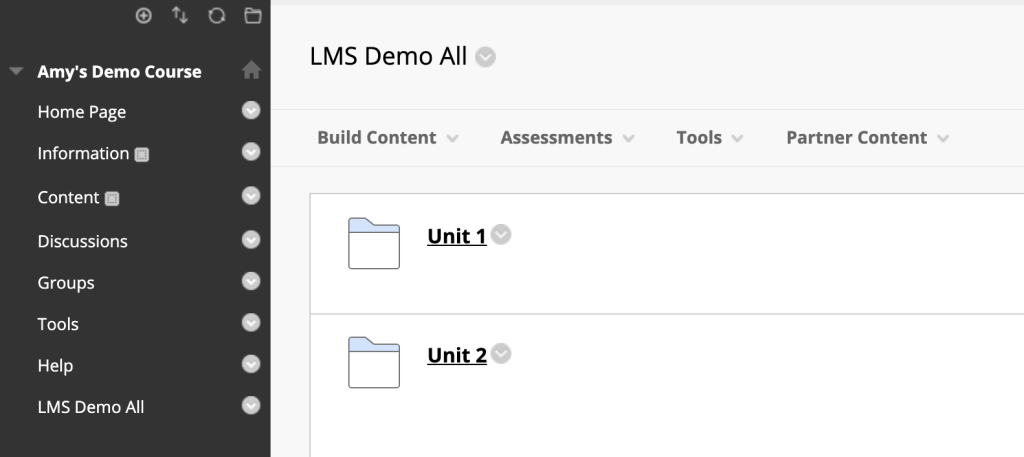
Here we will show you how to add select chapters from, or entire books from your Pressbooks network to courses in your LMS.
If you are a network manager, the first thing you may want to do is to decide which version of Common Cartridge exports book administrators on your network should be able to produce. On the network-level LTI 1.3 Settings page you will also an option called Allow books to override role-mapping and Common Cartridge defaults.
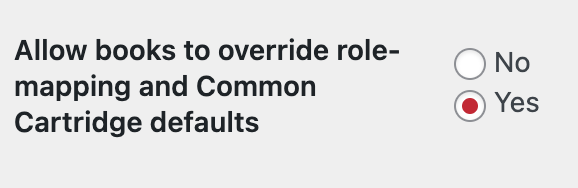
If marked ‘Yes’, this will allow individual book administrators to decide which Common Cartridge file they can export on a book-by-book basis. If marked ‘No’, you as the network manager can decide which exports will be available for book admins; if set to no, your choices will function as a global setting. You can set your network defaults via the Common Cartridge -> Create export files designed for use with: setting at the bottom of the settings page:
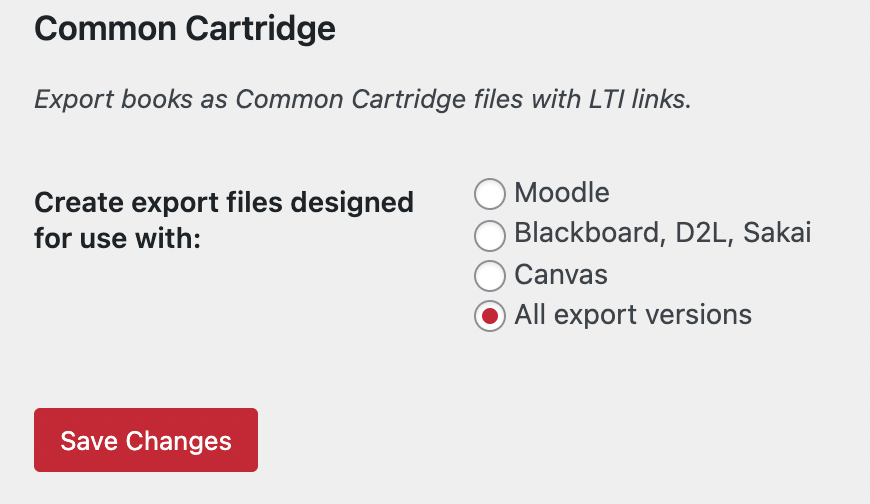
Your goal should be to ensure that book administrators have the ability to produce Common Cartridge export files designed for use with the LMS they’re planning to launch their books in.
Canvas
In Canvas, you can import several chapters of your book at once using using a Common Cartridge with LTI Links (Canvas) file or each chapter manually using the LTI 1.3 Launch Link.
Importing using Common Cartridge File
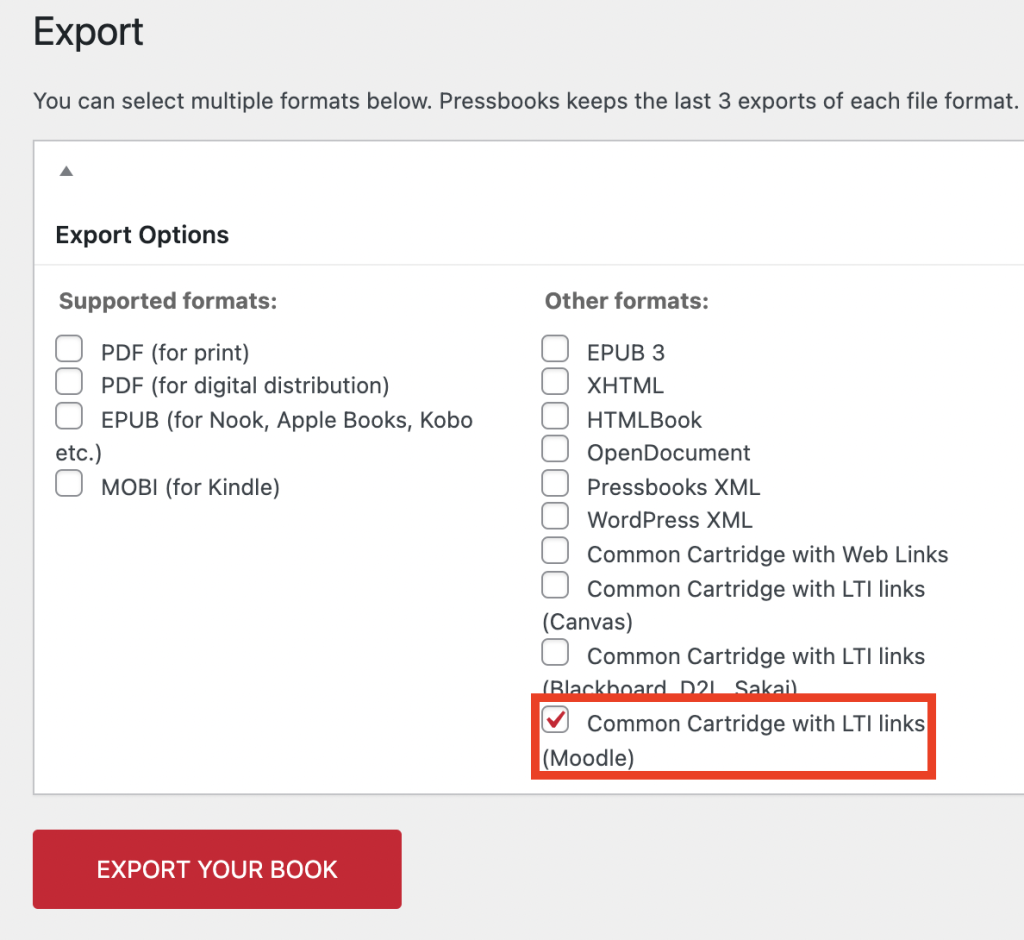
If you wish to have all (or many) of the parts and chapters of your book imported into your Canvas course as external tool links, you can do this quickly and easily by exporting a Thin Common Cartridge file in Pressbooks and importing this file into your Canvas course.
To produce a Thin Common Cartridge file, visit the Export menu available in the Pressbooks book dashboard. Select the Common Cartridge with LTI Links (Canvas) option and select Export Your Book.

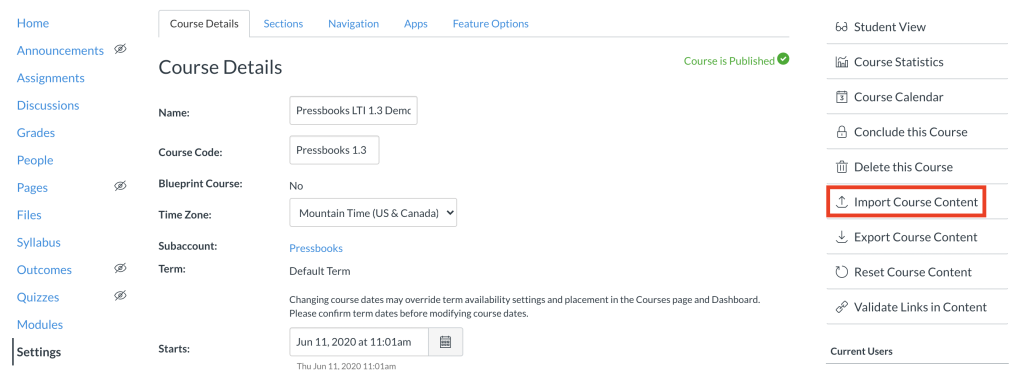
Once this file has been produced, download this file to your computer and navigate the Canvas course you’d like to import your activities into. In your course on Canvas, select Settings on the left-hand navigation bar. On the Settings page, select Import Course Content.
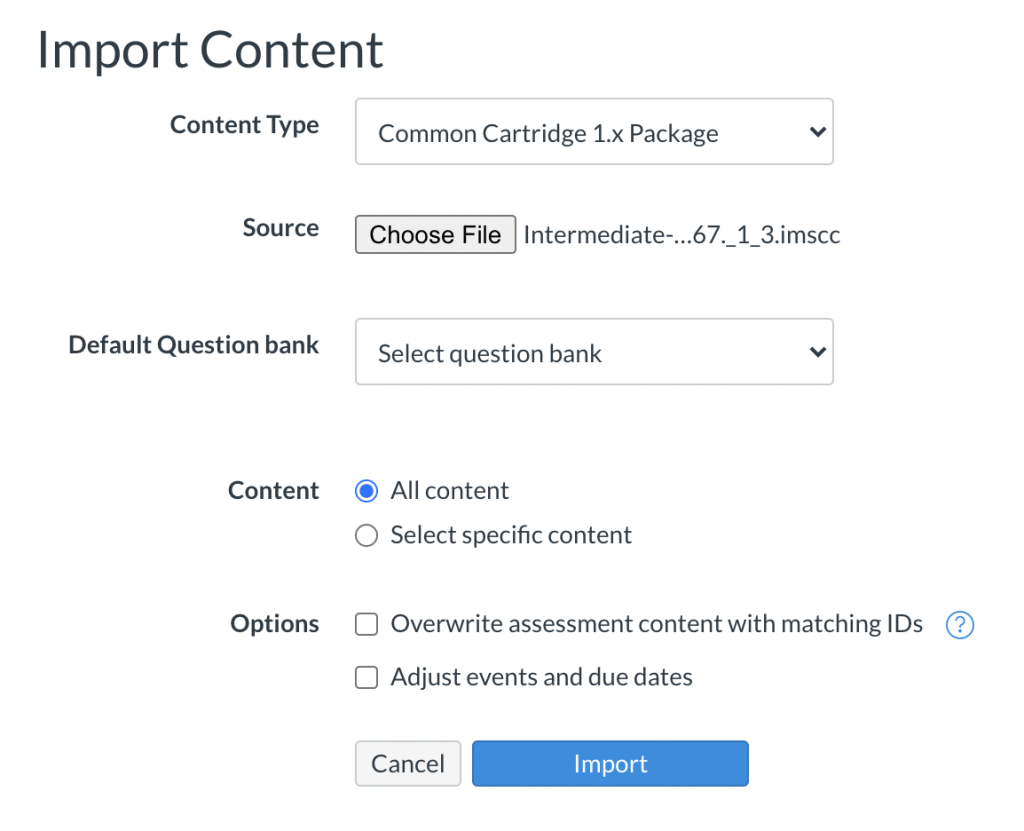
On the Import Content page, do the following:
- Select your Content Type as Common Cartridge 1.x Package
- Upload your Common Cartridge with LTI Links (Canvas) file (.imscc) in the Source field
- For content, select All Content
Then, click on Import to finalize the import.
Thereafter, you will see your file, along with the time of import and status of the import. When the status shows Completed on the right hand-side, it means that the file has successfully been imported.

Now, you can enter your Modules from the left hand-side navigation bar (above Settings) in your course to see your imported content.
Moodle
Importing Common Cartridge File
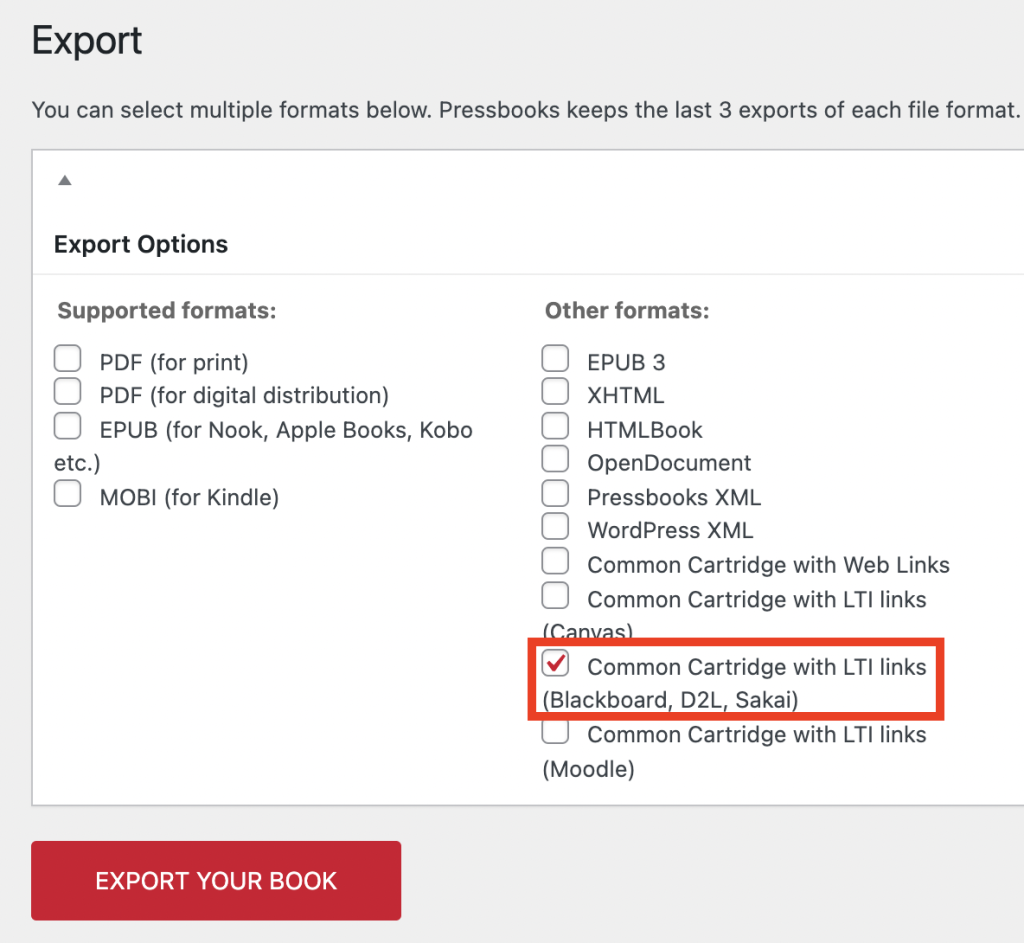
In Moodle, you can connect your book by importing the Common Cartridge with LTI Links (Moodle) file.
This file can be exported from the Export page found on the left-hand navigation bar.
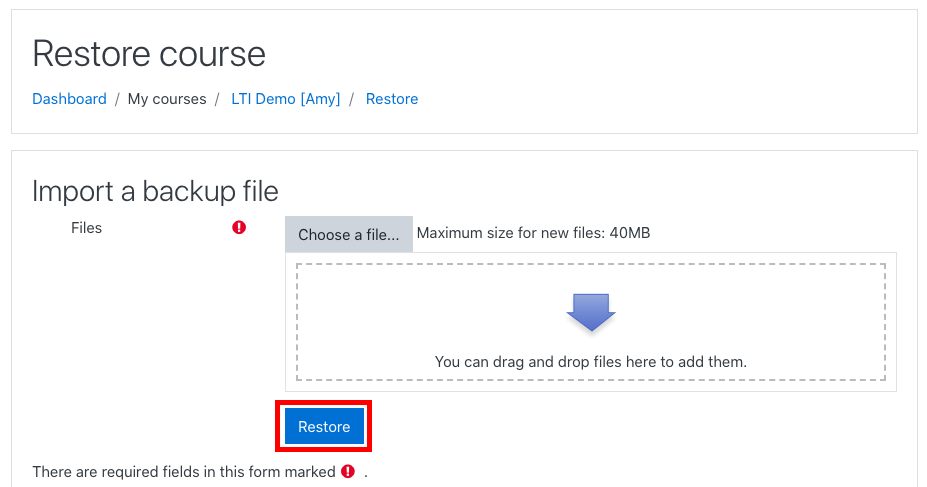
Then, in Moodle, go to your course. Under the settings cog on the top right-hand side, select Restore.

On this page, you can now import the Common Cartridge with LTI Links (Moodle) exported from Pressbooks and click Restore.
Once you do this, you will be taken through a short, seven-step process in order to complete importing this book.
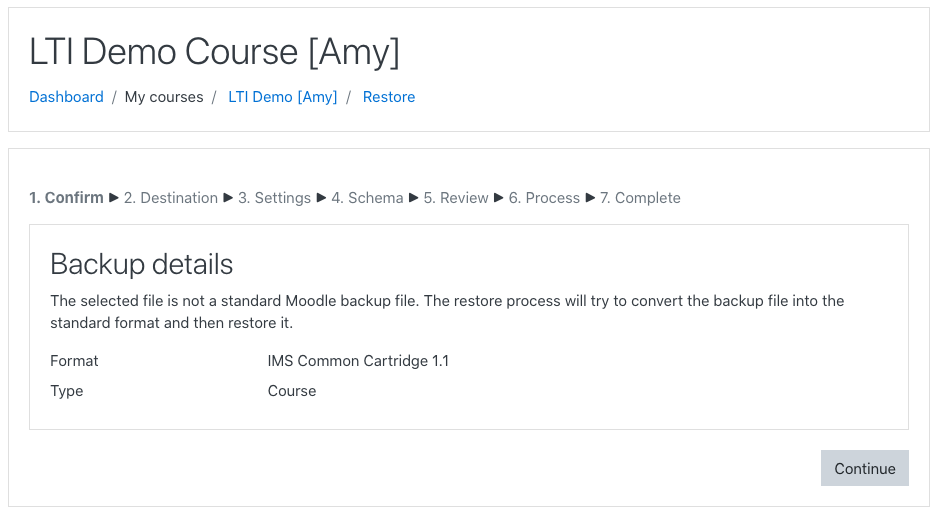
In each step, you will be offered the default selections, which you can customize as you go along. At the last step, once you click Perform Restore, you will get a success message.

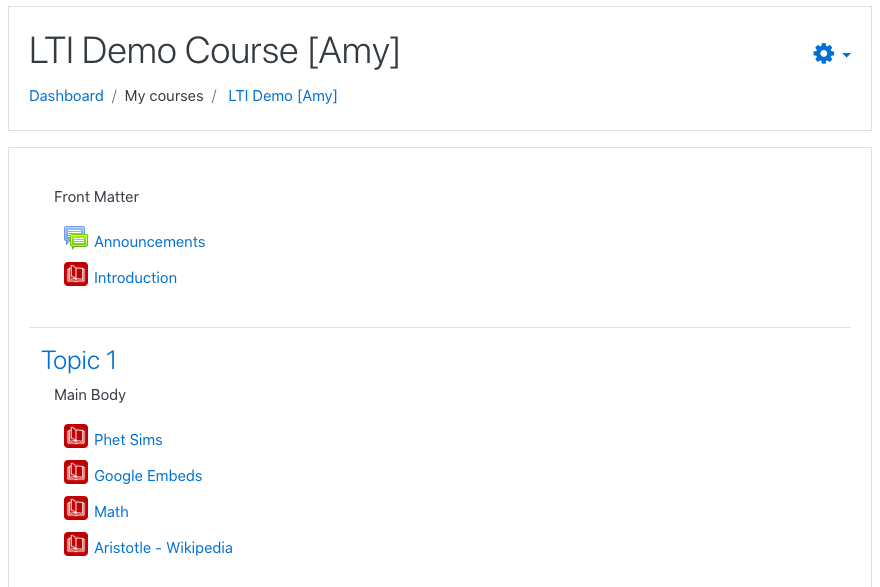
Click Continue, and you will be taken to your newly restored course. You will now see links to each of the book chapters imported into your course.
D2L/Brightspace
Please use these instructions to add chapters to D2L/Brightspace. Steps related to grading are not essential and can be skipped over.
Blackboard
In Blackboard, you can choose to import the book using a file called Common Cartridge with LTI links (Blackboard, D2L, Sakai).
Importing Common Cartridge File
This file can be exported from the Export page found on the left-hand navigation bar.
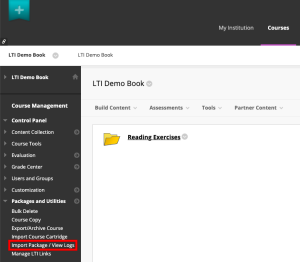
Once you’ve produced and downloaded this Common Cartridge (.imscc) file, you can now import the package to Blackboard. Enter your course on Blackboard. Under Course Management on the left-hand side, select Import Package / View Logs.
This will take you to the selected page, where you will see a button called Import Package.

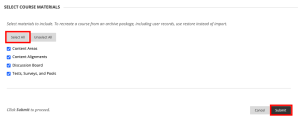
When you navigate to the import page, you can upload your file under Select a Package. Thereafter, you will see the file that you’ve uploaded underneath.

If you keep scrolling, you will see that you will have options to decide the parts of the book you can import. Selecting all is the most comprehensive way to bring in all necessary parts of your book. Click Submit to upload this file.
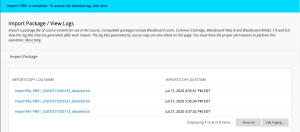
You will land on the Import Package / View Logs page again, where you will see the progress and success messages at the top. Once you see the blue success message, your course has been uploaded in full. Furthermore, you will be able to see the course which has been successfully uploaded in the Import/Copy Log Name list.
Once successfully imported, you’ll need to finish the configuration. On the course menu bar on the left hand side, see the imported file as the last selection; select this button.
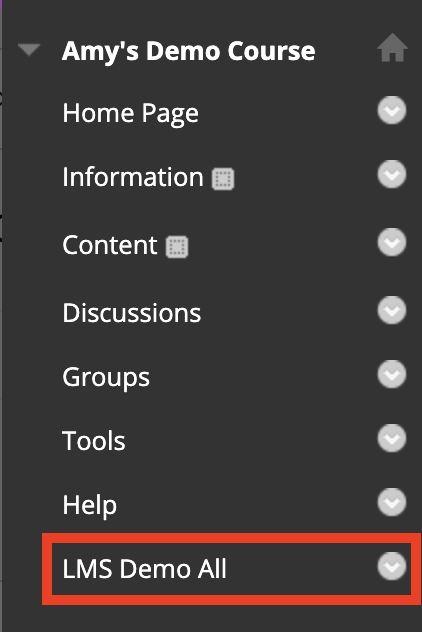
You’ll be lead to the book’s content, and you’ll see that this interface shows the Parts of the book. Click on the Part to see the Chapters within it.