Use the Editor
Create and Edit Tables
Displaying content in tables allows you to present complex information in a clear and accessible way. Information structured in a table is shown to enhance understanding and retention.
Pressbooks allows you to create and display information in tabular form, and to choose table styles that display your information in an attractive way in your webbook, ebook, and PDF exports.
Create a Table
- In the visual editor, click
 > Table.
 - Select the number of columns and rows via the grid.
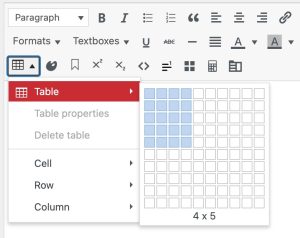
✔️ A table is inserted in the visual editor.
Add or Remove Rows and Columns
Once you’ve inserted a table in your book, you can use the Table tool to edit cell, row and column properties; merge and split cells; add and remove rows and columns; and cut, copy, and paste rows.
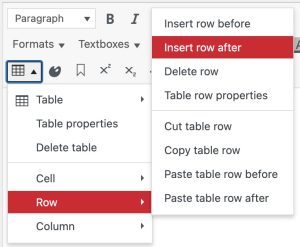
To add a row:
- Click into the row before or after which you want to add a row.
- Click > Row.
- Click Insert row before or Insert row after.
To add a column:
- Click into the column before or after which you want to add a row.
- Click > Column.
- Click Insert column before or Insert column after.
To remove a row:
- Click into the row you want to remove.
- Click > Row.
- Click Delete row.
To remove a column:
- Click into the column you want to remove.
- Click > Column.
- Click Delete column.
Change the Table’s Appearance
You can change a table’s appearance by editing the table’s properties. You can apply one of several predefined styles (classes) to your table, adjust its width and height, adjust the cell padding and cell spacing, increase or decrease border weights, and add table captions.
Define a Header Row
Defining a header row for your table will make that row distinct from other rows. Should the table take up more than one page in a PDF, the header row will be repeated on the second page.
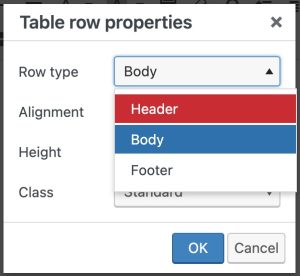
To designate a row as the table header:
- Click into the row you want to be the header.
- Click > Row > Table row properties.
- In the Row type dropdown, click Header.
- Click OK.
Apply Preset Styles
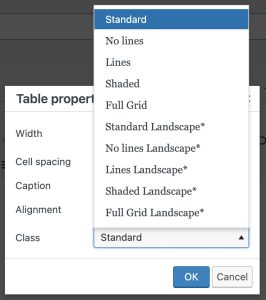 There are a number of classes (preset styles) available to assign to a table:
- Standard
- No lines
- Lines
- Shaded
- Full Grid
- Standard Lanscape*
- No lines Landscape*
- Lines Landscape*
- Shaded Landscape*
- Full Grid Landscape*
Note: Landscape table lasses (denoted with an asterisk *) will only appear landscape in PDF format. They will display in portrait format in the ebook and webbook versions of your book.
| Apple | Banana |
| Carrot | Date |
| Apple | Banana |
| Carrot | Date |
| Apple | Banana |
| Carrot | Date |
| Apple | Banana |
| Carrot | Date |
| Apple | Banana |
| Carrot | Date |
To apply a preset style to your table:
- Click into the table you want format.
- Click > Table properties.
- In the Class dropdown, select the class of your choice.
- Click OK.
Adjust Table Width and Height
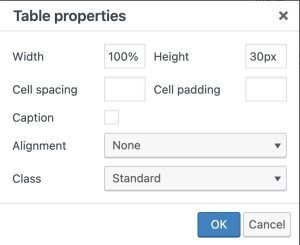 The width of your table can be set as a percentage or pixel value. Tables with percentage widths will be responsive to the size of their container, while tables with pixel widths will be will be fixed. By default, the width of your table will be set at 100%. This means that the table will take up the entire width of its parent element (typically, the page) and end at the left and right margins. You can increase or decrease your table’s width by changing the percentage or pixel value.
⚠️ Table width and height apply to all formats of your book. If you set your table width in pixels, your table might spill over your PDF page.
Table height can only be expressed in pixels. If you attempt to set a height value that is too small for the number of rows in that table, your value will be replaced by a safe default. If you increase the table height, the height will be distributed equally to all rows, unless row heights have been specified separately.
Add a Table Caption
To add a caption to your table:
- Click into the table you want format.
- Click > Table properties.
- Select Caption.
- Click OK.
✔️ A blank space appears above your table. - Click in this space and type your table caption.

Table captions will display below your table in your Pressbooks webbook and above the table in ebook and PDF export files.
Make Your Table Accessible
Tables need a properly defined structure to be accessible.[1] This means adding row and column headers to define the different sections of table contents. Screen readers read tables horizontally—cell by cell, row by row—and row and column headers help give context to the data in each cell.
To create column headers:
- In your table, select all the cells in the first row.
- Click > Cell > Table cell properties.
- In the Cell type dropdown, click Header Cell.
- In the Scope dropdown, click Column.
- Click OK.
If your table has row headers:
- In your table, select all cells that will be row headers.
This should be all cells in the first column of your table, except for the cell in the first row, which has already been marked as a column header. - Click > Cell > Table cell properties.
- In the Cell type dropdown, click Header Cell.
- In the Scope dropdown, click Row.
- Click OK.
Delete a Table
- In the visual editor, click anywhere inside the table
- Click the Table menu in the editor toolbar
- Click Delete table
Create Interactive Tables with TablePress
TablePress is a plugin that allows you to build dynamic, interactive tables which can be sorted, filtered, and searched in the webbook. These tables are exported as static tables in EPUB and PDF exports.
TablePress also allows you to import CSV, HTML, JSON, XLS, or XLSX files and convert their tabular data into TablePress tables and export tables you’ve created to your device as CSV, HTML, or JSON files.
Activate the TablePress plugin
In order to create these tables, the TablePress plugin must be installed on your network and activated in your book. If your network allows book admins to activate installed plugins in their books, you can do so by clicking Plugins from the left sidebar menu, and activating TablePress from the plugins list. If you do not see the Plugins menu item or the TablePress plugin, contact your network manager.
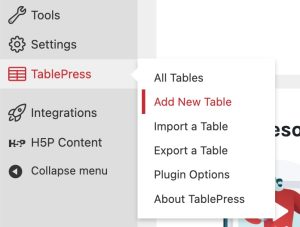
Once TablePress has been activated, you should see a TablePress item in your left sidebar menu.
Create a table with TablePress
To create a table with TablePress:
- Click TablePress > Add New Table from the book dashboard menu.
- Type a table name and (optional) a description of the table, then select the number of rows and columns you’d like your table to have.
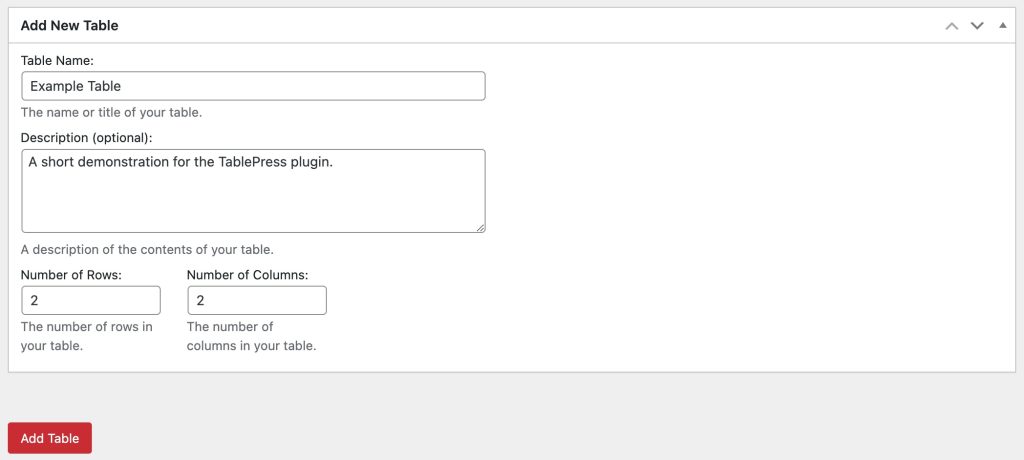
- Click Add Table.
The edit page for the newly created table opens. - Add content to the cells of your table.
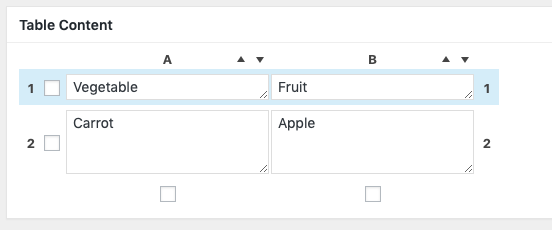
- Configure your table as desired using the Table Manipulation, Table Options, and Features boxes.
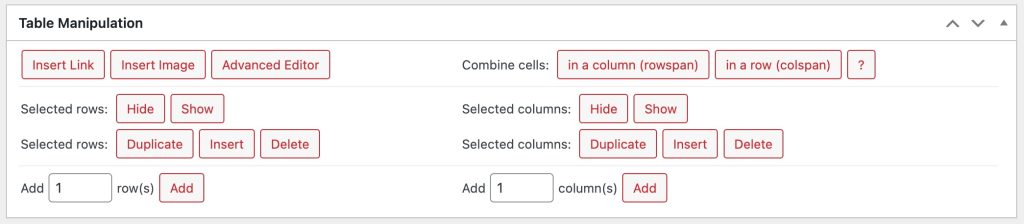
- The Table Manipulation box allows you to insert links and images into cells and to edit cells with the Advanced Editor. You can combine cells or rows (use with caution as this reduces the table’s accessibility). You can choose which rows or columns to hide and you can duplicate, insert or delete rows.
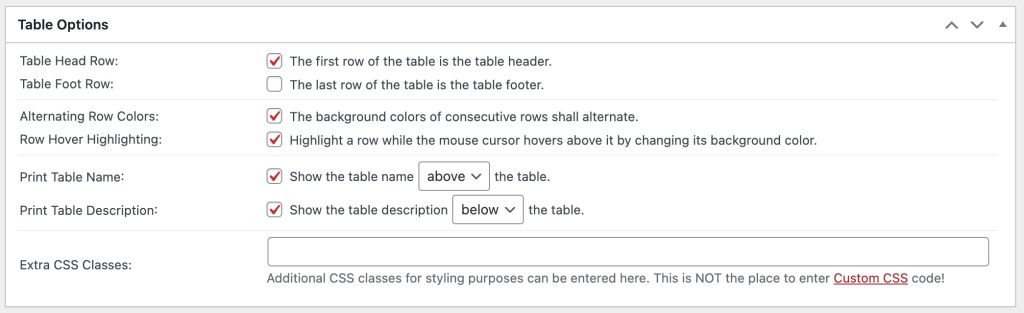
- The Table Options box has options to designate a table head row and/or a table foot row, to display alternating row background colors, to highlight a row the mouse hovers over, to display the table name above or below the table, to show the table description above or below the table, and to add additional CSS classes for the table.
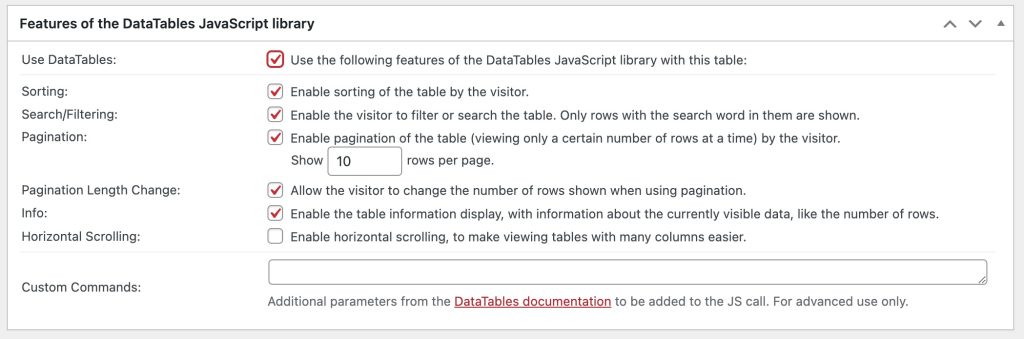
- The Features of the DataTables JavaScript library box offers the option to use the DataTables JavaScript library with the table. If activated, sorting, search/filtering, pagination, information display and horizontal scrolling options become available. The box also allows you to add custom commands.
- The Table Manipulation box allows you to insert links and images into cells and to edit cells with the Advanced Editor. You can combine cells or rows (use with caution as this reduces the table’s accessibility). You can choose which rows or columns to hide and you can duplicate, insert or delete rows.
- Scroll to the bottom and click Save Changes.
Add TablePress Tables to a Chapter
All TablePress tables will be given a shortcode upon creation. These shortcodes follow a predictable pattern: [table id=<ID> /] where <ID> is the number of a particular table (IDs are assigned to tables in the order of their creation within your book). To insert a TablePress table into a chapter:
- Click TablePress > All Tables and find the table you’d like to place in the chapter.
- Hover over the title of your table, then click Show Shortcode.
A window with the shortcode will pop up. - Copy the shortcode and click OK.
- Navigate to the chapter where you want the table to appear.
- Past the shortcode into the visual editor.
- Click Save.
The table won’t display in your visual editor; you’ll just see the shortcode. However, the table will appear in your webbook when you preview or view the chapter.
- These instructions are adapted from the Accessibility Toolkit - 2nd Edition by Amanda Coolidge; Sue Doner; Tara Robertson; and Josie Gray. In the chapter on Tables you can find additional information on how to improve your table's accessibility. ↵
