The Authoring Dashboard
Users
Pressbooks allows multiple people to work together in a shared book project with different authoring, editing, and publishing permissions. Read on to learn about:
Adding Users and Assigning Permissions
You can access the ‘Add New Users’ interface either by selecting Users -> Add New from your book’s admin dashboard or by clicking the Add New button on your book’s Users page.
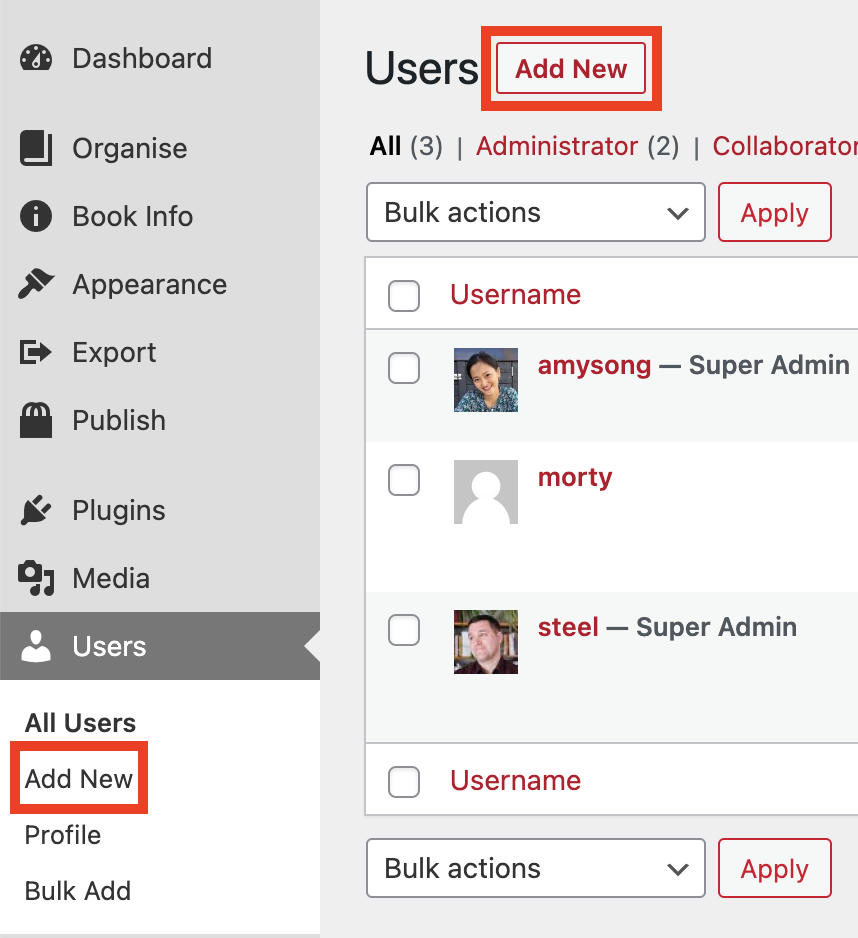
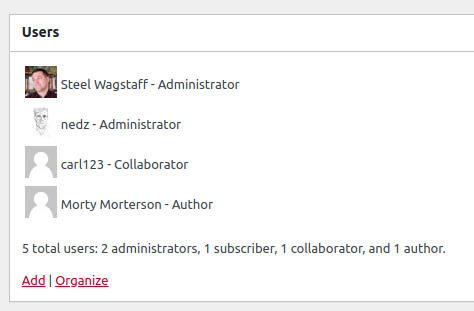
You can also see a list of users and their roles in the Users widget on your book’s Dashboard page. The Users panel displays the icon, username, and role of each user on the book (except for subscribers). The total number of users, as well as the number of users in each role, will be stated at the bottom of the panel. You can navigate directly to the Add New Users and Organize Users pages from the links in this widget.
Add Existing User
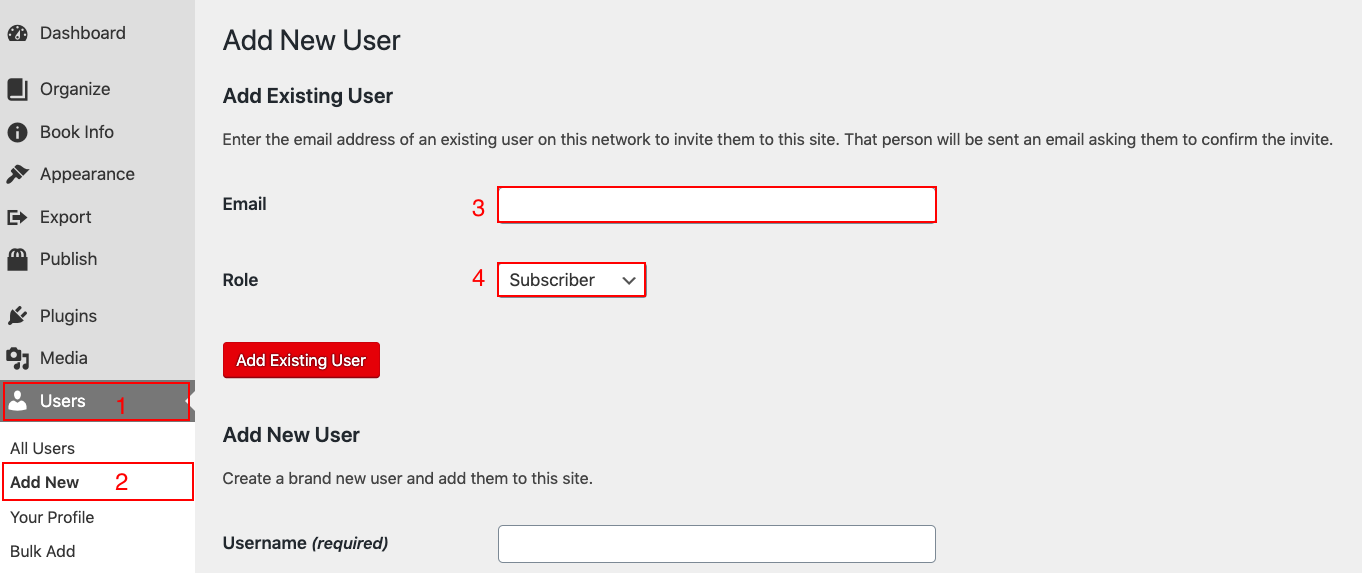
To add an existing Pressbooks user (i.e. someone who already has an account on your Pressbooks network):
- Select the Users tab on the left sidebar menu of your book’s dashboard
- Click Add New
- Enter the existing user’s email address or username
- Select the role you’d like to give them in your book
- Click Add Existing User.
Users invited by this method will be sent a confirmation email requiring them to accept the invitation to be added to this book. They will not appear in the book’s user list or be able to access the project until they have confirmed their participation.
Add New User
To add someone as a user to your book who does not already have an account on your Pressbooks network:
- Select the Users tab on the left sidebar menu of your book’s dashboard
- Click Add New
- Provide a username for this new user
- Provide an email address for the new user
- Select the role you’d like to give them in your book
- Click ‘Add New User‘.

A confirmation email will be sent to the new user’s email address. This new user must confirm the creation of their account and accept your invitation before they will appear in your book’s user list and have access to the project.
Add Users in Bulk
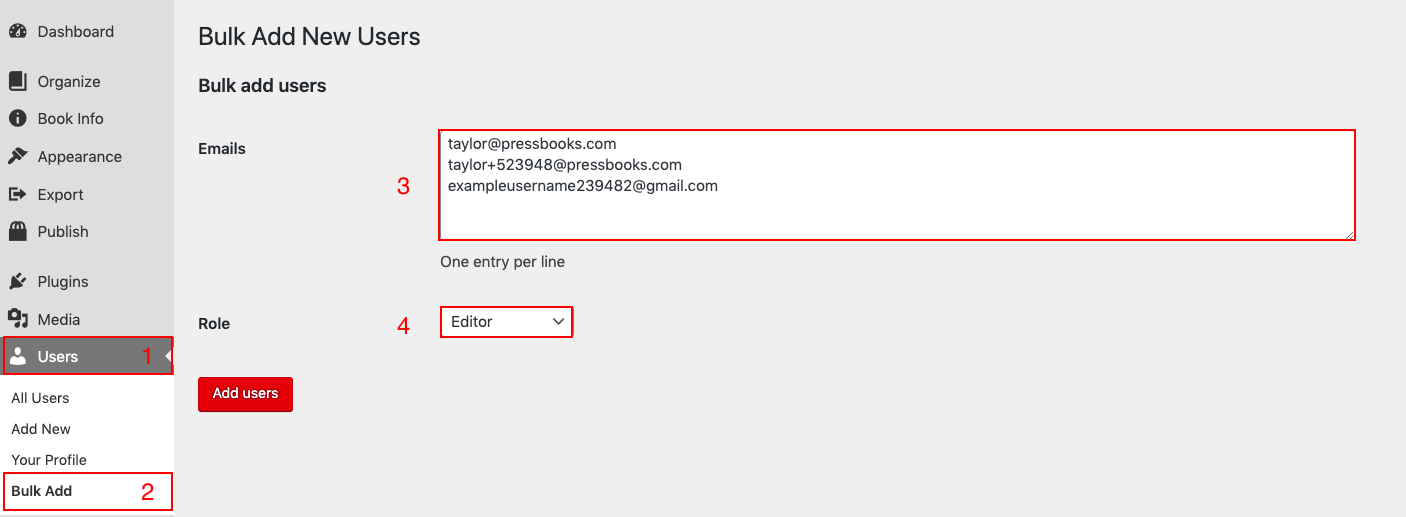
You can also add multiple users to your book at the same time. The Bulk Add feature allows you to add both new and existing Pressbooks users to your book at the same time.
- Select the Users tab on the left sidebar menu of your book’s dashboard
- Click Bulk Add
- Enter the emails for each person you intend to invite to the book (place one email address per line with no additional punctuation)
- Select the desired Role for these users.
- Click “Add users“
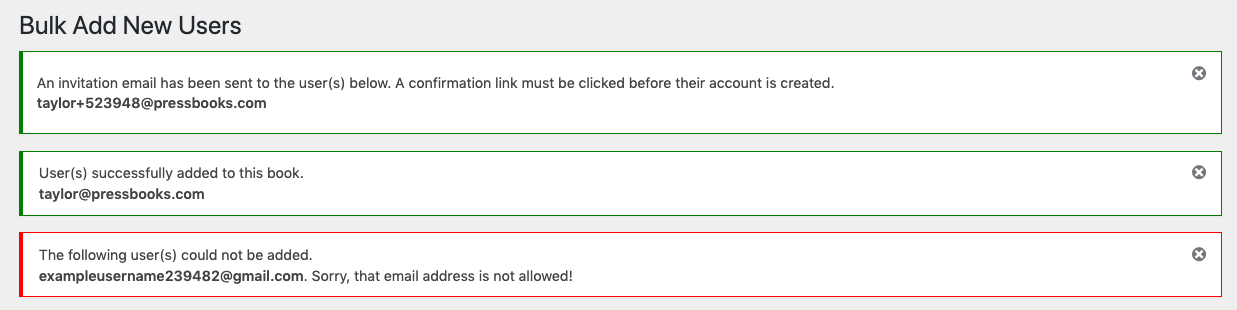
You will receive a notification at the top of the screen that lets you know which users were added, which need to confirm their accounts before they’ll be added, and which users were unable to be added.
Any new users added via the Bulk Add option will be sent an email asking that they confirm registration of their account. New users will not appear in your book’s user list until they’ve confirmed their account. Existing users will immediately appear in the user list without requiring special confirmation.
Managing Users and Changing Permissions
Sometimes you may wish to change user permissions or delete users from a book. Follow the steps below to manage users and their permissions within your book.
To access users:
- Select the Users tab on the left sidebar menu of your book’s dashboard
- Click All Users to view all users in any role on a given book

To change a user’s role:
- Select one or more users by clicking the checkbox next to their username(s) (selecting the checkbox next to Username at the top or the bottom of the user list will select all users)
- Open the “Change role to…” dropdown menu and select the desired role
- Click Change
The new role for any affected users will be reflected in the Role column.
To remove users from your book:
- Select one or more users by clicking the checkbox next to their username(s) (selecting the checkbox next to Username at the top or the bottom of the user list will select all users)
- Open the “Bulk Actions” dropdown menu and select “Remove“
- Click Apply
This will remove all selected users from the book.
User Roles in Pressbooks
Users can be assigned to one of the following roles within an individual book project: Administrator, Editor, Author, Collaborator, or Subscriber. Each of these user roles provides different levels of access, as described in the table below:
| Role | Manage Users & Settings | Add or Edit Chapters | Publish Chapters | Delete Chapters | Read Private Chapters | Comment (if enabled) |
| Administrator | Yes | Yes | Yes | Yes | Yes | Yes |
| Editor | No | Yes | Yes | Yes | Yes | Yes |
| Author | No | Only their own | Only their own | Only their own | Only if setting is enabled | Yes |
| Collaborator | No | Only their own | No | No | Only if setting is enabled | Yes |
| Subscriber | No | No | No | No | Only if setting is enabled | Yes |
Although Authors and Collaborators are only able to add and edit their own chapters, ownership can be re-assigned. It is always possible for Administrators or Editors in a book (or network managers on the network) to re-assign the ‘Owner’ for a given chapter or front/back matter from its Edit page, using the dropdown menu in the Owner box at the bottom of the page (below the Visual / Text editor and Chapter Metadata). Any users belonging to the book with a role higher than Subscriber may be assigned as the ‘Owner’ of a chapter. In this way, an Author or Collaborator user can be assigned edit access to a chapter that they themselves did not create.
Different user roles also have access to different interfaces while within Pressbooks. The chart below (courtesy of BCcampus’ Lauri Aesoph) summarizes which dashboard links are visible to which types of users:
| Dashboard Link | Administrator | Editor | Author | Collaborator | Subscriber |
| Organize | √ | √ | √ | √ | x |
| Private/ Public setting (Organize) | √ | x | x | x | x |
| Book Info | √ | x | x | x | x |
| Appearance | √ | √ (but no “Themes”) | x | x | x |
| Export | √ | √ | √ | √ | x |
| Plugins | √ | x | x | x | x |
| Media | √ | √ | √ | x | x |
| Users | √ | x | x | x | x |
| Tools | √ | √ | √ | √ | x |
| Settings | √ | x | x | x | x |
| Import | √ | √ | √ | √ | x |
Only users with the role of Administrator in a book can install H5P content types from a book’s H5P hub. Administrators, Editors, Authors and Collaborators are able to create new H5P activities using installed content types.
