Learning Objectives
- Soundproofing Strategies for Recording
- Remote Recording Options
- Best Practices for Recording {video tutorials}
Podcast audiences deserve to hear good audio quality.
Creators of podcasters can make that happen even on a budget but it does take time and attention to basic soundproofing, use of an external microphone, and practicing proper recording techniques.
Studies show that audiences tune out uneven or muddy sounds so audio distractions like hissing or popping p’s or echo-y rooms are not only irritating but reflect badly upon the podcaster and what they are trying to say.
In addition, researchers at the Mind & Society Center at USC have found that the quality of audio even influences whether you believe what you hear. “The findings are significant amid the recent rise of fake news and public distrust in science,” said co-director Norbert Schwarz.
A professional audio studio has soundproofing to deaden noise, but how do you know if other places where you would like to record, need soundproofing?
First, you can safely assume that every environment will need some help in blocking out external noise. Another good test is if you clap your hands and hear an echo then the sound is reverberating and you need to put in some acoustic treatment.
Fortunately, it’s not hard to create your own quiet recording space at home, on the road, or wherever you are very inexpensively.
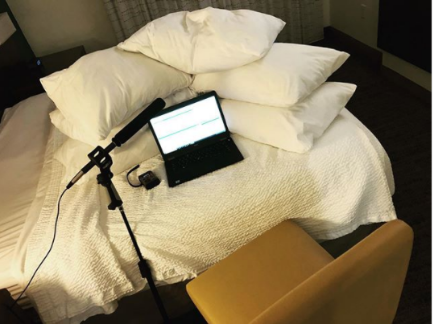
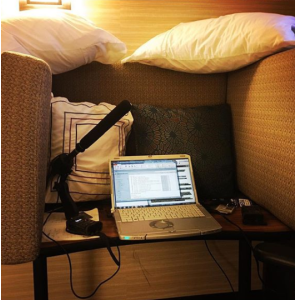

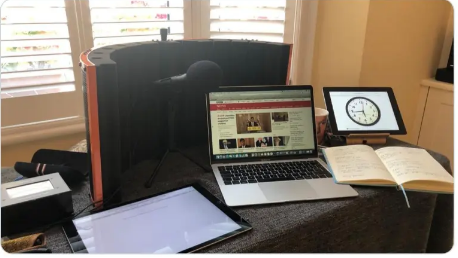
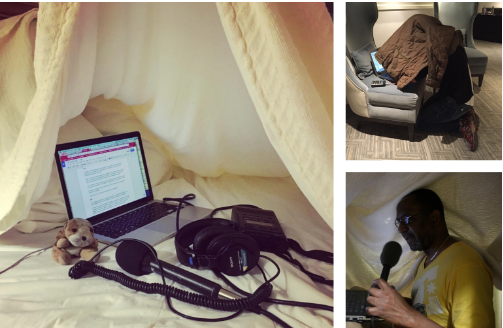
Professional journalists traveling on the campaign trail have long created their own mini-recording studio on the road.
NPR national political correspondent Don Gonyea builds pillow tents in his hotel room to voice his stories. He’s been kind enough to provide some photos and a video sharing his secrets of how to deaden the sound in a room by creating sound barriers.

When there’s no time to build a pillow fort, reporters improvise by using a blanket or jacket over their heads or recording inside a car (assuming there’s no traffic noise). Transom offers tips on home recording as does Soundproof Advice.
When the global pandemic forced media professionals to work from home, they improvised by creating recording studios with makeshift acoustic treatments. In Seattle, KUOW public radio news reporter Casey Martin tweeted his version of a home recording studio.
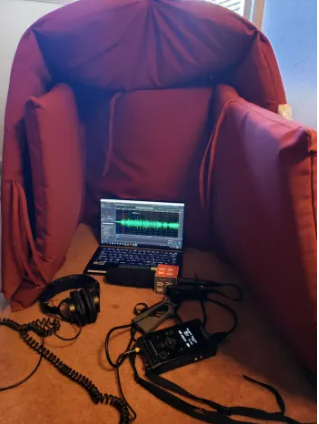
BBC Presenter Sasha Twining uses a portable molded foam vocal booth that avoids having to attach acoustic tiles to home walls. You can find these portable microphone isolation shields online for a variety of prices.
Podcasters can create their own at-home recording environment by finding a smaller space without echo — a room or closet with carpet, draperies and low ceilings to soften any sound bouncing. Avoid areas with a lot of tile, glass, or hard shiny surfaces such as kitchens or bathrooms.
To further deaden sound during narration, be inventive: clear out a spot in a closet, build a tent of blankets or put your head under a towel to deaden sound while recording.
If you have the option to create a more permanent recording solution, you can purchase foam core boards or attach cardboard egg crates on walls, buy egg crate foam, or a sound isolation box like the one below at Double R Productions, in Washington DC.

 .
.
It’s important to understand what makes good audio quality before exploring various ways to record.
Below is a sound clip of two people talking in which we can clearly hear the audio. The first person’s audio is warm and without an echo. However, while the second person can be heard, the audio is hollow, as if he’s not speaking into the microphone.
The problem was solved by adding additional soundproofing to the recording booth where the interview was conducted.
If you have soundproofed and are still having hollow sound, or background sound from air conditioning that you can’t turn off, there is a tool you can try. Enhance Speech from Adobe is a free AI tool that I tested out and found to be pretty good in removing noise.
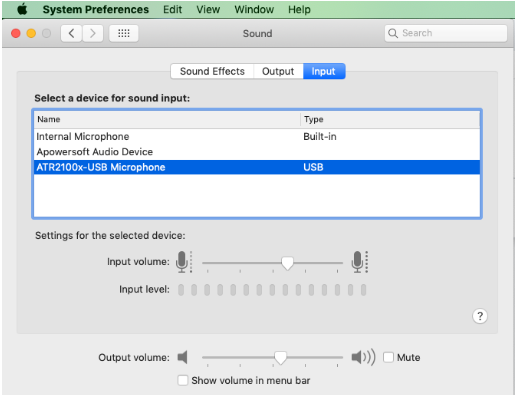
As discussed in Ch. 3 it’s always preferable to use an external mic for better audio quality.
But for an external microphone to work properly on a computer or digital device, you need to be sure it’s recognized. Go to system preferences and sound or audio to select the correct device input such as the ATR2100-USB microphone.
With any recording technique, you’ll need to discuss some basic recording and soundproofing techniques with your guests so they sound their best. Try to make the interview recording as easy as possible for guests and don’t overwhelm them with too much information.
Technology provides a variety of free or low-cost recording options and each has its pros and cons for quality, cost, and technical difficulty.
FREE or LOW-COST OPTIONS:
PAID OPTIONS:
In-person interviewing is great for being able to look someone in the eye and read their body language. However, even when the world is not in a pandemic it’s often not possible to meet face-to-face or cost-efficient to do so.
If you don’t have an external microphone, one of the easiest and highest-quality ways to record yourself is to use a smartphone voice app like the native iPhone voice memo.
Because smartphones are digital, the audio quality is quite good as long as the phone is placed at mouth level without a lot of extraneous noise around you. You can use a stack of books to hold the phone while you speak to avoid causing any handling noise.

There are also external microphones for smartphones as discussed in Ch. 3, or you could use the built-in mic that comes with Apple earbuds – but be sure to test out the audio quality in advance so you don’t get caught with poor quality audio.
Remember that the time limit on recordings depends upon the device’s internal storage capacity, so it’s best to have an external hard drive to store your audio files and get them off your phone.
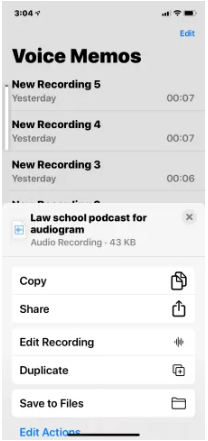
Download the audio by sending via email or click on the app’s three dots to get to the Share button. You can also access AirDrop or download to iTunes.
To record interviews remotely and do narration on a shoe-string budget you can use a smartphone to record what is known as a double-ender. This is a way to achieve high quality sound without having an external mic because the voice app is digital.
Using the voice memo app on their phone, the interviewer and the guest each separately record their own words during the interview when they are in separate locations. After the interview is finished the guest sends the audio file to the interviewer. In the editing process, those two audio files are then merged into one high-quality recording.
While the smartphone is used to record, the double-ender requires each person to listen to the other using a second device — it could be a computer, a second mobile phone, Facetime, Skype, Zoom, or go old-school by listening via a landline.
Aspen Public Radio has a video on how to do this. Just be sure to wear earbuds or headphones to avoid feedback. There are several different ways to use this technique, which are covered below.
THE DOUBLE-ENDER:
FOR TECH-SAVVY GUESTS:
GUEST SENDS HOST THE AUDIO FILES:
The recordings can sound very good and I’m delighted to be able to share some of the fine work of my former podcast students.
One student interviewer did a double-ender recording of her own voice on the iPhone voice memo and her guest did the same on her iPhone. They listened to each other’s questions using Facetime and wearing earbuds connected to their laptops.
Here’s a clip from “The Abroad Experience with Silvia Hernandez.”
For his podcast, former student Austin Ramsey did a double-ender interview using Zoom to record. Both he and the guest listened to each other via headphones and Austin also used his iPhone to record himself with an external mic. Here’s a clip.
Before recording the actual interview, ask your guest to do a quick practice run and have them send you the recorded audio file to test its quality and help put them at ease.
To do a high-quality, no-cost remote audio recording there is a browser-based recorder that makes it very easy on the guest because there is nothing to download or install on a computer or mobile phone, the app provides remote collaboration for professional audio applications.
In 2022 CleanFeed won an Emmy Award for Engineering, Science & Technology from the Television Academy. The technology is used in film and television, by musicians, audio drama, and podcasting – essentially providing an online studio. The award honors the creation of audio tracks used in series such as Star Trek:Discovery, The Crown, and The Walking Dead.
In CleanFeed.net the host simply signs up to create a free account and then sends the guest an email invite. The guest clicks on the START link and the app records both the guest and interviewer.
Use the Chrome browser and wear headphones to avoid audio feedback and bleed into the recording. Be sure to always connect headphones and any external mic to your computer before opening CleanFeed or other similar programs so that the computer “sees” your microphone. By using an external mic (see Ch. 4 for recommendations), you will have high-quality sound.
In terms of audio quality, if a guest uses their mobile phone and is located in a fairly quiet environment, the audio should be very good because the phone is a digital device.
When the host uses an external microphone, check the inputs by clicking on the Setting icon next to your name and use the pulldown menu to find your mic (if you don’t see your mic then close down CleanFeed, connect the mic and then reopen).

My test of Cleanfeed.net found it to be an easy way to record quality-sounding phone interviews. The reason why the audio is so good is because it is never compressed like it is in Zoom, Skype, or other online conferencing tools. A video tutorial and written directions for free sign-up are below.
Videoconferencing is another good option for doing remote interviews as it has been around for more than a decade and some apps, like Zoom, offer a free version for limited recording time.
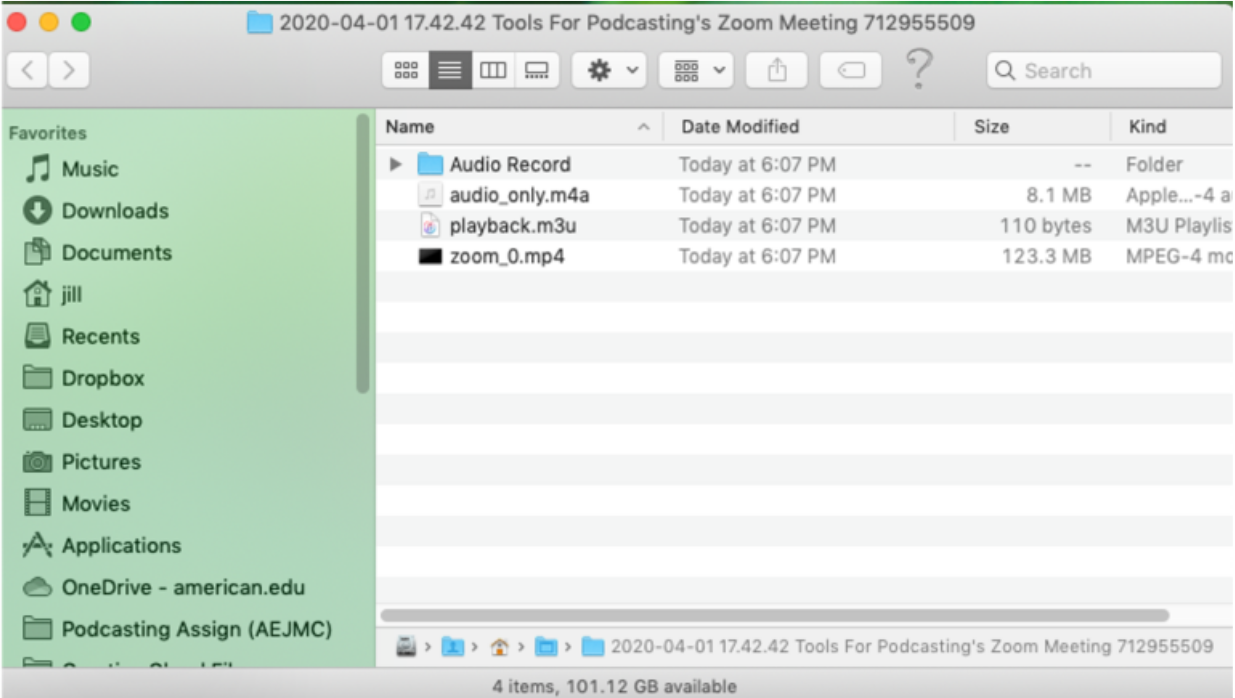
Guests are sent a link and put into a chat room after clicking on that link. After the recording is done Zoom sends an MP4 recording to you for editing. While Skype is one of the oldest and best-known apps it’s not good enough sound quality for podcasts.
During the pandemic, Zoom.us became the go-to tool for schools, universities, businesses, and family and friends although it’s long been used by podcasters.
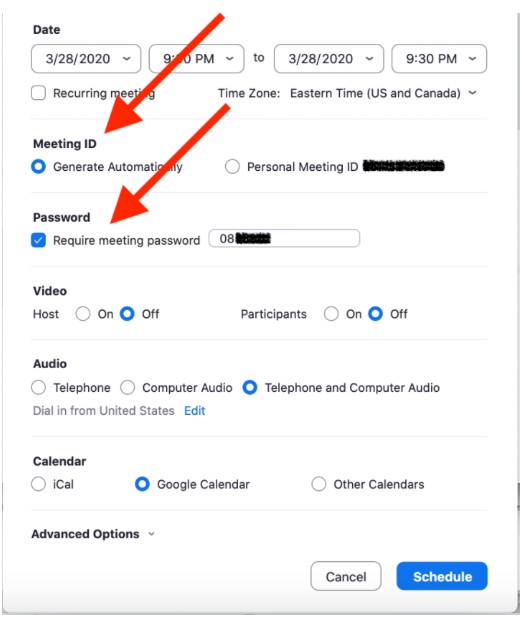
The free version of Zoom has a 40-minute time limit but when that runs out you can simply restart the recording. You can save bandwidth by selecting not to use the video option but you may also want to establish a visual connection with your guest – it’s your choice. However, you should take security precautions such as requiring a password to prevent “Zoombombing” by nasty internet trolls.
Video tutorial on using Zoom for recording:
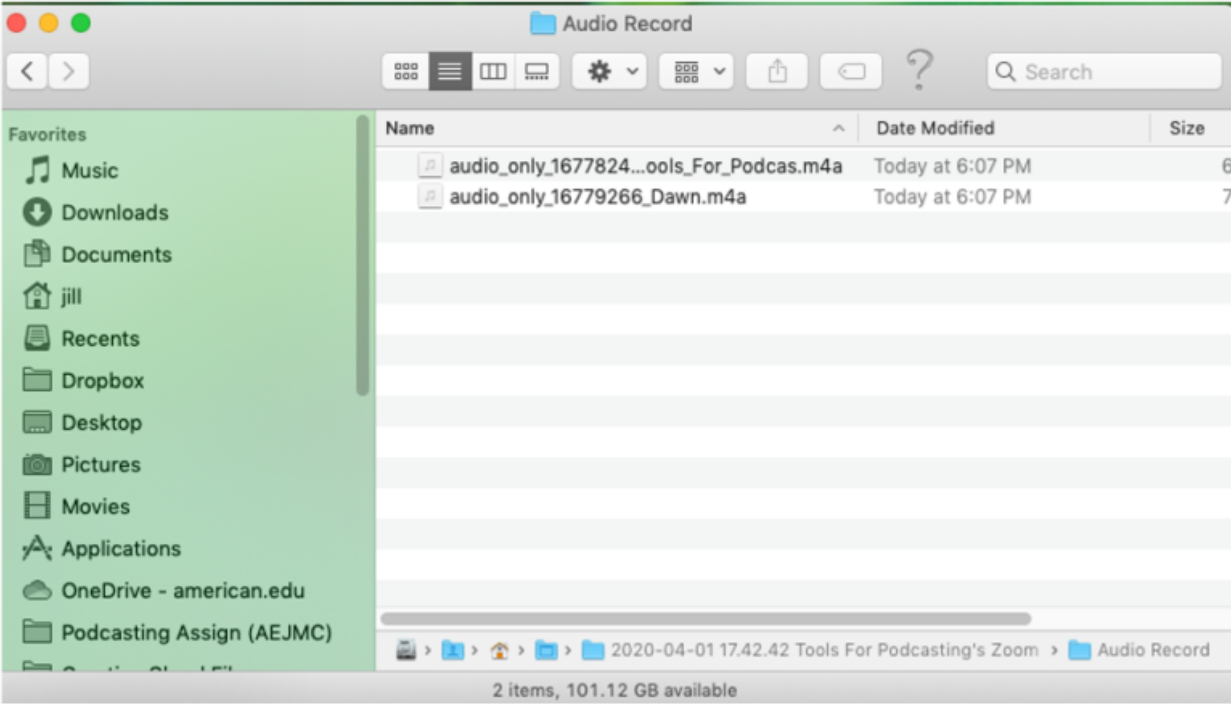
I found Zoom sound quality to be very good, especially when the interviewer and guest both used external microphones instead of the computer’s built-in mic. Even a guest interview by cell phone had decent audio quality and Zoom allows you to record separate audio tracks, which makes editing out a cough or other noise much easier.
To avoid “Zoombombing” where unwanted, unauthorized trollers enter your recording space:


YaYa Podcasting offers directions on how to set up the Zoom recording menu to record separate tracks.
Several paid web-based platforms also offer free remote recording options. Several of my students reported a good experience using the free version of Zencastr. Resonate Recordings has a video tutorial explaining how to set it up and record.
Other popular paid services include SquadCast and Riverside.
Public radio has long hired freelancers known as tape syncers to go into the field to record when the interviewer and interviewee are in different places. These professionals usually take their own equipment to record interviews.
If the guest is willing to have someone come to their home or office to record, you can put out a call for a tape syncer on email listserves or places like the Association of Independents in Radio (AIR). The cost is likely to be $150 or more.
Beyond the technical challenge of how to record multiple guests or hosts at the same time, is the challenge of how to avoid having people talk over each other at the same time, and that comes down to observing some best practices.
If recording in person, use non-verbal cues like leaning into the mic when you want to speak; or holding up a finger to signal others.
If recording remotely without the use of video, listen respectfully to the other person to actively not interrupt them.

Tools for Podcasting Copyright © by Jill Olmsted is licensed under a Creative Commons Attribution 4.0 International License, except where otherwise noted.