31
An approach to reviewing an abdominal x-ray (AXR) will create a foundation that will facilitate the detection of abnormalities. You should create your own strategy. There is no correct way to analyze the images. Consistency and thoroughness are good general strategies. With time, and repetition, the process will become subconscious. Repetitive viewing of images will help establish a baseline of normality and normal variation that will represent an internal yard stick for the detection of variation from normal.
Assess image type and quality
| Projection | Supine, Upright, Decubitus, Other |
| Rotation | The spinous processes of the vertebrae should be equidistant between the pedicles |
| Exposure | The bones of the spine should be discernible |
Anatomic Coverage
Ensure the whole abdomen is visible from the hemidiaphragms to pubic symphysis (may need multiple views to accomplish this). The lateral abdominal walls should be included.
Quadrants or Regions:

The abdomen can be subdivided into four quadrants or nine regions (see above).
| 1 | 2 | 3 |
| Right Hypochondrium | Epigastrium | Left Hypochondrium |
| 4 | 5 | 6 |
| Right Lumbar | Umbilical | Left Lumbar |
| 7 | 8 | 9 |
| Right Iliac | Suprapubic | Left Iliac |
It is best to perform a census of at least the four quadrants of the abdomen to assess for abnormalities. If something unusual is detected a description of the abnormality will be more accurate if a description of the zone it occupies is provided.
Abdomen X-ray Image Acquisition Positioning:
Supine:
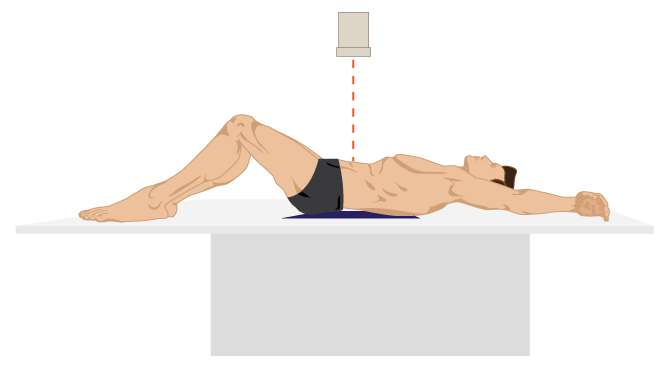
The patient lies on their back and the x-ray beam enters anteriorly. There will be no discernible air-fluid levels in the intestine on this view.
Upright:
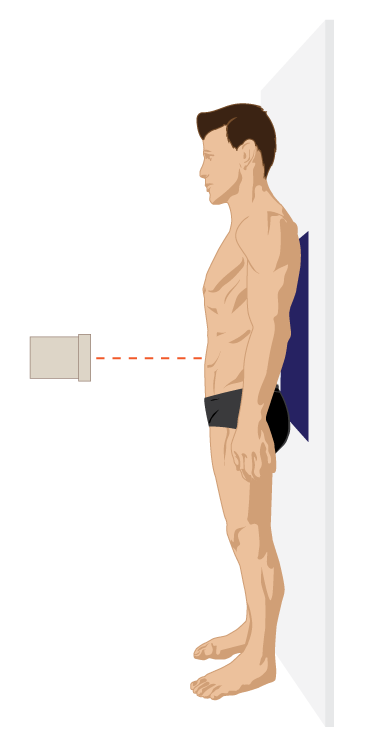
The table is oriented in a vertical orientation and the x-ray beam enters from the anterior abdomen. This image optimally visualizes air-fluid levels and free, intraperitoneal gas.
Decubitus:
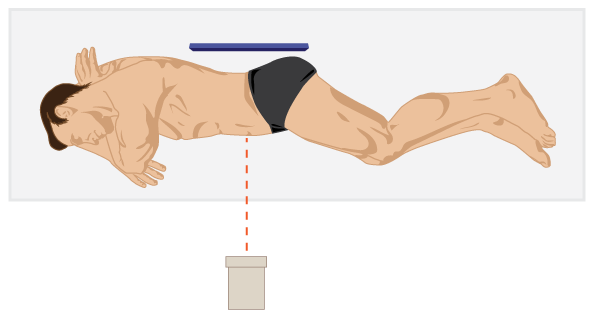
The patient lies with their side down to the table and the x-ray beam enters anteriorly. Time should be allocated to allow for any gas to rise to the non-dependent region of the abdomen. This is a view commonly used to detect free, intraperitoneal, gas.
Abdominal X-ray Review
The abdominal x-rays variably demonstrate anatomic features i.e. sometimes entities are seen and other times they are not. The conspicuity of an anatomic structure depends upon whether it contains gas or is surrounded by fat. Therefore, intestine not filled with gas that does not have fat at its margins, will not be seen on x-ray.
BBC approach:
- Bowel & other organs
- Bones
- Calcification & artifact
Bowel & other Organs: Stomach, small and large bowel
The stomach is in the left upper quadrant and usually has gas within it. An air-fluid level can be seen in the stomach on the upright and decubitus views.
Differentiating between the small and large bowel on an AXR is not always straightforward but there are a number of clues to help.
The small bowel usually lies more centrally, with the large bowel framing it around the periphery. The small bowel’s mucosal folds are called valvulae conniventes and are usually seen across the full width of the bowel.
The large bowel wall features pouches or sacculations call haustra (pl), haustrum (sing). Between the haustra are bridges of soft tissue that project into the colonic lumen, known as the plicae semilunares coli. The fold pattern created by the plicae are thicker than the valvulae conniventes of the small bowel and usually do not completely traverse the lumen of the colon.
Feces has a mottled appearance and are most often seen in the colon, due to trapped gas within solid feces.
There is considerable normal variation in the distribution of bowel gas and fecal material.
The upper limit of normal diameter of the intestines on an AXR do not usually exceed:
| 3 cm | Small bowel |
| 6 cm | Colon, except for Cecum |
| 9 cm | Cecum |
This is often referred to as the ‘3/6/9 rule’
Figure 5.11 depicts a normal Abdominal x-ray, the colon and stomach seen well.

The colon, with barium and air to highlight the anatomic distribution, of this structure is seen in Figure 5.12.

| 1 | Appendix | 6 | Splenic flexure |
| 2 | Cecum | 7 | Descending colon |
| 3 | Ascending colon | 8 | Sigmoid colon |
| 4 | Hepatic flexure | 9 | Rectum |
| 5 | Transverse colon |
Note: Organ margins and psoas shadow details are not visible due the overlapping bowel gas.
Small bowel obstruction
Small bowel obstruction can be visualized on an AXR as dilatation of the small bowel (>3cm).
The valvulae conniventes are much more visible and have what is referred to as a “coiled spring appearance”.
The most common cause (75%) of small bowel obstruction is adhesions (related to previous abdominal surgery).
Large bowel obstruction
Large bowel obstruction is most often due to colorectal carcinoma and diverticular related strictures. Less common causes are hernias or a volvulus.
Other organs and structures
Although AXR isn’t well suited to imaging these structures in their entirety, or consistently on sequential images, they can be variably seen and may offer clues to possible pathology.
| Lungs | Check the lung bases, if visible, for abnormalities (e.g. consolidation, pleural fluid), as abdominal pain can sometimes be caused by chest abnormalities (referred pain) |
| Liver | Large right upper quadrant (RUQ) structure |
| Gallbladder | Rarely seen. Look for calcified gallstones or cholecystectomy clips |
| Stomach | Left Upper Quadrant to midline structure. Often contains visible gas. Air-fluid level will change with the projection obtained i.e. not seen on AP, transverse on upright, longitudinal on decubitus. |
| Psoas muscles | The lateral margin is seen as an oblique, low density, line on either side of the vertebral column. |
| Kidneys | Often visible, right kidney lower than left |
| Spleen | Left Upper Quadrant (LUQ), superior to the kidney |
| Bladder | Variable appearance based upon the degree of fullness. It is outlined by a low density line of fat. |
Bones/Musculoskeletal
Many bones are visible on an AXR and it’s important that you can identify each and screen for any pathology (which may be expected or unexpected). In addition, bones on the AXR provide useful landmarks for where you might expect to see a soft tissue structure (e.g. ischial spines are the usual level of the vesico-ureteric junction).
Bones commonly visible on AXR include:
- Ribs
- Thoracic and lumbar vertebrae
- Sacrum/coccyx
- Pelvis
- Proximal femurs
A wide range of bone pathologies can be identified on abdominal x-rays including fractures, osteoarthritis, Paget’s disease and bone metastases.
Image 5.13 demonstrates a variety of bone and musculoskeletal structures, not labelled and labelled:

The margin of the right, lower liver is seen due to fat surrounding the tip of the right lobe. The fat-soft tissue interface also allows us to visualize the psoas muscle margins.
| 1 | Left rib |
| 2 | Spinous process |
| 3 | Transverse process of a lumbar vertebrae |
| 4 | Pedicles of L3 vertebra |
| 5 | Right psoas muscle |
| 6 | L4 vertebral body |
| 7 | Right iliac/ischial/pubic bones |
| 8 | Sacrum |
| 9 | Left femoral head |
Calcification and Artifacts
Various high density (white) areas of calcification or artifacts may be seen
Examples include:
- Calcified gallstones in the RUQ
- Renal calculi
- Pancreatic calcification
- Vascular calcification
- Costochondral cartilage calcification
- Contrast (e.g. following barium administration)
- Surgical clips
- Metallic umbilical jewelry, artifact over the approximate location of the umbilicus
Figure 5.14 demonstrates a sample of some possible artifacts seen on abdominal x-rays:

Attributions
Fig 5.7 Abdomen Quadrants/Regions by Dr. Brent Burbridge MD, FRCPC, University Medical Imaging Consultants, College of Medicine, University of Saskatchewan is used under a CC-BY-NC-SA 4.0 license.
Fig 5.8 Supine Positioning for Abdomen x-ray, by the Distance Education Unit, University of Saskatchewan, is published using a CC-BY-NC-SA 4.0 International License.
Fig 5.9 Upright Positioning for Abdomen x-ray, by the Distance Education Unit, University of Saskatchewan, is published using a CC-BY-NC-SA 4.0 International License.
Fig 5.10 Decubitus Positioning for Abdomen x-ray, by the Distance Education Unit, University of Saskatchewan, is published using a CC-BY-NC-SA 4.0 International License.
Fig 5.11 Normal Abdominal x-ray by Dr. Brent Burbridge MD, FRCPC, University Medical Imaging Consultants, College of Medicine, University of Saskatchewan is used under a CC-BY-NC-SA 4.0 license.
Fig 5.12 Colon anatomy emphasized by the presence of barium and air by Dr. Brent Burbridge MD, FRCPC, University Medical Imaging Consultants, College of Medicine, University of Saskatchewan is used under a CC-BY-NC-SA 4.0 license.
Fig 5.13 Bones and Musculoskeletal Landmarks in the Abdomen by Dr. Brent Burbridge MD, FRCPC, University Medical Imaging Consultants, College of Medicine, University of Saskatchewan is used under a CC-BY-NC-SA 4.0 license.
Fig 5.14 Possible Artifacts on Abdomen x-rays. The image demonstrates two umbilical piercings, fallopian tube clips, and the buttons on the patient’s pants by Dr. Brent Burbridge MD, FRCPC, University Medical Imaging Consultants, College of Medicine, University of Saskatchewan is used under a CC-BY-NC-SA 4.0 license.
