16
By the end of this chapter, you will be able to:
- Sketch out how your paper will be organized. (GEO 1, 2; SLO 1)
- Develop a structure for your paper. (GEO 2; SLO 1)
- Create and fill in an outline with your paper’s content. (GEO 2; SLO 1)
Now that you have “invented” the content of your paper, it’s time to figure out how to organize that material and write your first draft. Here’s where the genre approach to writing can be very helpful, because genres offer useful organizational patterns that you can follow while writing your first draft.
Start by deciding which genre best fits your purpose and your paper’s thesis statement. Your thesis statement will usually include a verb like “review,” “argue,” “propose,” “explain,” or “analyze” that will point you toward the genre (or microgenre) you should follow. Then you can turn to the chapter that explains that genre. For example, if you are writing a profile, you can flip to the beginning of Chapter 25 and look at the “At-A-Glance” genre diagram. Inside the chapter itself, you will find plenty of good advice about how to organize and draft your profile.
As you strengthen your writing skills, you will find yourself mastering a genre set that fits your major, your career, and your life. Keep in mind that genres are flexible patterns that reflect how people act, react, and interact in the real world. They aren’t formulas to be followed mechanically. Since no two writing situations are ever exactly the same, you should alter, bend, and stretch the genre to fit your particular needs.
In this chapter, you will learn some easy strategies for putting your ideas and research into patterns that will be familiar to you and your readers. You will then learn some powerful strategies for drafting papers that will save you time and energy.
Why and How to Create a Useful Outline
Why create an outline? There are many reasons, but in general, it may be helpful to create an outline when you want to show the hierarchical relationship or logical ordering of information. For research papers, an outline may help you keep track of large amounts of information. For creative writing, an outline may help organize the various plot threads and help keep track of character traits. Many people find that organizing an oral report or presentation in outline form helps them speak more effectively in front of a crowd. Below are the primary reasons for creating an outline.
- Aids in the process of writing
- Helps you organize your ideas
- Presents your material in a logical form
- Shows the relationships among ideas in your writing
- Constructs an ordered overview of your writing
- Defines boundaries and groups
How do I create an outline?
- Determine the purpose of your paper.
- Determine the audience you are writing for.
- Develop the thesis of your paper.
- Brainstorm: List all the ideas that you want to include in your paper.
- Organize: Group related ideas together.
- Order: Arrange material in subsections from general to specific or from abstract to concrete.
- Label: Create main and subheadings.
Sketching Out Your Paper’s Organization
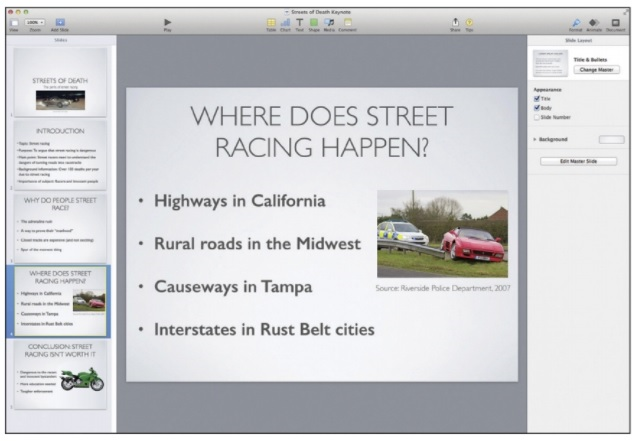
Begin by sketching out a rough outline or diagram that sorts your ideas and helps you gather input from others. In the workplace, teams often use a whiteboard or a glass wall to create an outline or draw a diagram. Increasingly, people are also using presentation software like PowerPoint, Keynote, or Google Slides to outline their project as slides (Figure 9.1). The presentation software allows them to organize their ideas as bullet points and rearrange the slides as needed. Your outline or diagram can be informal and loosely structured, unless your professor wants a formal outline. Most writers type a quick outline on a screen or scribble one on a sheet of paper or a whiteboard. Minimally, your outline or diagram should identify the major parts of your paper and sketch in some of the details. Your notes will then serve as a map that guides your drafting of the paper.
Using the Genre to Create a Basic Outline
Here’s an easy way to start your outline. Type or write “I. Introduction” on your screen or a piece of paper. Then type or write “X. Conclusion” at the bottom. Why? Because you already know your document will need an introduction and a conclusion. For now, use an “X” with the conclusion, because at this point you don’t know how many sections will be needed for the body of your paper.
If you are using presentation software to outline your project, create an “Introduction” slide and a “Conclusion” slide. You will be adding slides between these two as you sketch out the body of your paper.
Filling In Your Outline
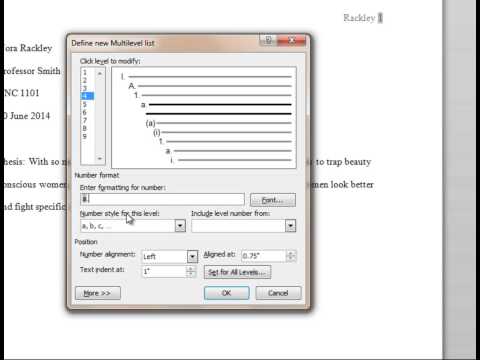
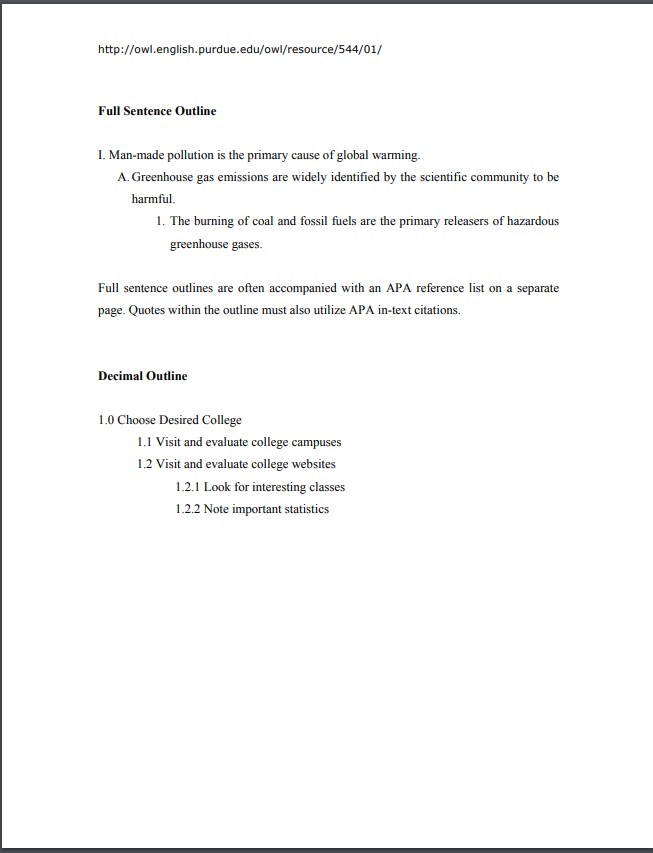
The alphanumeric outline used in MLA Style is the most common type of outline and usually instantly recognizable to most people. The formatting follows these characters, in this order:
- Uppercase Roman Numerals
- Capitalized Letters
- Arabic Numerals
- Lowercase Letters
- Lowercase Roman Numerals
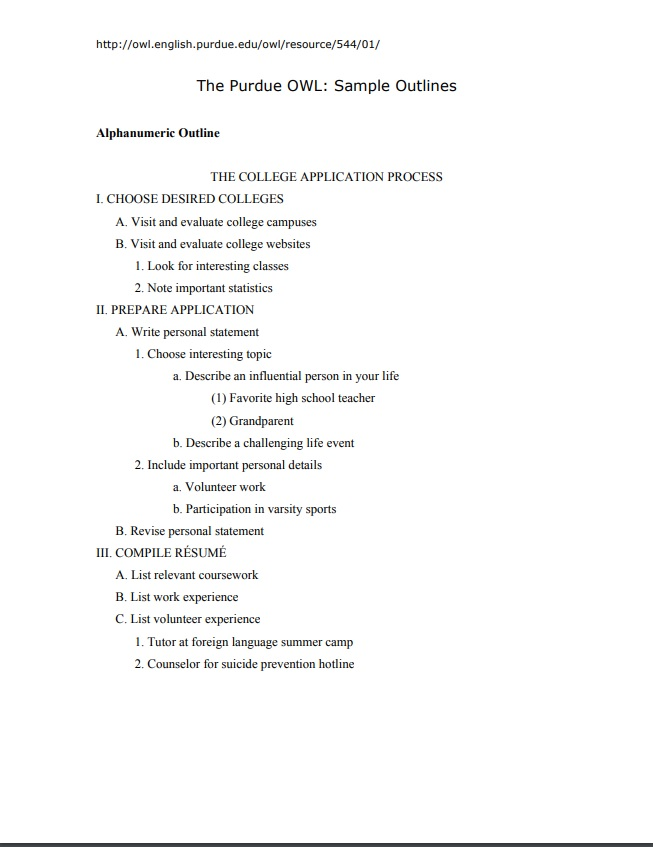
Start by listing the major sections that will appear in your document. Give each one an uppercase Roman numeral (e.g., II, III, IV, V, VI, VII, etc.). If you are using presentation software, create a separate slide for each section of your paper. Include a title for each slide that describes what that section will be about. The genre you are following should give you a good idea about how many sections you will need (Figure 9.3).

After you have identified the sections, think about each one separately and list the topics that might be discussed. Each section should include about two to five topics for discussion. The “Starter Outline” shown in Figure 9.3 illustrates how you can use roman numerals (I, II, III, IV) and uppercase letters (A, B, C, D) to sort out the items you will discuss in your paper.
In some situations, you may be asked to hand in a more formal outline for your paper so your professor can look it over before you begin drafting. Increasingly, professors are asking students to hand in “PowerPoint” versions of their outlines that show how the document will be organized.
Four Components of Effective Outlines
Ideally, you should follow the four suggestions presented here to create an effective outline. When creating a topic outline, follow these two rules for capitalization: For first-level heads, present the information using all upper-case letters; and for secondary and tertiary items, use upper and lower-case letters. The examples are taken from the Sample Outline at the end of this chapter.
Parallelism
Each heading and subheading should preserve parallel structure. If the first heading is a verb, the second heading should be a verb. Example:
CHOOSE DESIRED COLLEGES
PREPARE APPLICATION
(“Choose” and “Prepare” are both verbs. The present tense of the verb is usually the preferred form for an outline.)
Coordination
All the information contained in Heading 1 should have the same significance as the information contained in Heading 2. The same goes for the subheadings (which should be less significant than the headings). Example:
VISIT AND EVALUATE COLLEGE CAMPUSES
VISIT AND EVALUATE COLLEGE WEBSITES
Note important statistics
Look for interesting classes
(Campus and website visits are equally significant. They are part of the main tasks you would need to do. Finding statistics and classes found on college websites are parts of the process involved in carrying out the main heading topics.)
Subordination
The information in the headings should be more general, while the information in the subheadings should be more specific. Example:
DESCRIBE AN INFLUENTIAL PERSON IN YOUR LIFE
Favorite high school teacher
Grandparent
(A favorite teacher and grandparent are specific examples from the generalized category of influential people in your life.)
Division
Each heading should be divided into two or more parts. Example:
COMPILE RÉSUMÉ
List relevant coursework
List work experience
List volunteer experience
(The heading “Compile Résumé” is divided into three parts.)
Technically, there is no limit to the number of subdivisions for your headings; however, if you seem to have a lot, it may be useful to see if some of the parts can be combined.
The sample outline below is an example of an outline that a student might create before writing an essay. In order to organize her thoughts and make sure that she has not forgotten any key points that she wants to address, she creates the outline as a framework for her essay.
Example
Q: What is the assignment?
A: Your instructor asks the class to write an expository (explanatory) essay on the typical steps a high school student would follow in order to apply to college.
Q: What is the purpose of this essay?
A: To explain the process for applying to college
Q: Who is the intended audience for this essay?
A: High school students intending to apply to college and their parents
Q: What is the essay’s thesis statement?
A: When applying to college, a student follows a certain process, which includes choosing the right schools and preparing the application materials.
A general plan or overview giving the essential features of an essay but not the detail.
The goal or objective that the creator of a message is trying to achieve by communicating that message.
The groups of people (demographics) who receive a message.
The main idea, point, or claim of a written work. Plural: theses.
An informal way of generating ideas to write about or points to make about your topic.
Existing in thought or as an idea but not having a physical or concrete existence.
Existing in a material or physical form; not abstract.
A category of artistic composition, as in music or literature, characterized by similarities in form, style, or subject matter.
