AntConc
Introduction
AntConc is a powerful corpus analysis software for researchers and linguists to explore and extract information from large text corpora. It is developed by Professor Laurence Anthony is With its user-friendly interface and comprehensive features, AntConc enables users to conduct in-depth linguistic analyses, including tools such as concordance (KWIC) tool, plot tool, file tool, cluster tool, N-gram tool, collocate tool, word list and keyword list tool, and finally the wordcloud tool. AntConc visualises linguistic data with a streamlined interface. By leveraging advanced algorithms and statistical methods, AntConc empowers users to uncover hidden patterns, and make informed decisions for language research as well as language teaching.
Pre-requisites of using AntConc
Operating Platform
♦ AntConc works on desktop computers ONLY. Mobile devices such as iPhones, Android phones, iPads, and Chromebooks are NOT supported)
Registration
♦ No registration is required. AntConc is a free resource to download from its official website.
Video tutorial
In the following five tutorial videos, we will cover the all basics of using AntConc. These include (in sequence) 1) compiling a corpus or corpora by importing language data from the site, or injecting your preprocessed language data of different file formats, 2) the KWIC (concordance) tool, 3) the plot tool, 4) the file tool, 5) the cluster tool, 6) the N-gram tool, 7) the collocate tool, 8) creating target corpus and a reference corpus, 9) the word list and keyword list tool, and finally 10) the wordcloud tool.
1. Interface and settings
2. Corpus manager
3. KWIC, File, Plot, and Collocate tools
4. Cluster and N-gram tools
5. Reference corpus, Keyword, and Wordcloud tool
Textual tutorial
1. Interface and settings
2. Corpus manager
3. KWIC, Plot, and Collocate tools
4. Cluster and N-gram tools
5. Reference corpus, Keyword, and Wordcloud tool
1. Interface and settings
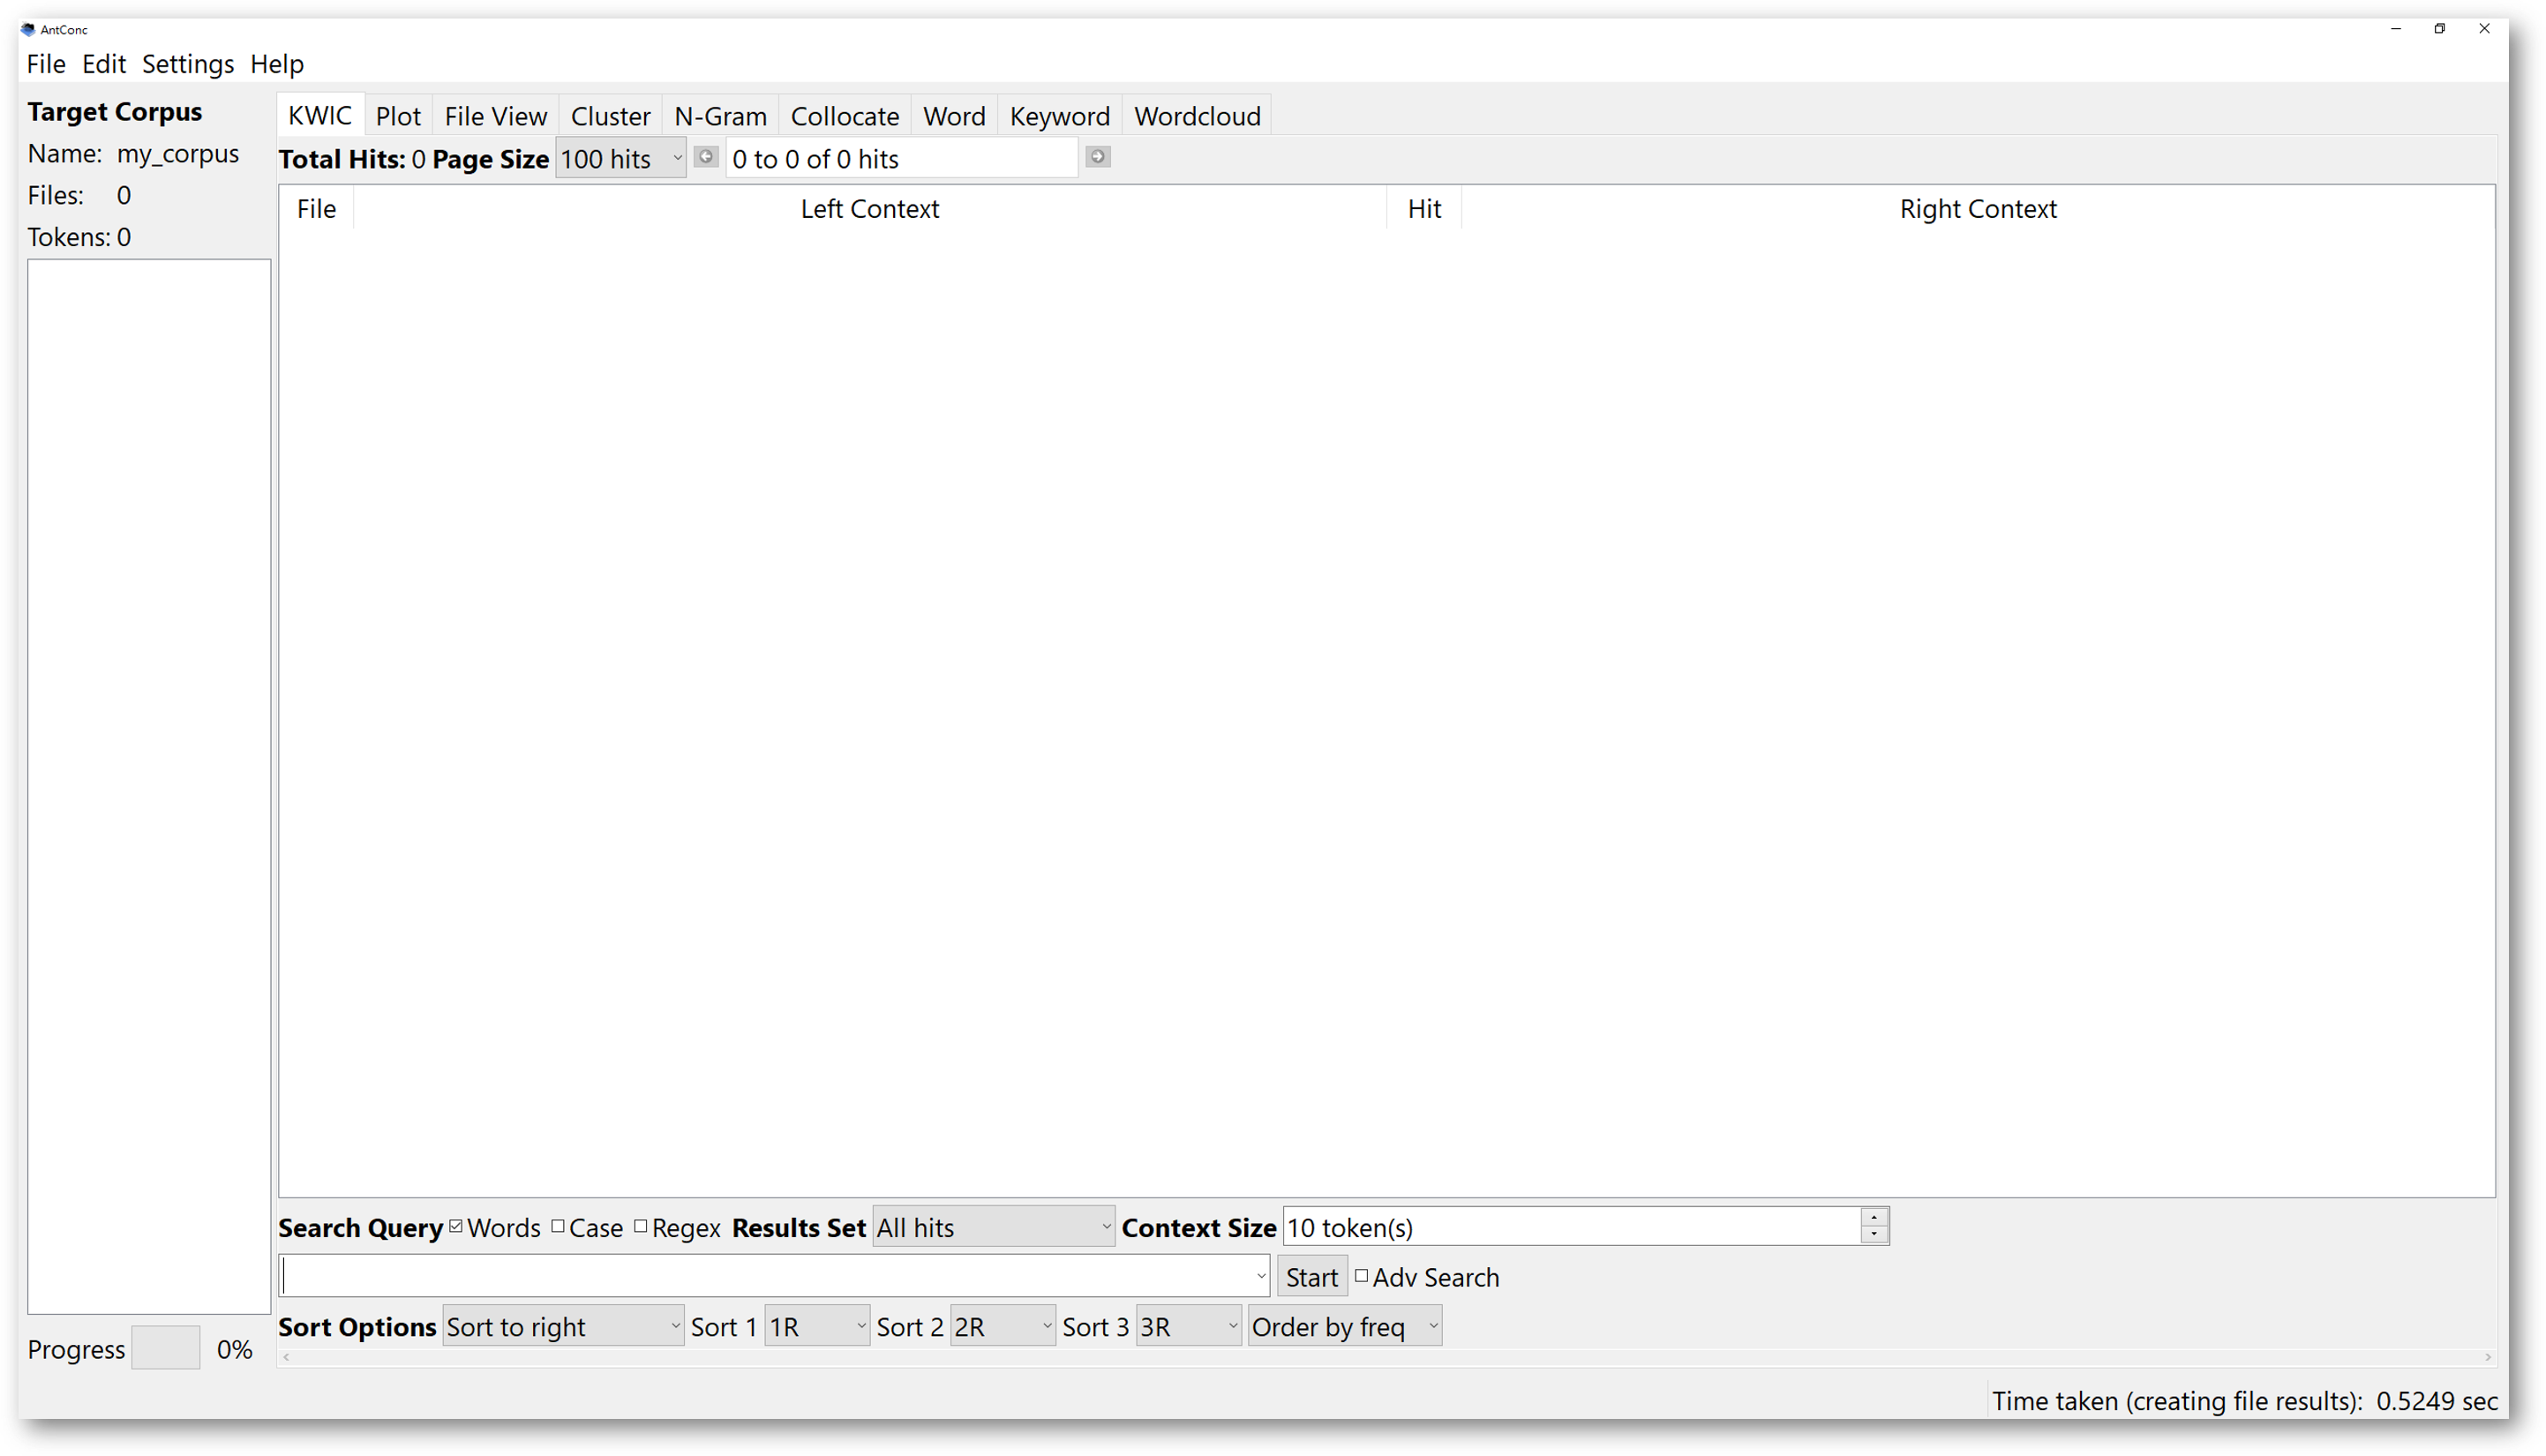
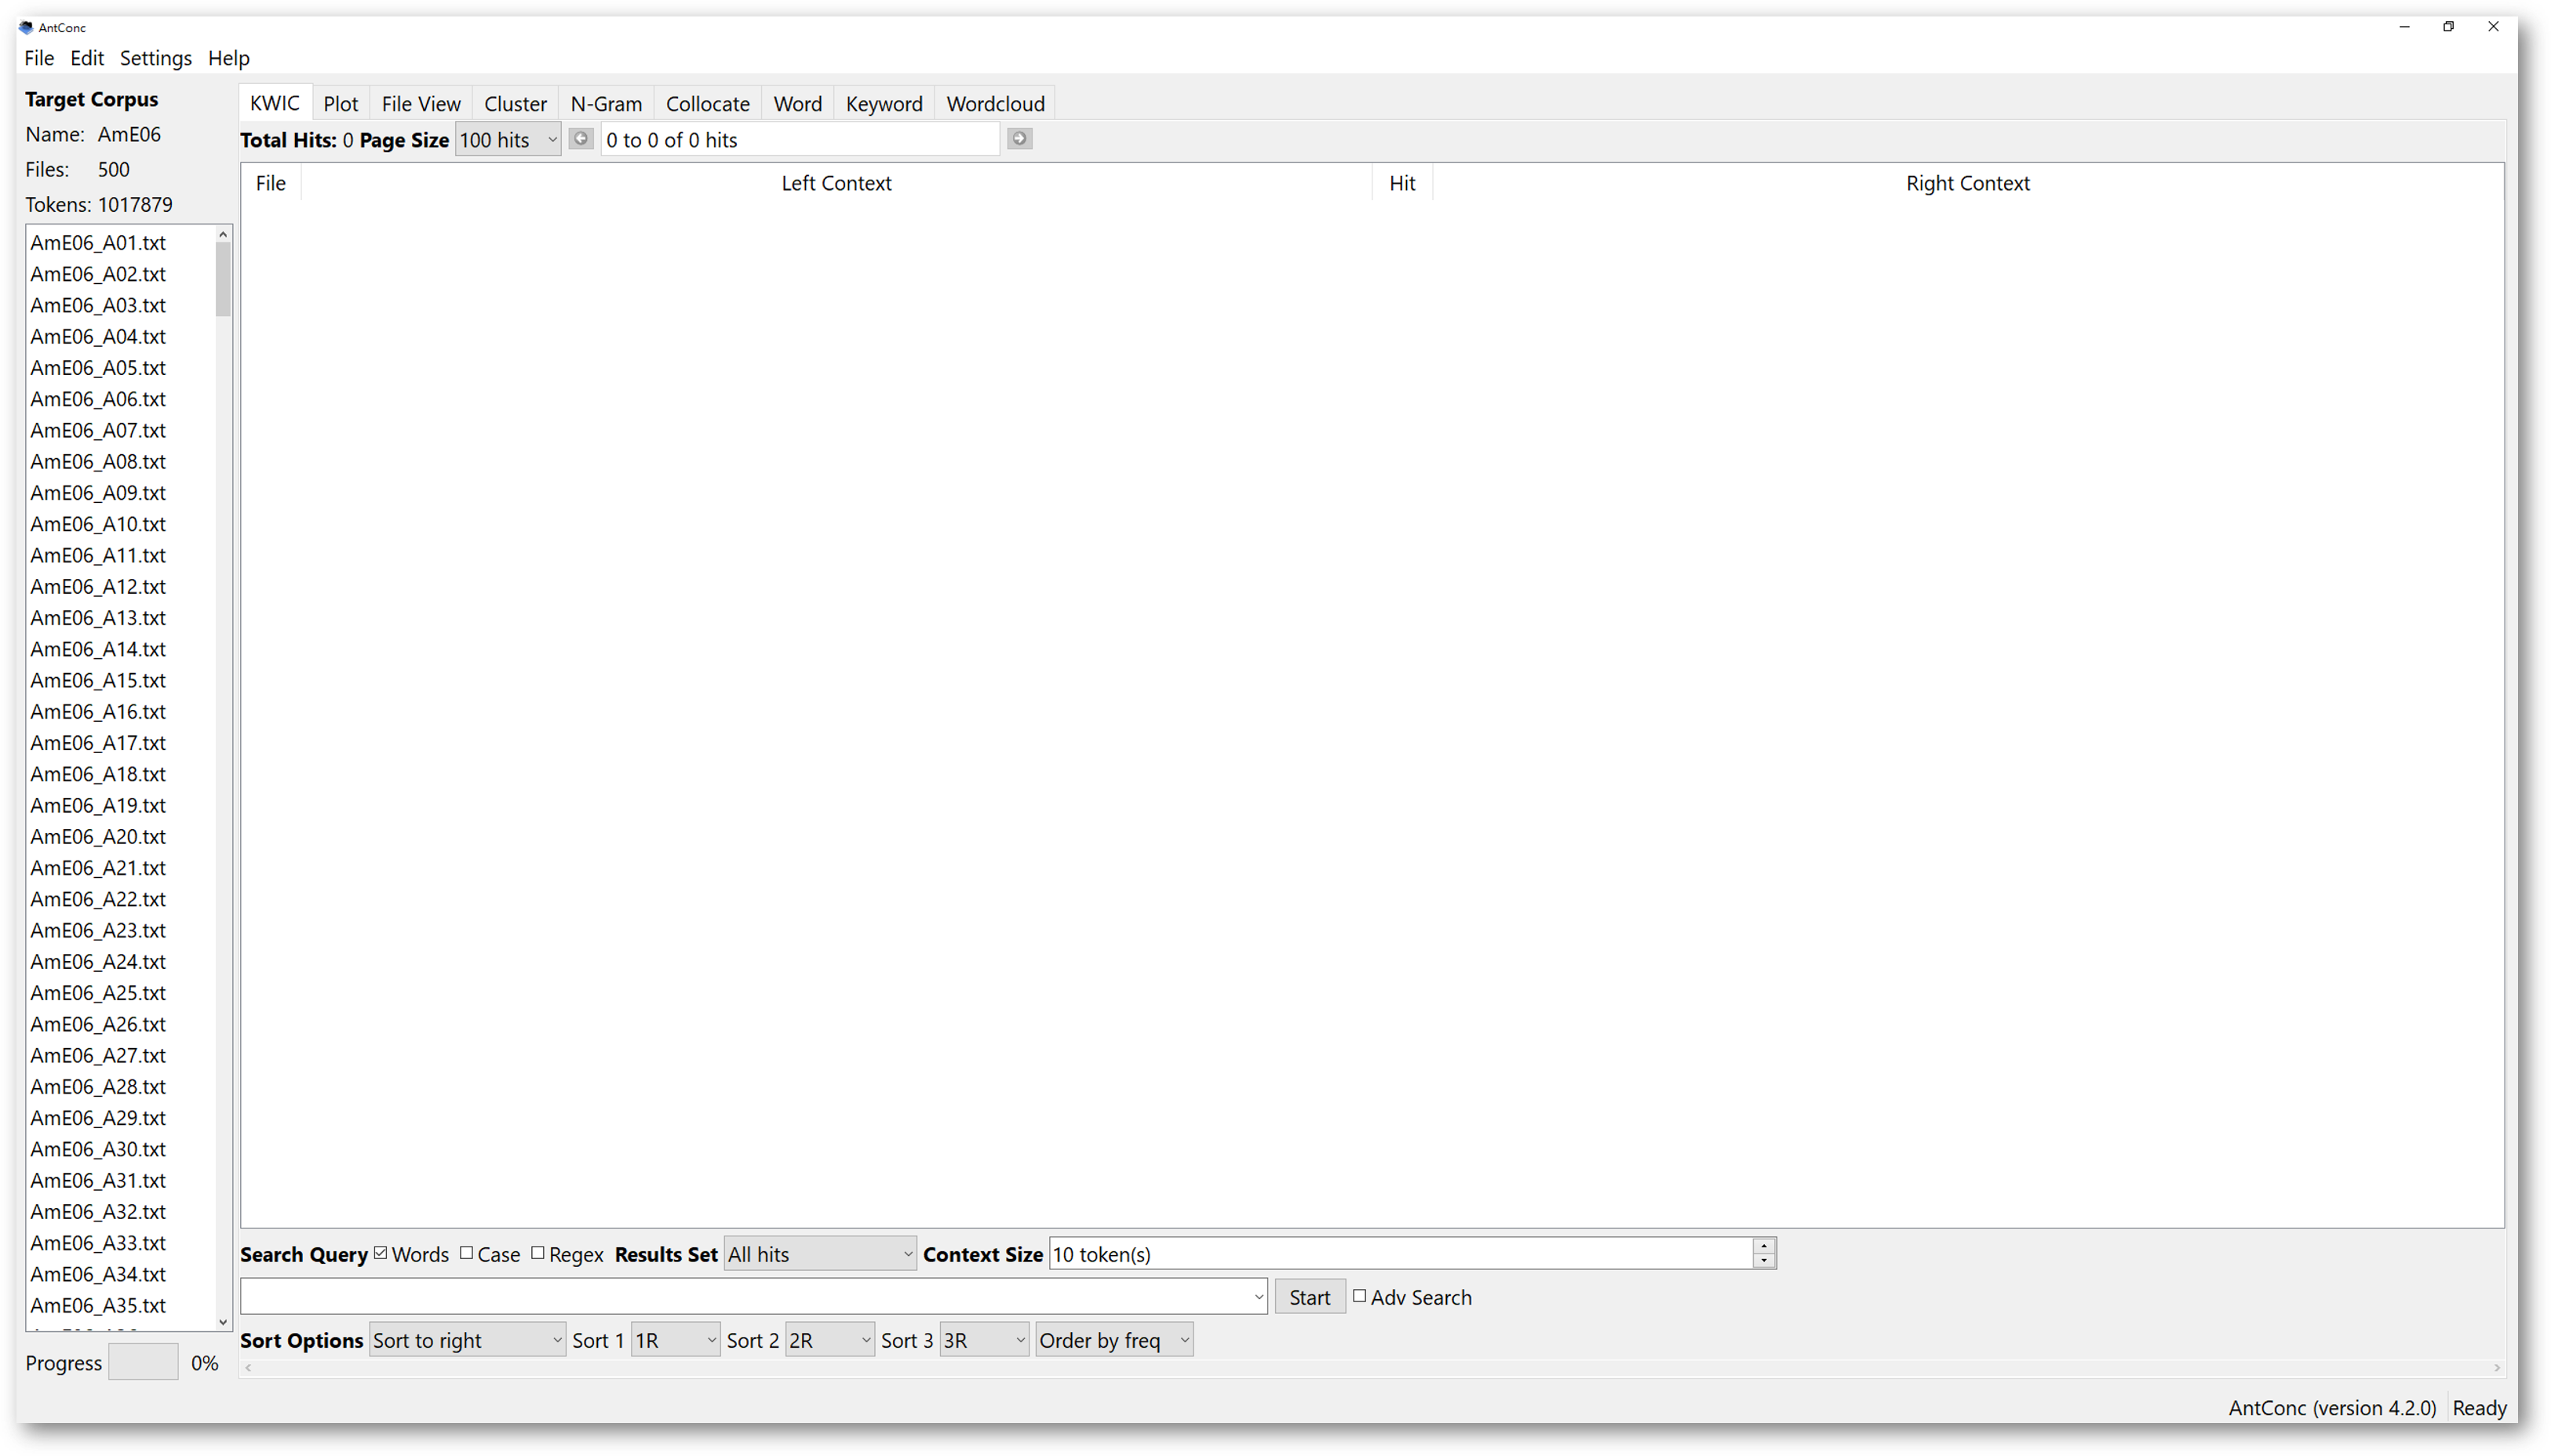
When you first open AntConc on your desktop, by default the KWIC tool is selected. There are other tools which you can switch to at the top panel, including the KWIC, Plot, File View, Cluster, N-Gram, Collocate, Word, Keyword, and Wordcloud tools.
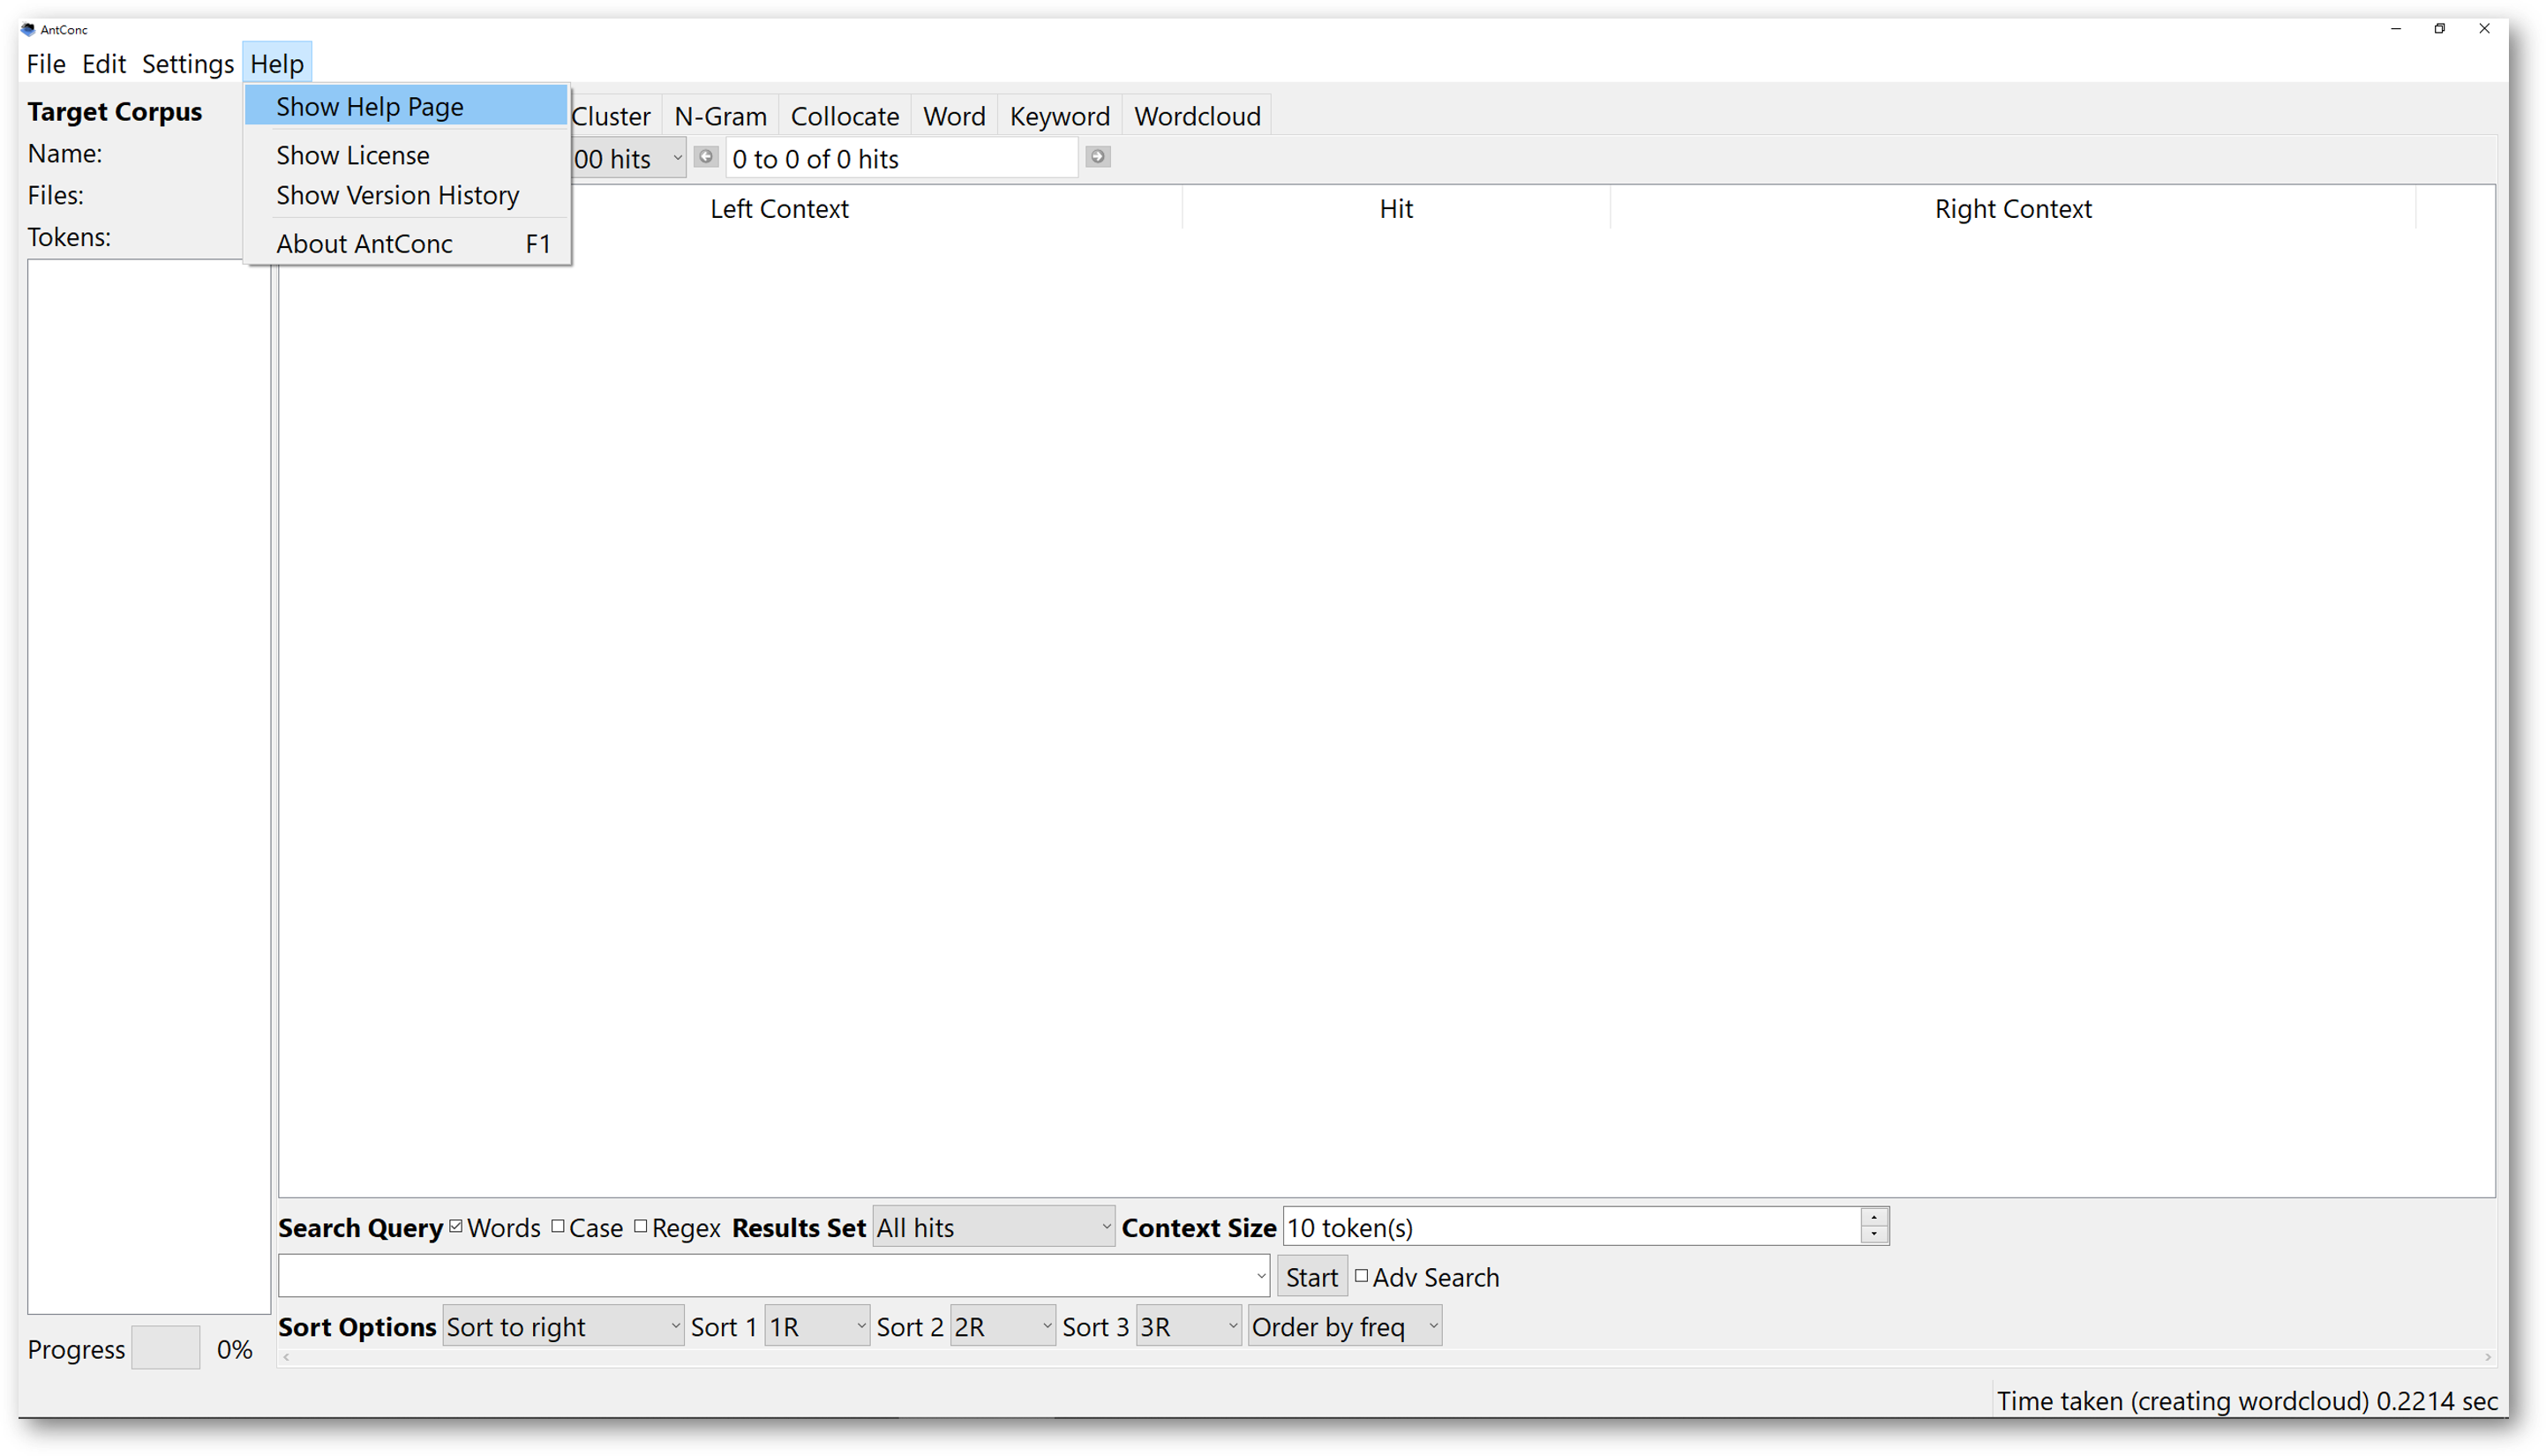
The “Help” is available for you to look for more instructions. It is created by the developer as a help guide for you to use the software. Click on “Help” will open a dropdown menu, then click the “Show Help Page” will bring you to the official document, where you can read the detailed instructions of the software. You can also refer to “Show Version History” from the dropdown menu and learn about all previous updates of the software.
Another important configuration is the fonts of the interface. In the “Global Settings”, you can change the font types and sizes that will be displayed in the software. If you find the interface too small, you can change the font size of the whole interface to fit your own screen.

2. Corpus manager
The corpus manager is a relatively new facilitation created by the developer. It is a very convenient function for you to manage your corpus data.
Since AntConc is a tool for running analysis of corpus data, it is not a corpus itself. However, AntConc comes with online texts available to download from its official hosting source.
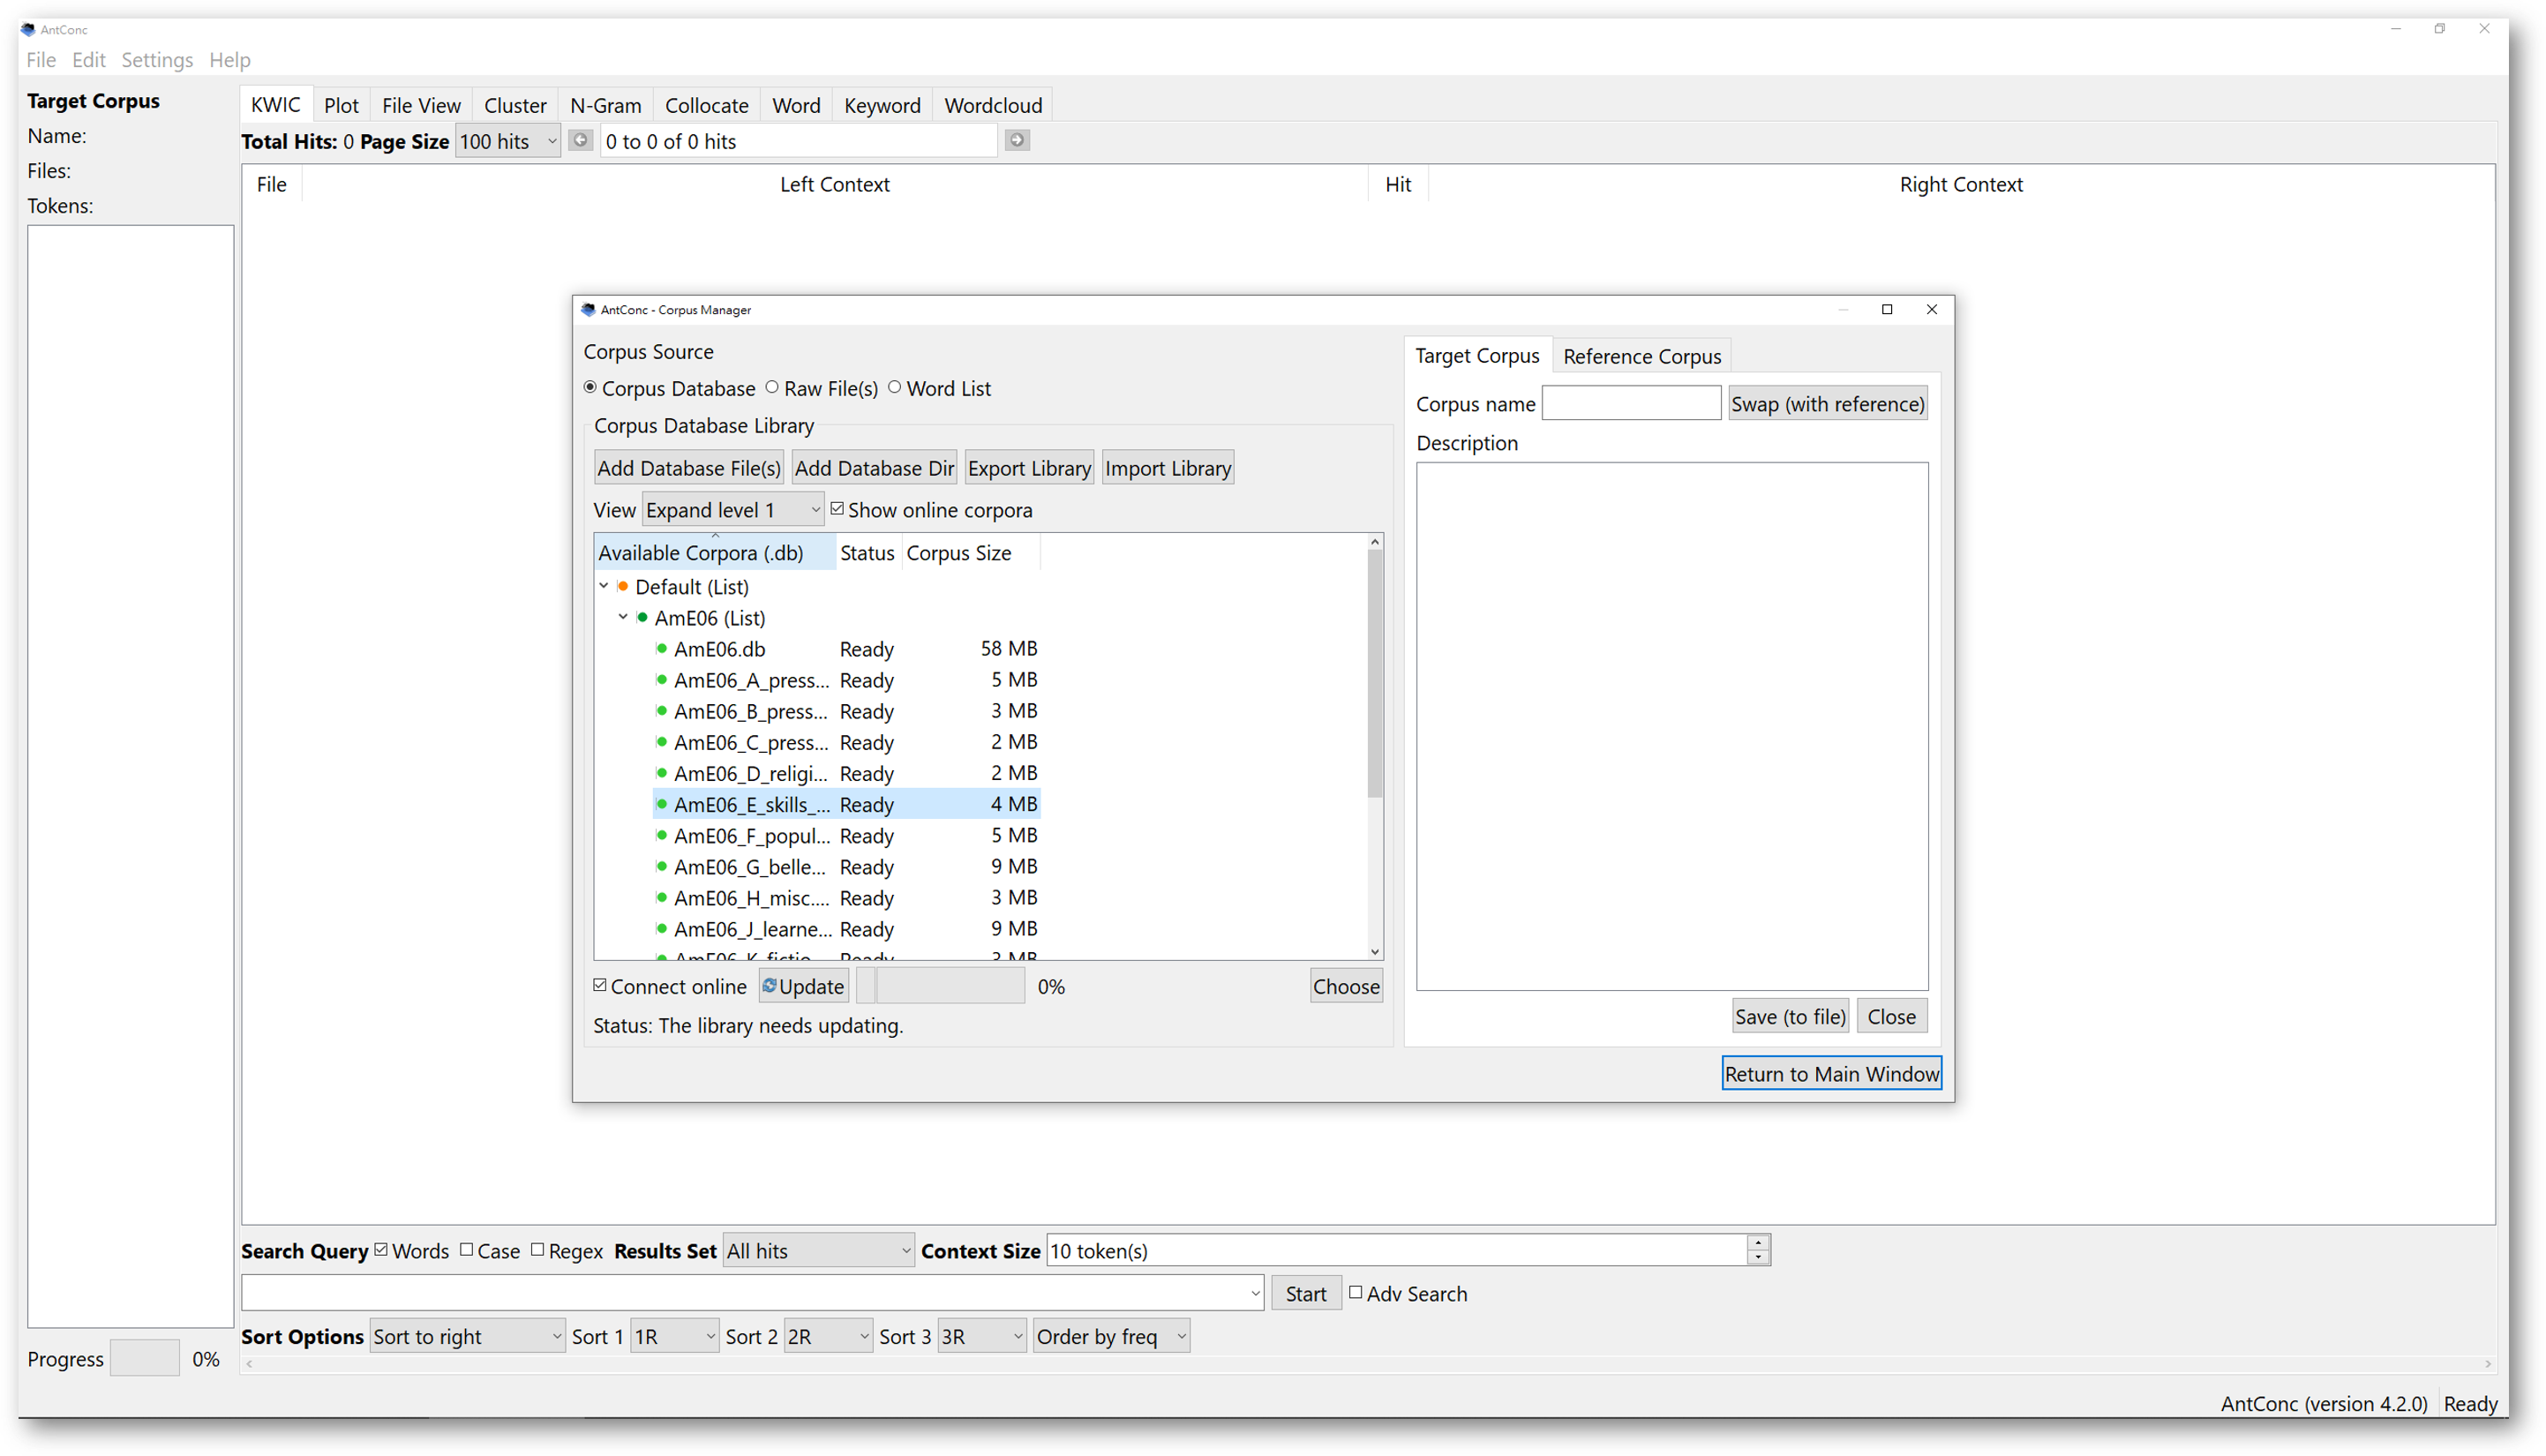
To download the official texts and use them to compile a corpus, once you open AntConc, find the “File” and click on the second option in the dropdown menu “Open Corpus Manager”.

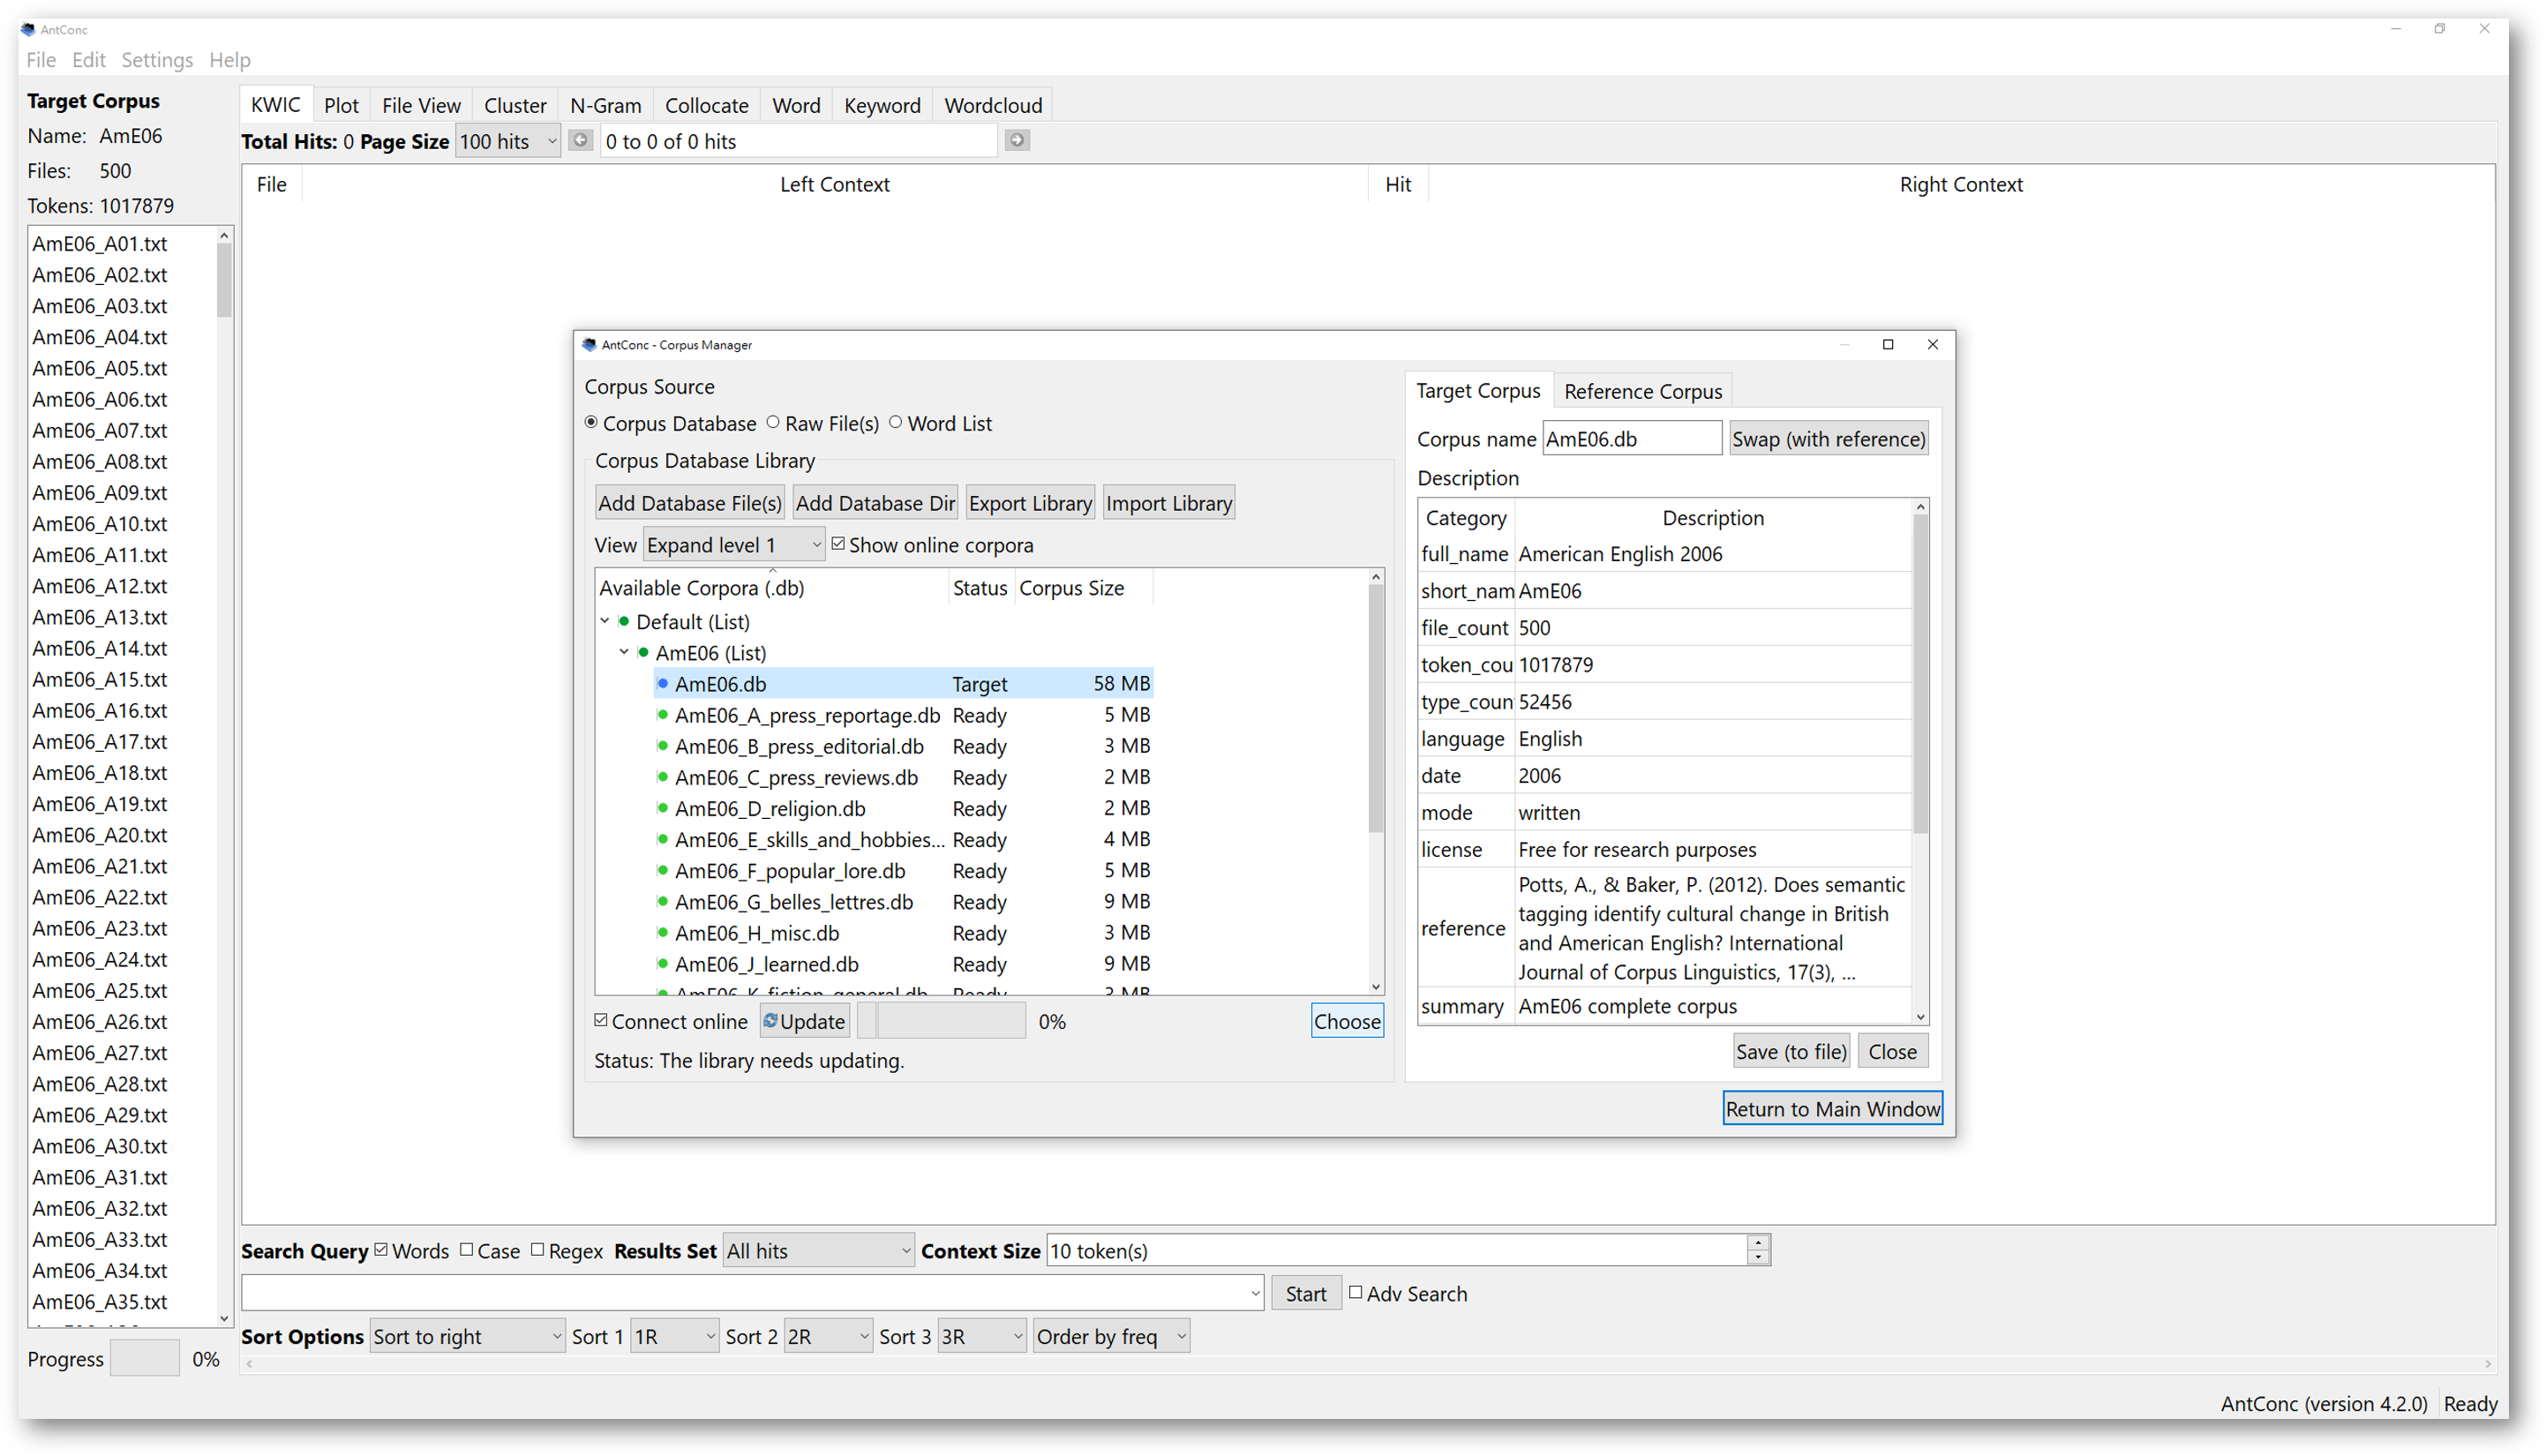
Check the “Show online corpora” box to see all the online corpora available to download. You can then see “Default (List)”, and “AmE06 (List)”.
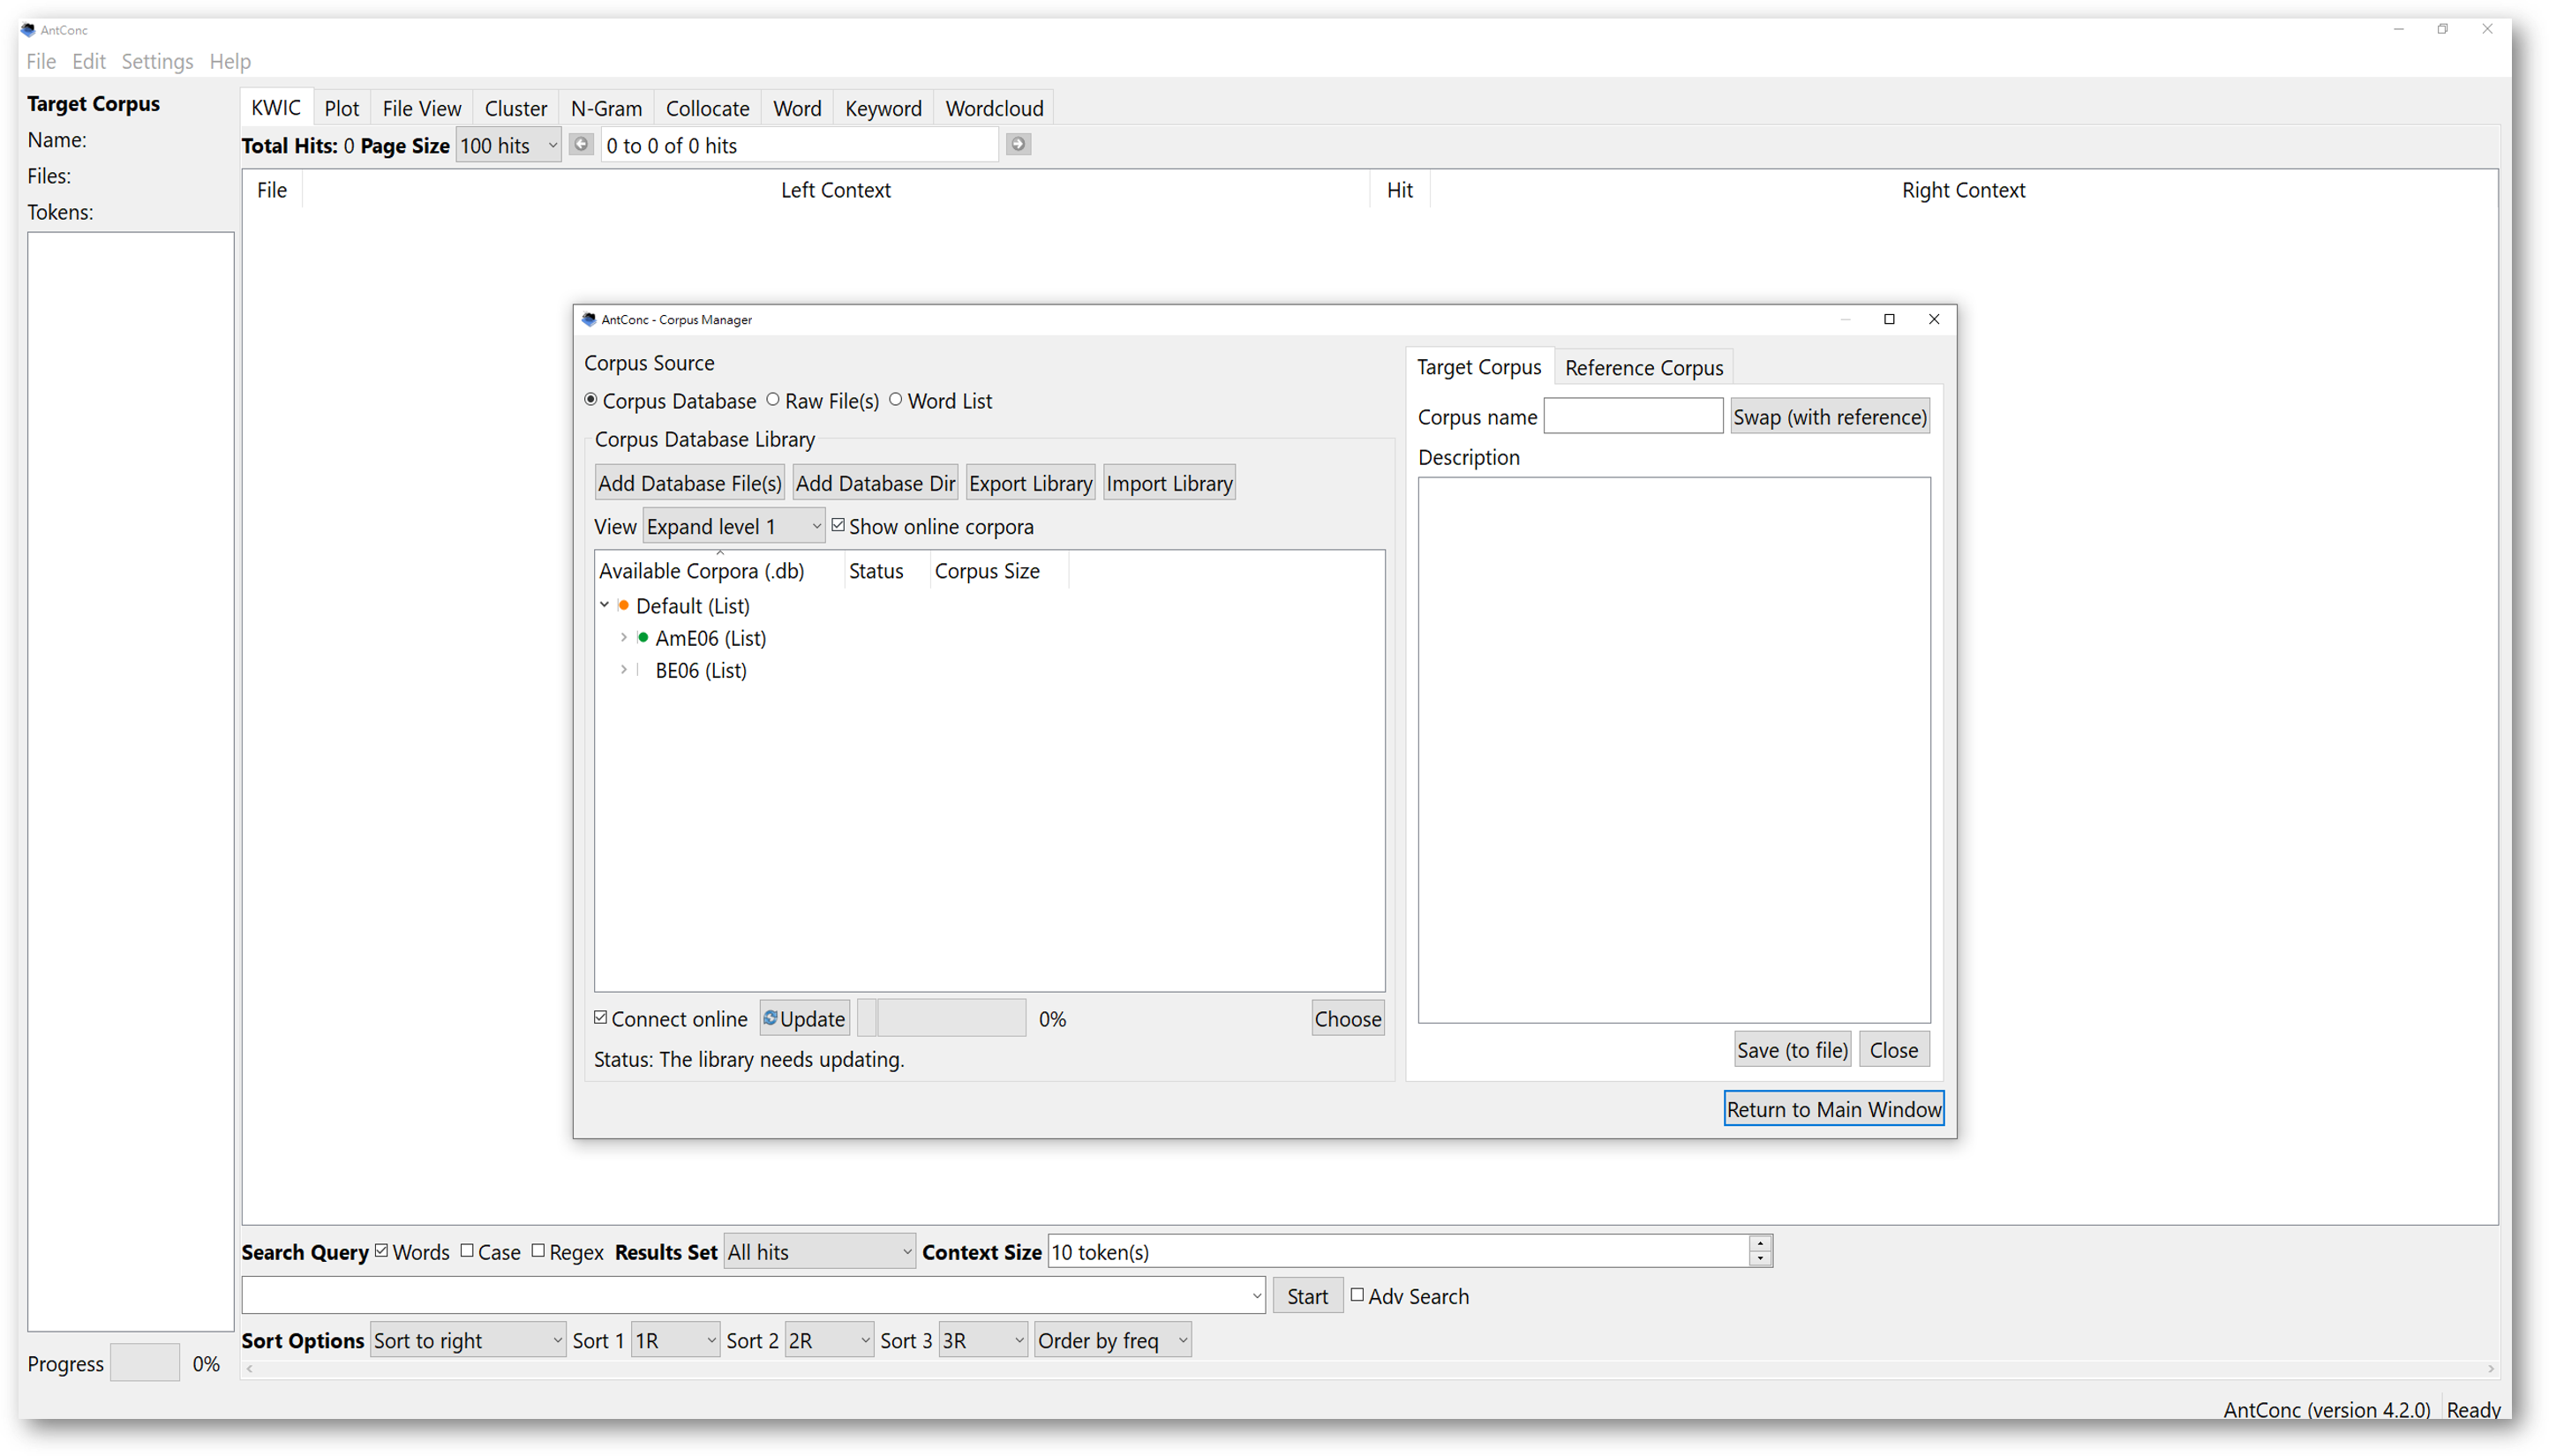
The “AmE06” corpus is from the family of Brown Corpus. It is a corpus compiled of 500 files of 2000 words taken from 15 subgenres of writing in American English.
You may want to look at what the corpora are about by expanding the section to view the metadata of the corpora.
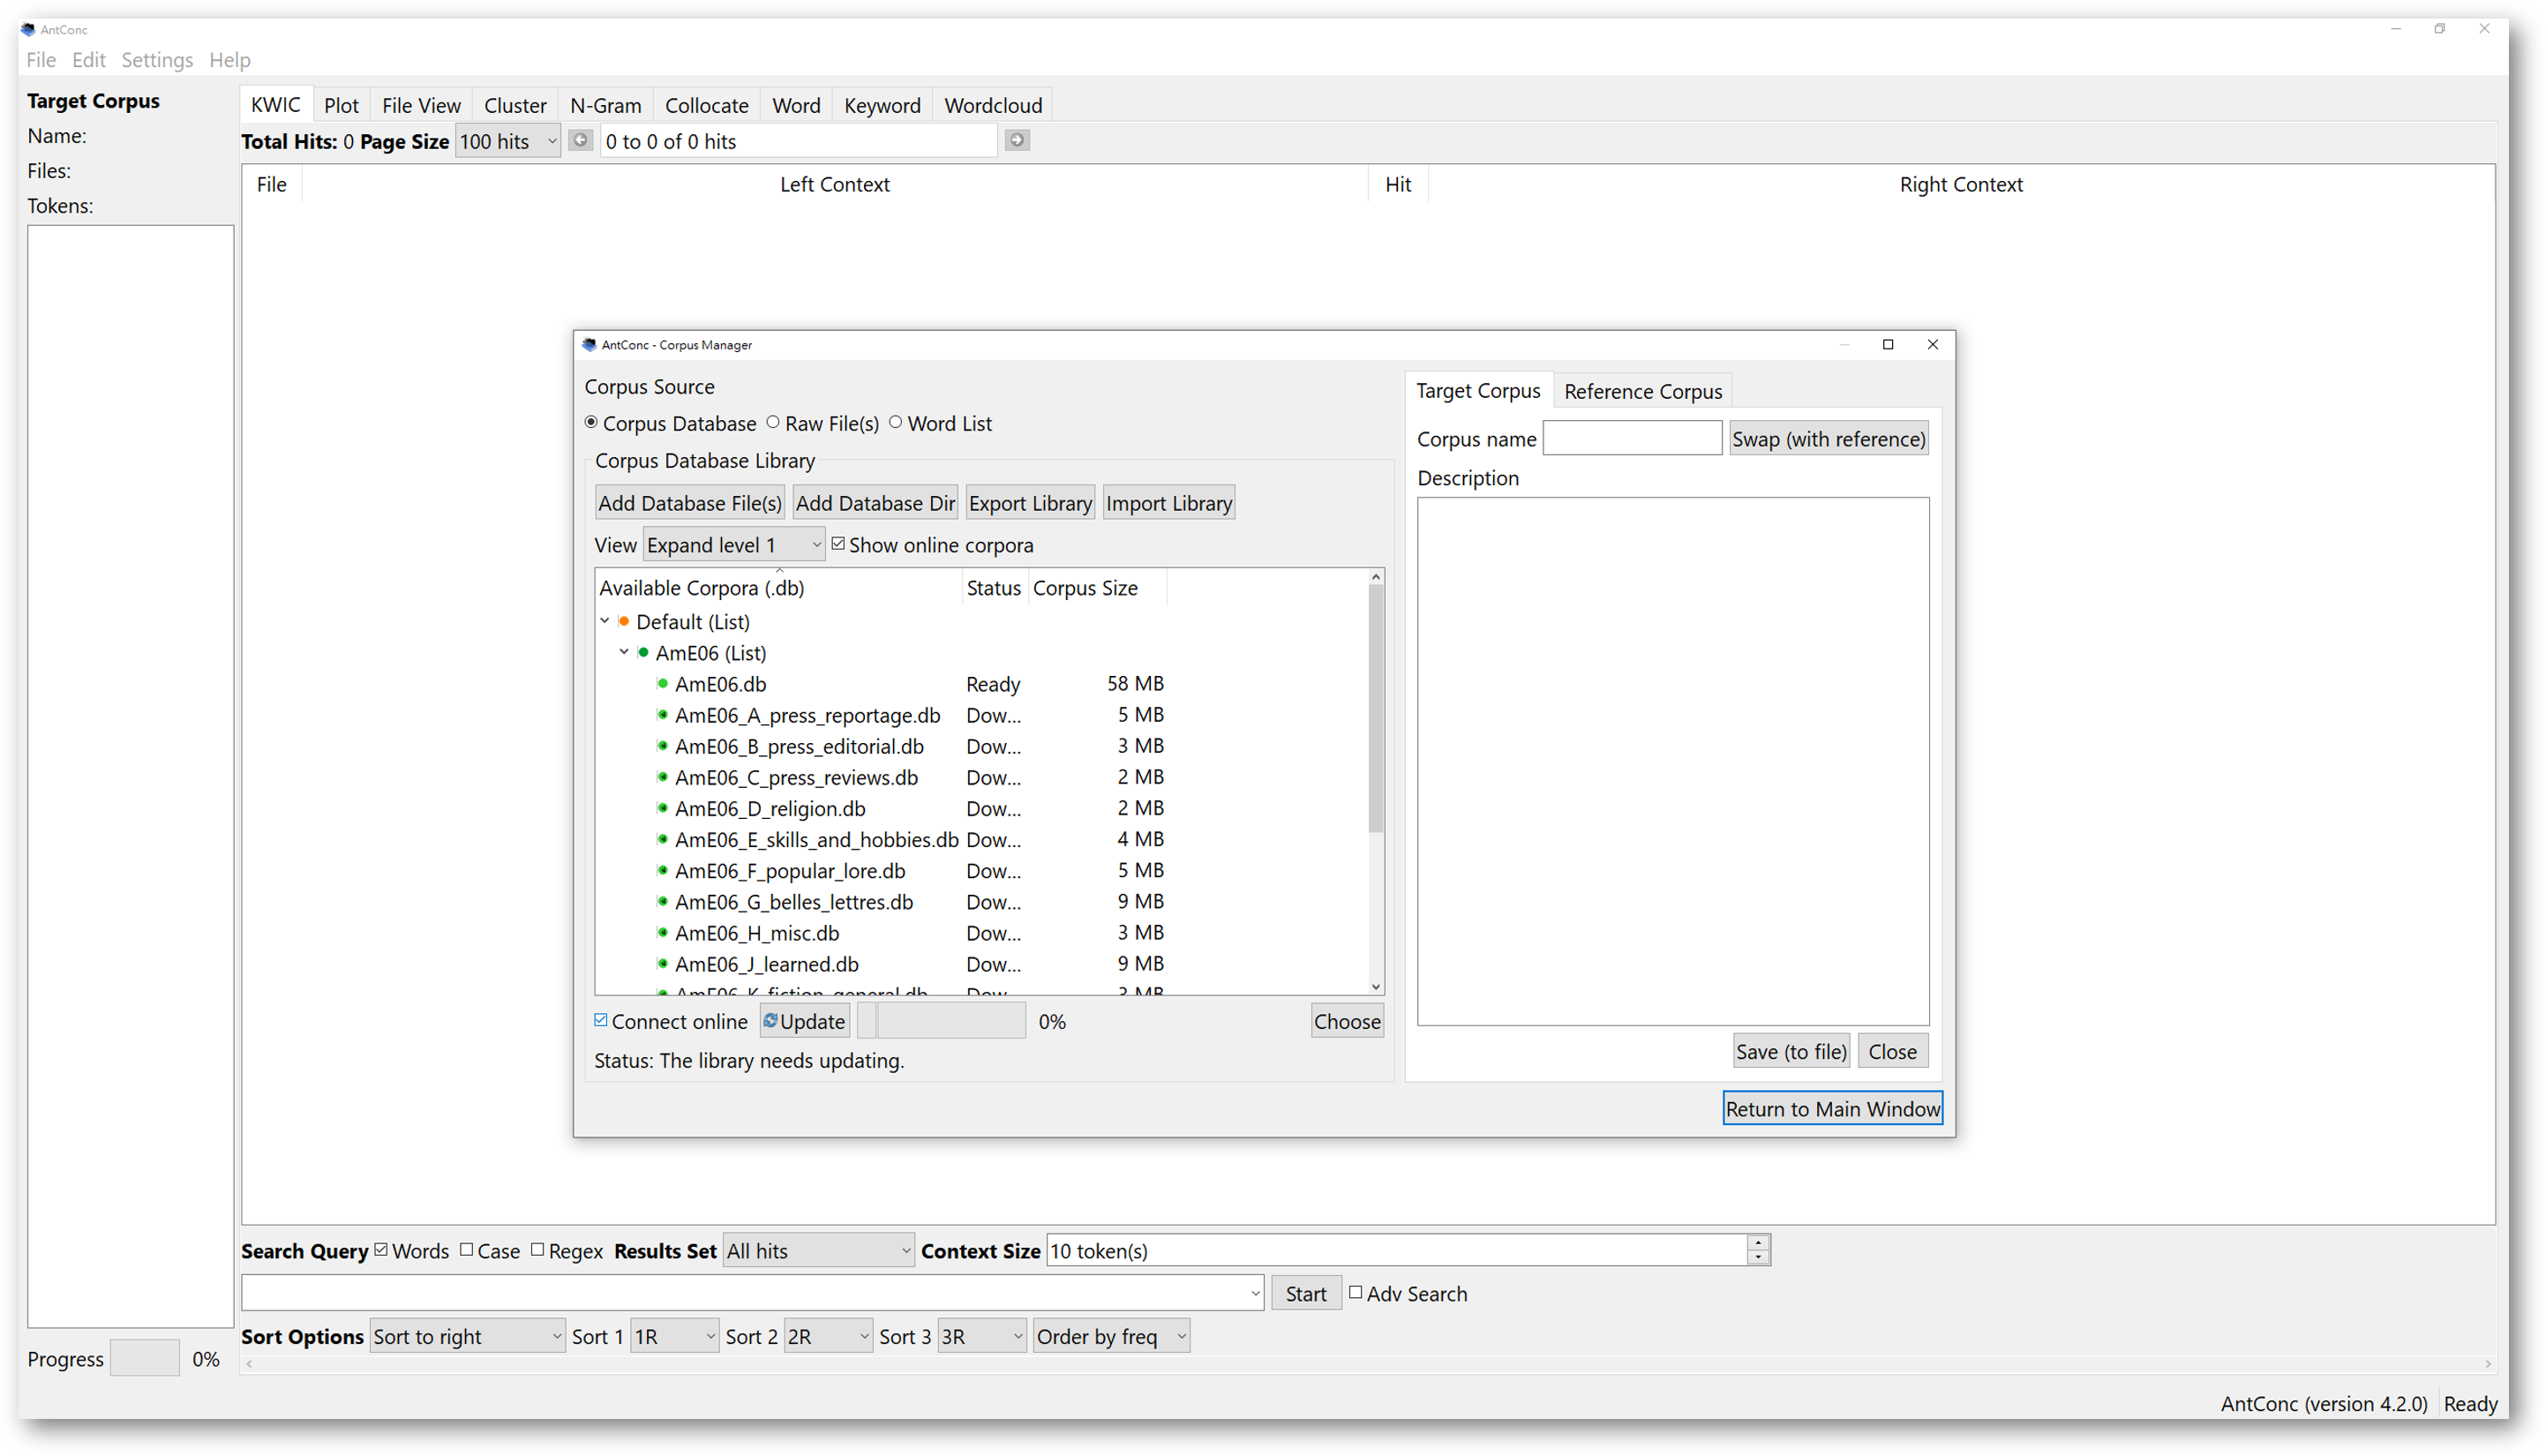
If you want to selectively choose a few corpora to download, you can also open the dropdown menu by clicking the small arrow on the left. Then, you can choose what to download. Once you’ve made your selection, go down below and tick ‘connect online’. The software will ask you to confirm the download procedure from the Internet. If you do not tick the box, the update won’t begin, and nothing will be imported.

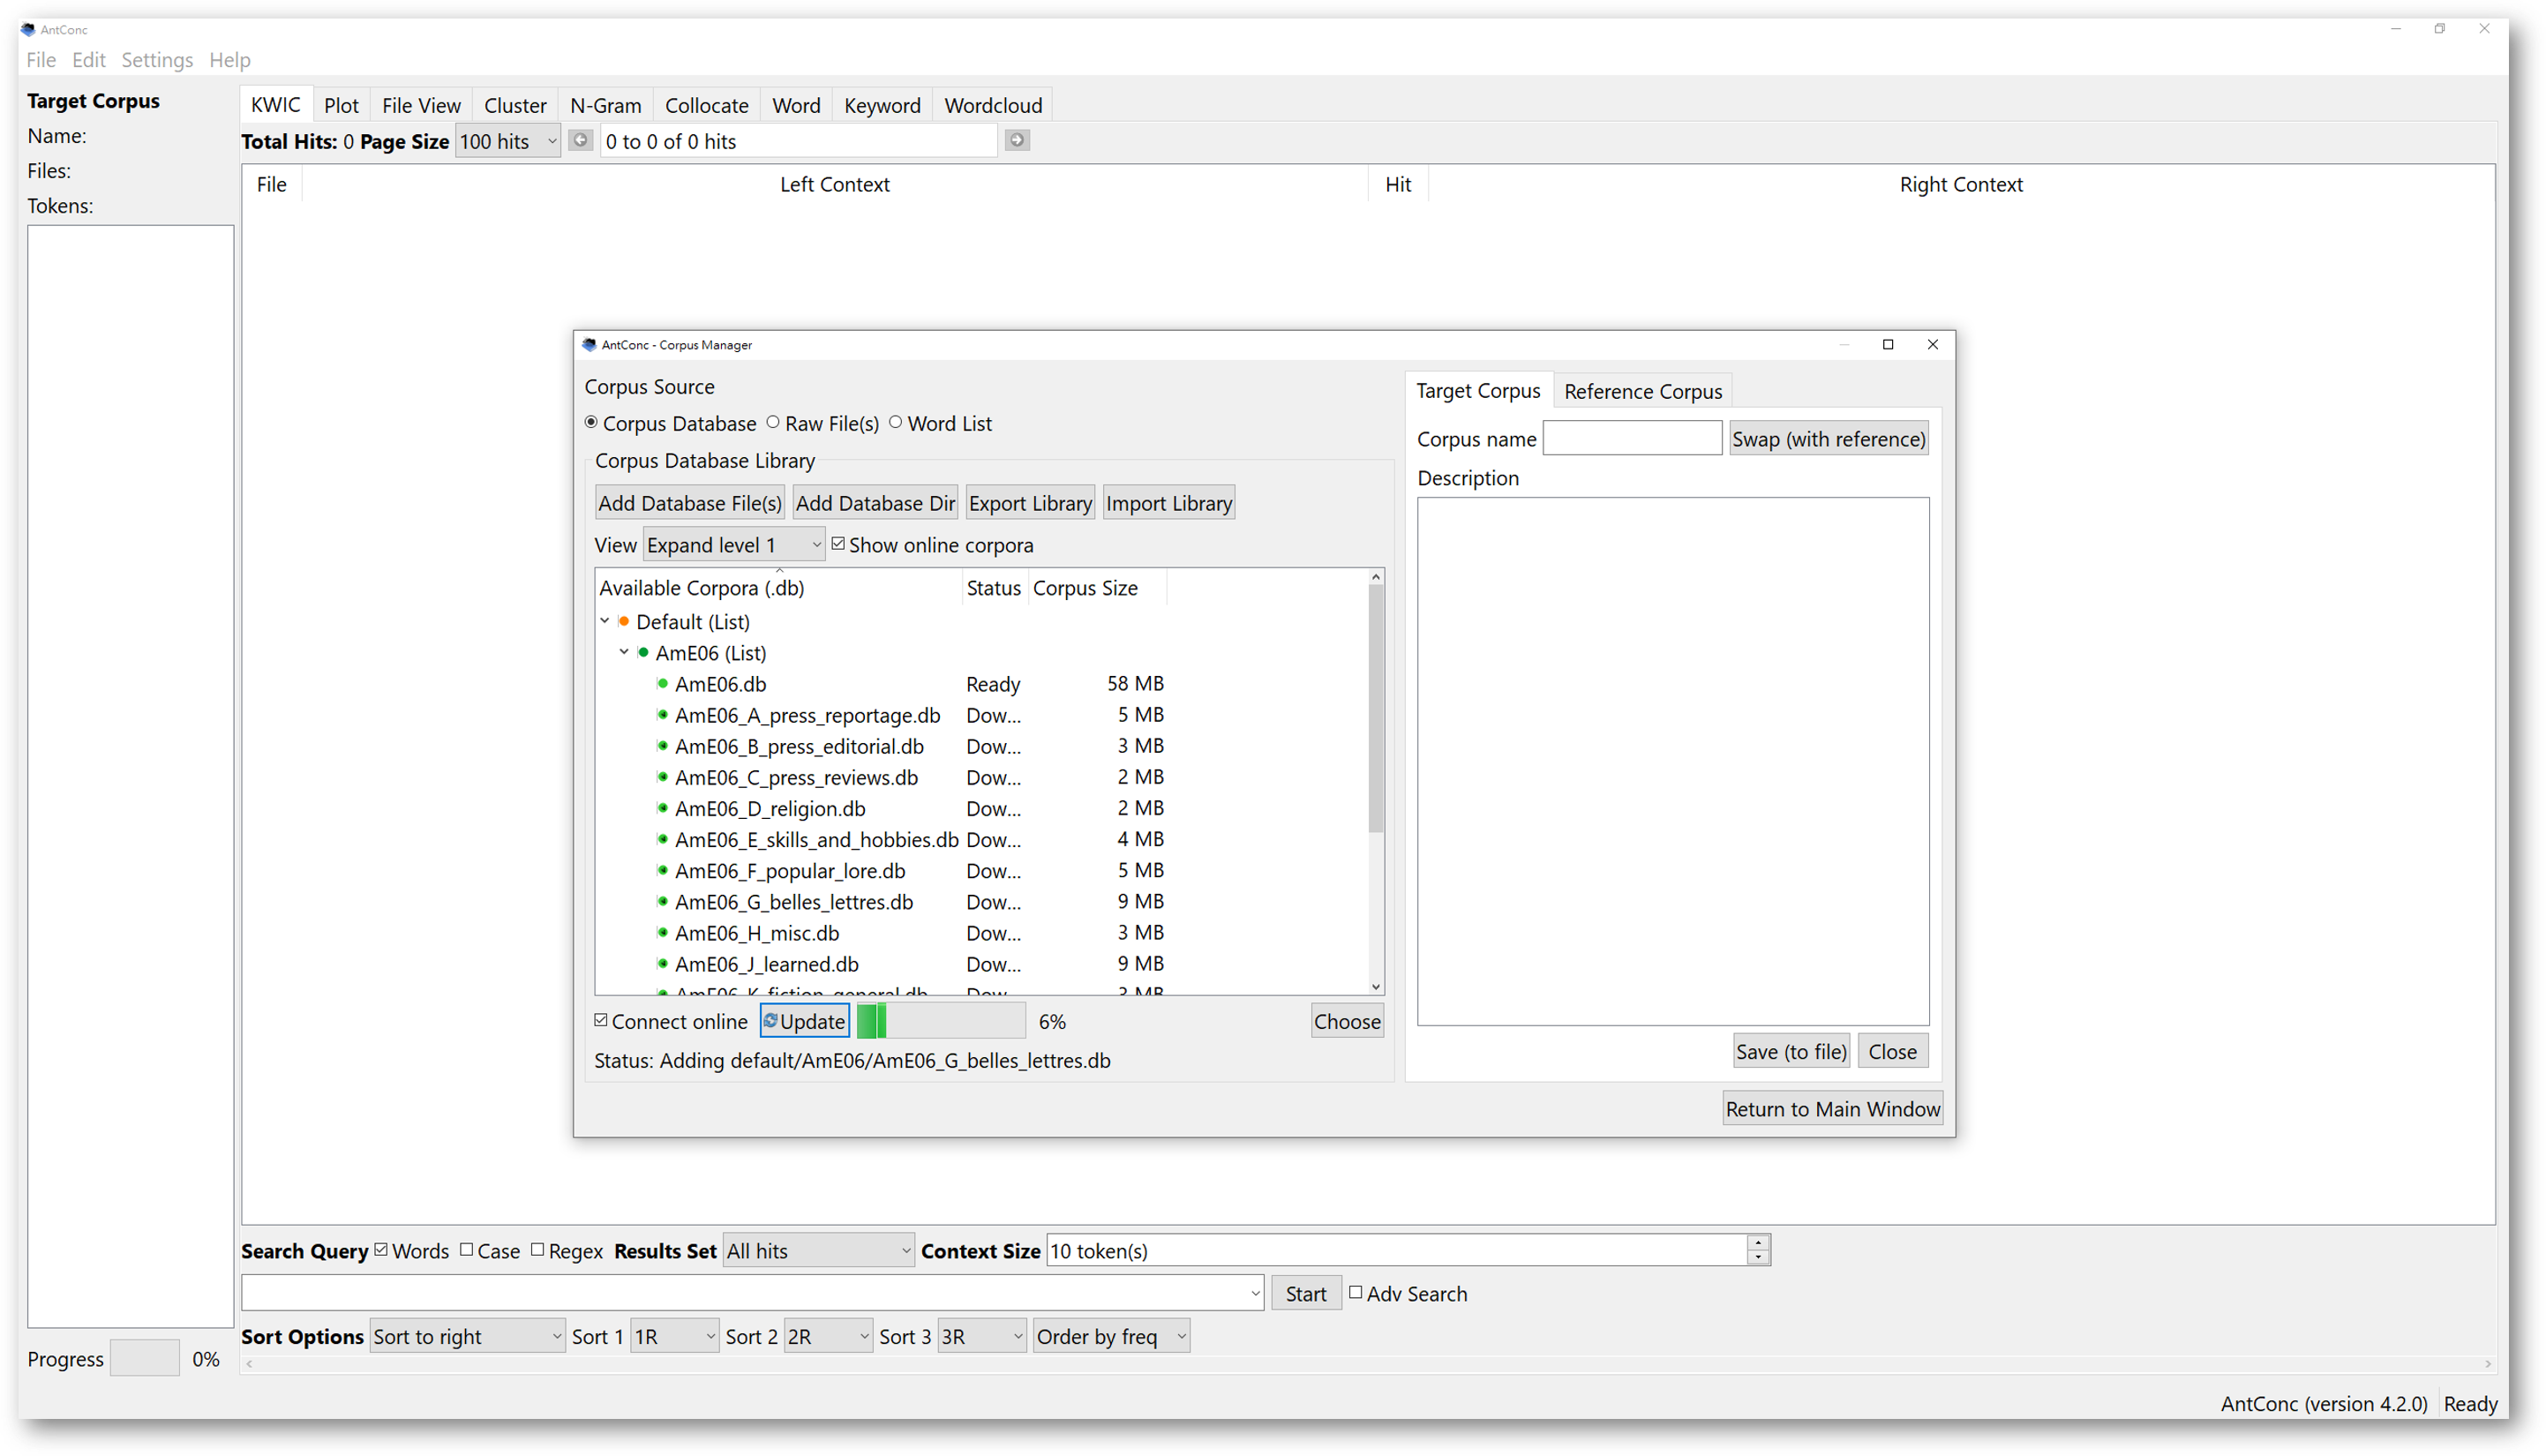
Once the import finishes, a pop-up message will alert you the library is updated. This means that you have successfully imported the selected corpora. Now, you have a library of selected corpora.
Note that, these files are stored in the ‘.db’ format, meaning database files. AntConc will process corpora in database format. A database file may contain a number of selected texts, making it a corpus. After importing, you can select the corpus or corpora you wish to use for analysis.
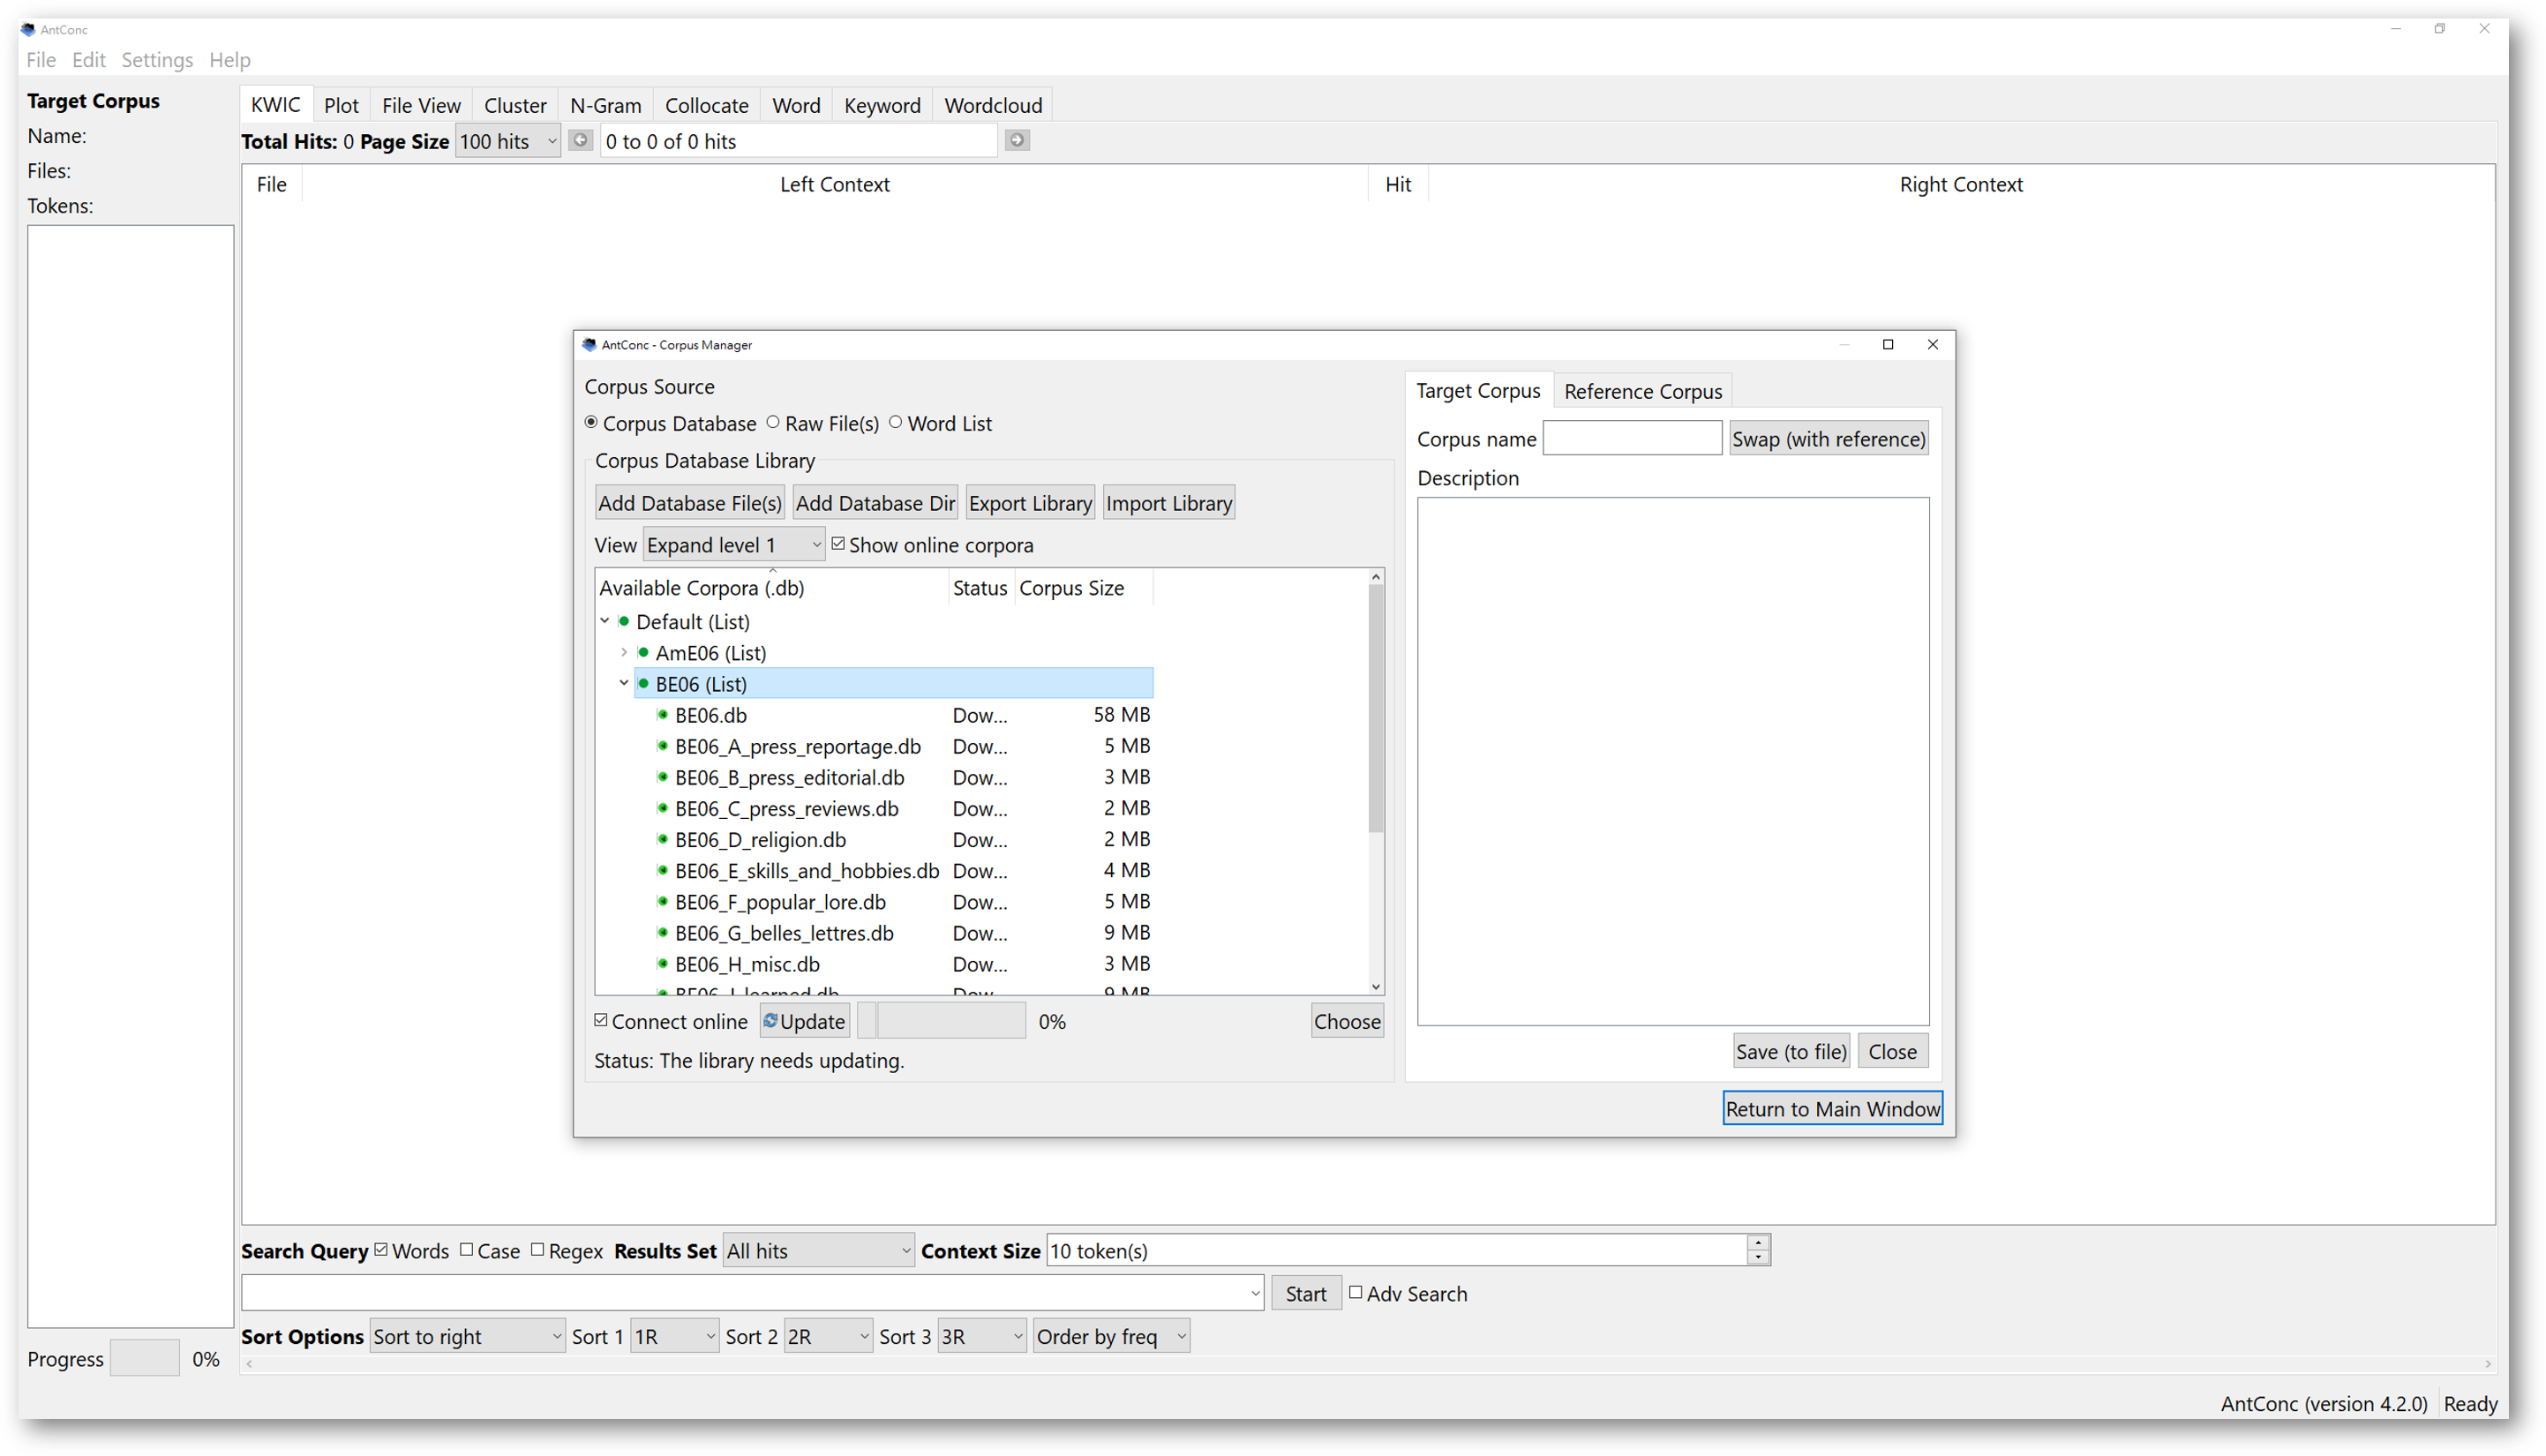
Downloaded corpora are lit in green, and the status bar should say “ready”. Click on any corpus you wish to analyse, and press choose below. You can also just double click the files. Then, click “return to main window”. You will now have a target corpus.
To create a self-built corpus using different file formats, in the ‘Corpus Manager’, select “Raw Files” instead. AntConc support many text formats, including plain texts, table files, HTML or XML files, Word files, and PDFs.
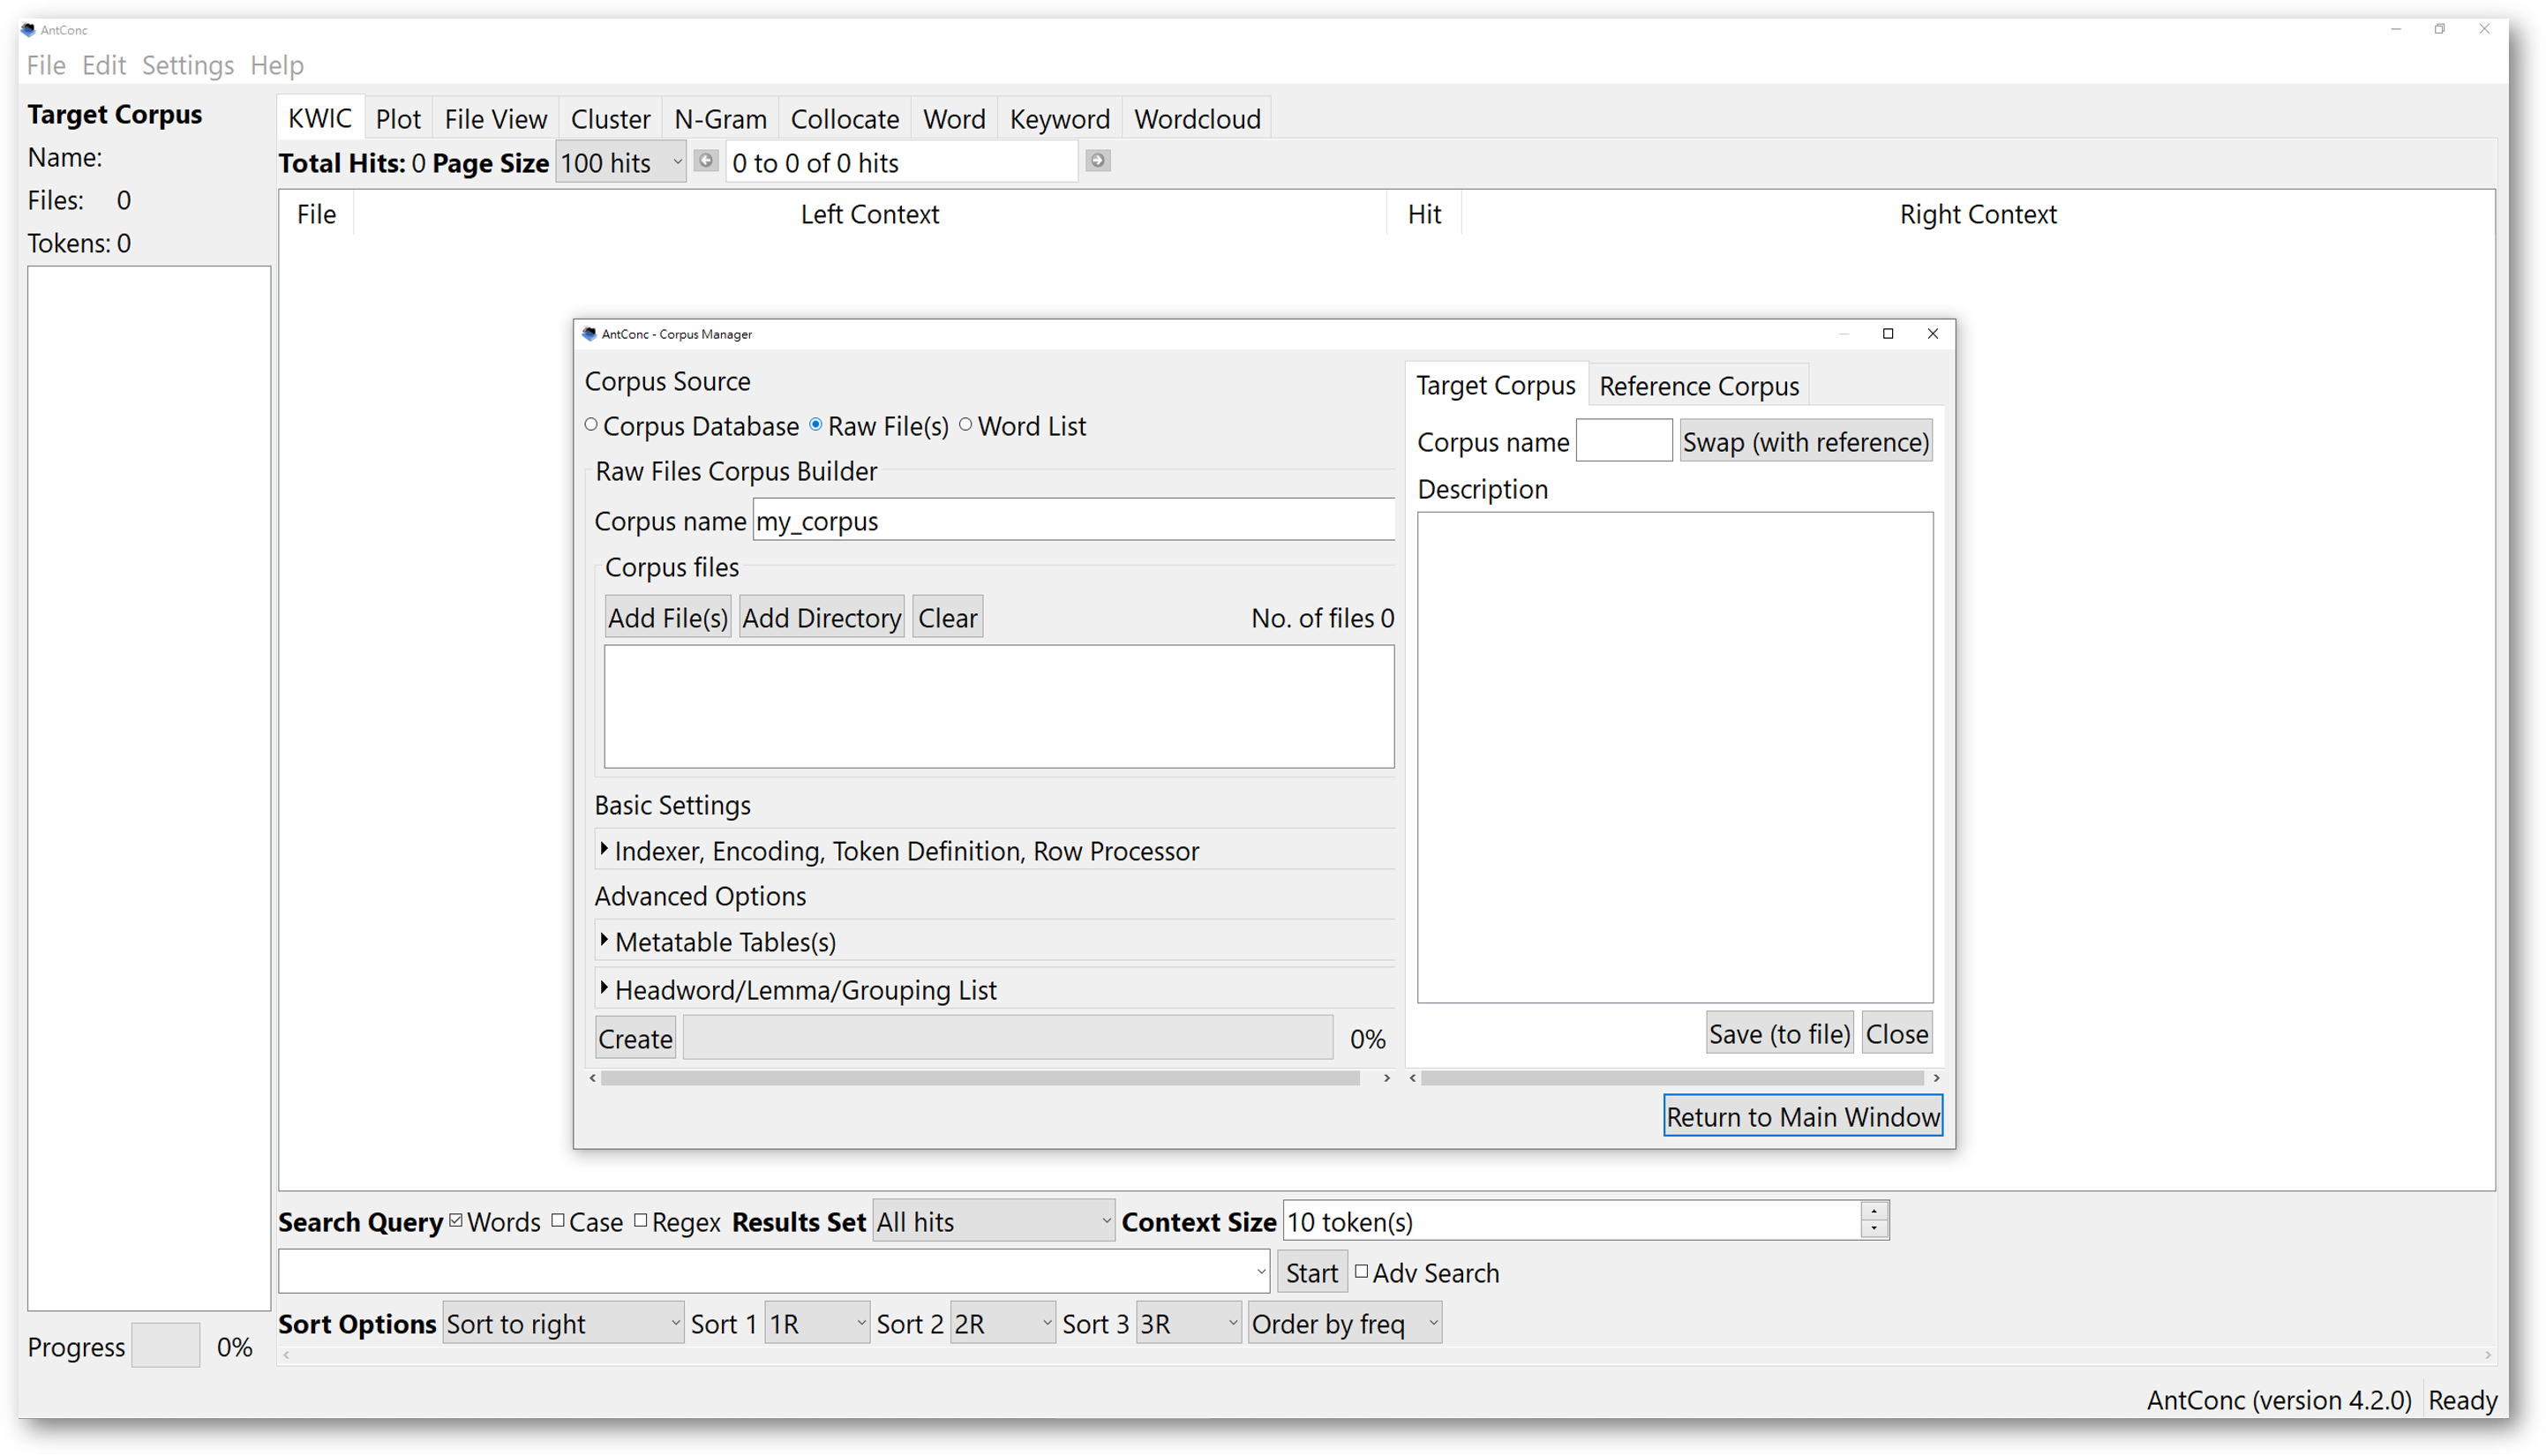
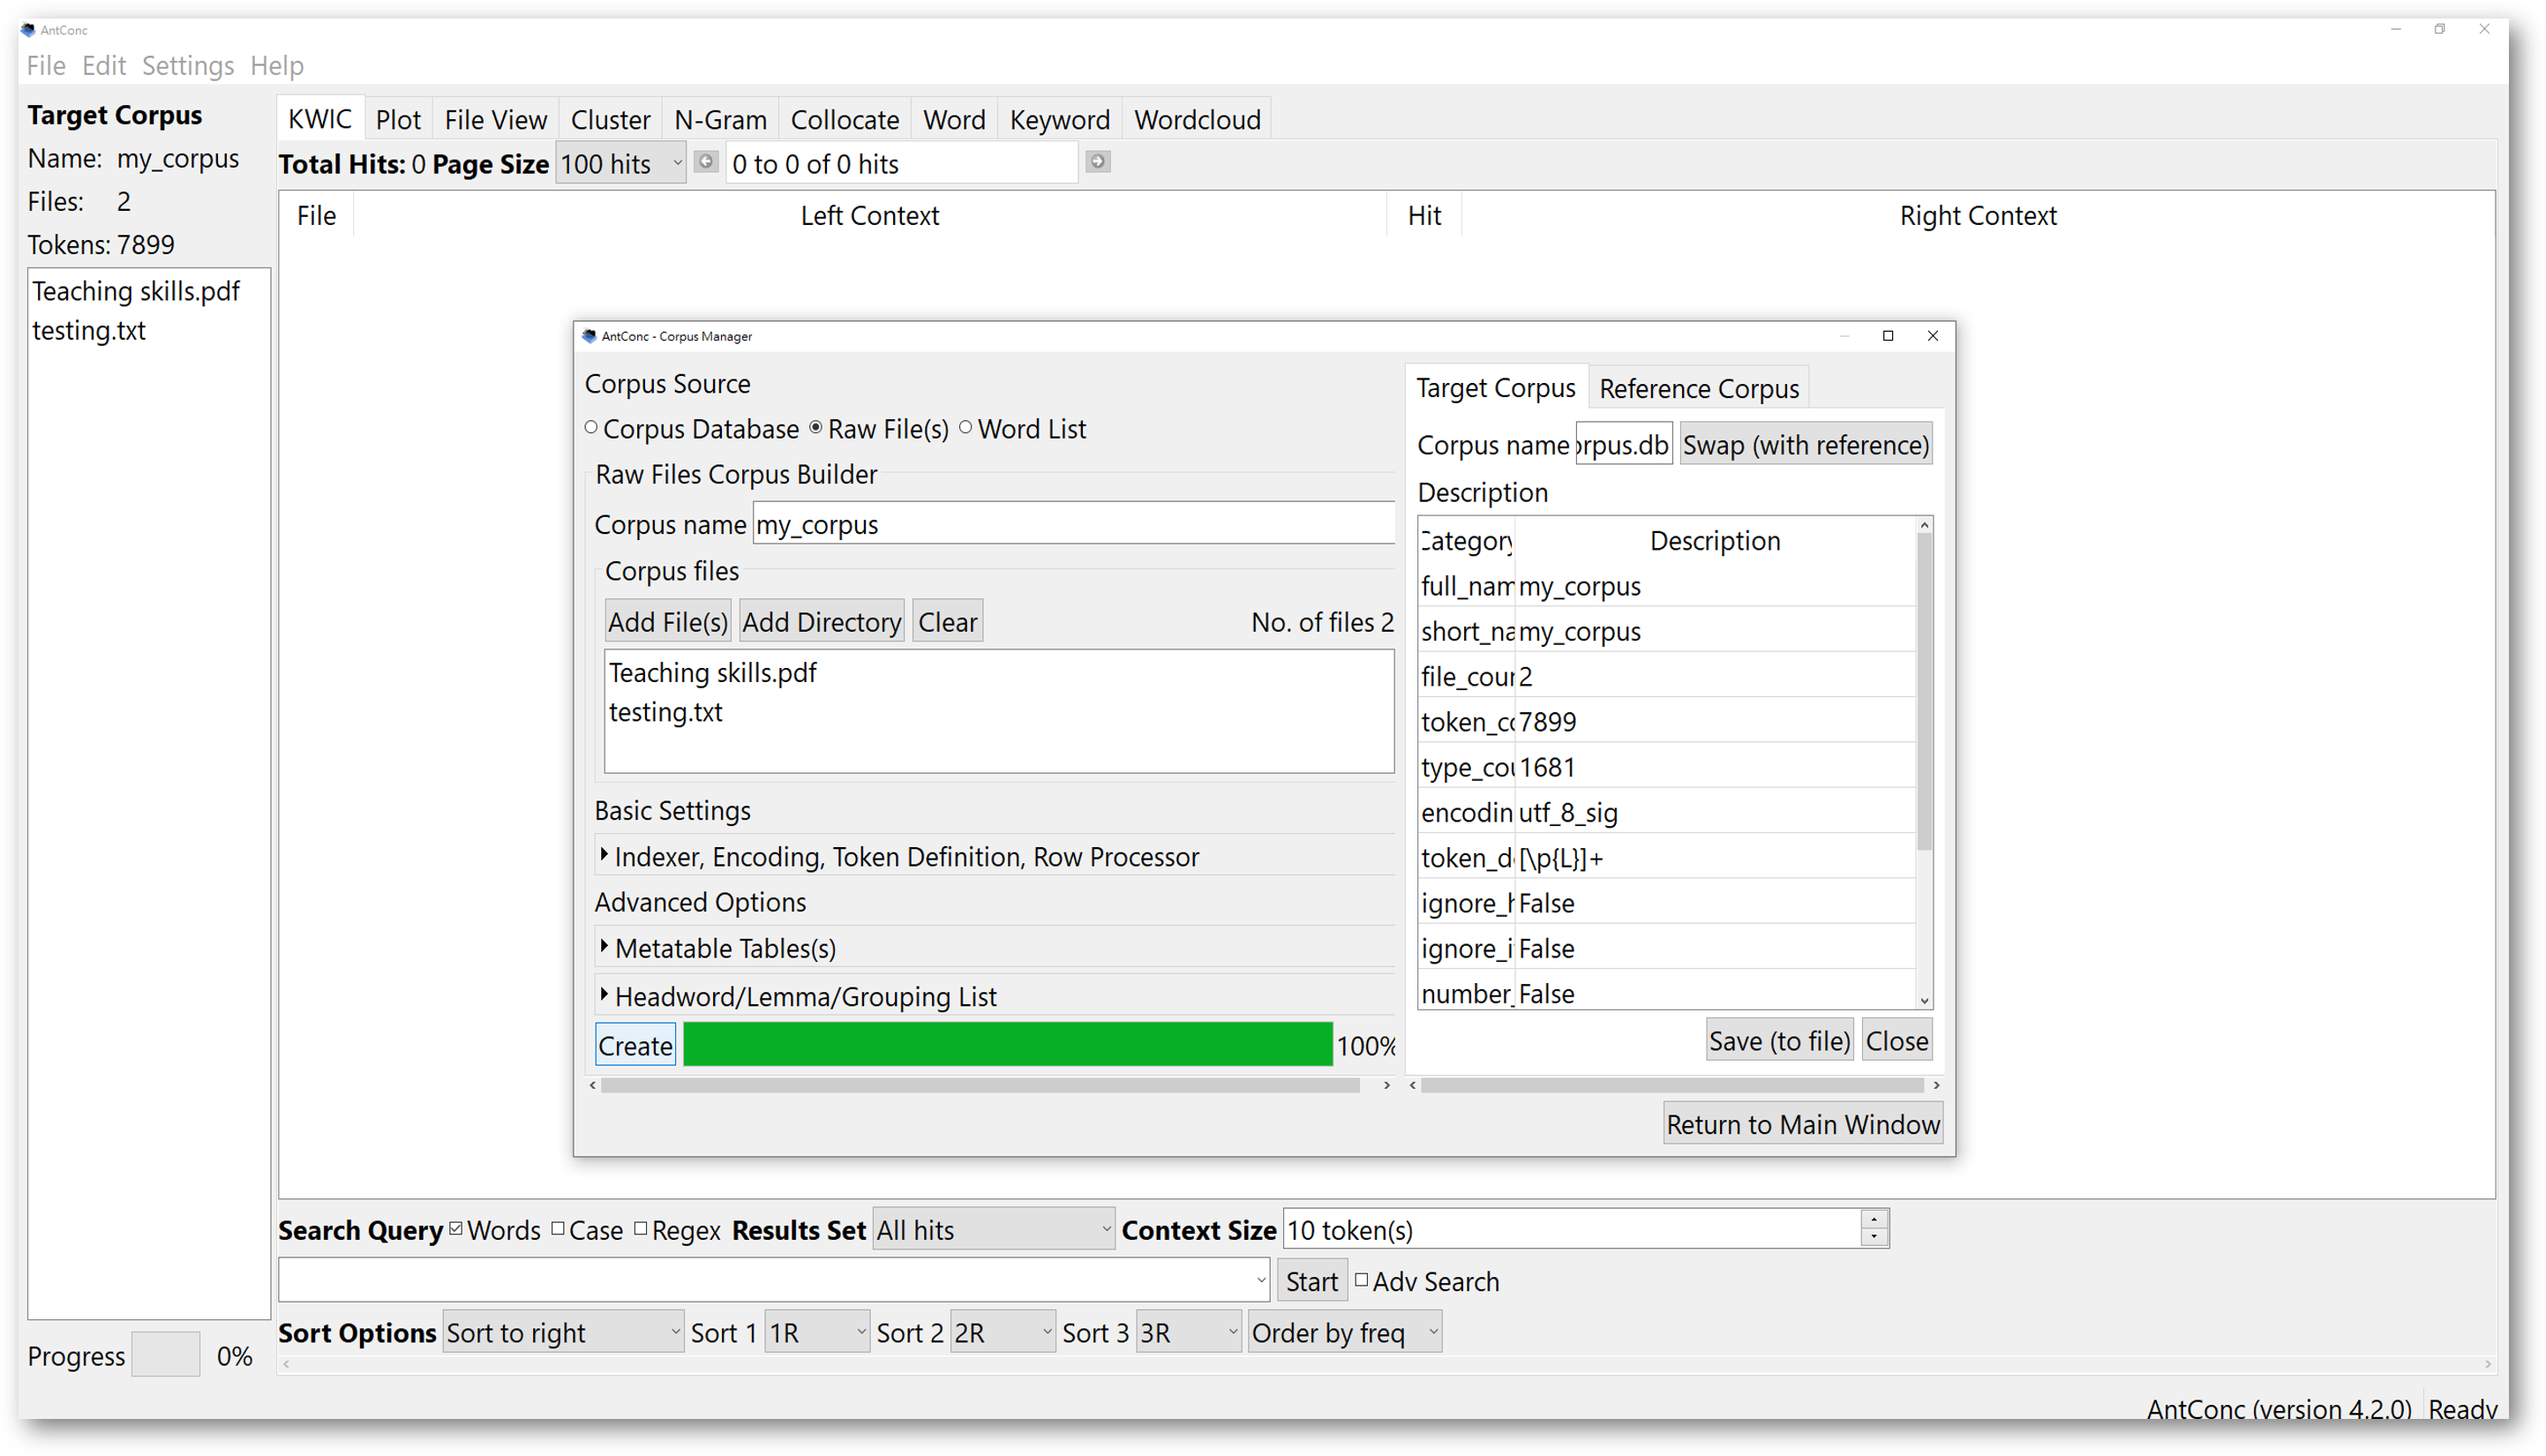
One important note to pay attention to is that, when importing your own text files, ensure that the files are encoded in the UTF-8 characters. To do that, click on “Basic Settings” to check the encoding format.

This will prevent AntConc from showing an error message warning you the files could not be read. For users whose computer systems are not using English as the default language, this may be a problem.
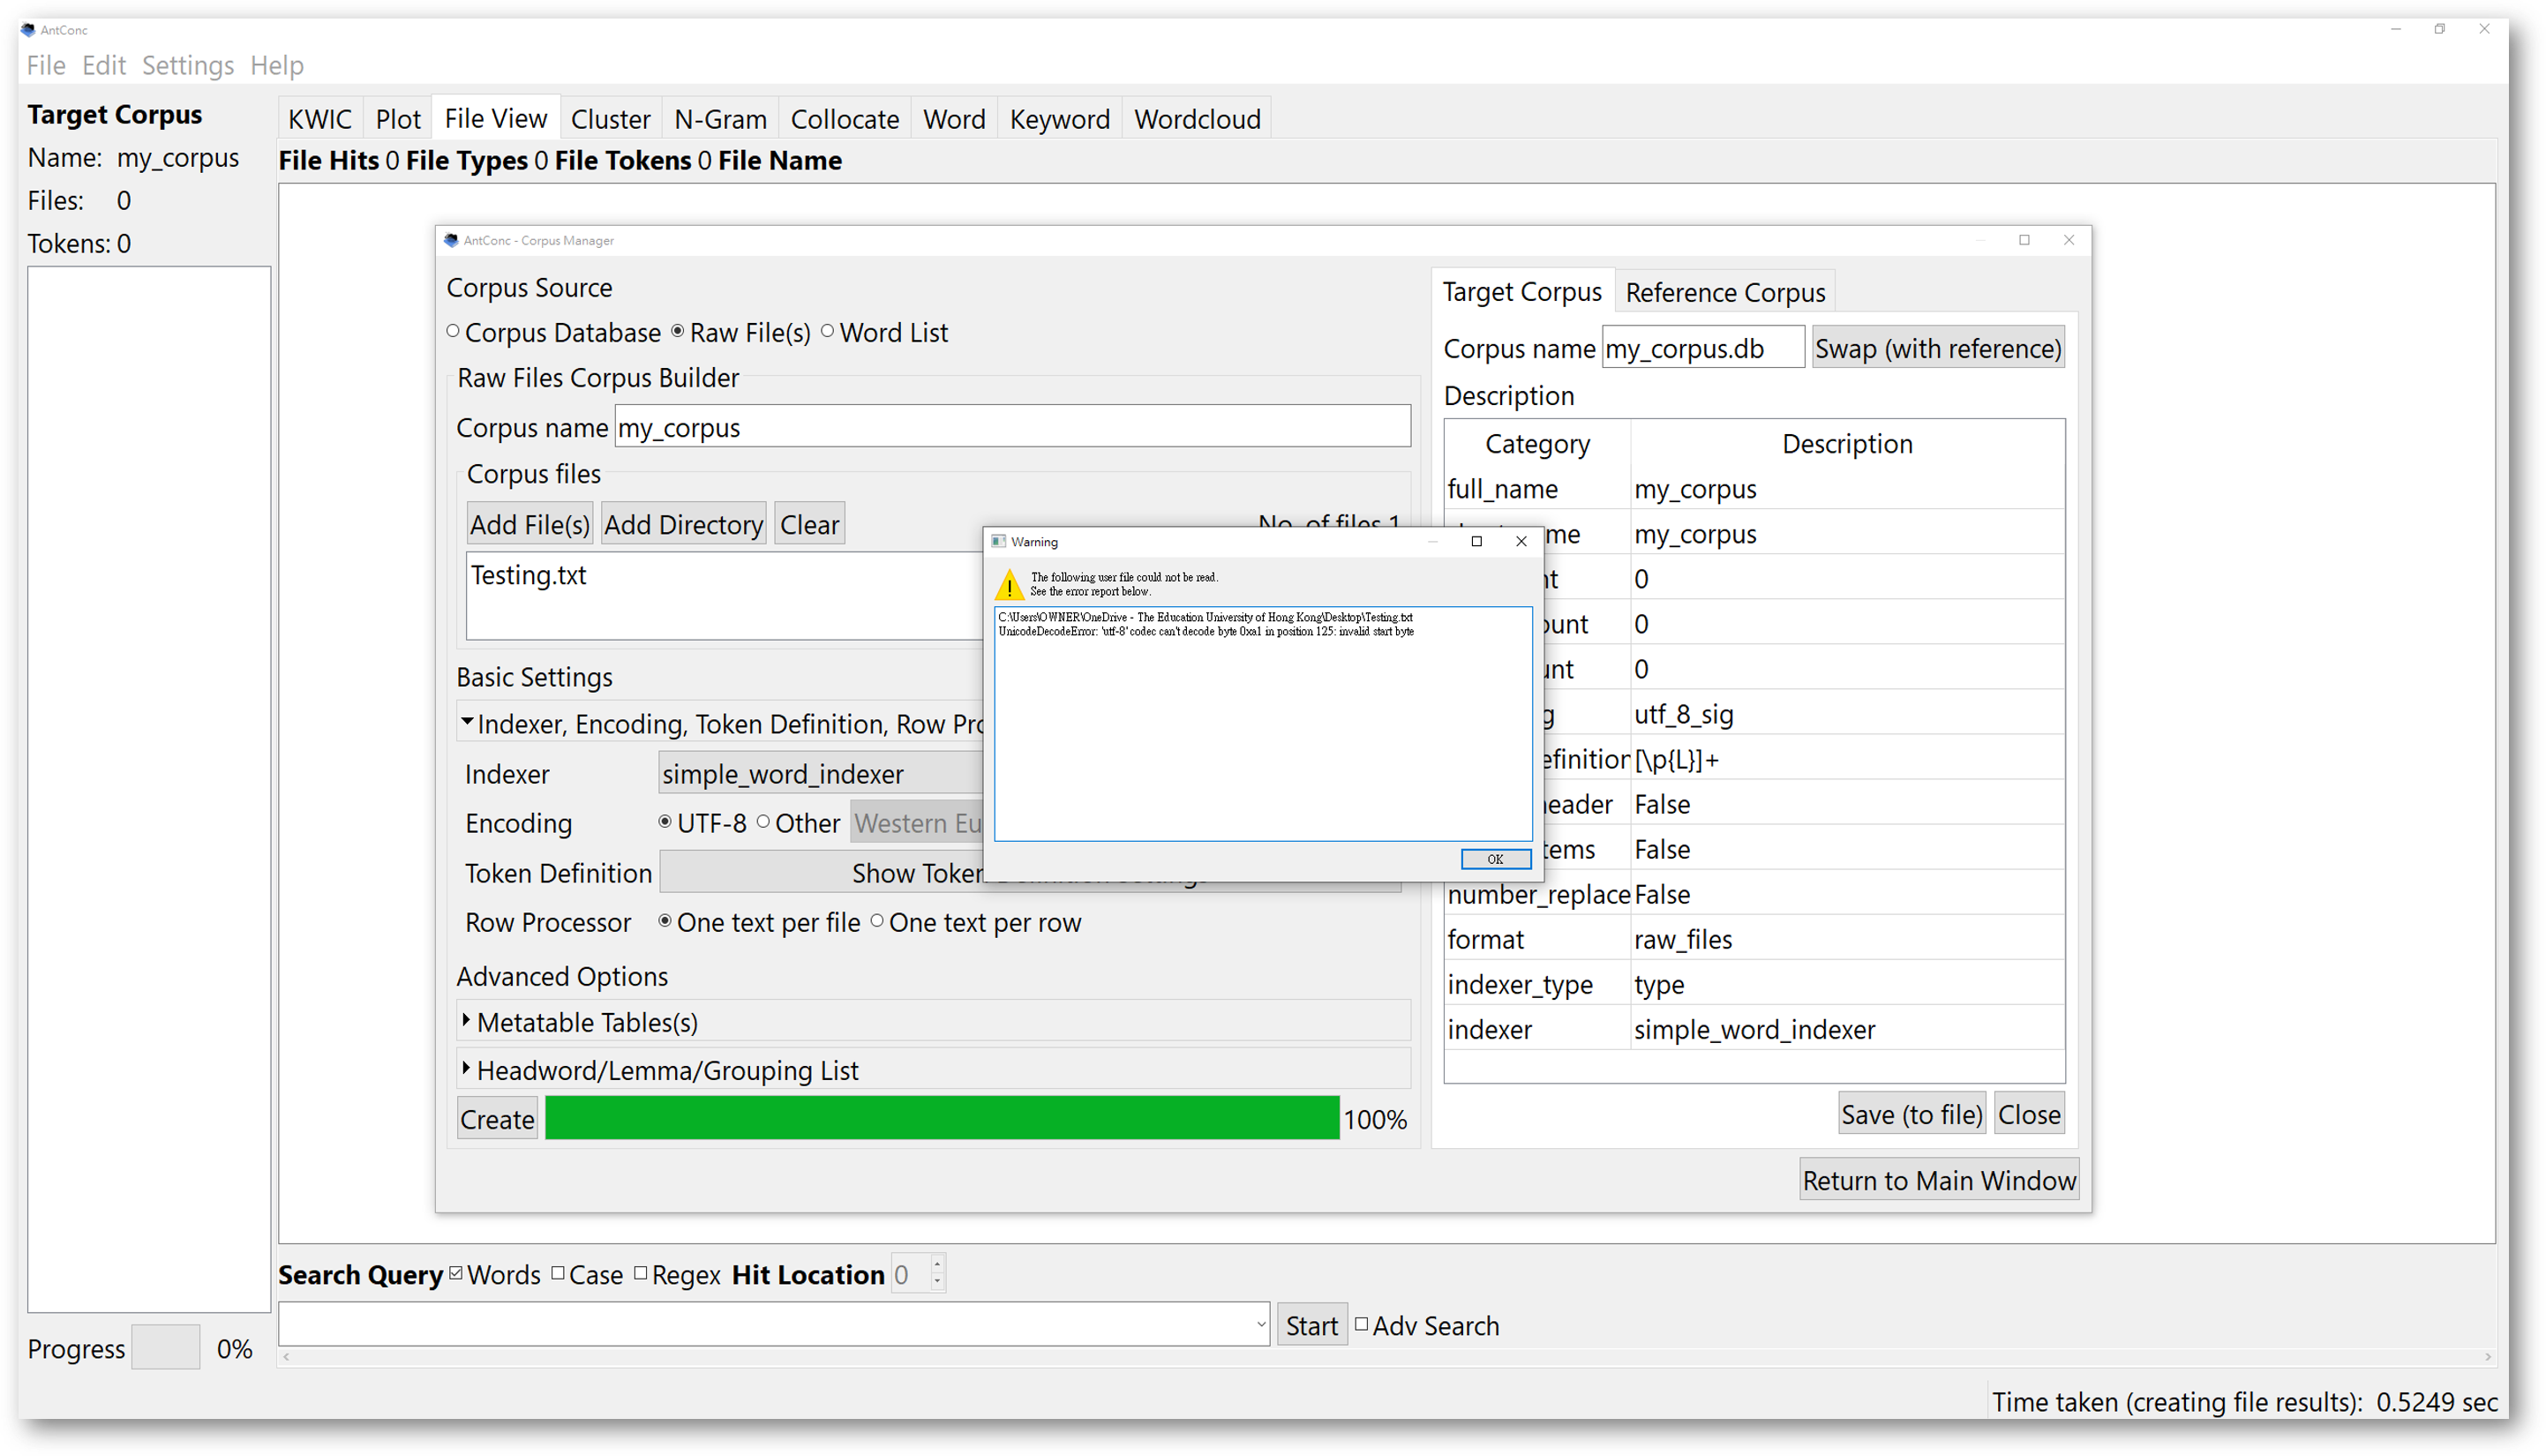
For further inquiries about how to save your files or plain text files with UTF-8 encoding, please search for the solutions online. If you are unsure about the encoding options of your text files, it is recommended that you choose the default UTF-8 settings. If you want to change the encoding format of AntConc to match that of your files, you have the option to choose “other”, and find the one you need.
3. KWIC, File, Plot and Collocate tools
3.1 KWIC
Similar to previous corpus websites, e.g., COCA, AntConc also provides a ‘KWIC’ tool for generating concordance. The difference is that AntConc can generate KWIC for either premade corpora (downloaded) or your own compiled corpus. To start KWIC searches, after your have selected your corpora, you will see them on the left pane. Make sure the KWIC tool is selected.

Then, you can start typing a search item in the search box. By default, any single word typed in the search box is not case sensitive. Once you have typed in your search item, press the start button, and the search results will display in the result window immediately.
Above the search window, you can select how many concordance lines to display on a page by altering the amounts of “hits”.
This is a function more powerful than some other corpus engines, because sometimes data overload occurs, and you may come across with erroneous messages telling you to refine your search items, which can be quite frustrating.
You can choose to sort concordance lines according to the frequencies, or alphabetical order of the words to the right or left. This function works similarly to other general corpus engines. To sort the search results using frequencies, select “order by frequency”. To sort them according to alphabetical order, select “order by value”. Checking the “Case” box will enable you to apply case-sensitive searches.


Double-clicking on any of the concordance lines will direct you to the ‘File View’ tool. This shows you the exact location of the target word with more contextual information.
3.2. Plot tool
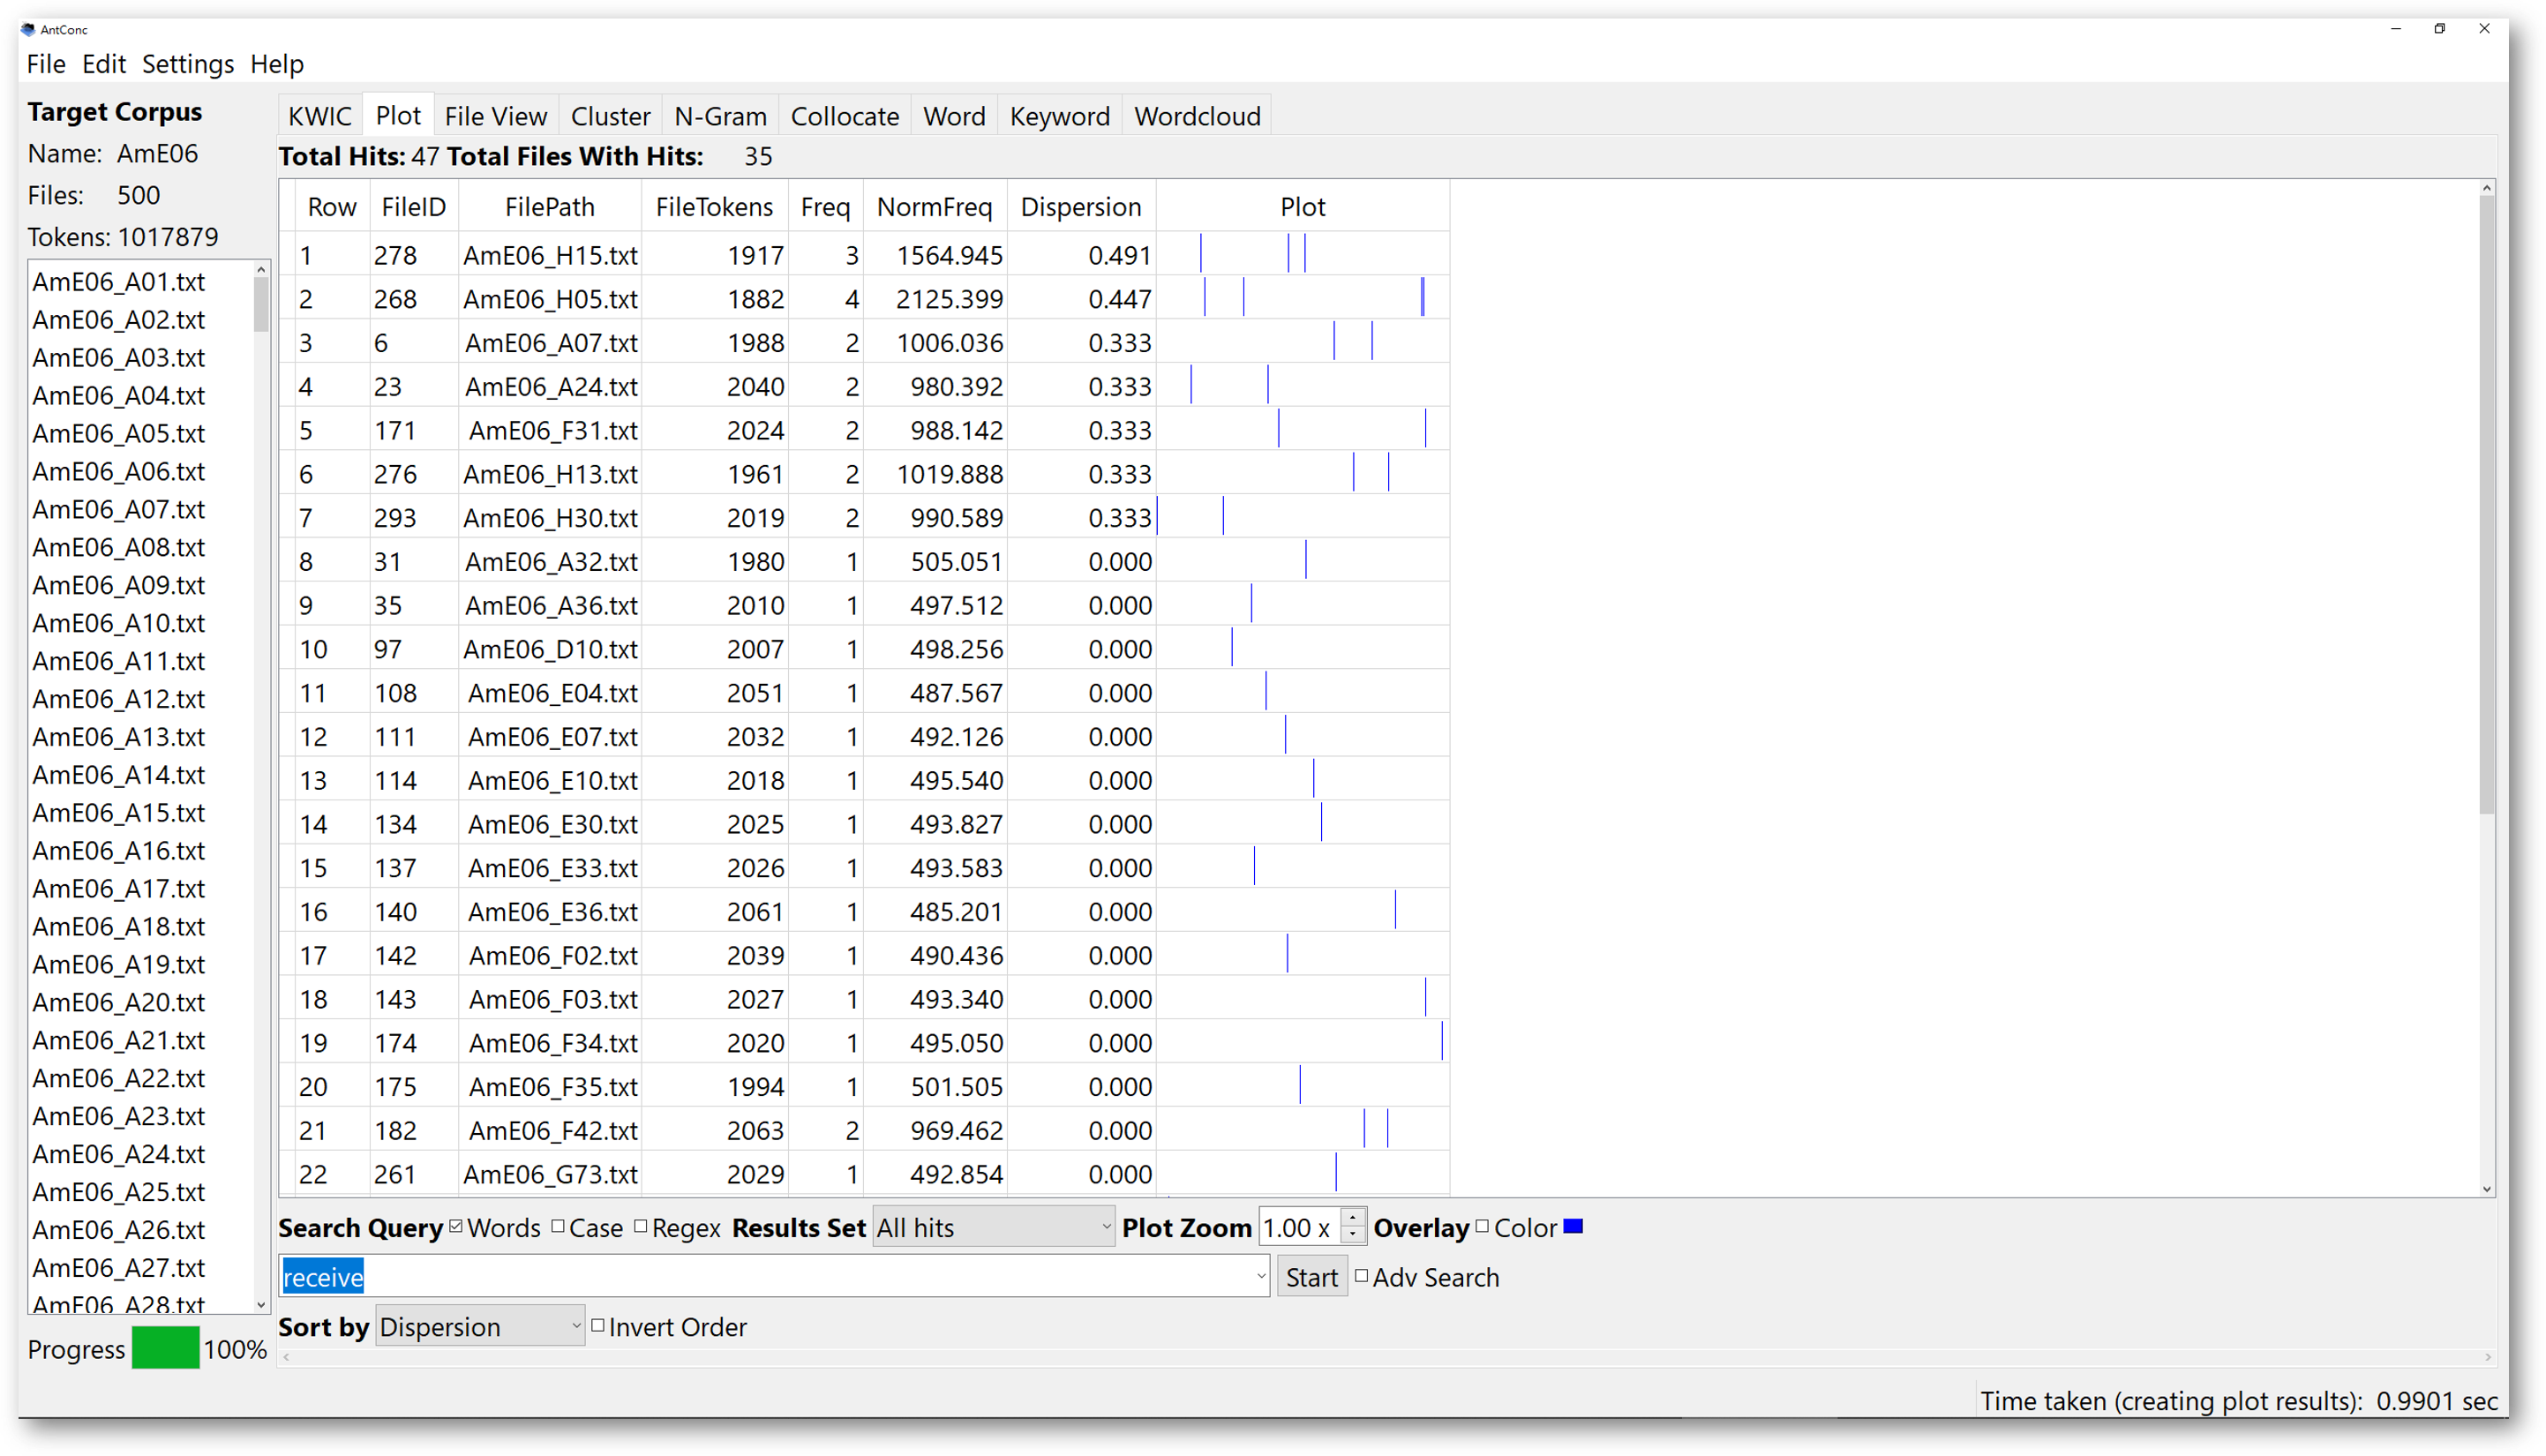
In the ‘Plot’ tool, AntConc helps you to graphically and visually view the positions of the searched words in texts or corpus. After you typed in the target words or phrases , and click ‘start’, the plot view will generate a graph, which looks like a barcode. In the example here, we are looking for “receive” in the AmE06 general corpus. Therefore, the vertical lines indicate the positions of the word receive” in the whole corpus. Again, clicking on the vertical lines will lead you to the ‘File’ view window.

The “plot tool” can be useful in exploring the distribution of specific content words in different texts. The search results will show a number of plots, so you may then look at the distribution of the word in each text file.
We can also sort the plots according to the frequency, or dispersion. Dispersion reveals more details about the distribution of the target words or phrases. A higher dispersion indicates that the words or phrases are spread across a text or corpus more.

The “Plot Zoom”, allows you to zoom in the plot according to the multiplication factor set on the right.
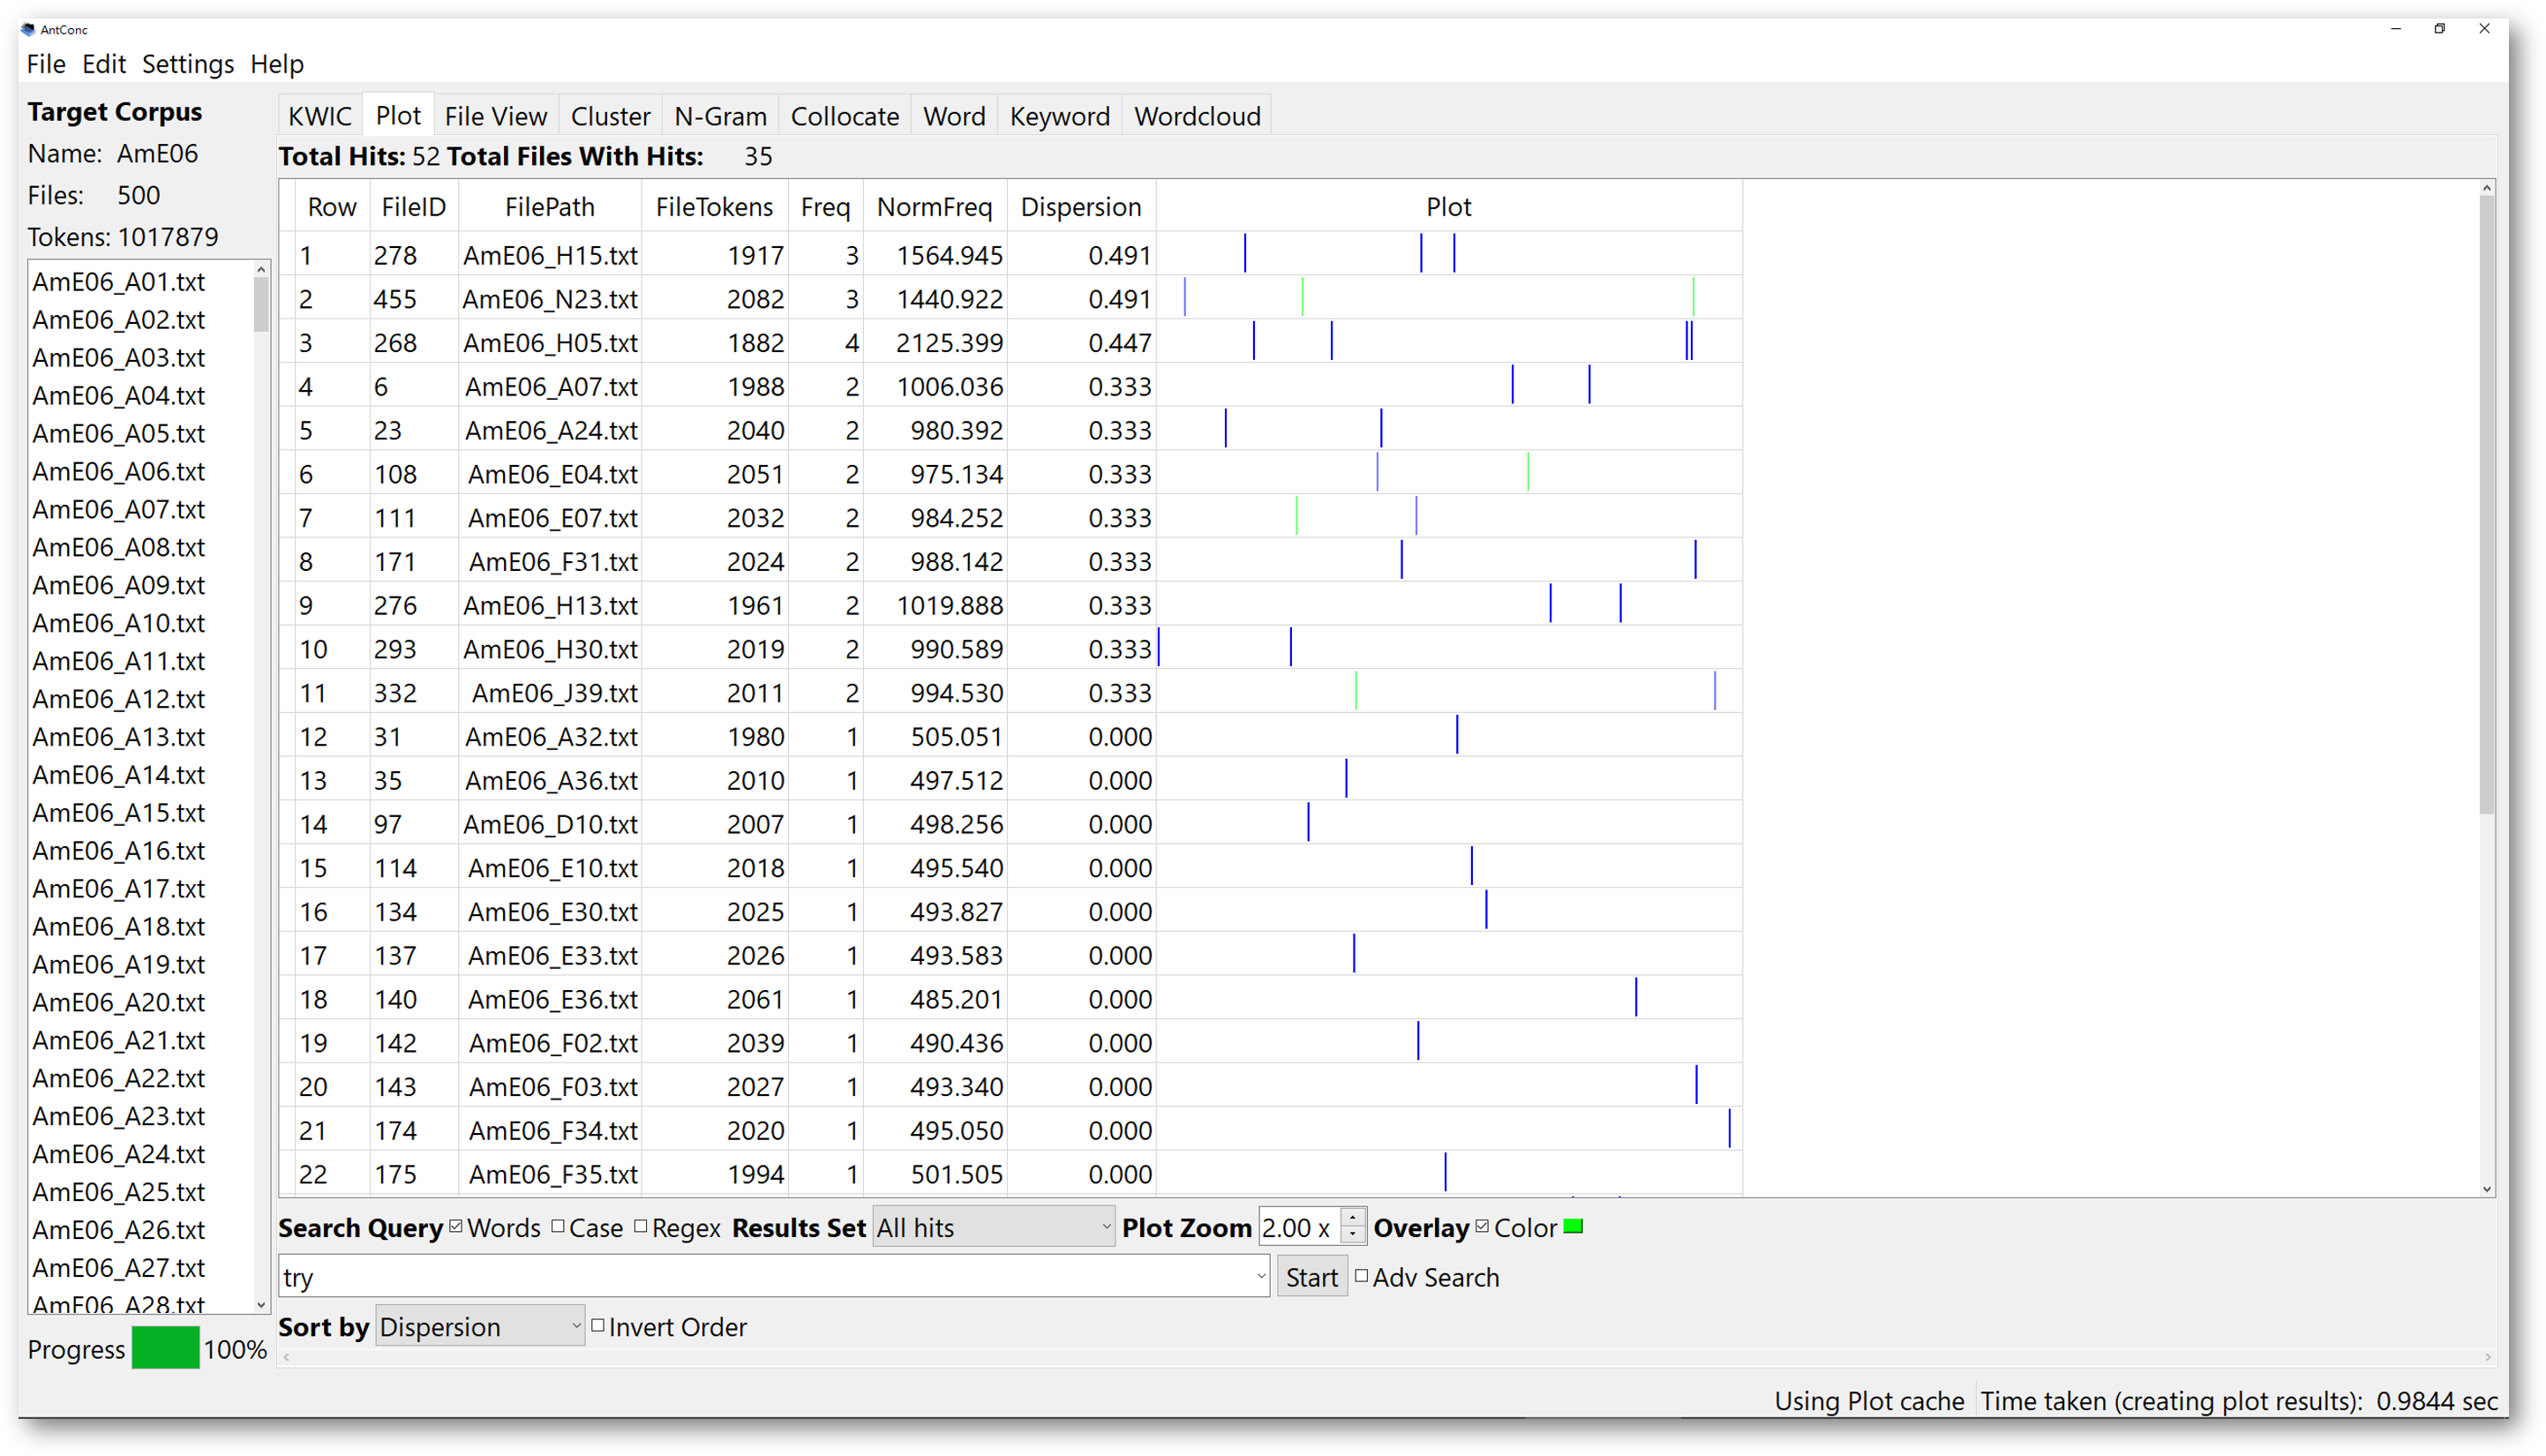
Overlaying is another useful function, which allows you to plot several searched words in the same plot.
Let’s use the search results of “receive” here. If we have the option “Overlay” checked, then select another colour, and we look for the word “try”, then click start again, the new results will show us each hit of “receive” and “try” in the same plot with different colours.

3.3. Collocate tool
To use the ‘Collocate’ tool, open the ‘Collocate’ tab, then key in the search item. To find collocates, search item(s) must be provided in the search box, because we look for the specific collocates of these items.
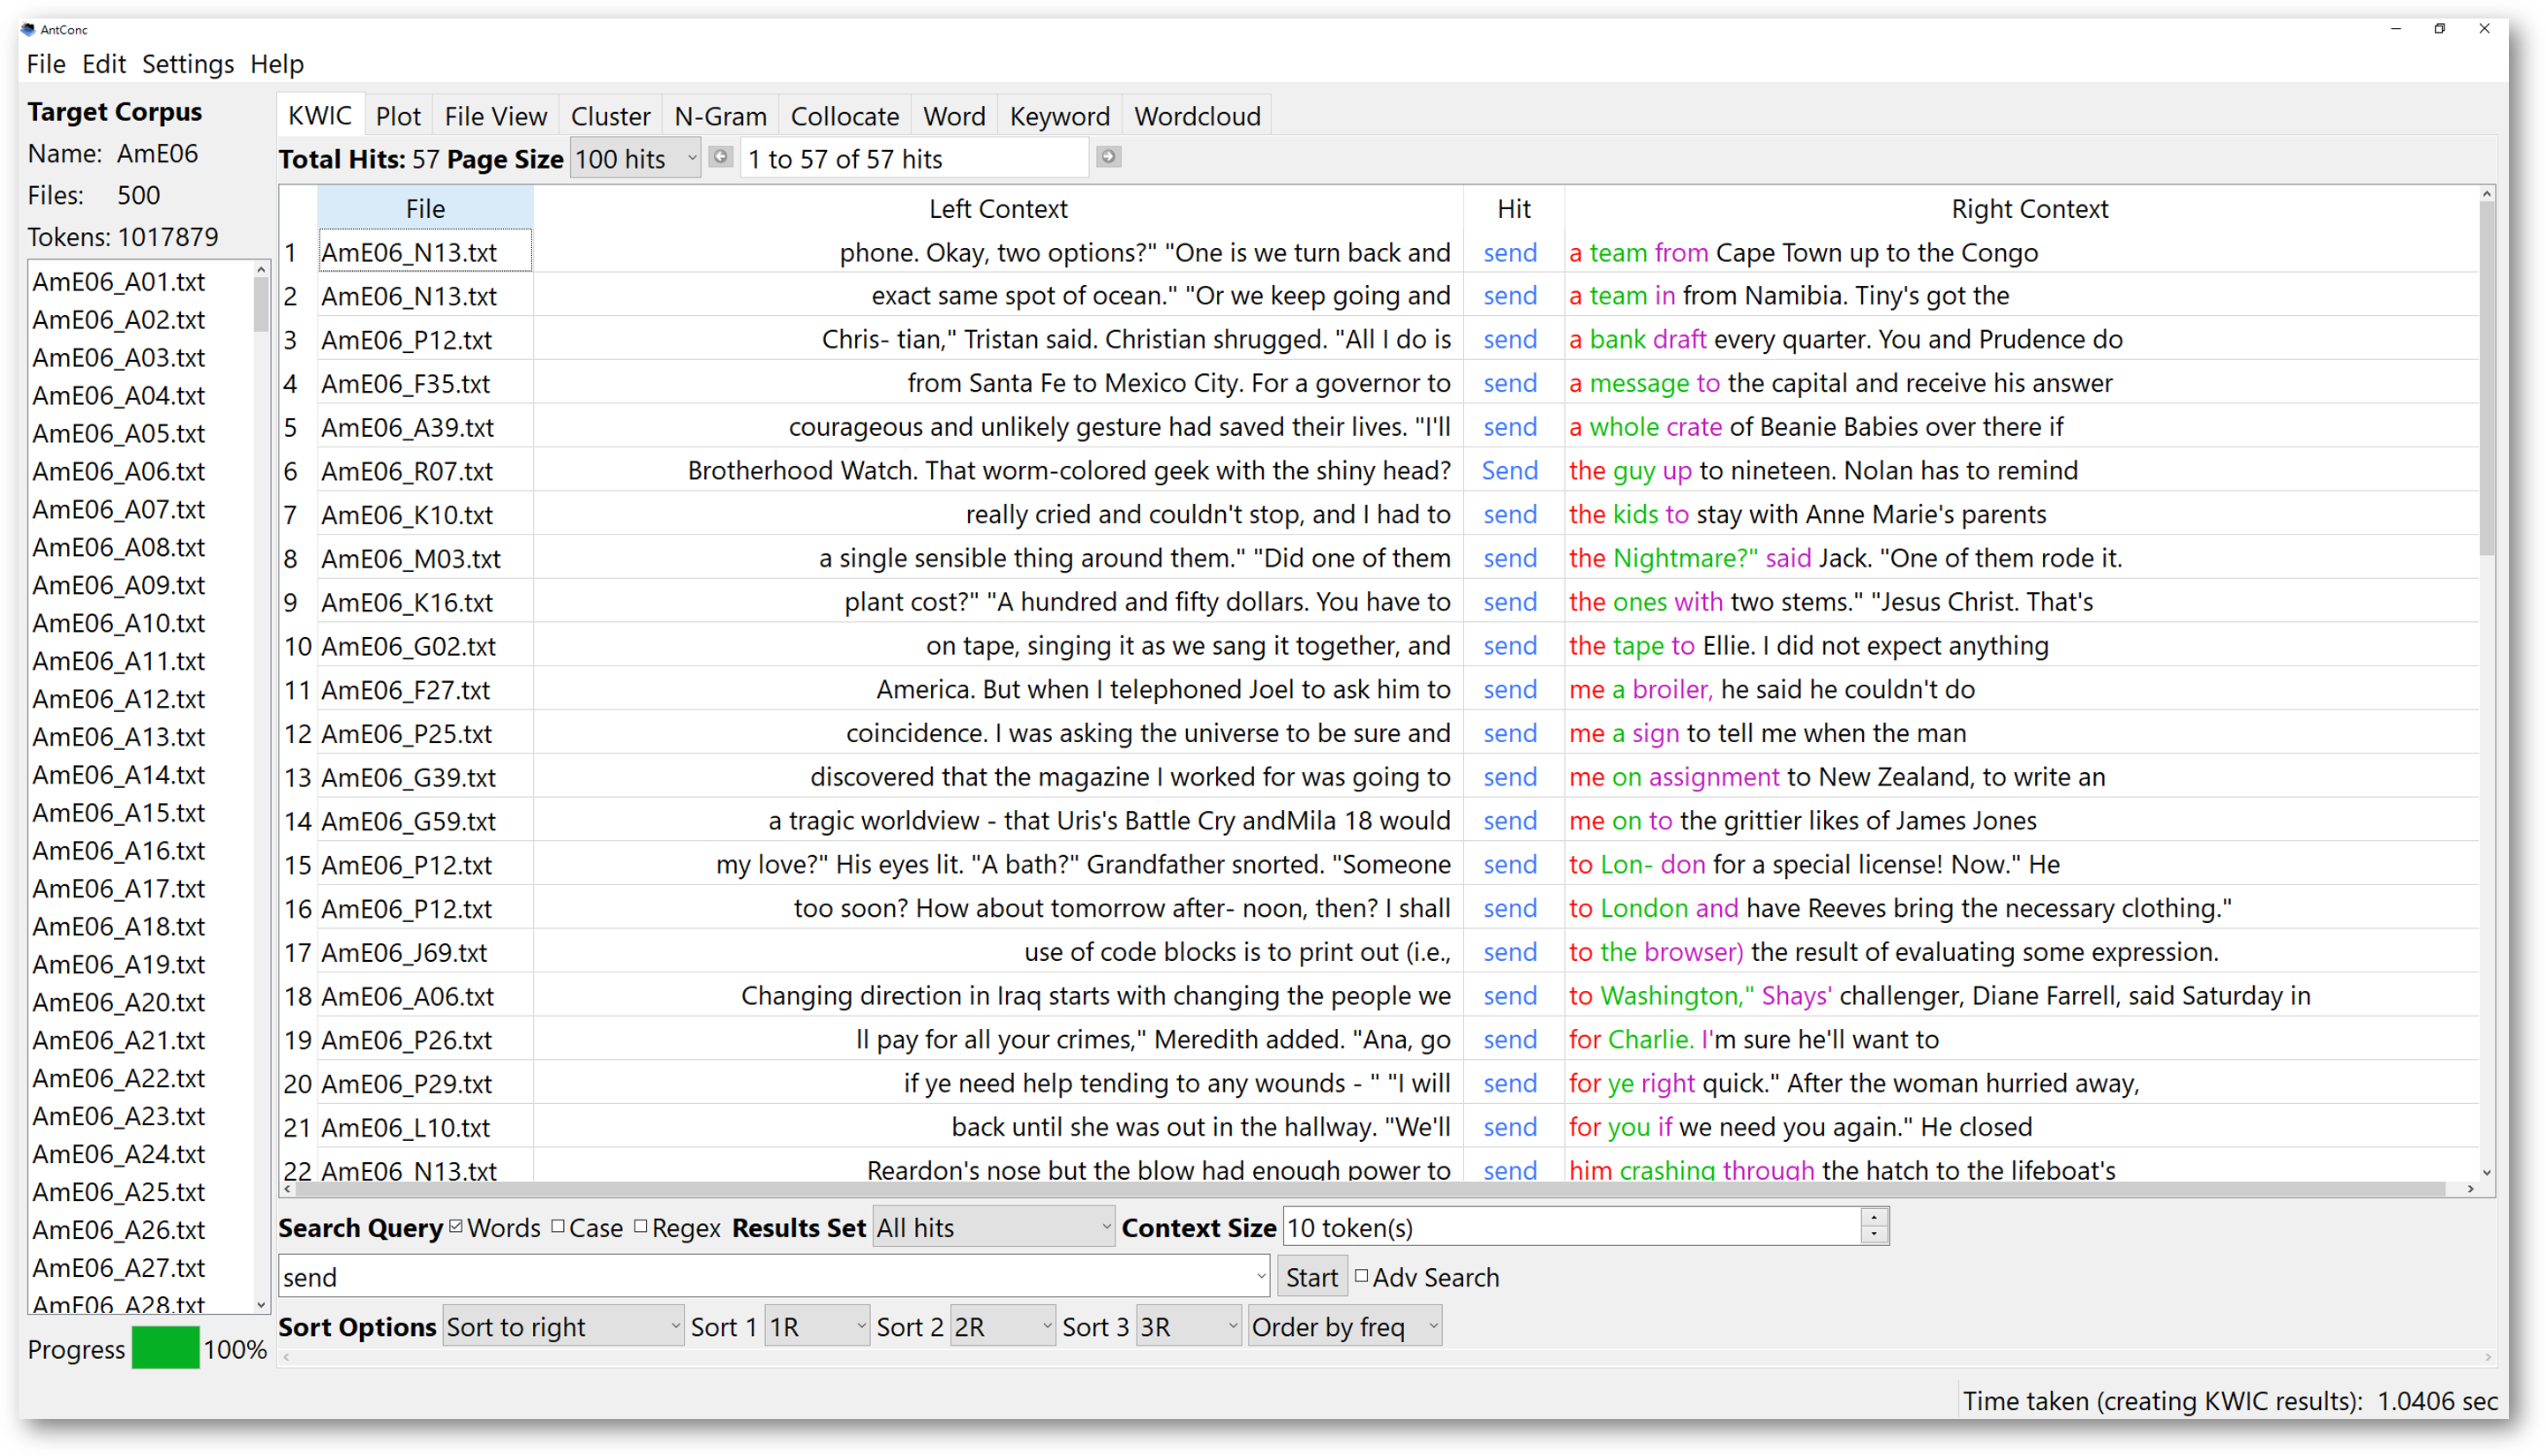
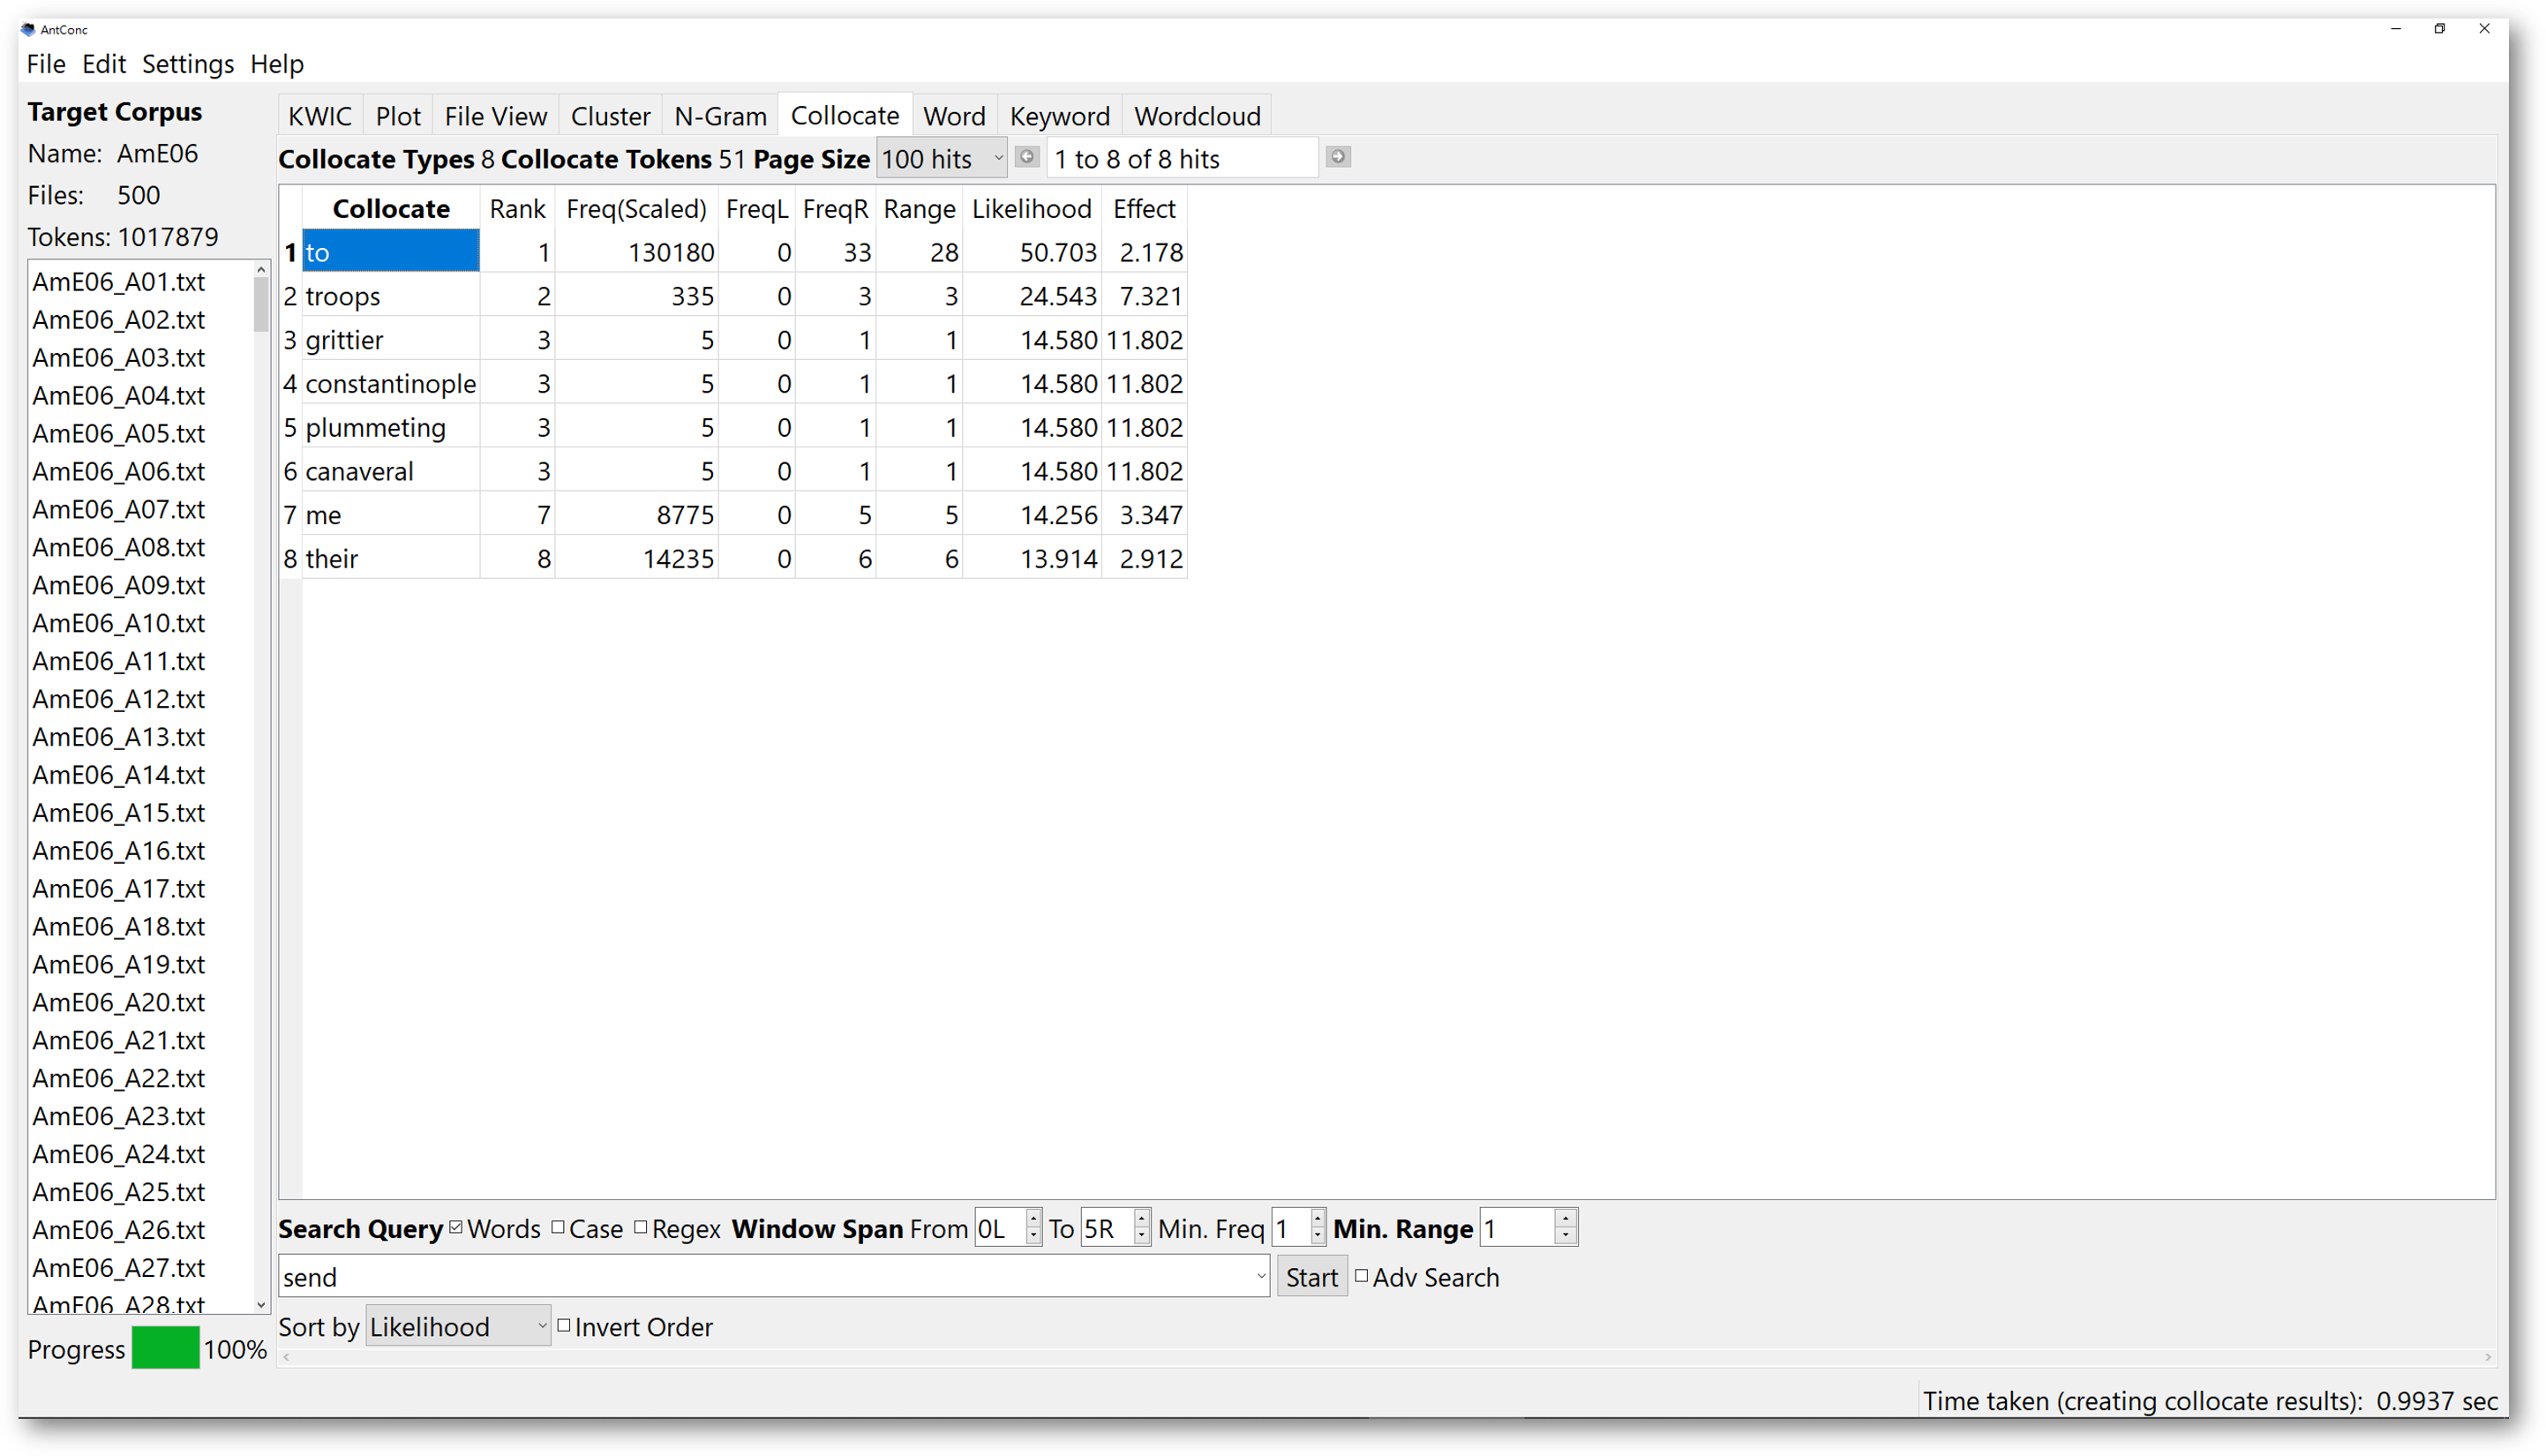
In the example below, we look for collocates of the word “send”.
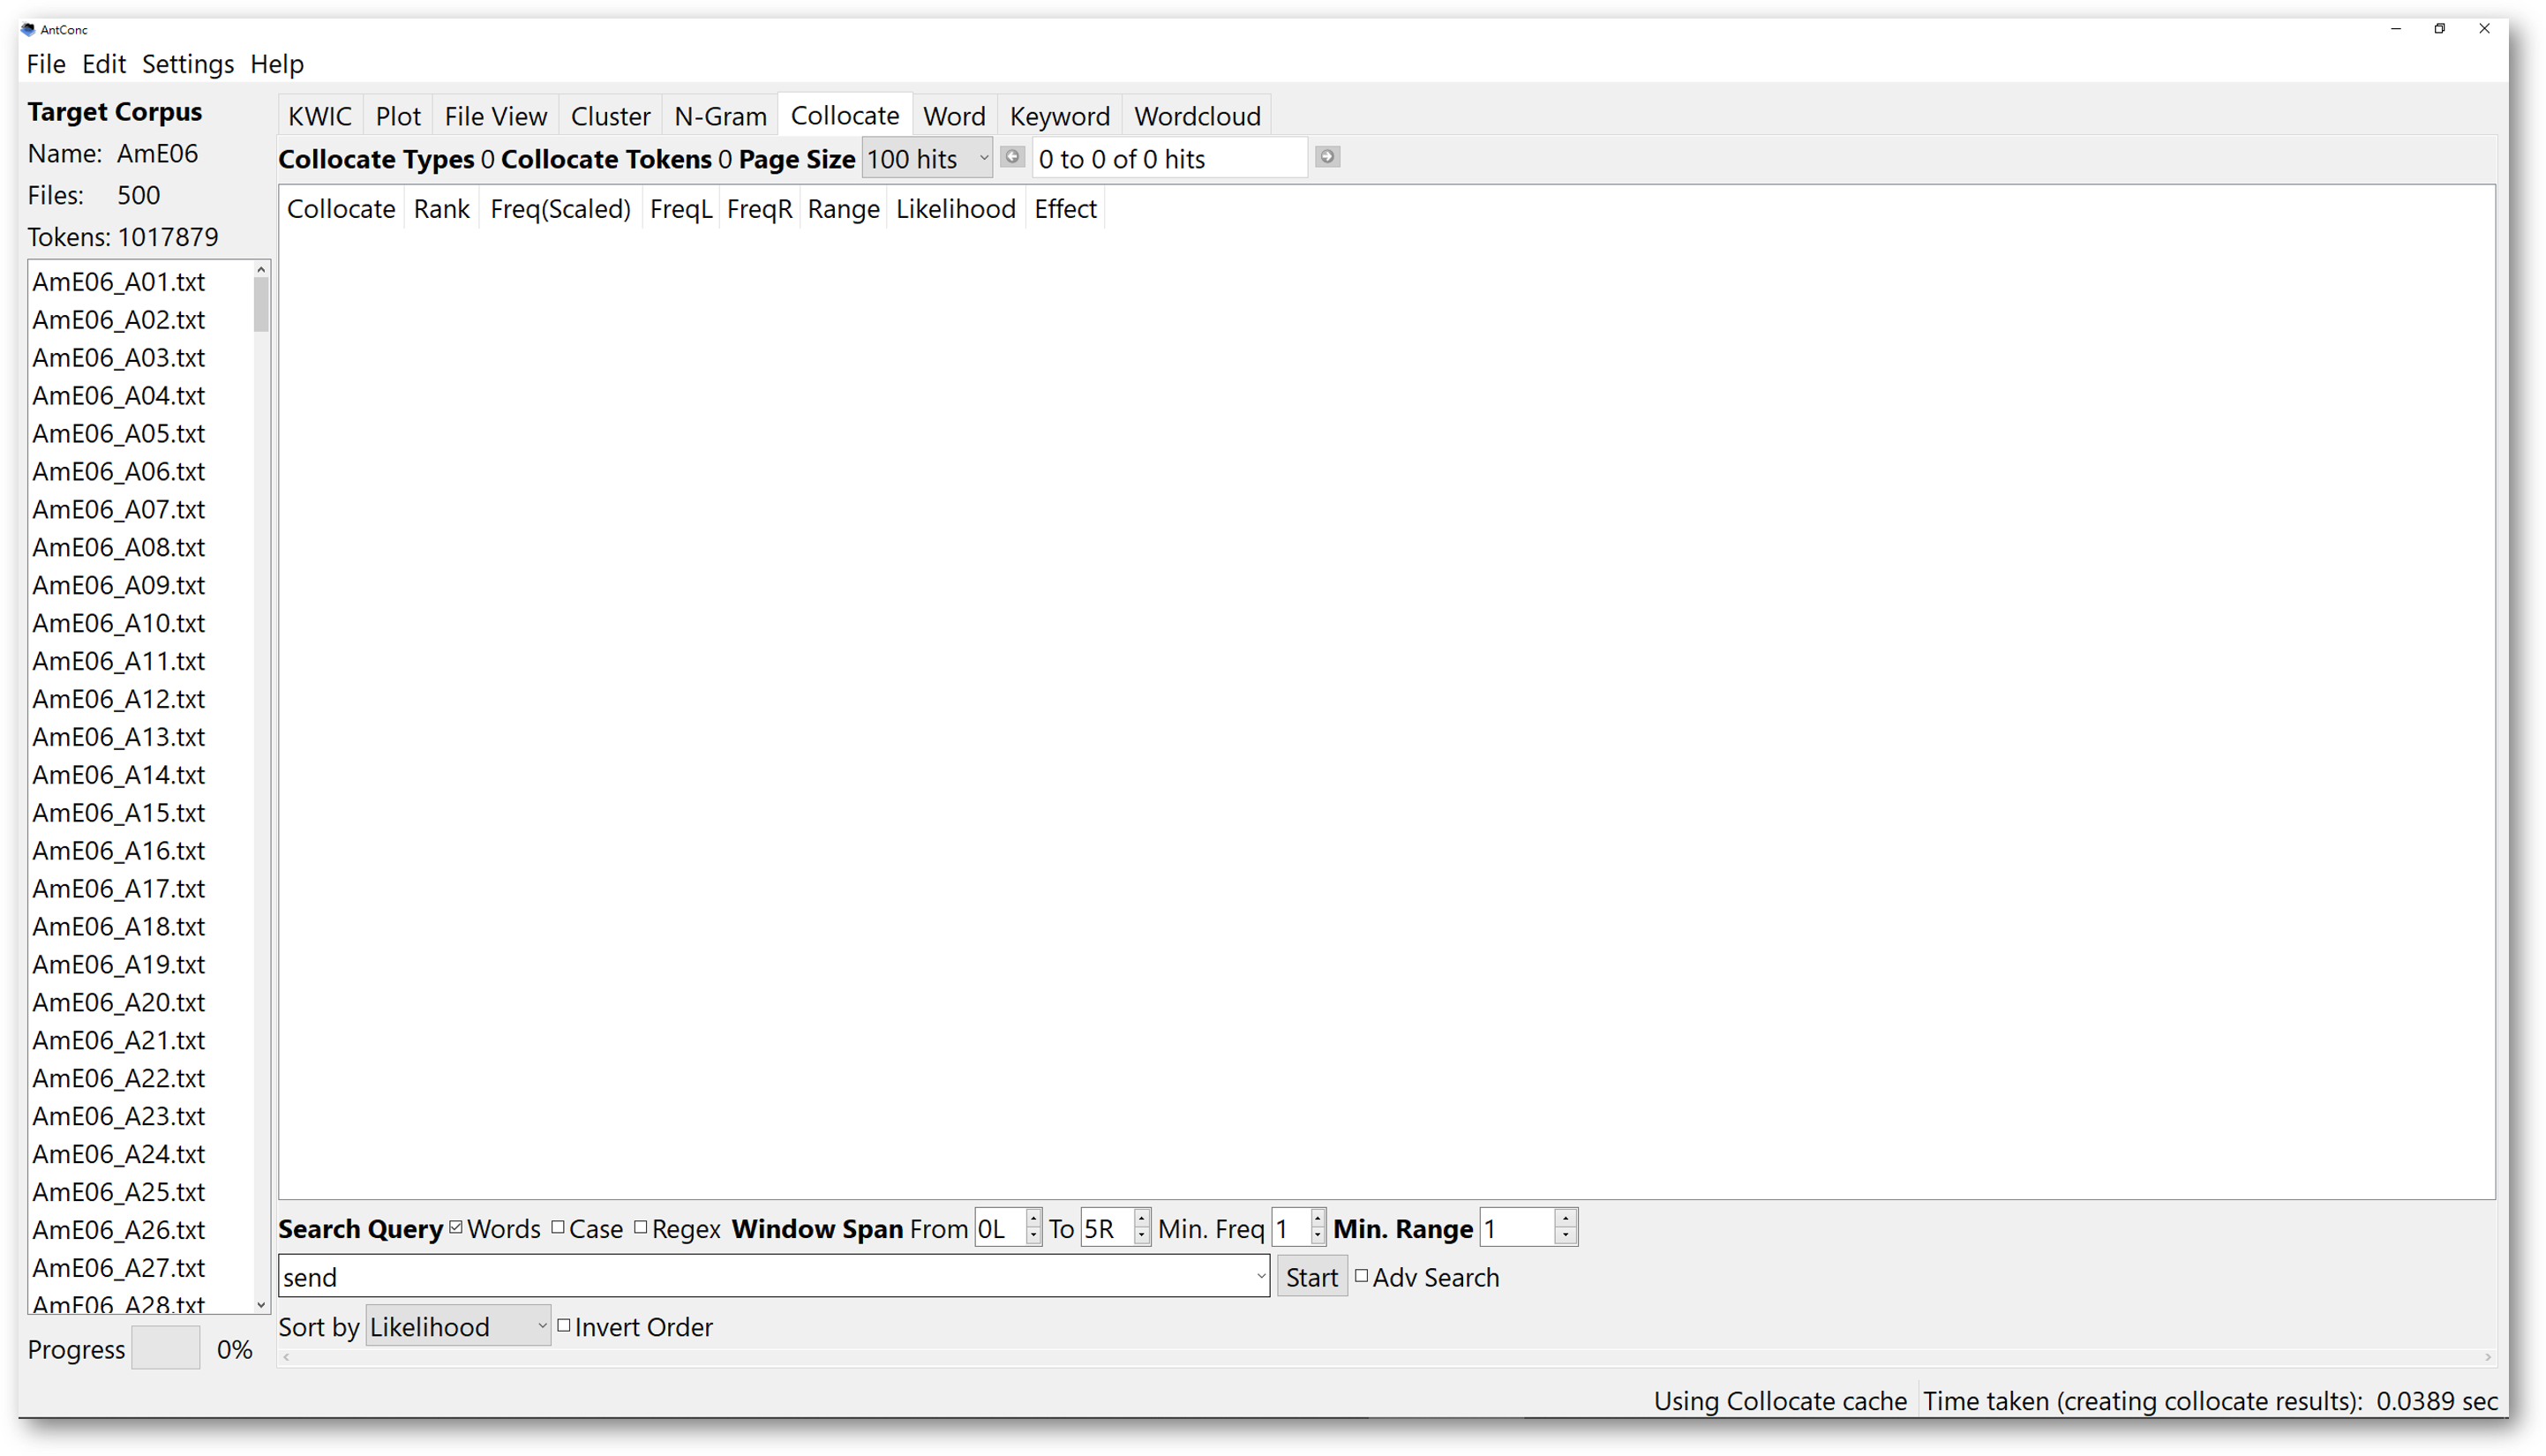
Determine the “Window Span”. The span refers to the possible distance between the search items and the collocates. For example, if we choose 5R, the results will show you that, the collocate “to” is the most frequently occurring word within 5 words to the right of “send”. Clicking on any row of the search results will lead you to the KWIC window, and you will see every concordance line containing the search item “send”, and the collocate “to” within a distance of 5 words to the right.


If you configure the window span setting, you will be able to control the results to look for collocates either to the left, or to the right within your set distance.
You may wonder what “Likelihood” and “Effect” mean. Simply put, the “Likelihood” tells you the probability of the listed collocates co-occurring with the search items in the corpus, and it is statistically significant compared to chance.
As for the “Effect” score, it tells you the degree of closeness of the pair. If the “Effect” score is high, the two words are likely to appear together.
4. Cluster and N-Gram tool
4.1 Cluster tool
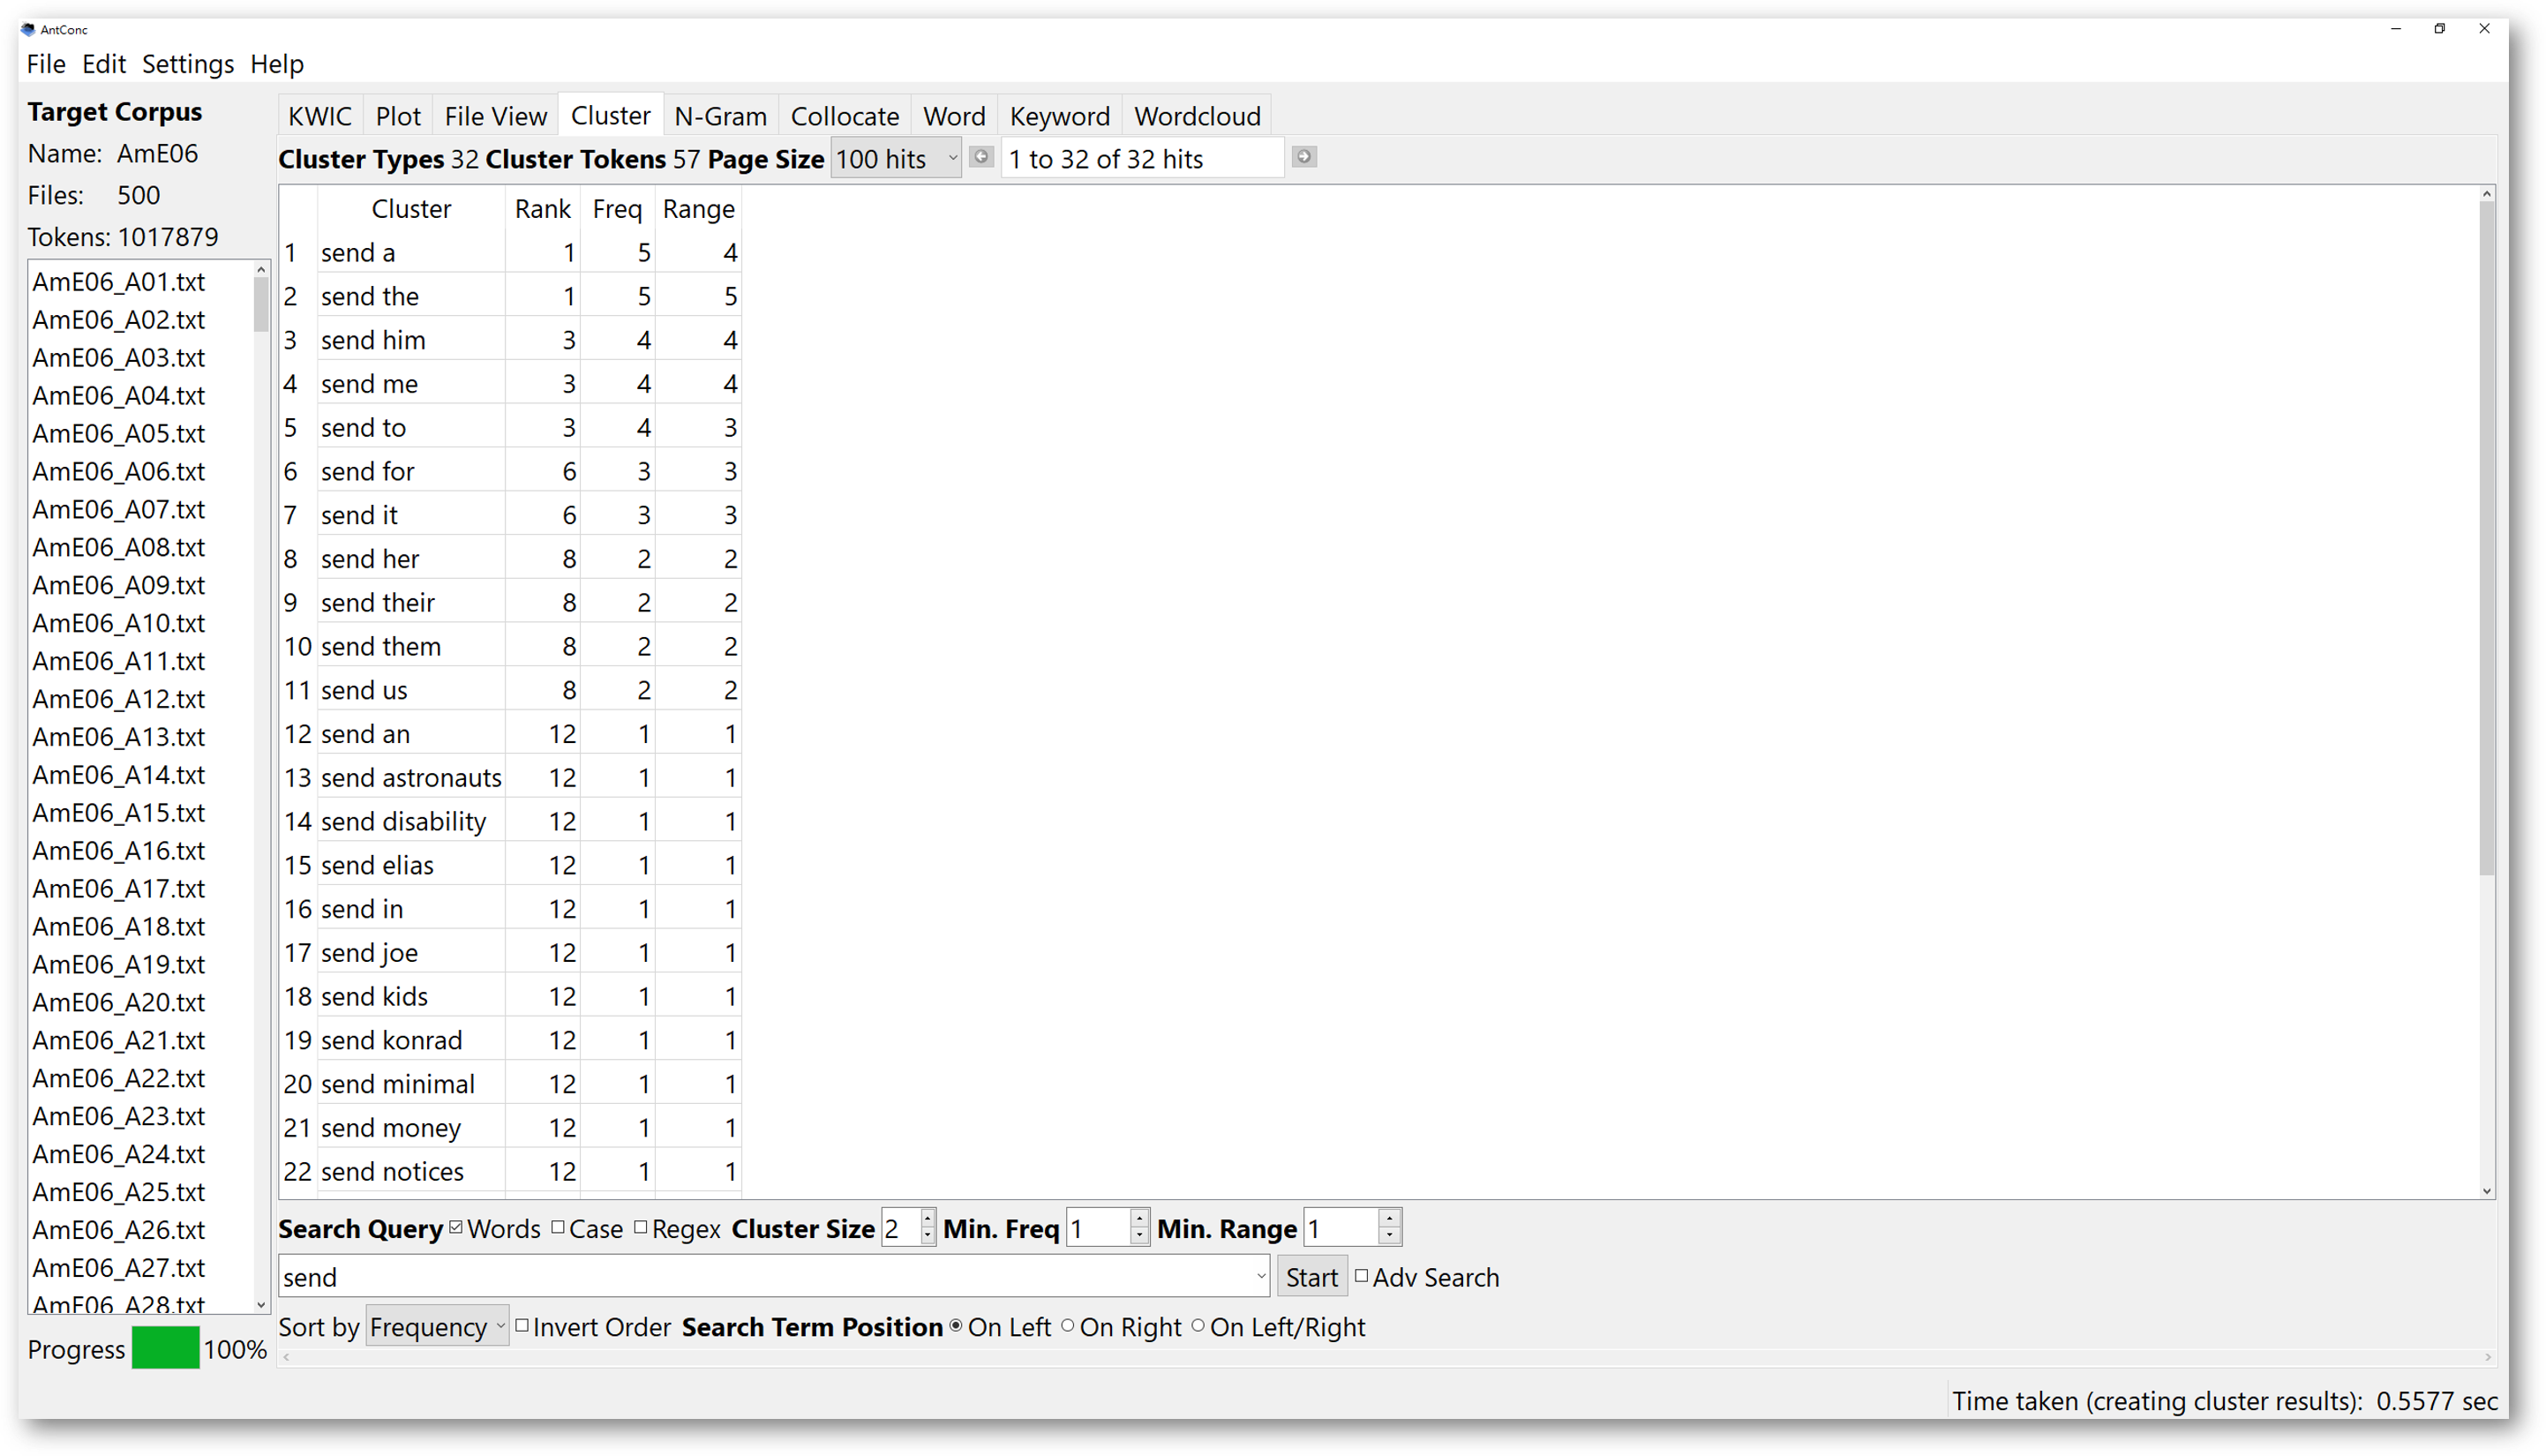
In the Cluster tool, you can look for adjacent word clusters near your searched words or phrases.
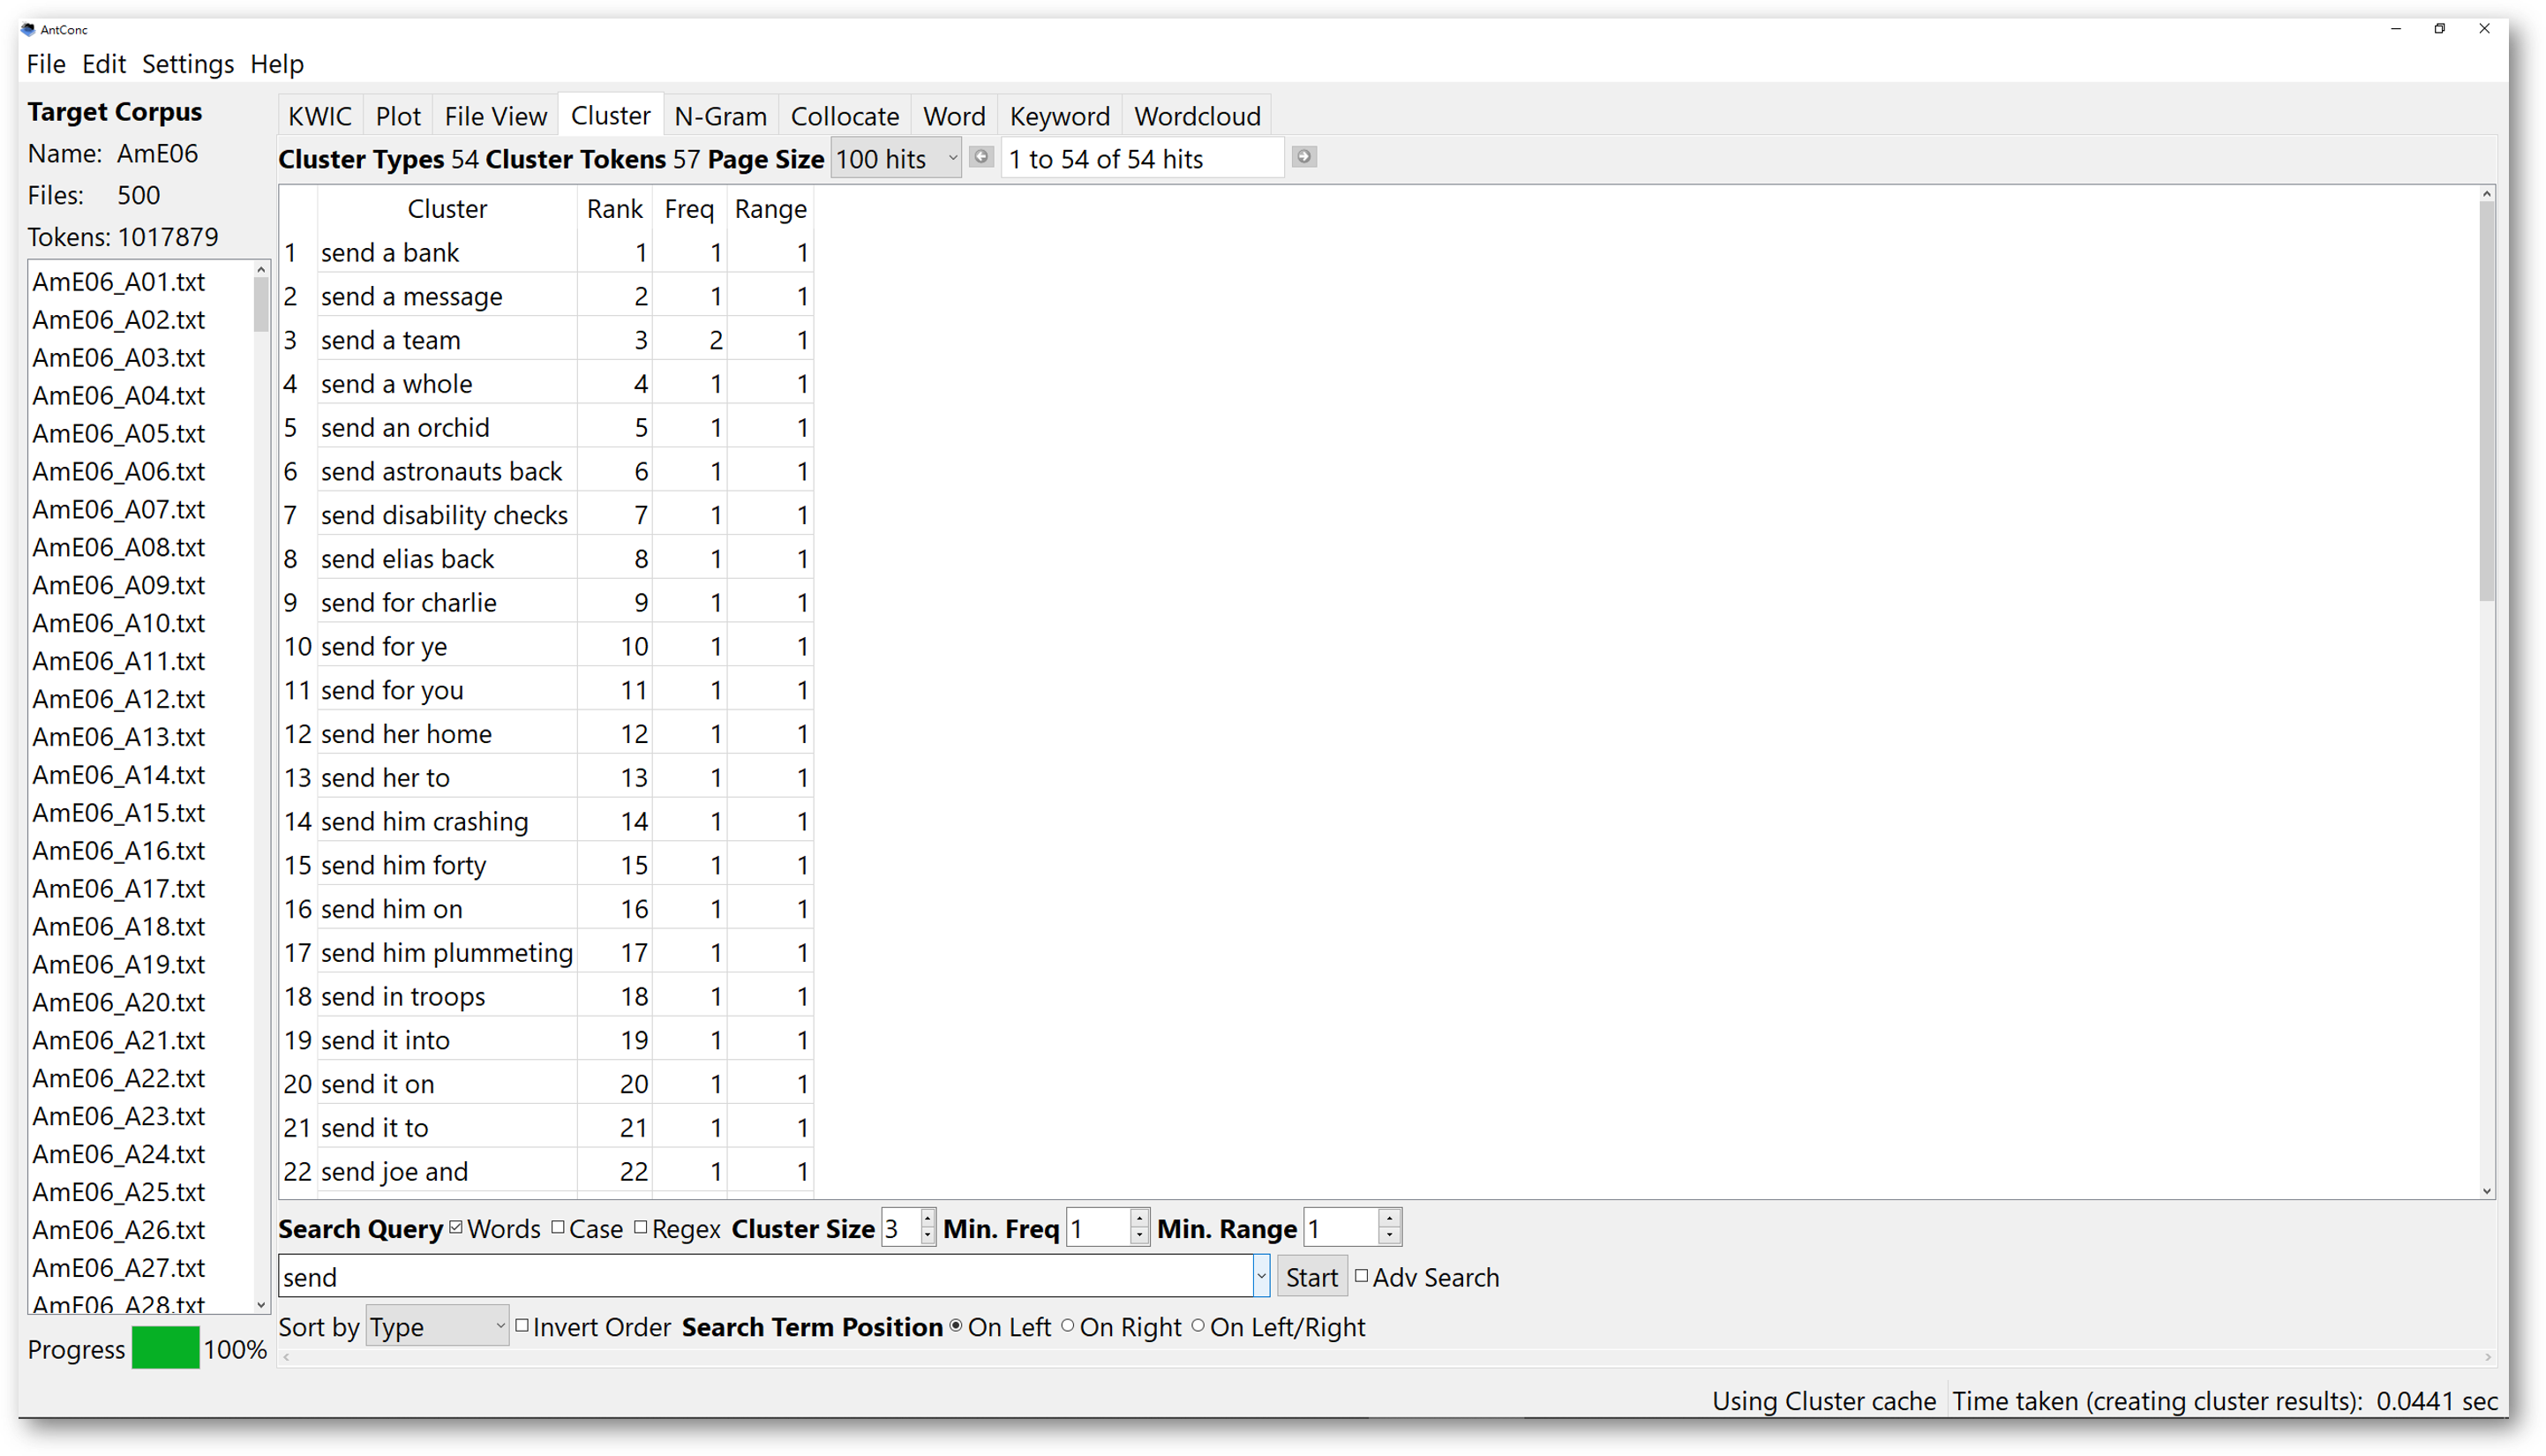
Open the ‘Cluster’ window, and type in your search conditions. Here, we use the word “send” again. Similar to the previous functions, you could alter the case sensitivity and sorting order.

You could look for clusters to the right, or to the left of “send” by altering the “search term position”, whereas “on right” means the search term is the end of the cluster. “On Left or right” will display results no matter whether the search term is the head, or the end.
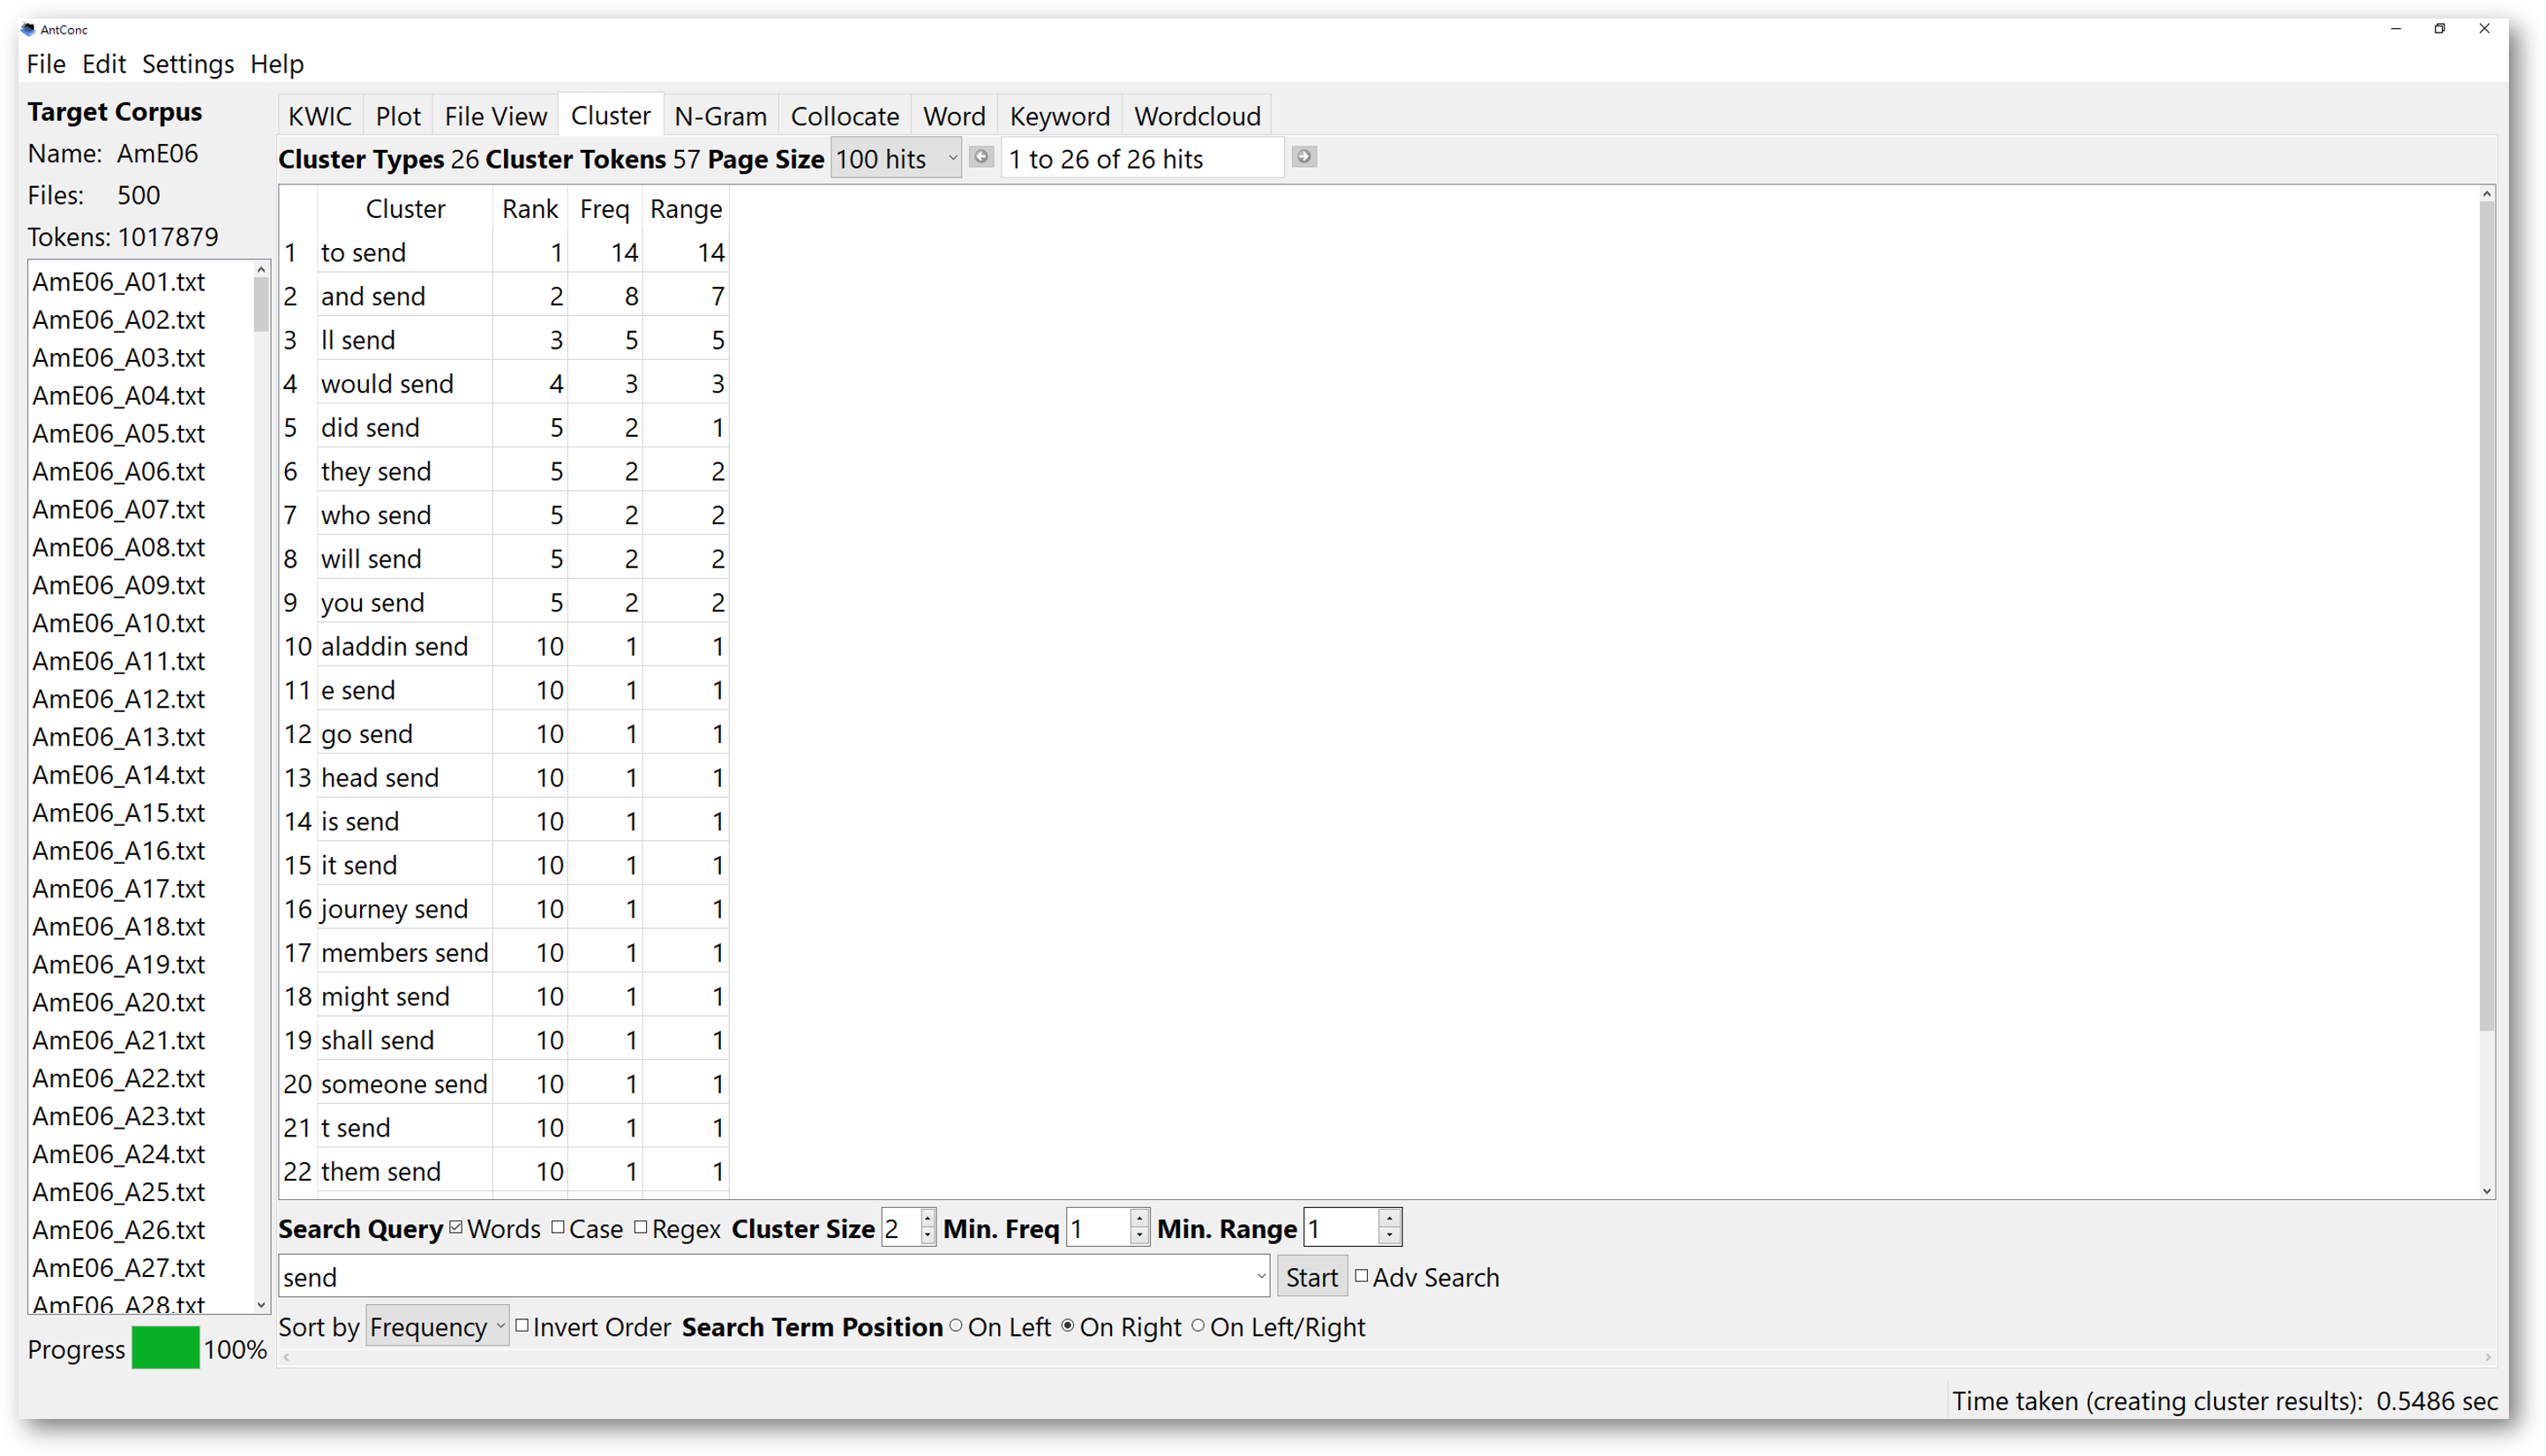

You could also change the cluster size located just above the search box. Again, the results can be sorted according to the alphabetical order of the ending word. If you want to do so, you will choose “Type”. If you want to sort by frequency of the clustering words, you should choose “frequency”. Then, the results will be first sorted according to the frequencies, followed by the alphabetical order of the clusters.

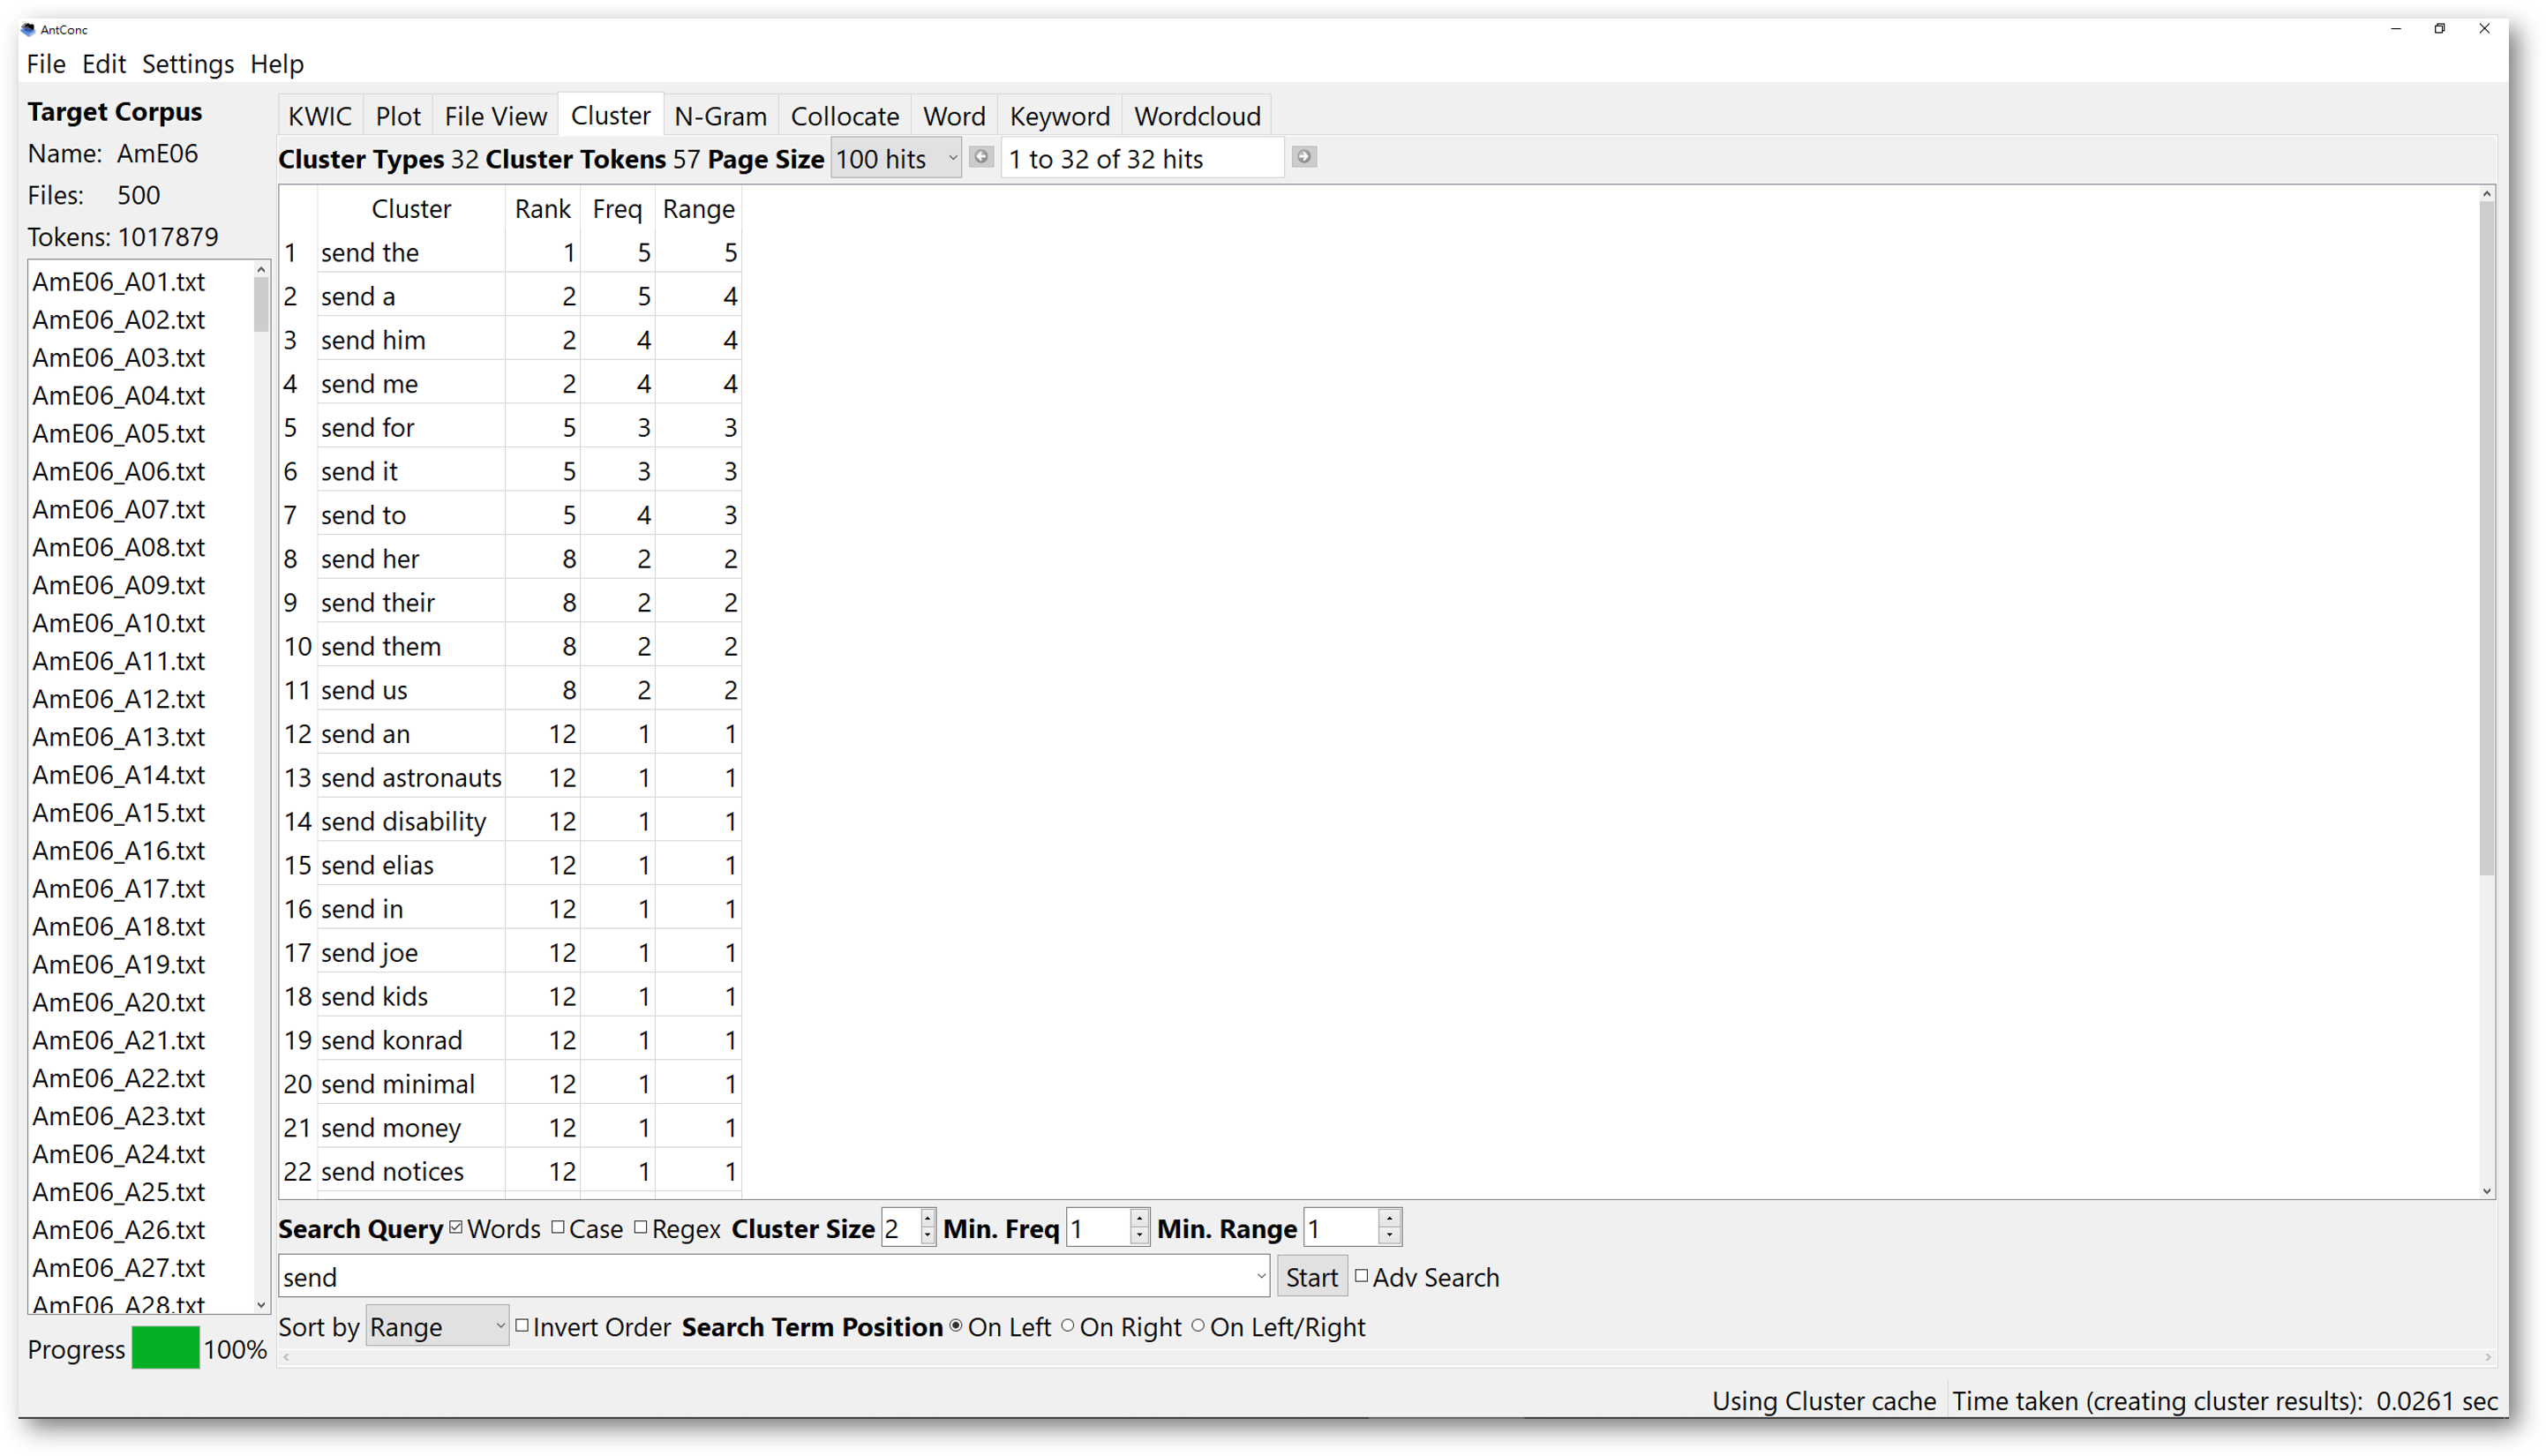
Choosing range is another aspect for you to try. If you want to sort the results according to the number of times the clusters appear in different texts. You can sort them according to range. For example, here we look for 2-word clusters with “send” on the left.
When you sort the results according to range, the cluster, “send the”, ranks the first, and it appears in 5 different texts, whereas the cluster, “send for”, “send it”, and “send to”, ranking the fifth, appears only in 3 texts.
4.2 N-Gram tool
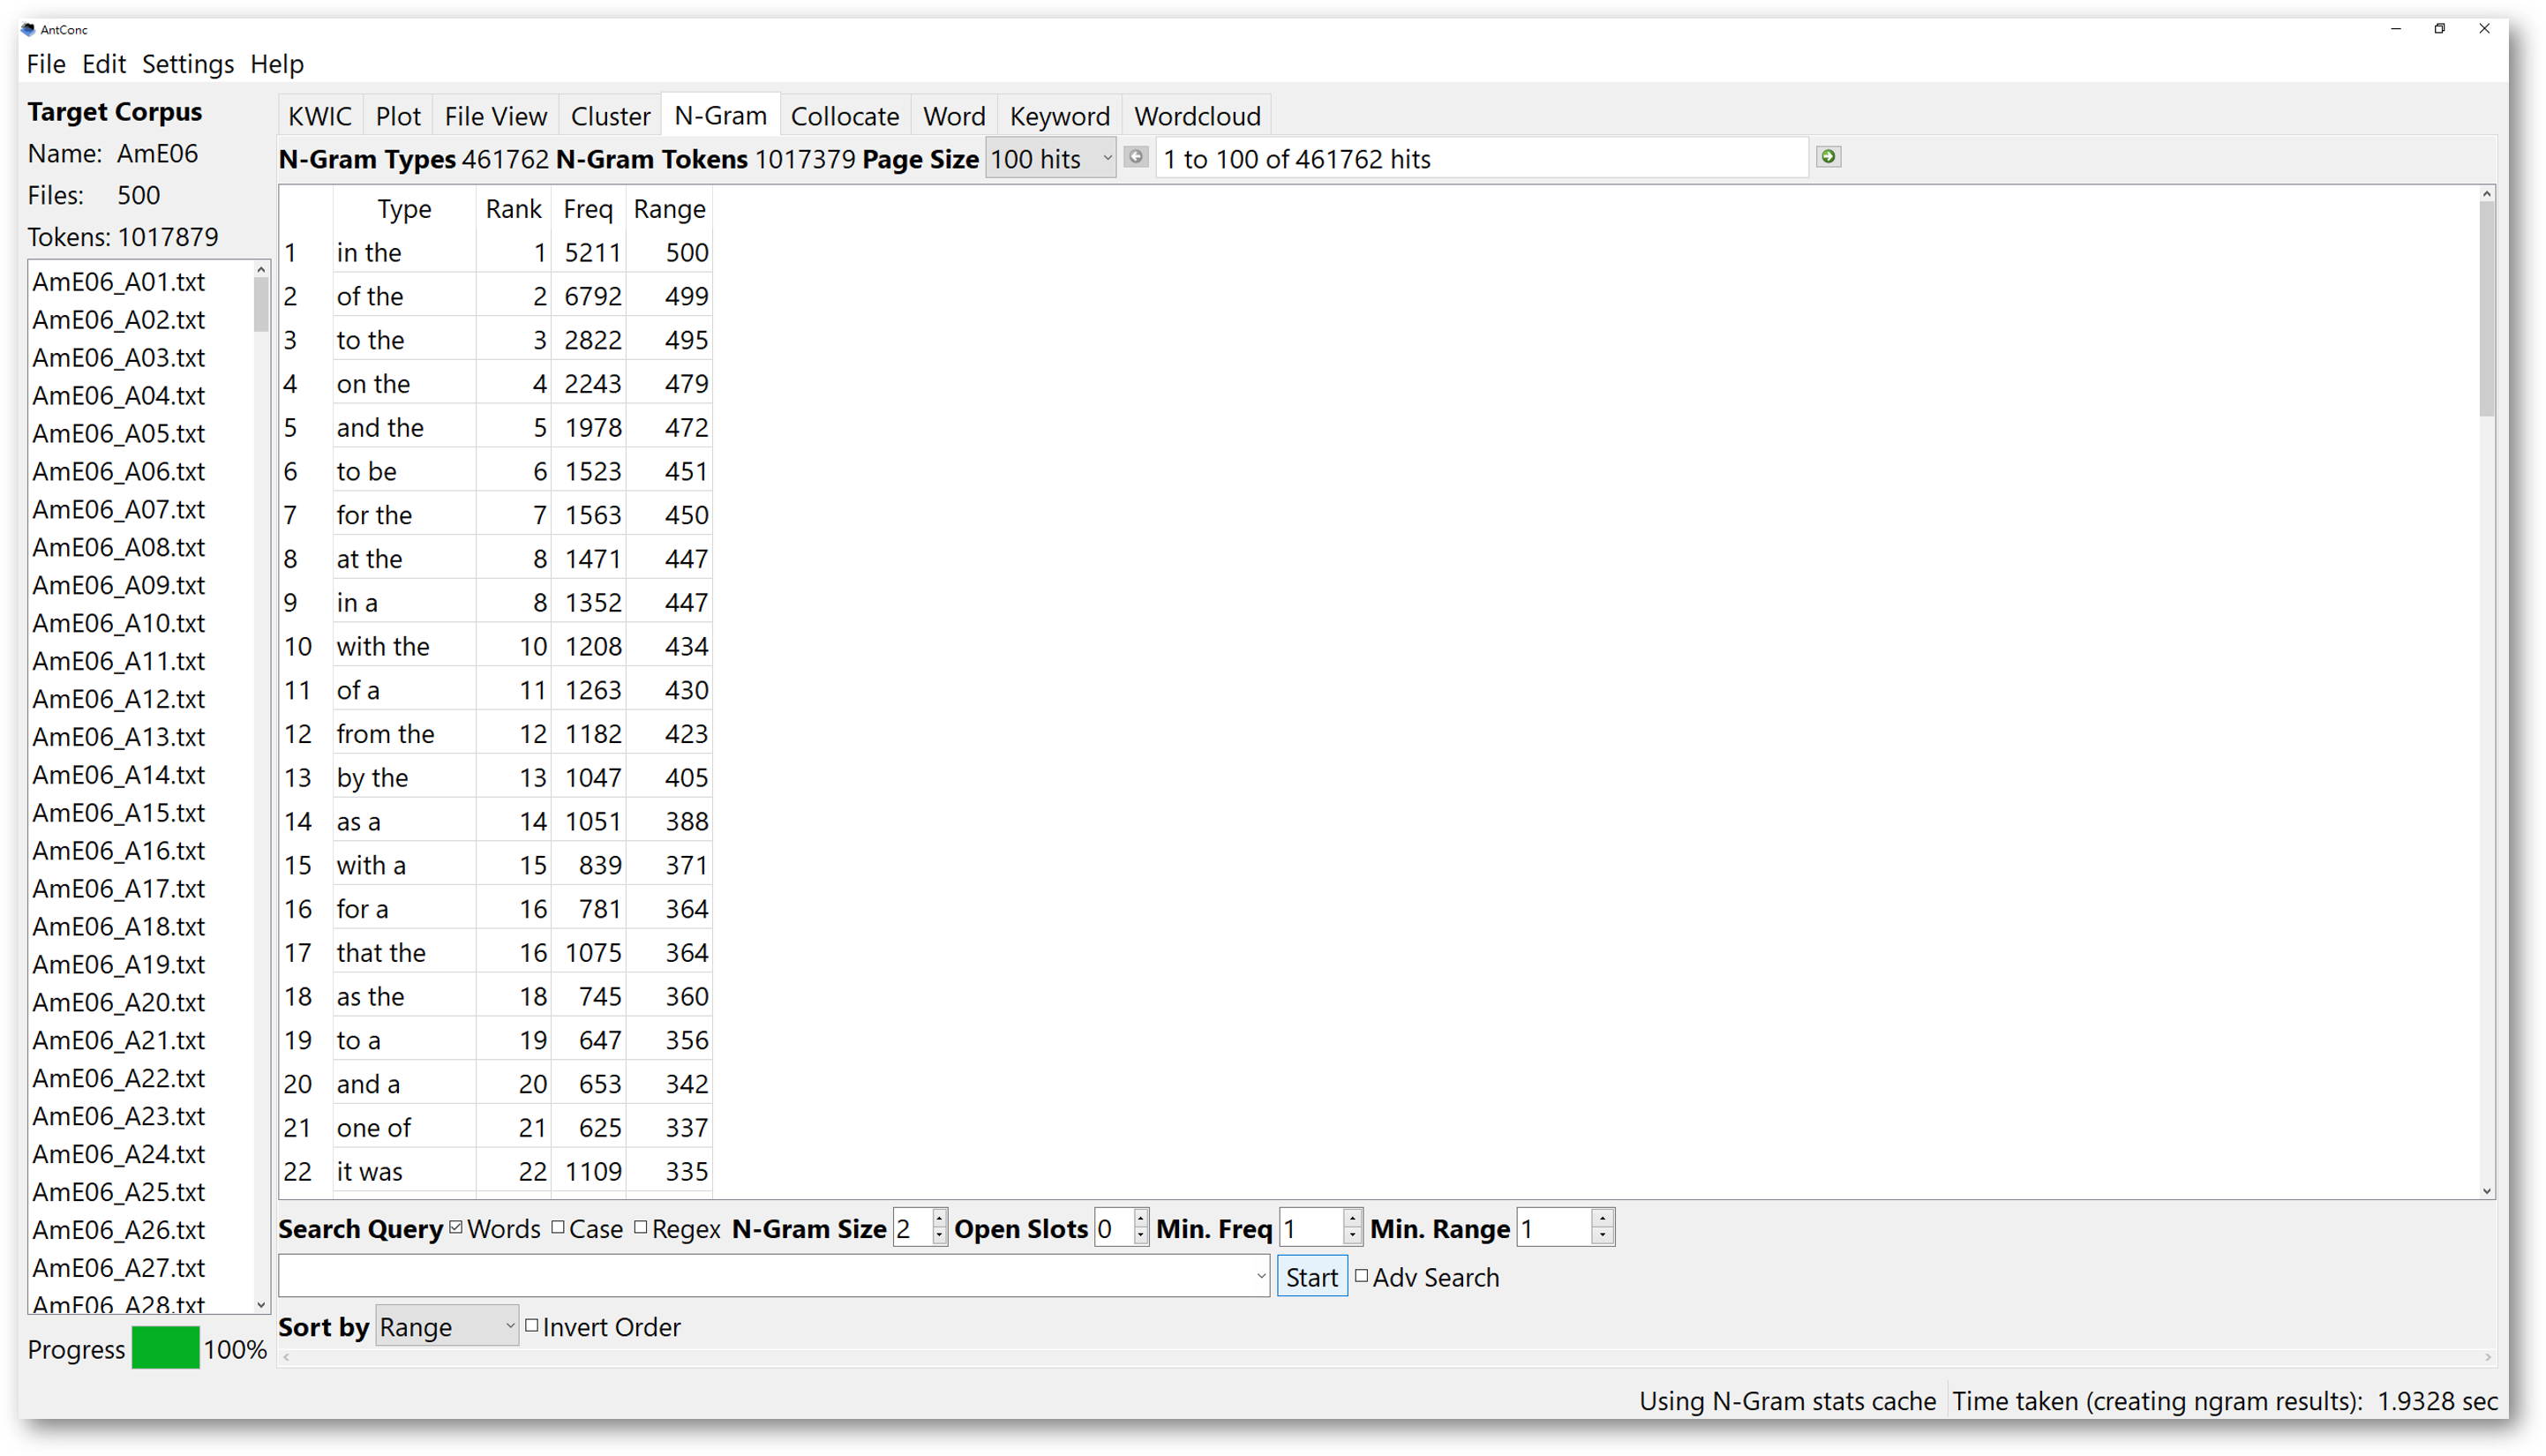
In the “N-Gram” tool, AntConc helps to scan the entire corpus for all “N-sized” clusters. This allows you to find common expressions in a corpus. If you want to run an N-Gram analysis of the corpus, you do not necessarily need to type in a search item. This is unlike the “Custer” tool, where you have a word that you want to analyse by looking at its surrounding words.
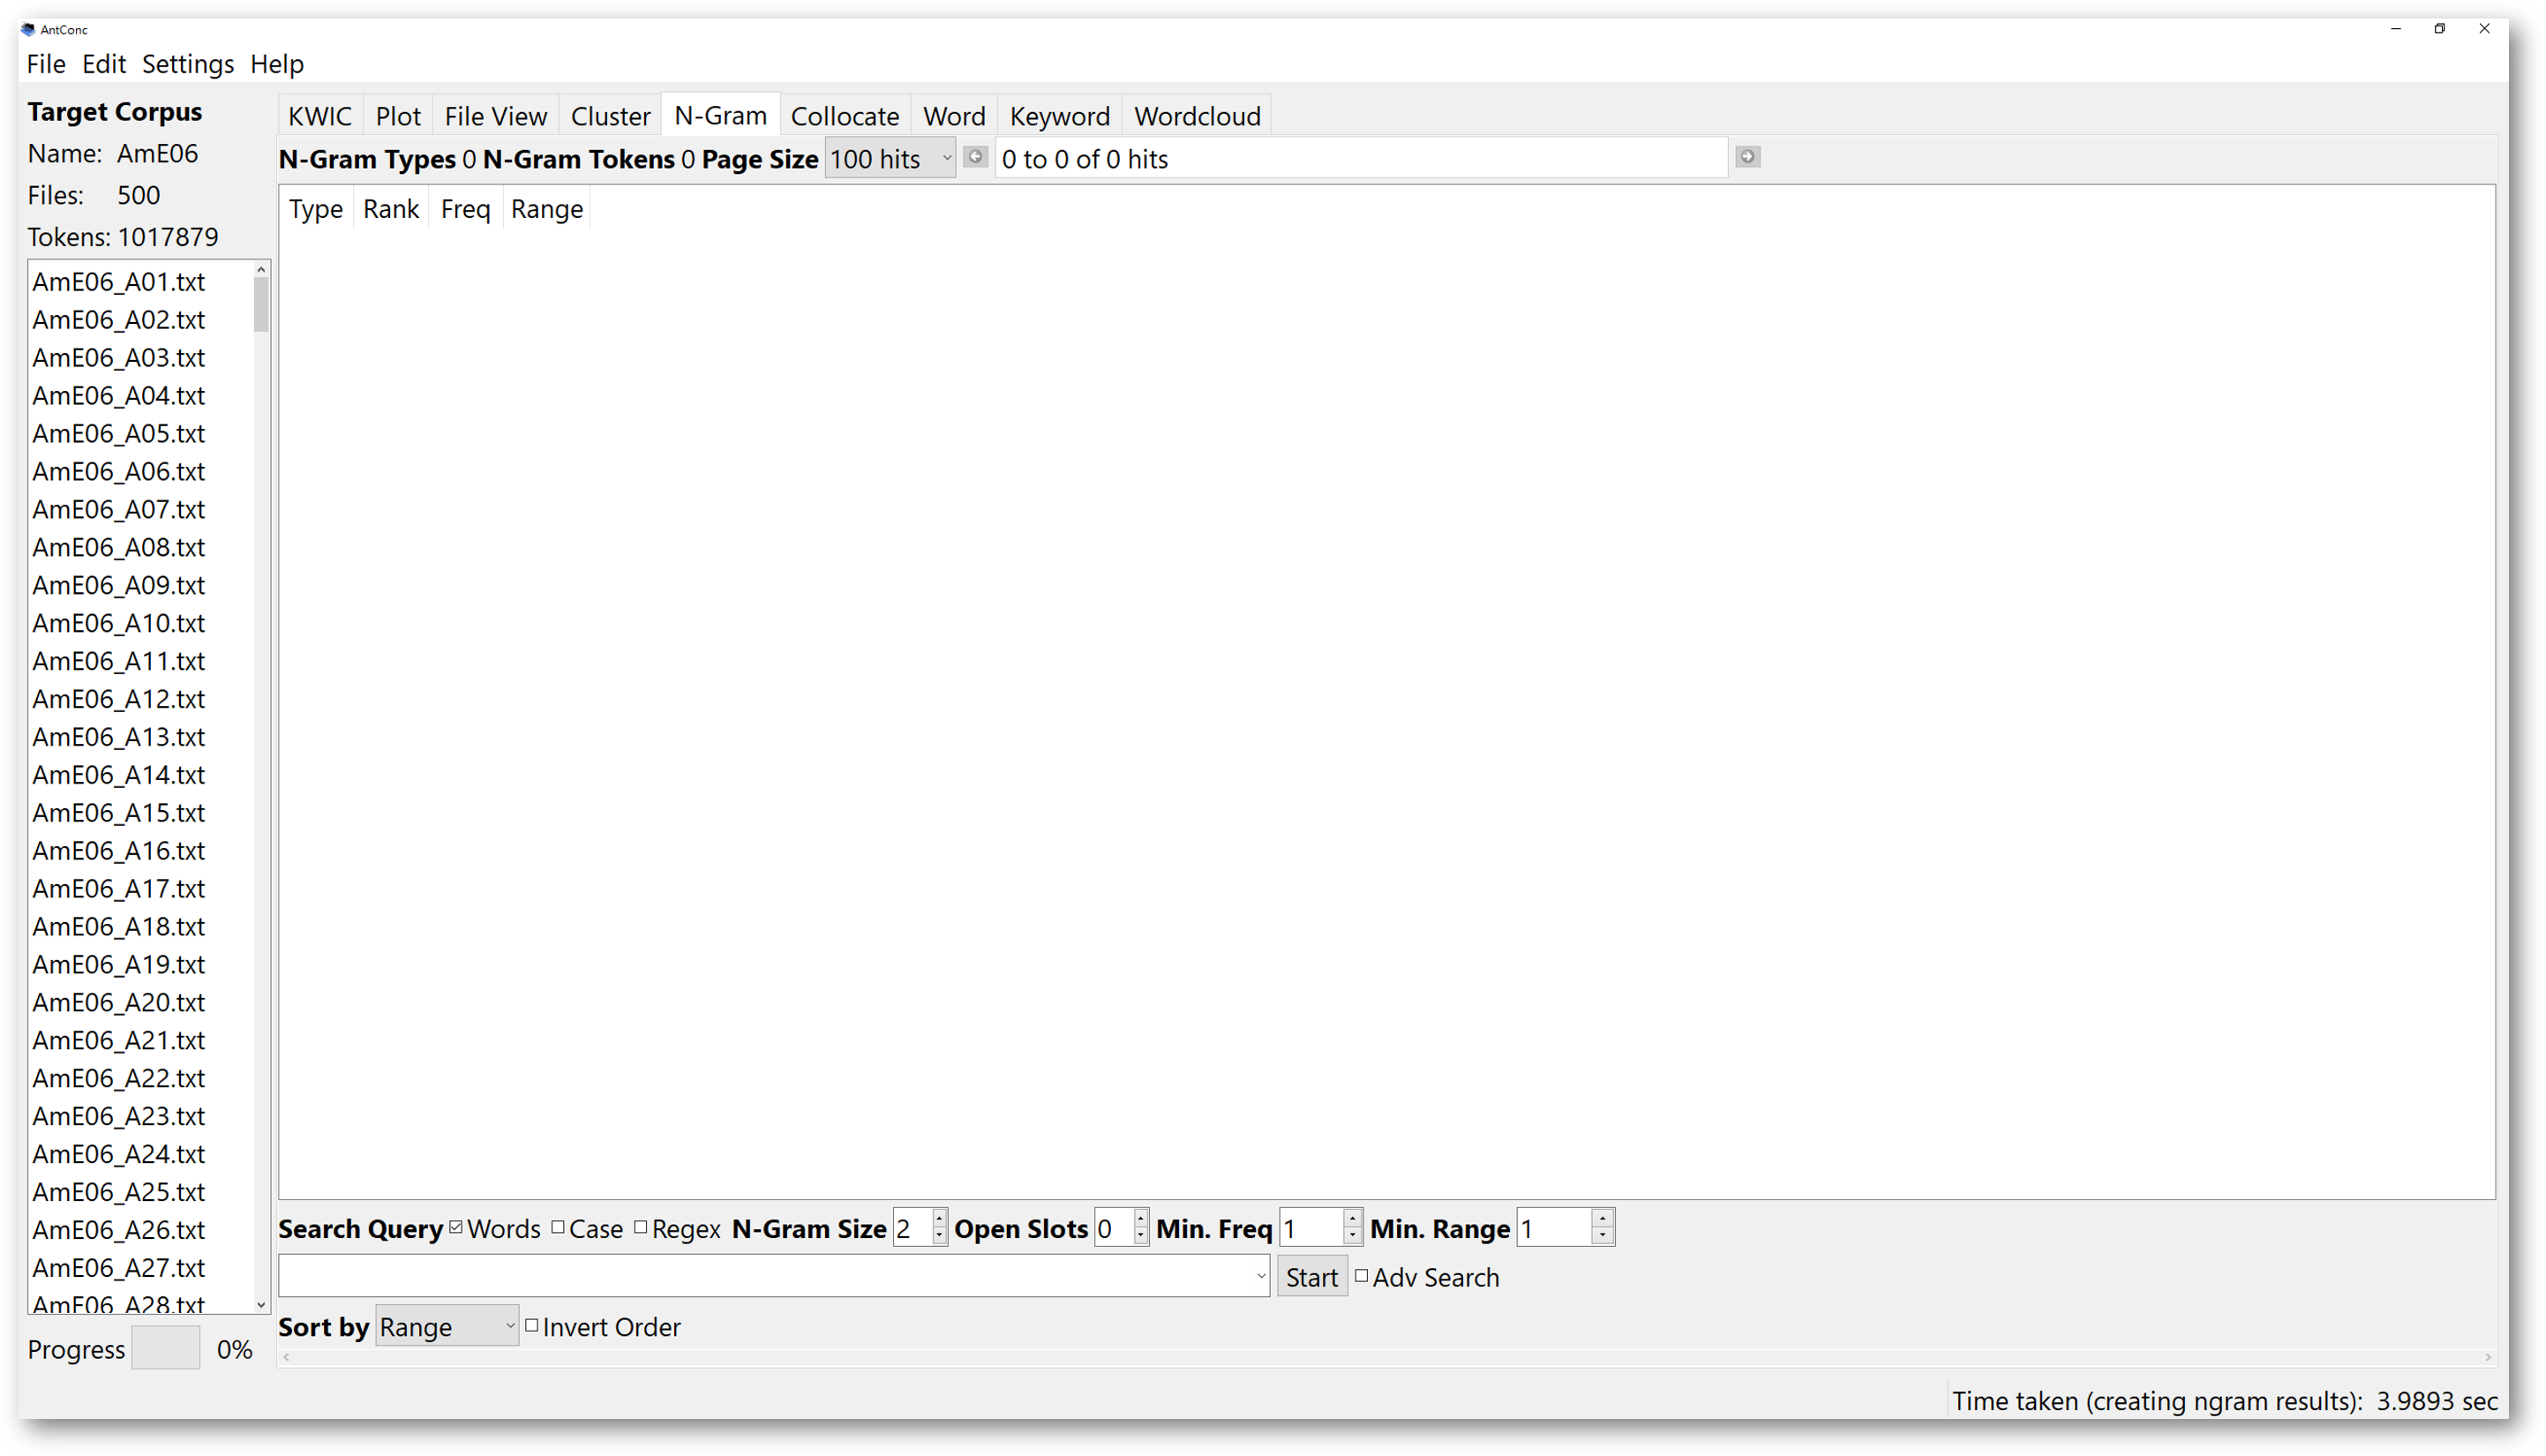
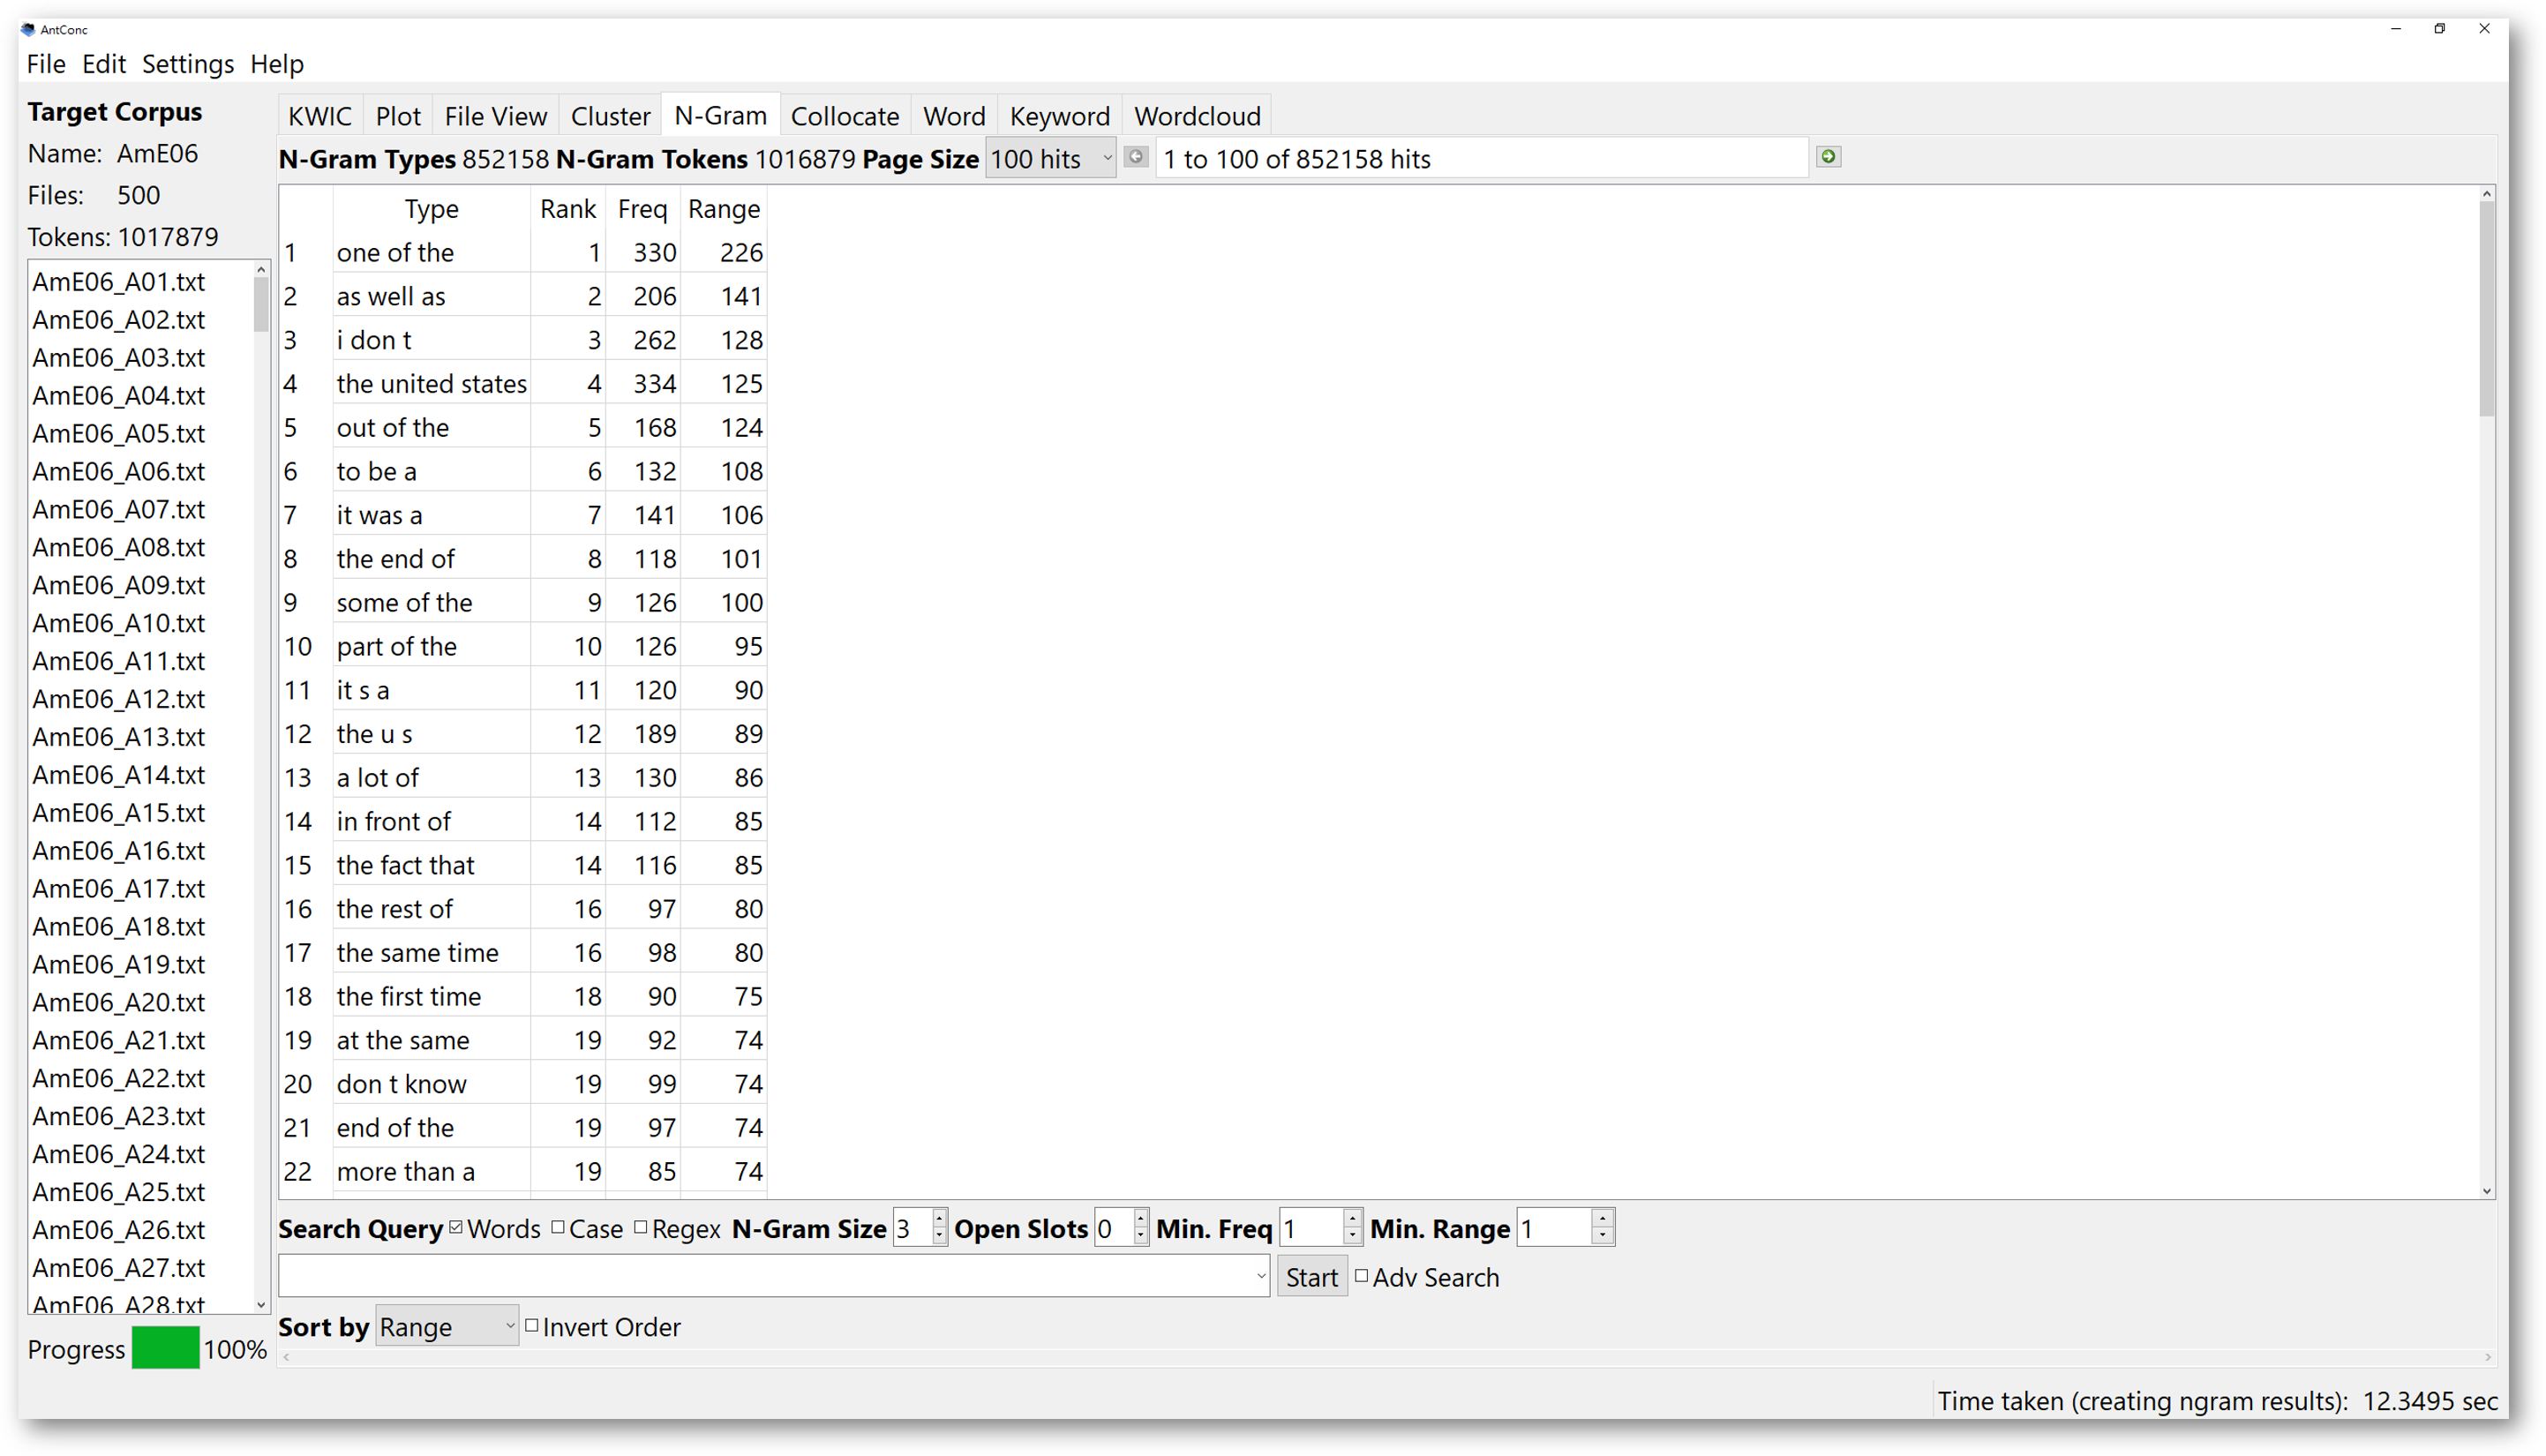
You could simply decide the search conditions for the “N-Gram” search to start off. For example, you can set the “N-Gram” size to 2. The tool will find all the expressions of a 2-word cluster in the corpus. The results will show all the 2-word chunks. If somehow you do not find results of these 2-word clusters interesting, you could increase the N-Gram size to 3, and it may give you more interesting results. The total number of “N-Gram types”, and combined total count of all the “N-Gram Tokens” are shown at the top of the tool window.
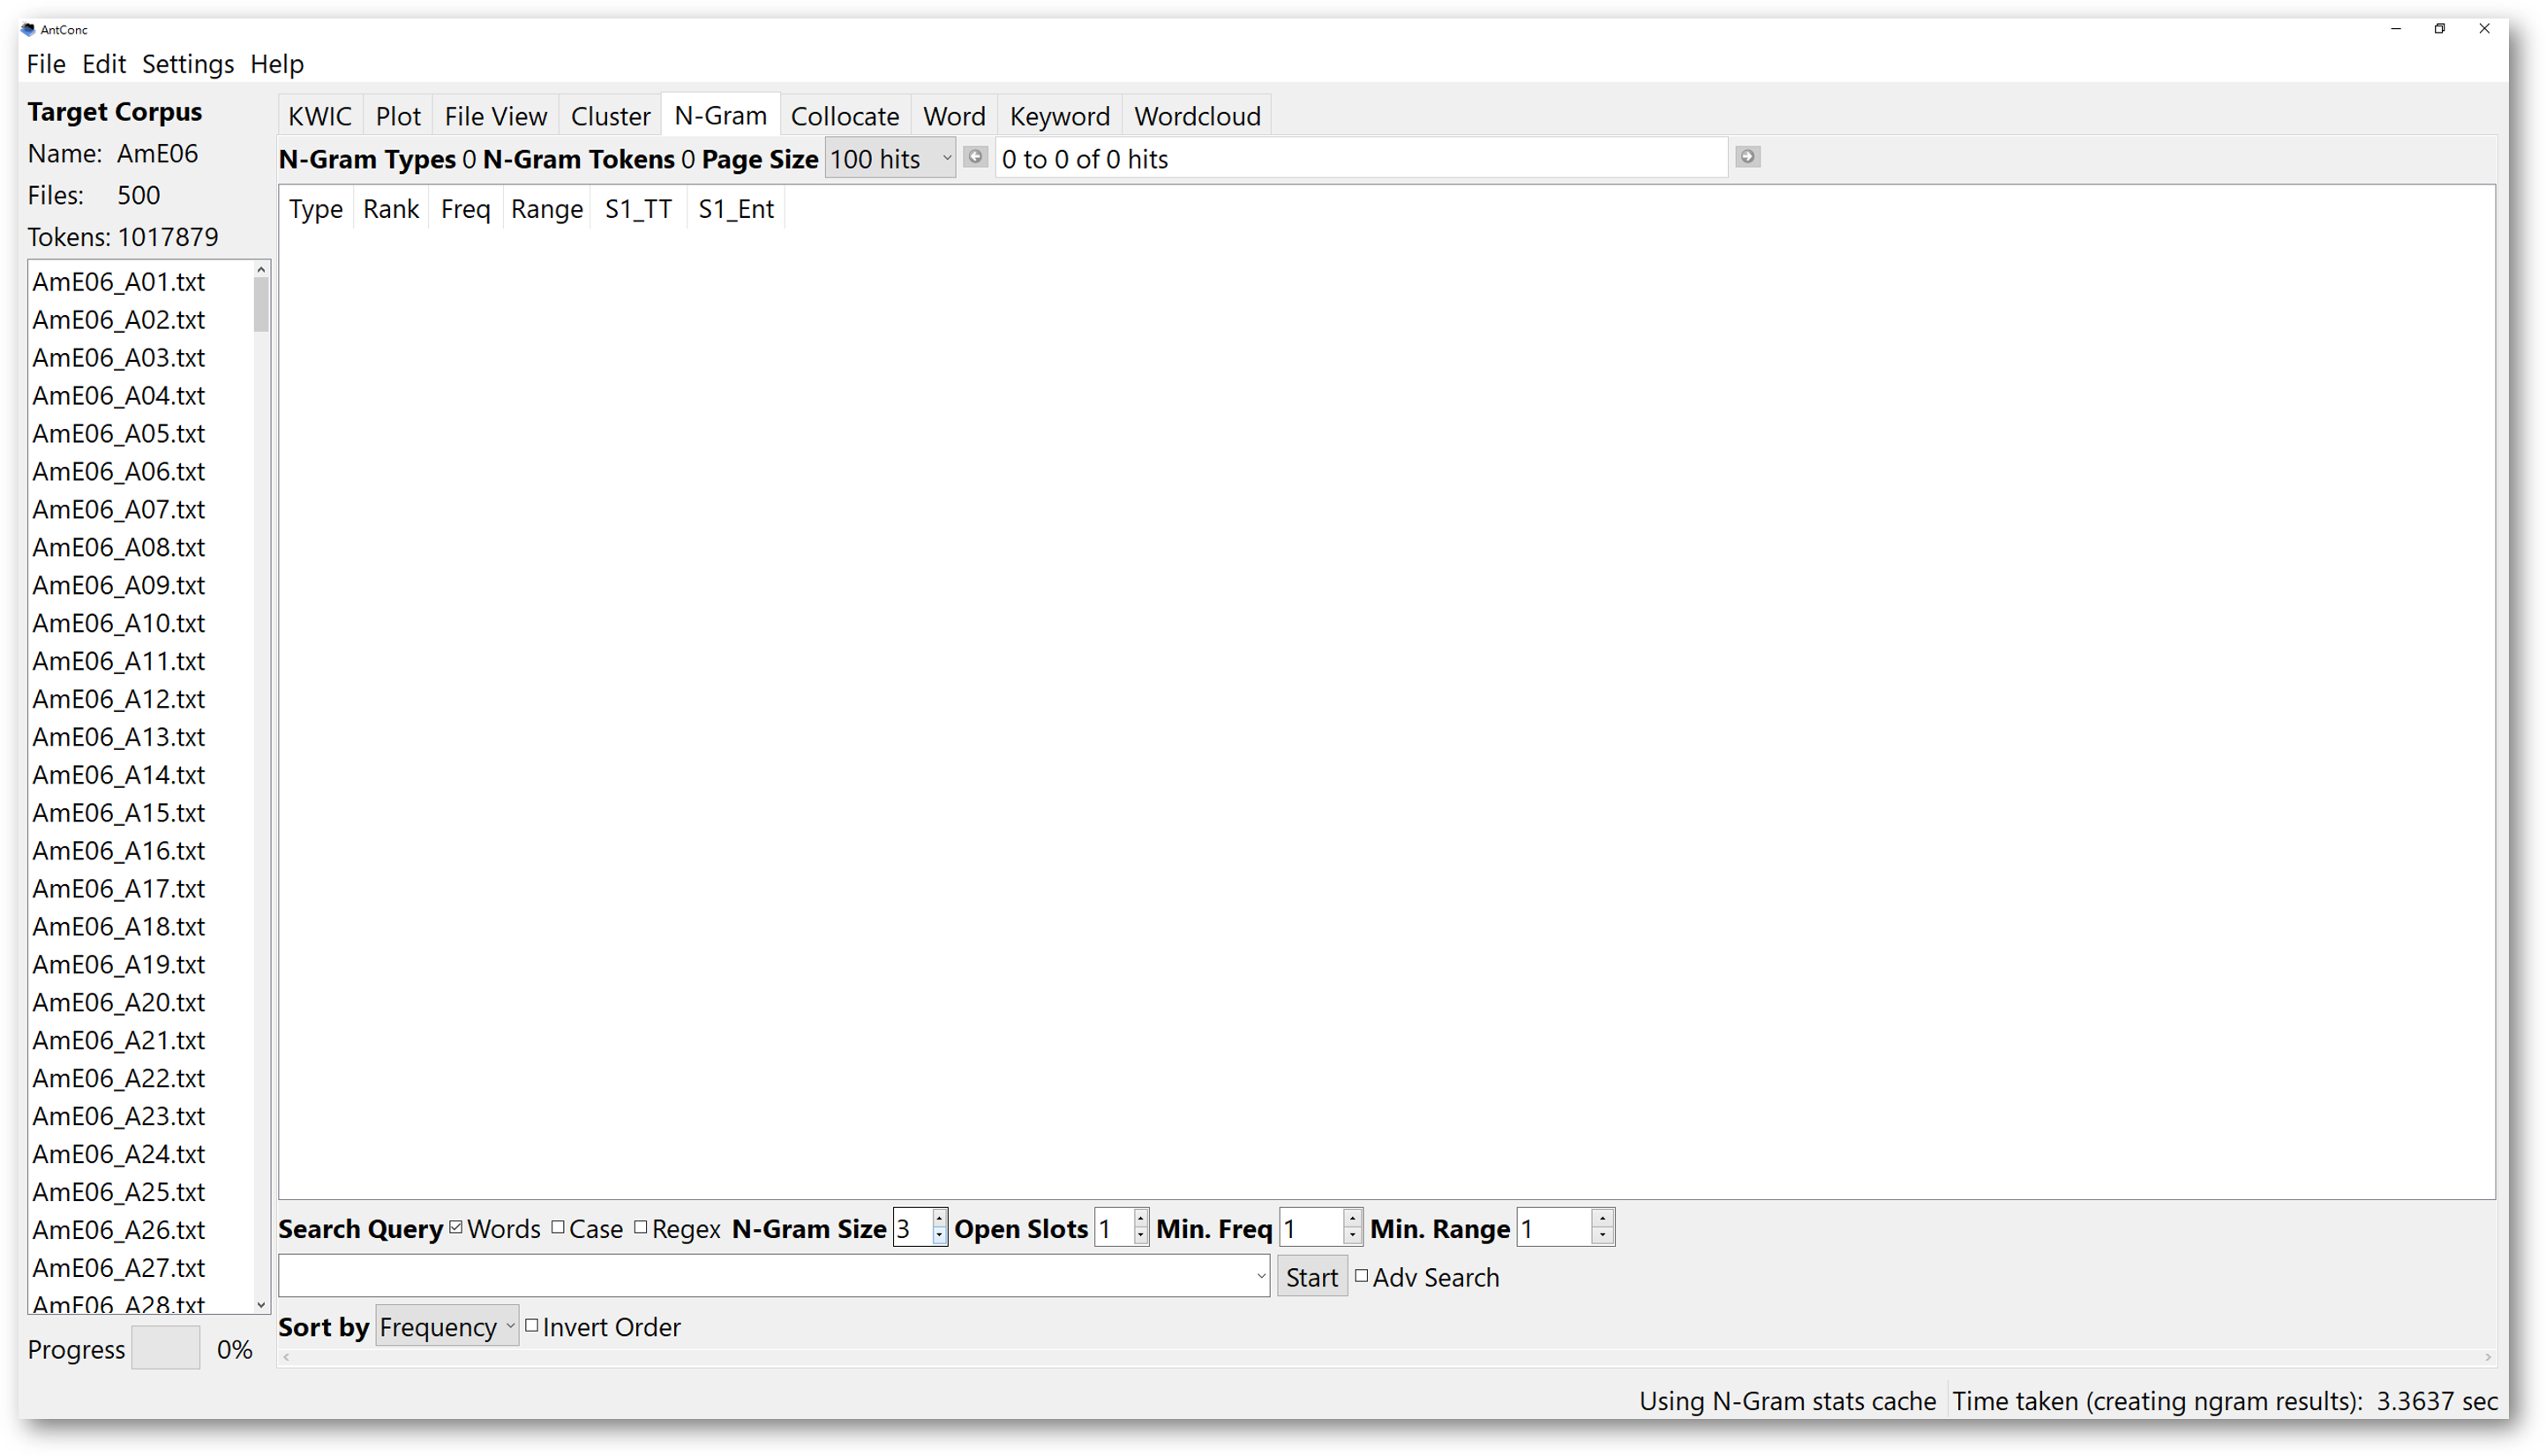
One more powerful function of AntConc N-Gram searches is the “Open Slot searches”. If we set the value of open slot to 1, the N-Gram search will help us to look for the N-number of word chunks, which have 1 open slot. The number of open slot determines the number of fillers of that slot. For instance, if we set the “N-Gram Size” to 3, and have 1 open slot, any 3-word chunks which have one filler will be displayed.

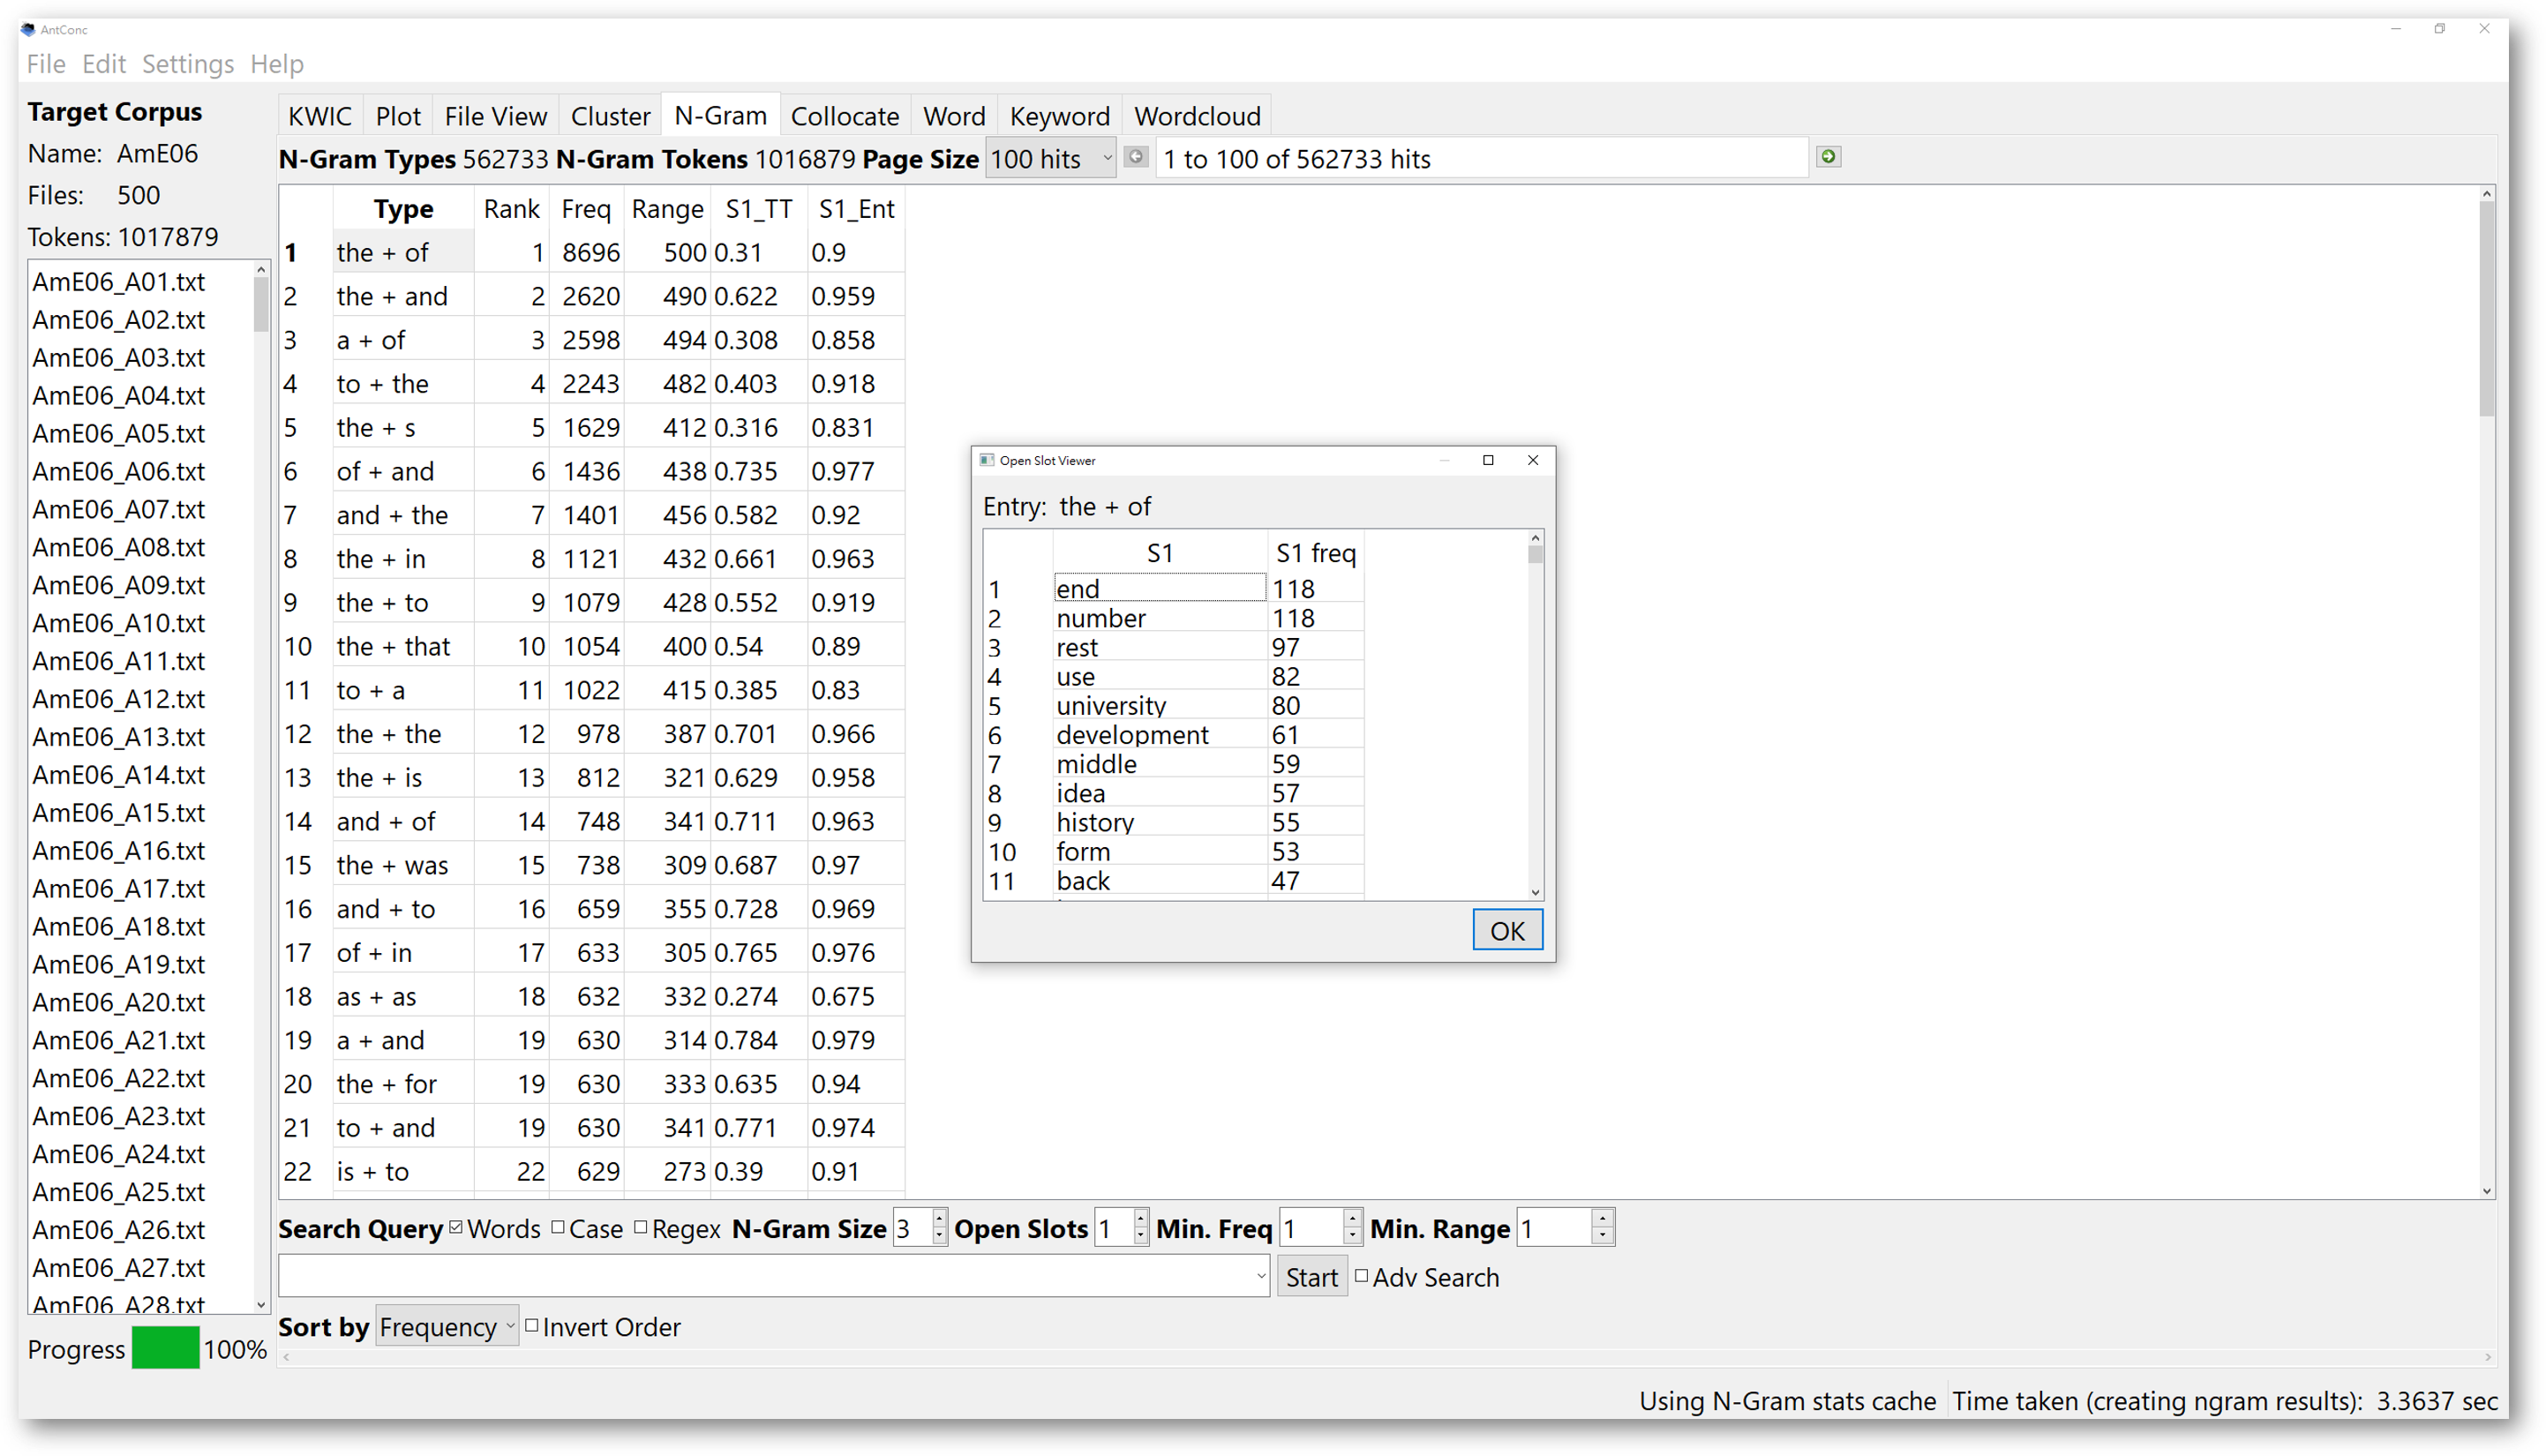
If you want to have further contextual information of the open slot entries, hold the “Shift” key, and double-click on the cell on the “Type” column. For example, double-click on the cell of “the + of”, the “Open Slot Viewer” will show all possible fillers between “the” and “of”, like “the end of”, “the number of”, and “the rest of”. The “Open Slot Viewer” will disclose statistics about the degree of variation of the slot.
5. Reference corpus, Keyword, and Wordcloud tool
AntConc is particularly useful when you want to analyse texts and make comparisons. But to do so, we need a reference corpus to compare against your target corpus, so you can ask the software to analyse its features.
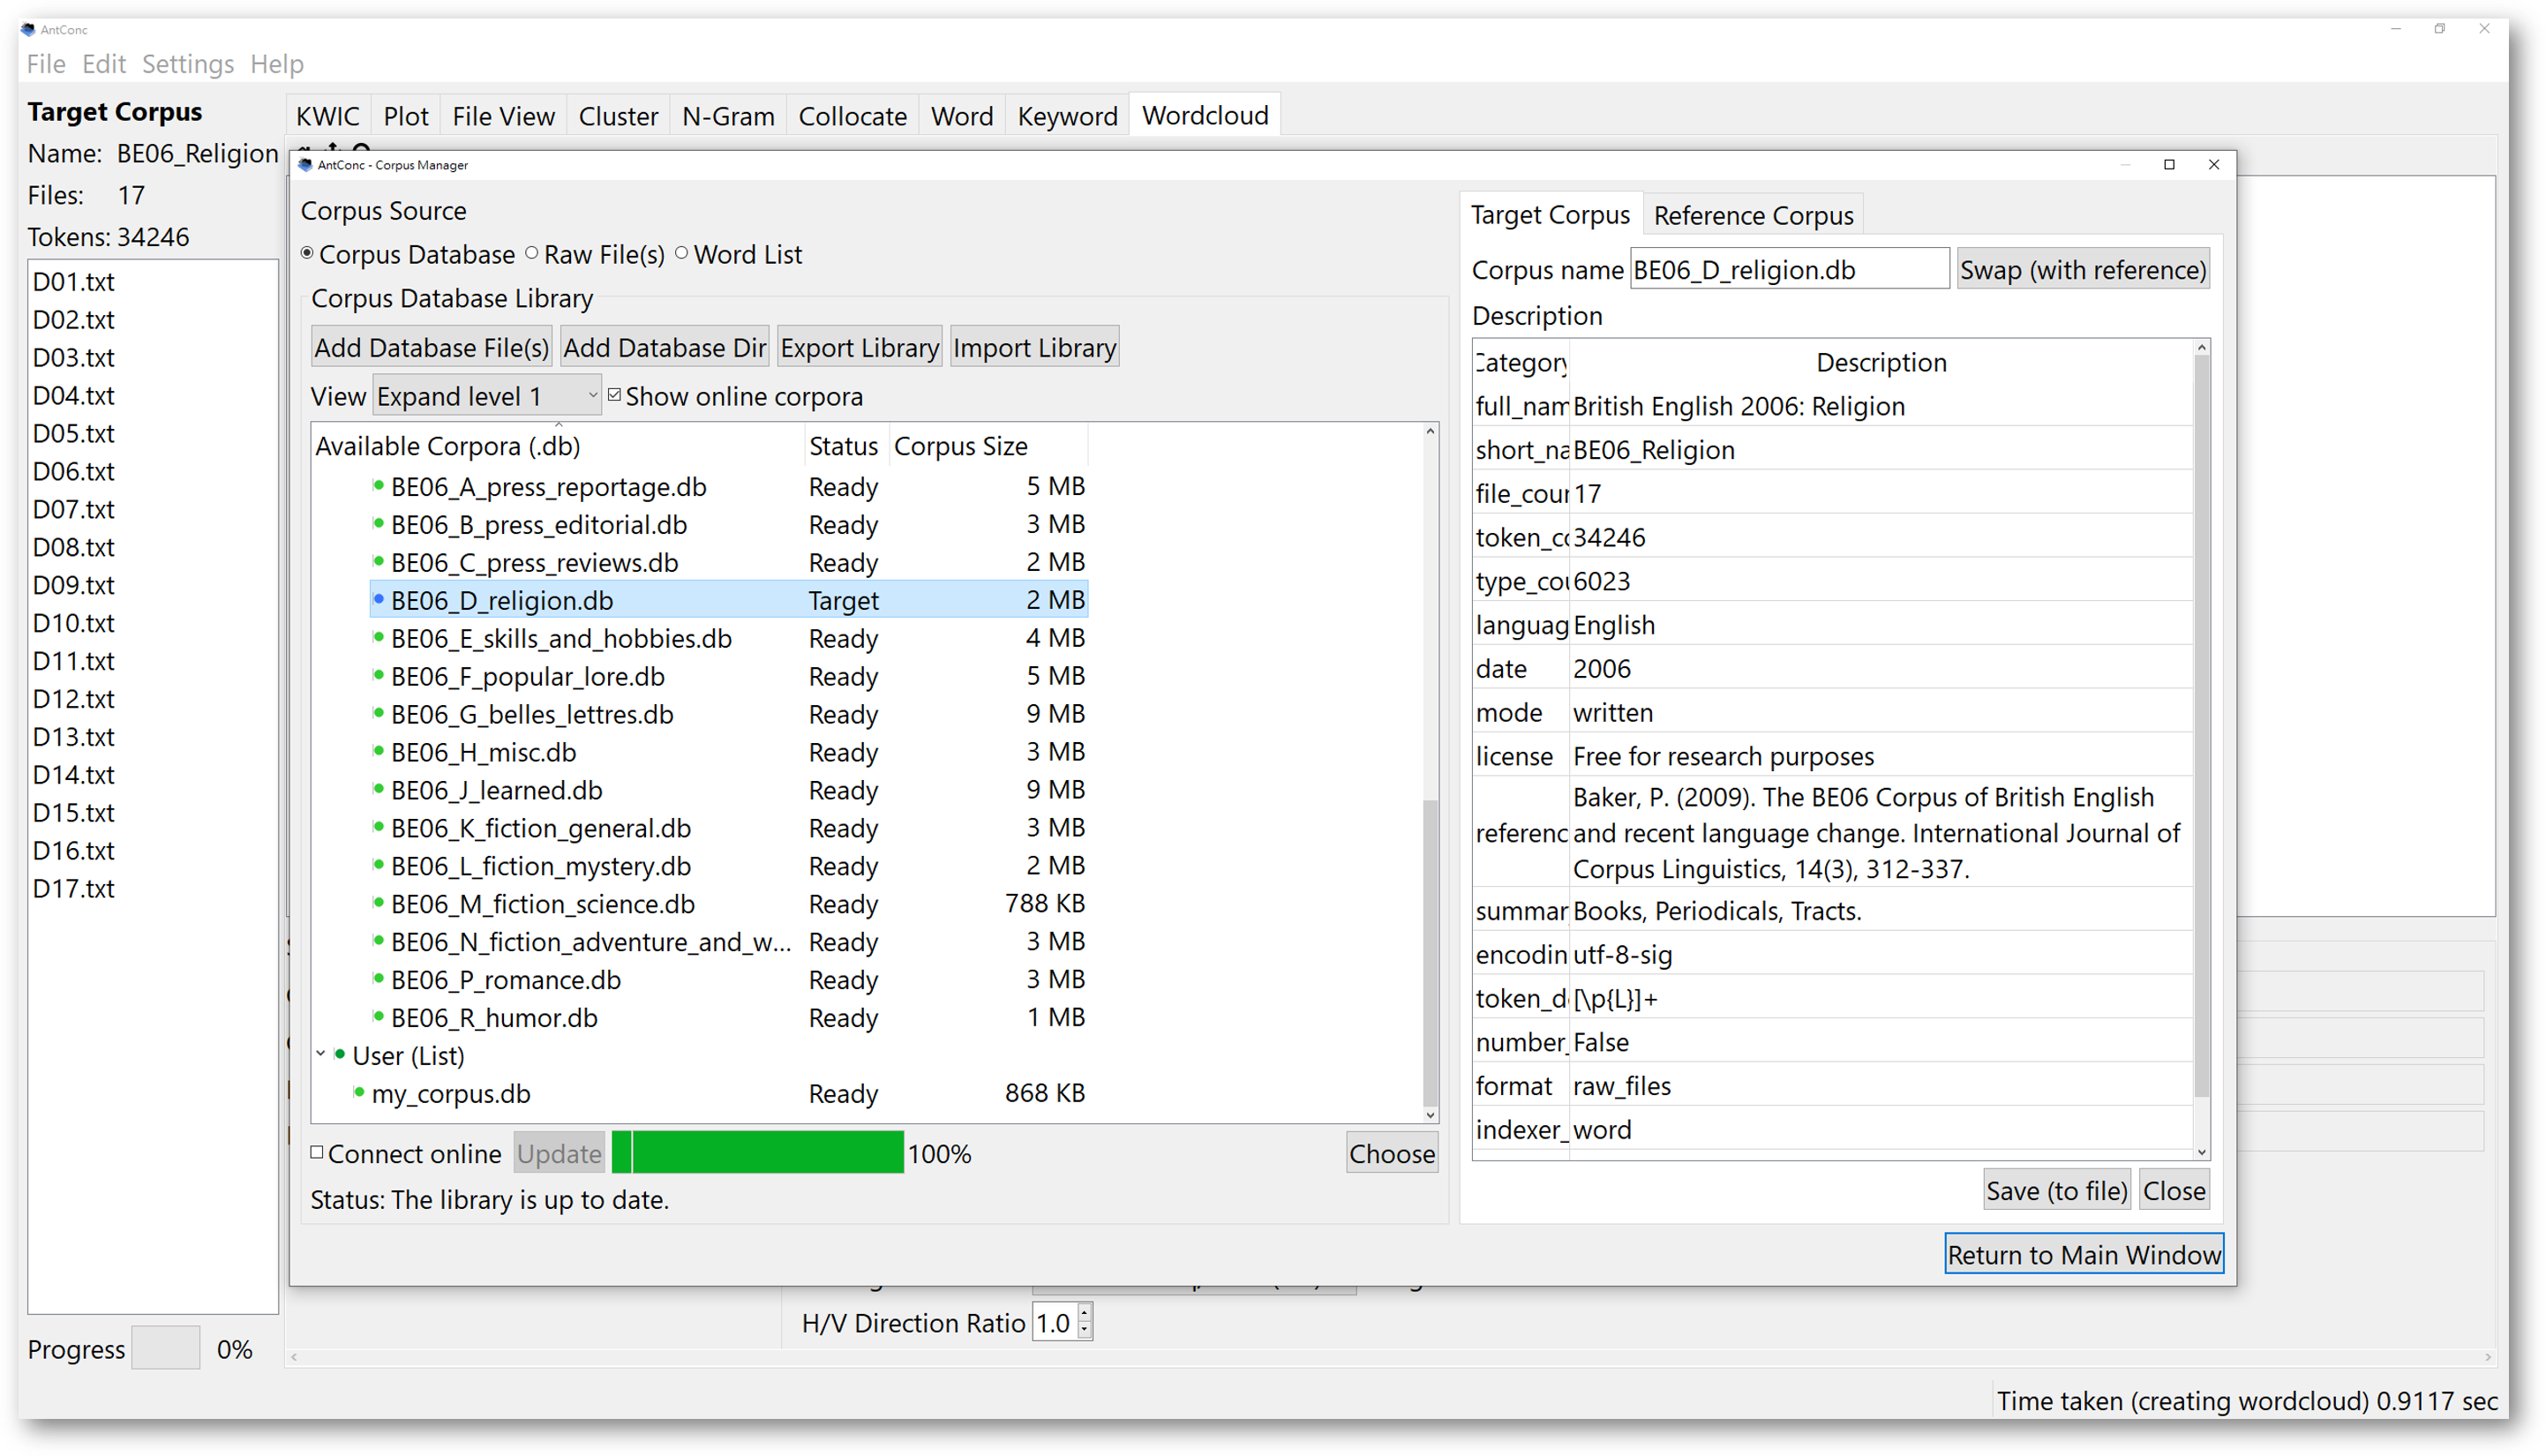
To open a reference corpus, begin by opening the ‘Corpus Manager’. Previously, when we selected a particular database as a corpus, we actually selected it as a target corpus. In our example here, let’s use the religion corpus from the “BE06_religion” corpus as the target corpus.
Now, we want to incorporate another corpus as a reference corpus. To do that, select the “Reference Corpus” tab at the top right, next to the “Target Corpus” tab. This means that you now want to select a reference corpus. If you have not selected anything as a reference corpus yet, the window should be blank.
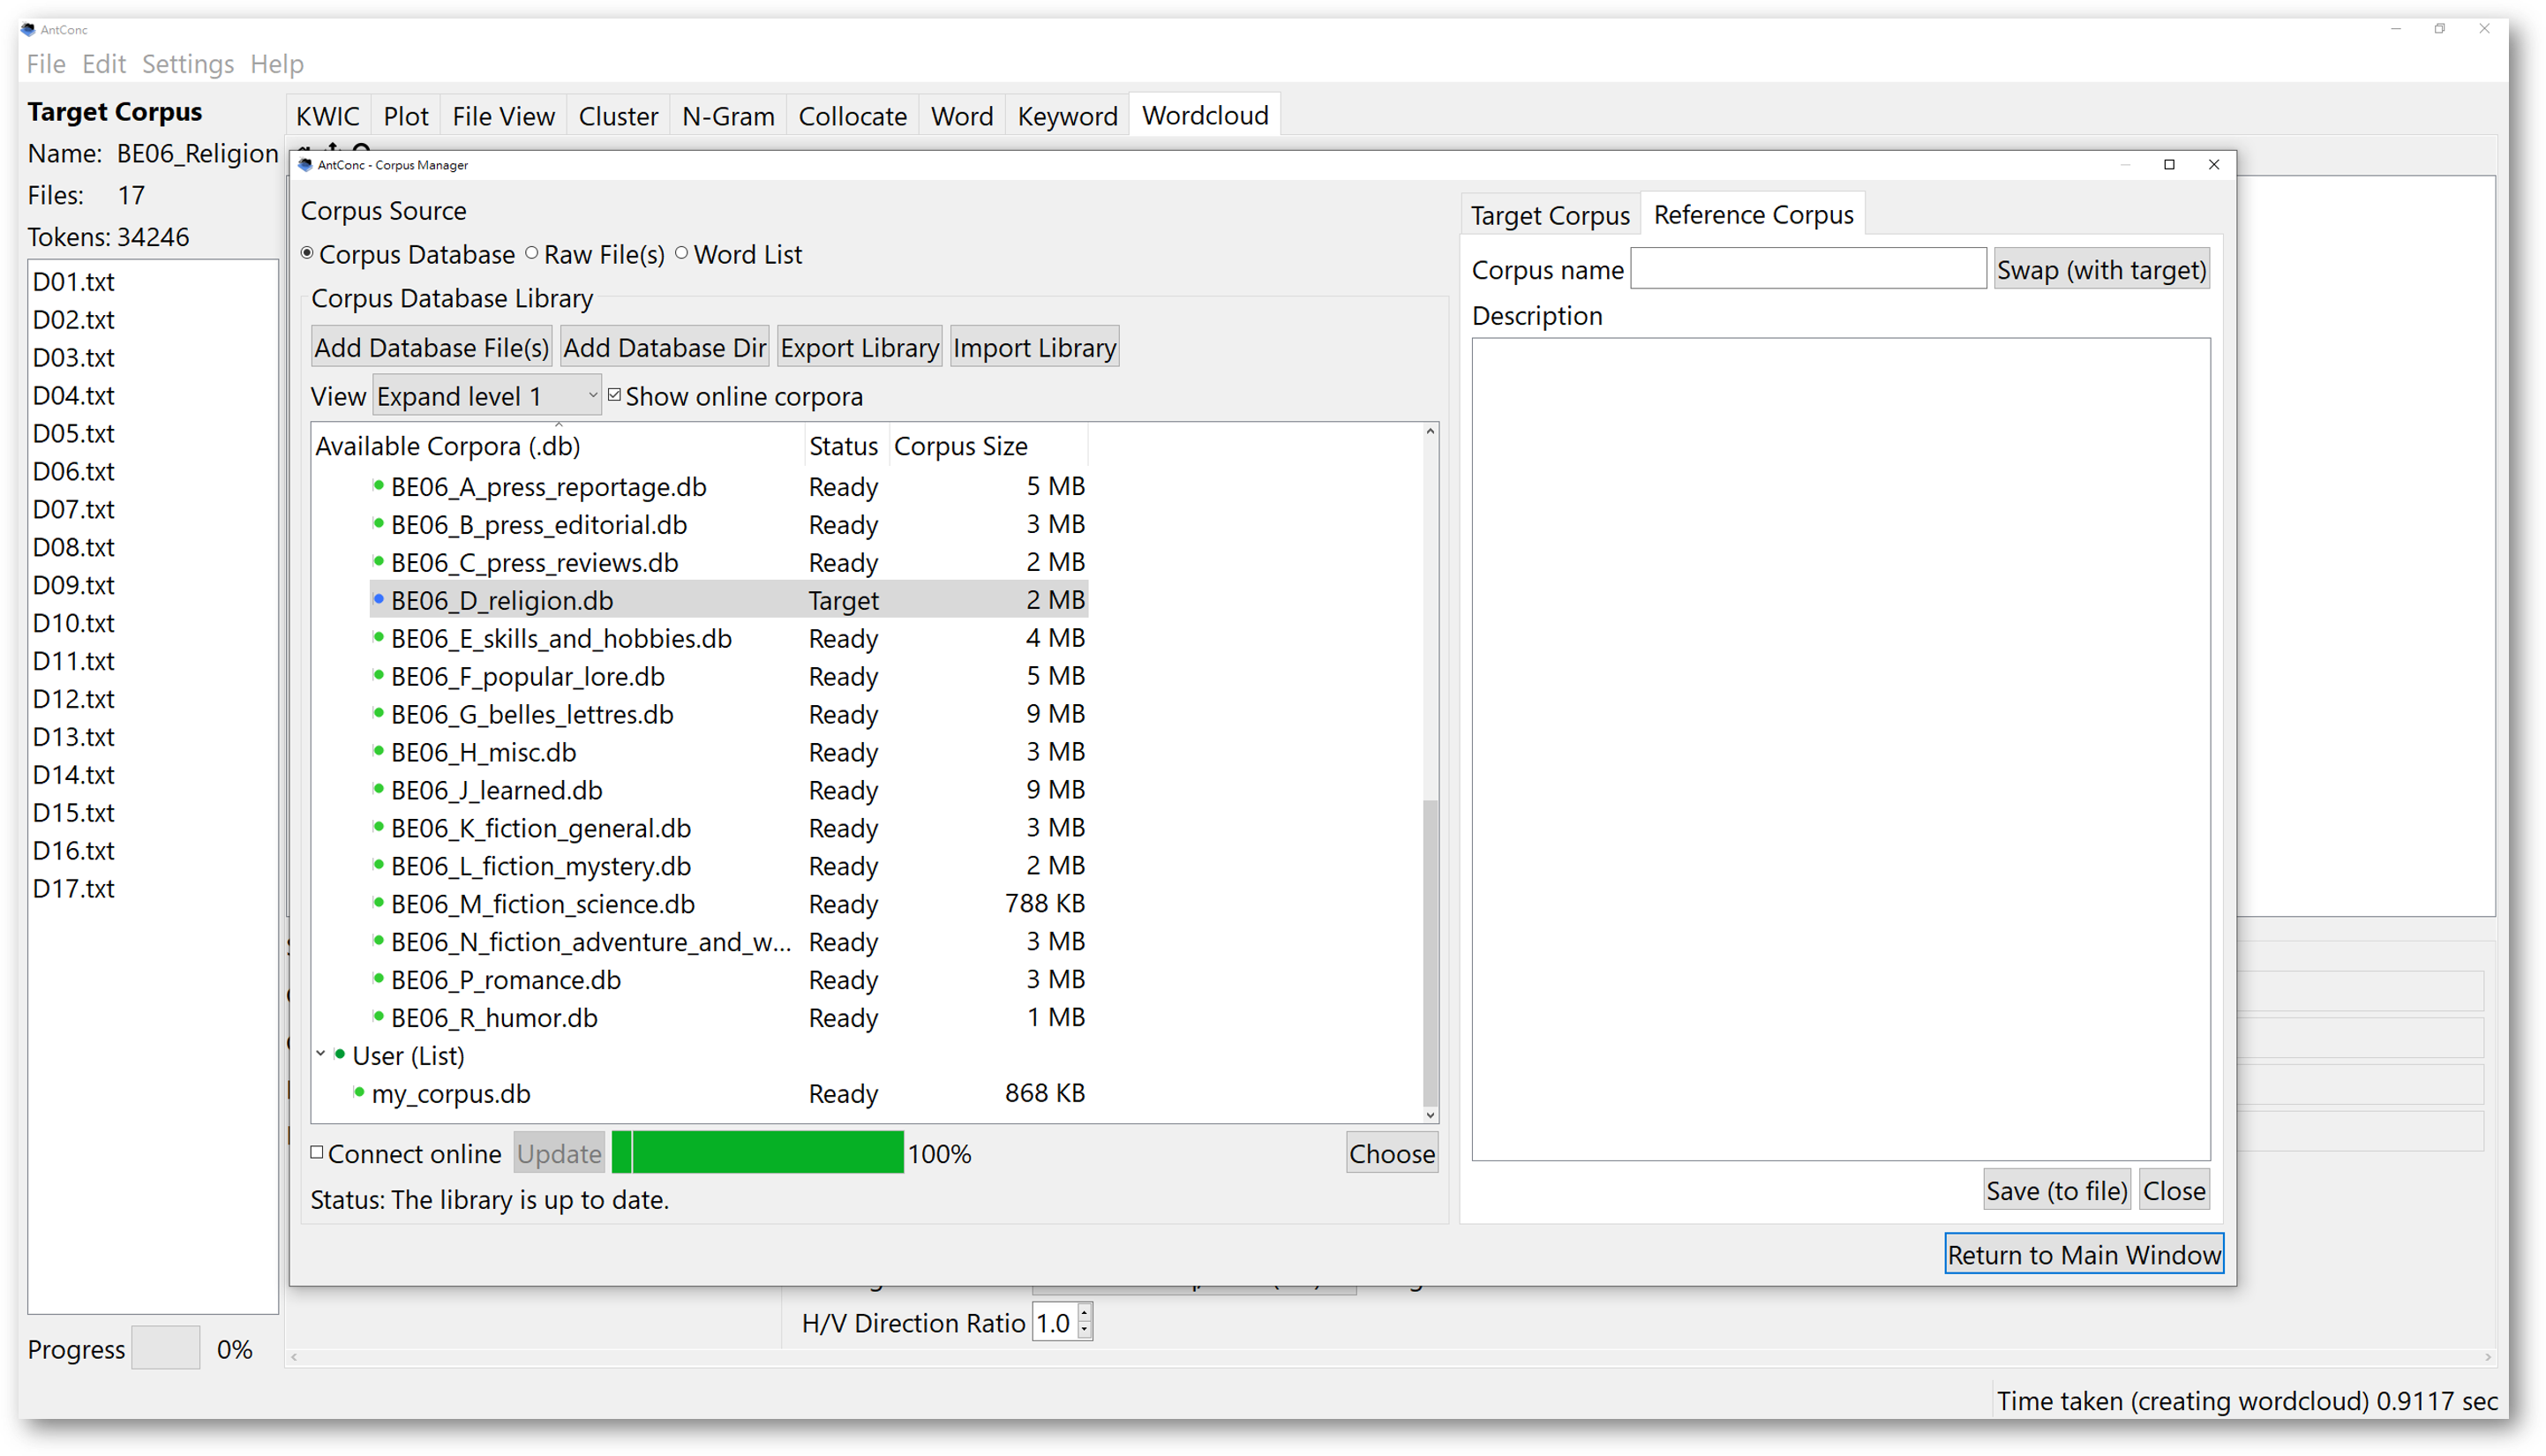
Normally, we would like to see how a specialised corpus is different from a larger reference corpus. Let’s use the “AmE06” general corpus in this case. Double-click on the corpus to incorporate it as a reference corpus after the ‘Reference Corpus’ tab is selected. Upon selection, the “Reference Corpus” window on the right will now show the properties of the “AmE06” general corpus.

After you have selected a reference corpus, you will be able to see the information on the left. The text files compiling the target corpus and reference corpus will be shown separately.

From here, you can start generating a keyword list for the target corpus. Same as the “N-Gram” tool, the “Keyword” tool does not necessarily require a search query item.
The “Keyword” tool could simply generate a list of keywords that appear “unusually frequently in the target corpus” based on statistical measurements. Using our example of the religion corpus (BE06_religion) here, we can easily notice that the keywords from the are related to religion, and they appear significantly more frequently compared to the general corpus (AmE06) without any specific themes.

Keep in mind the “Keyword” tool only works if you have loaded in a reference corpus. Without it, AntConc is not going to compare anything for you. Also, the keyword list is generated for the target corpus instead of the reference corpus.
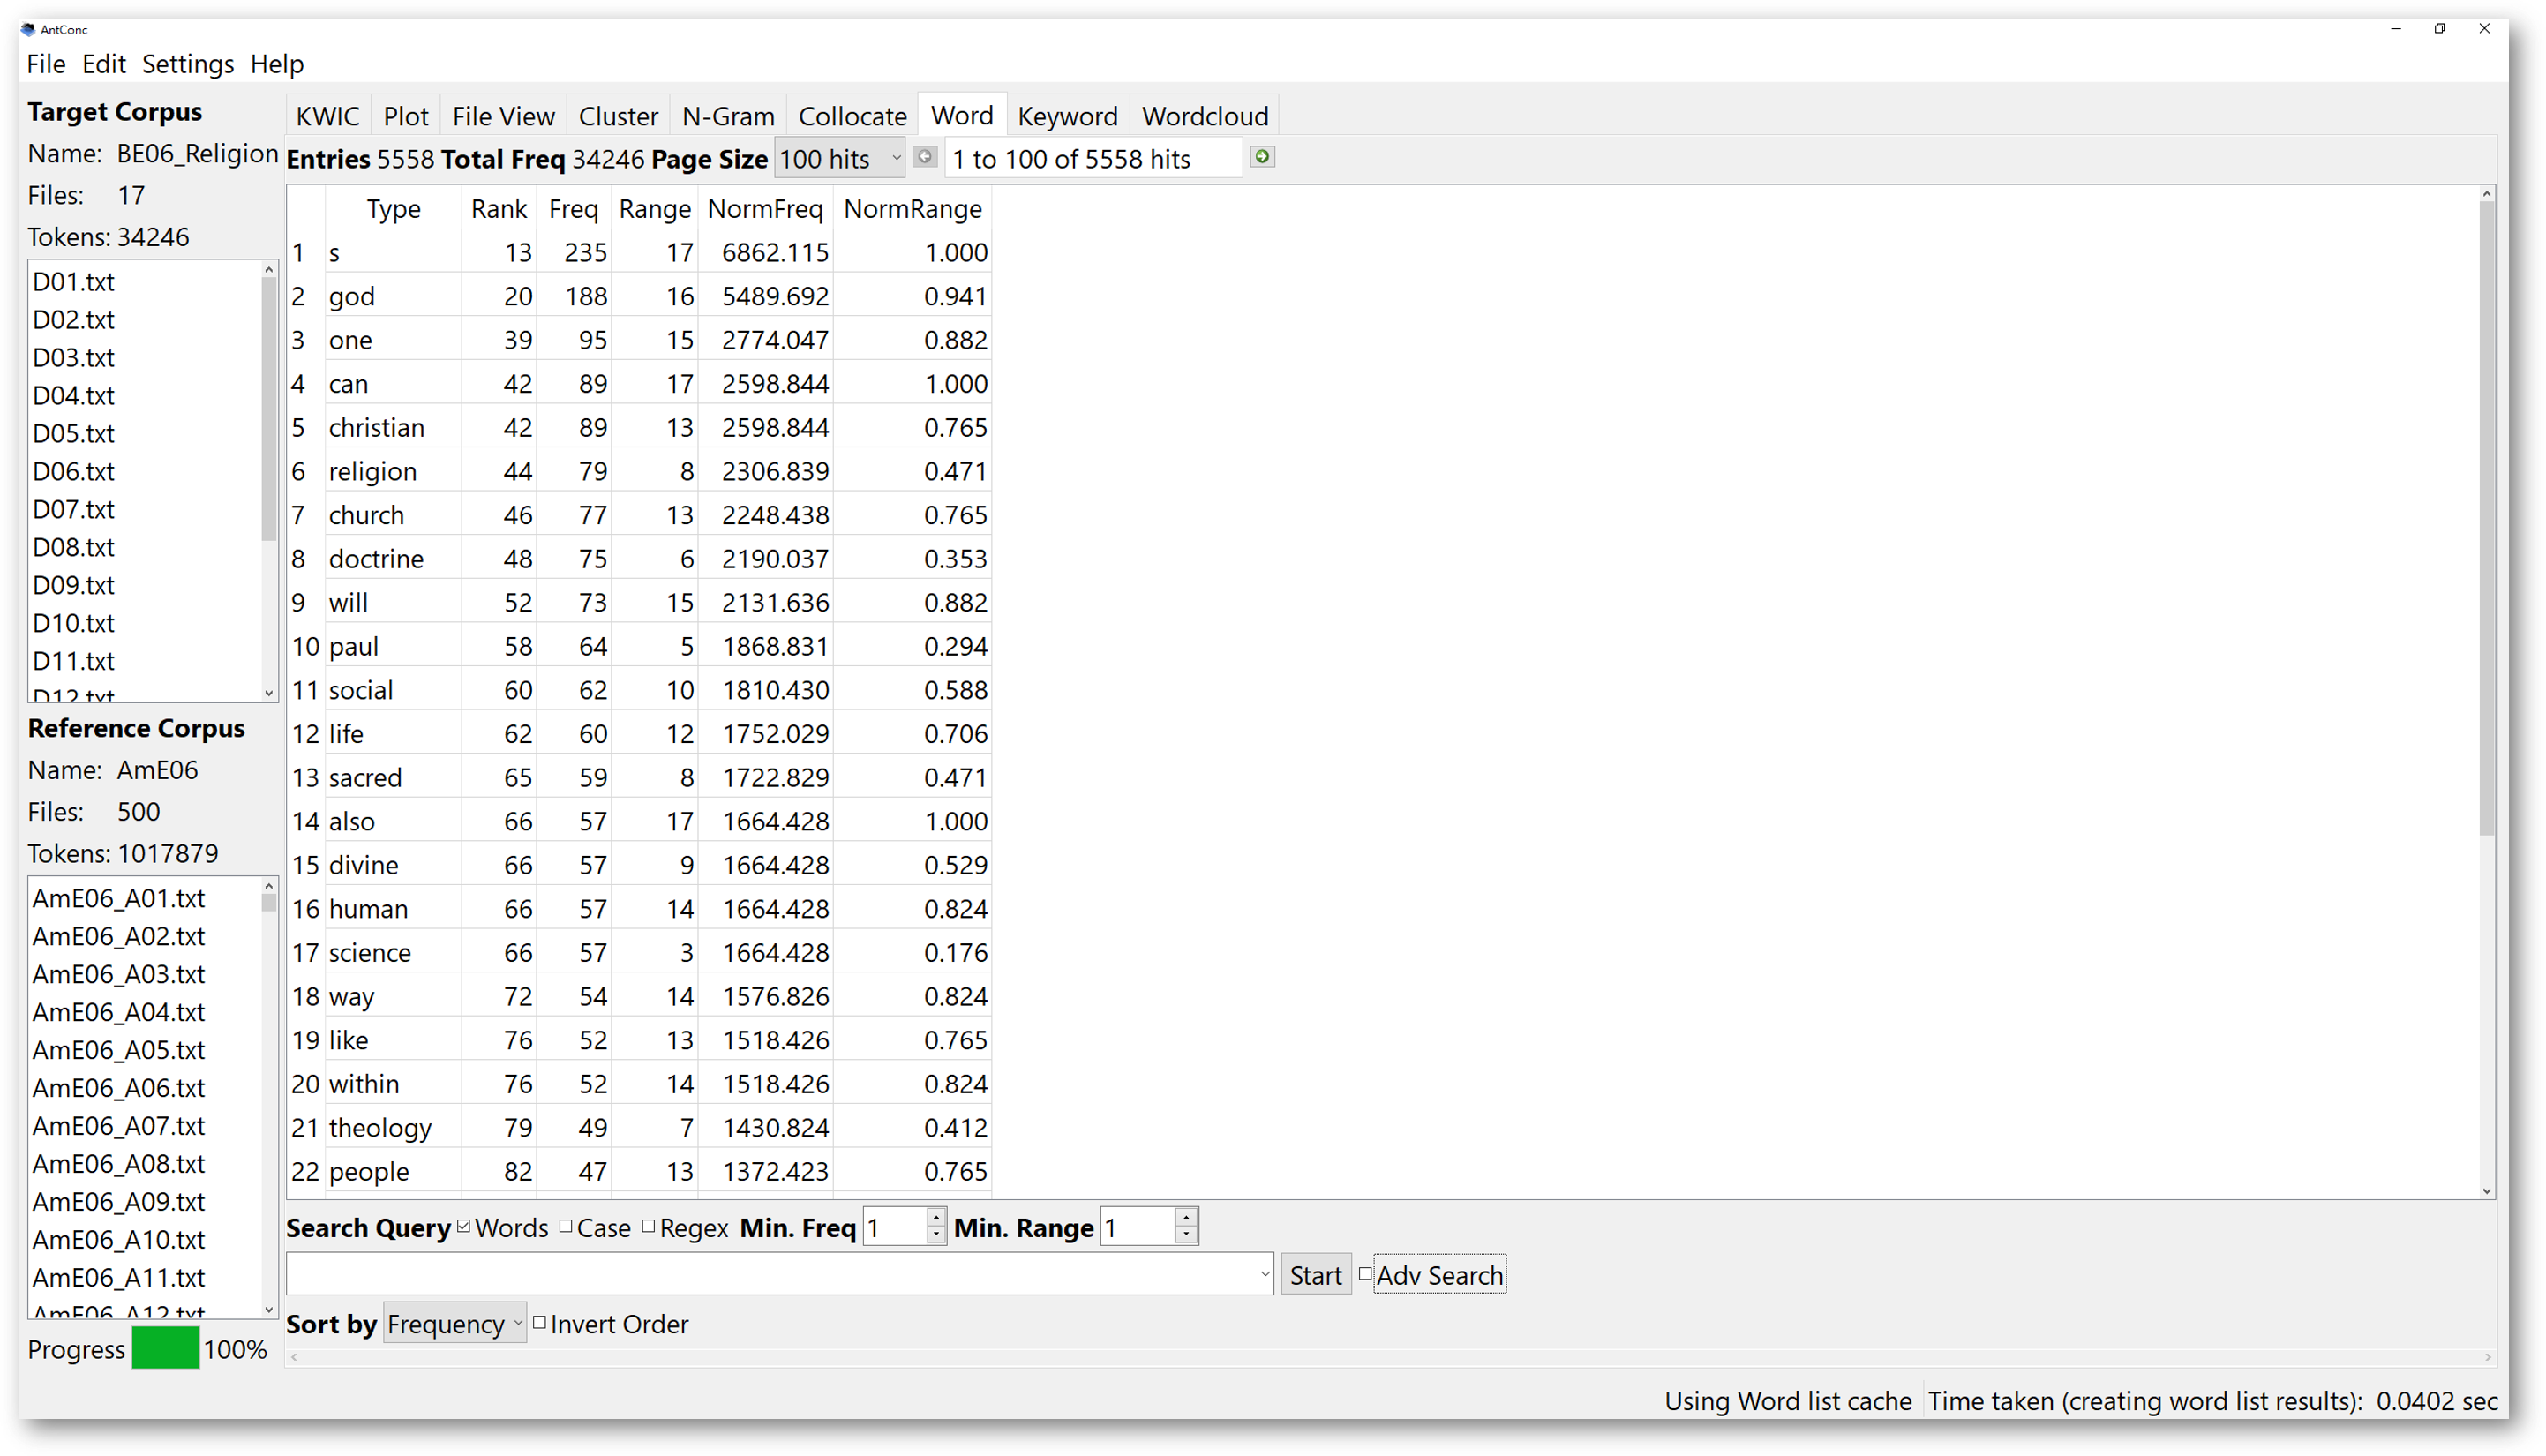
The “Word” tool works quite similarly by generating a list of words in the target corpus, but it does not compare those in the reference corpus. Therefore, by principle, you can run the “Word” list tool without having a reference corpus. It simply shows summarised statistics of the words in the target corpus based on your search conditions.
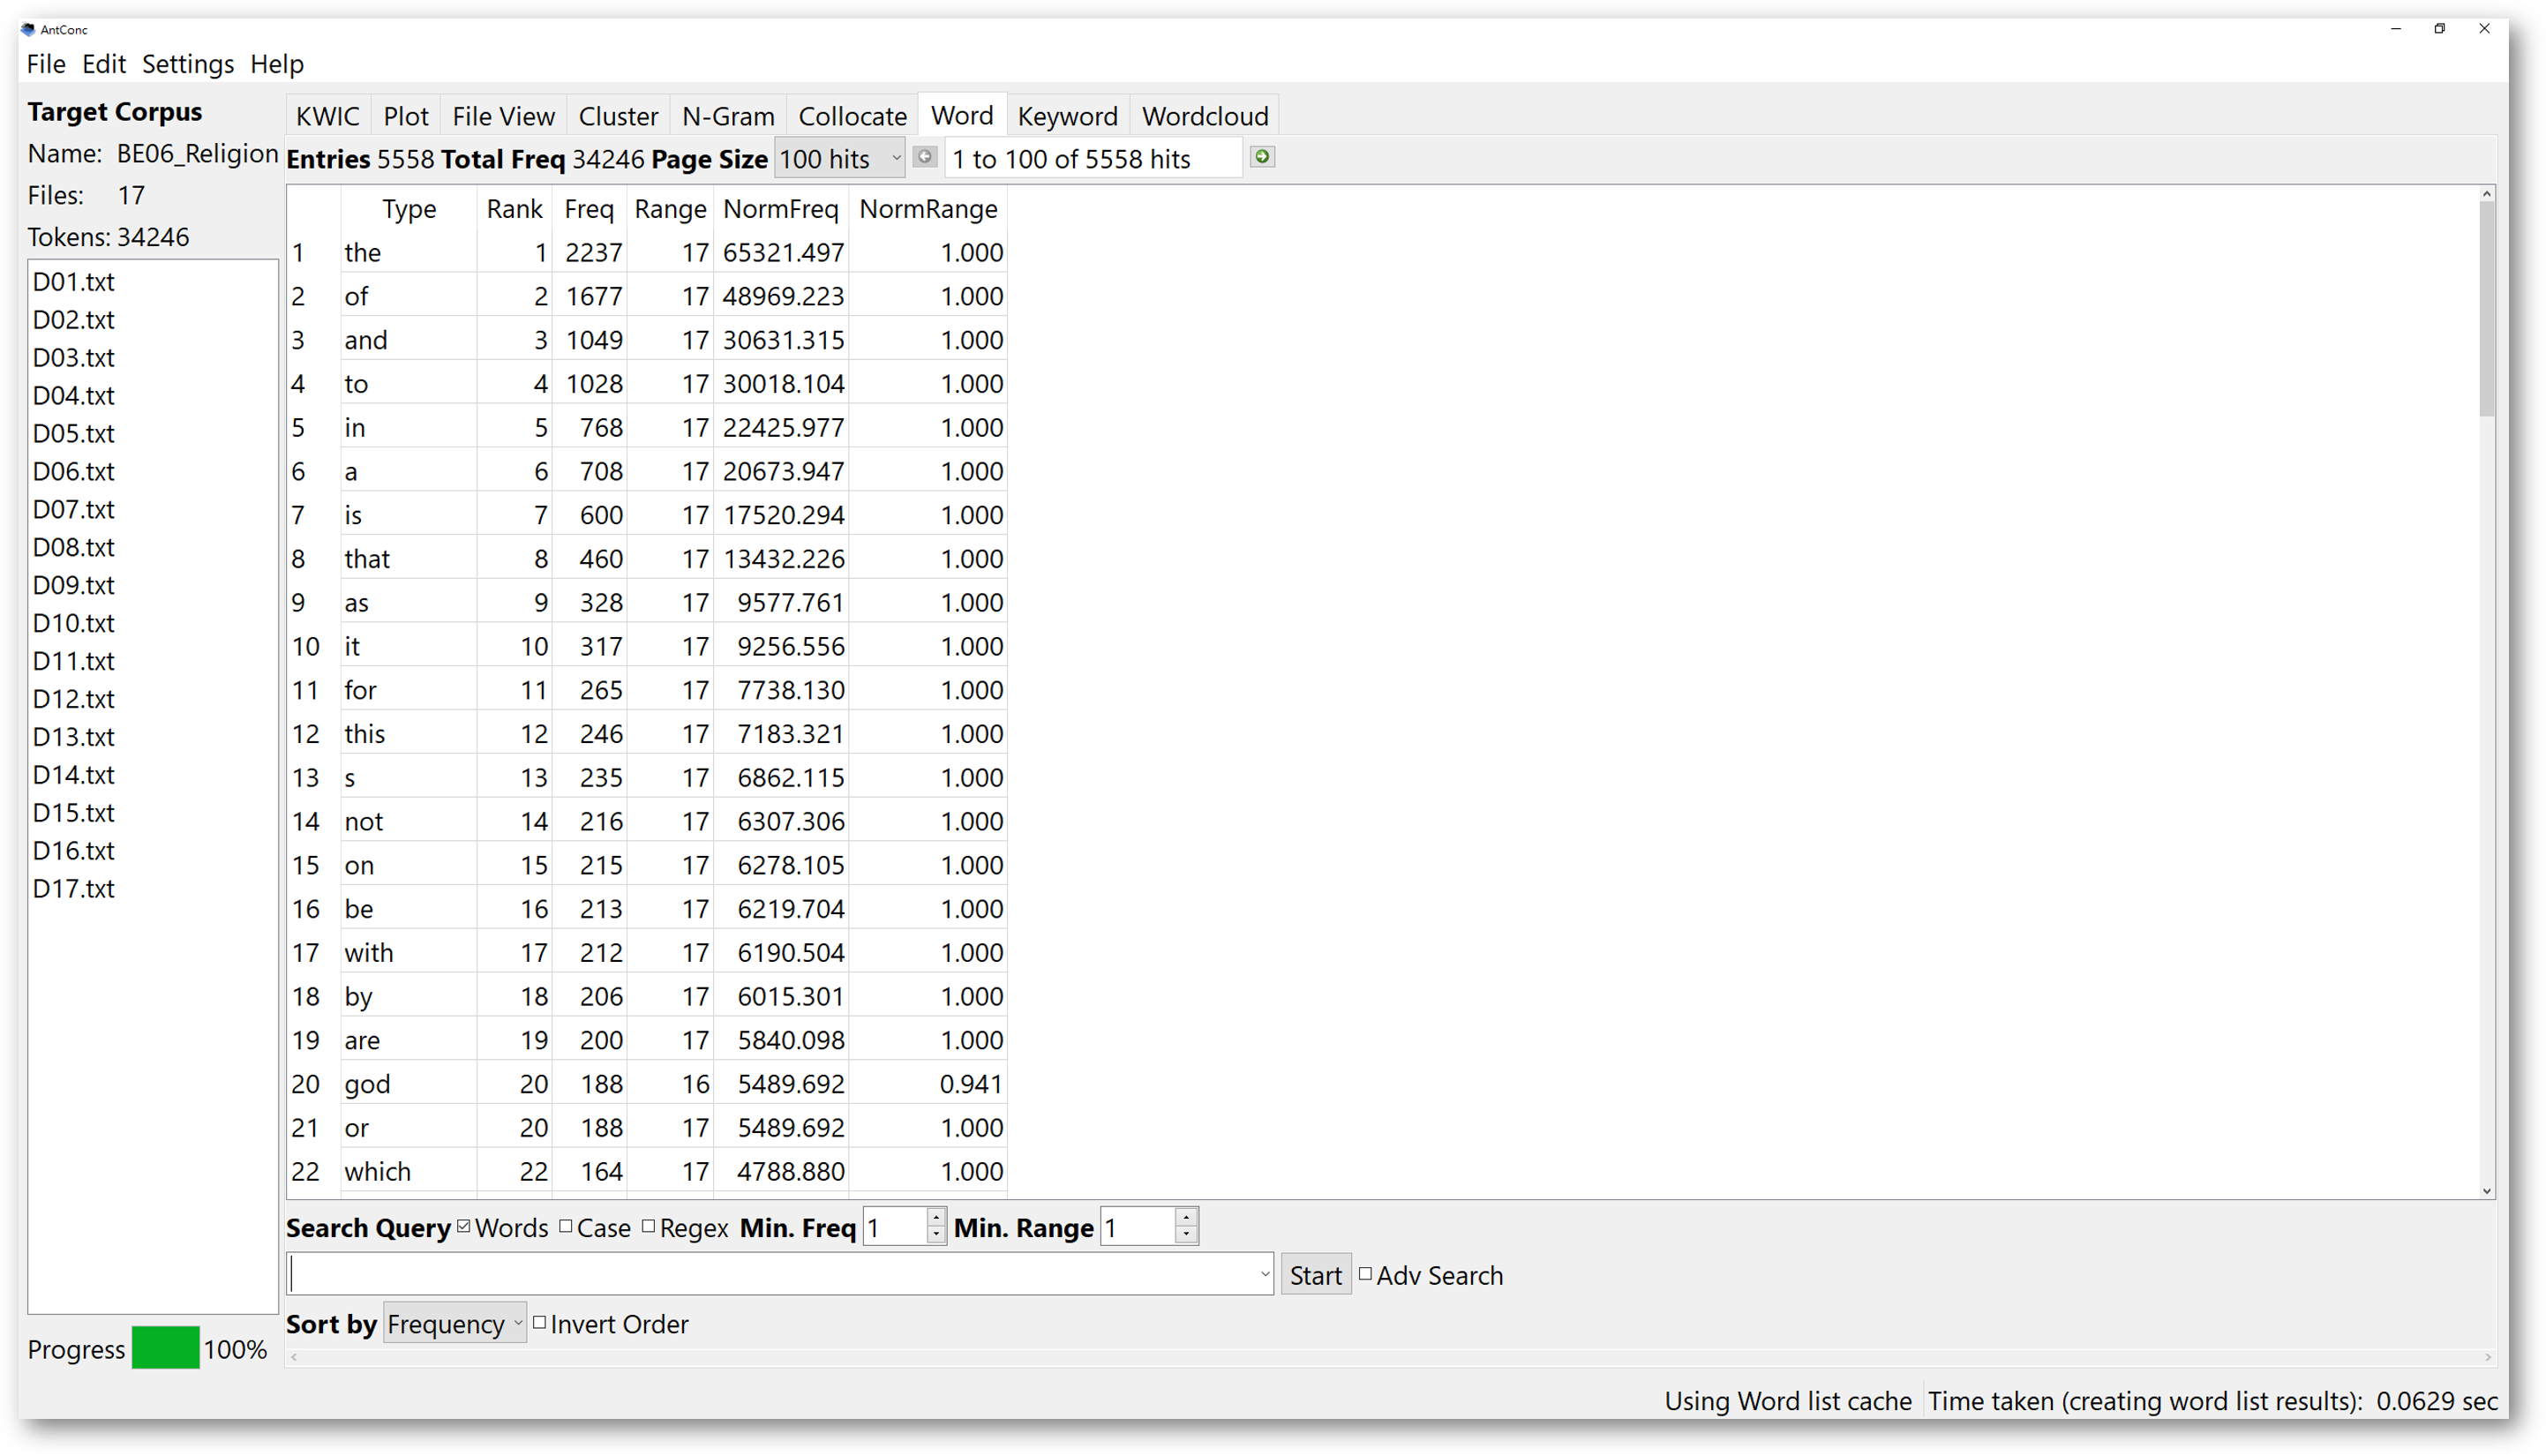
When we generate a word list or keyword list, we might see the function words ranking the top positions. This is because they appear more frequently than other content words.
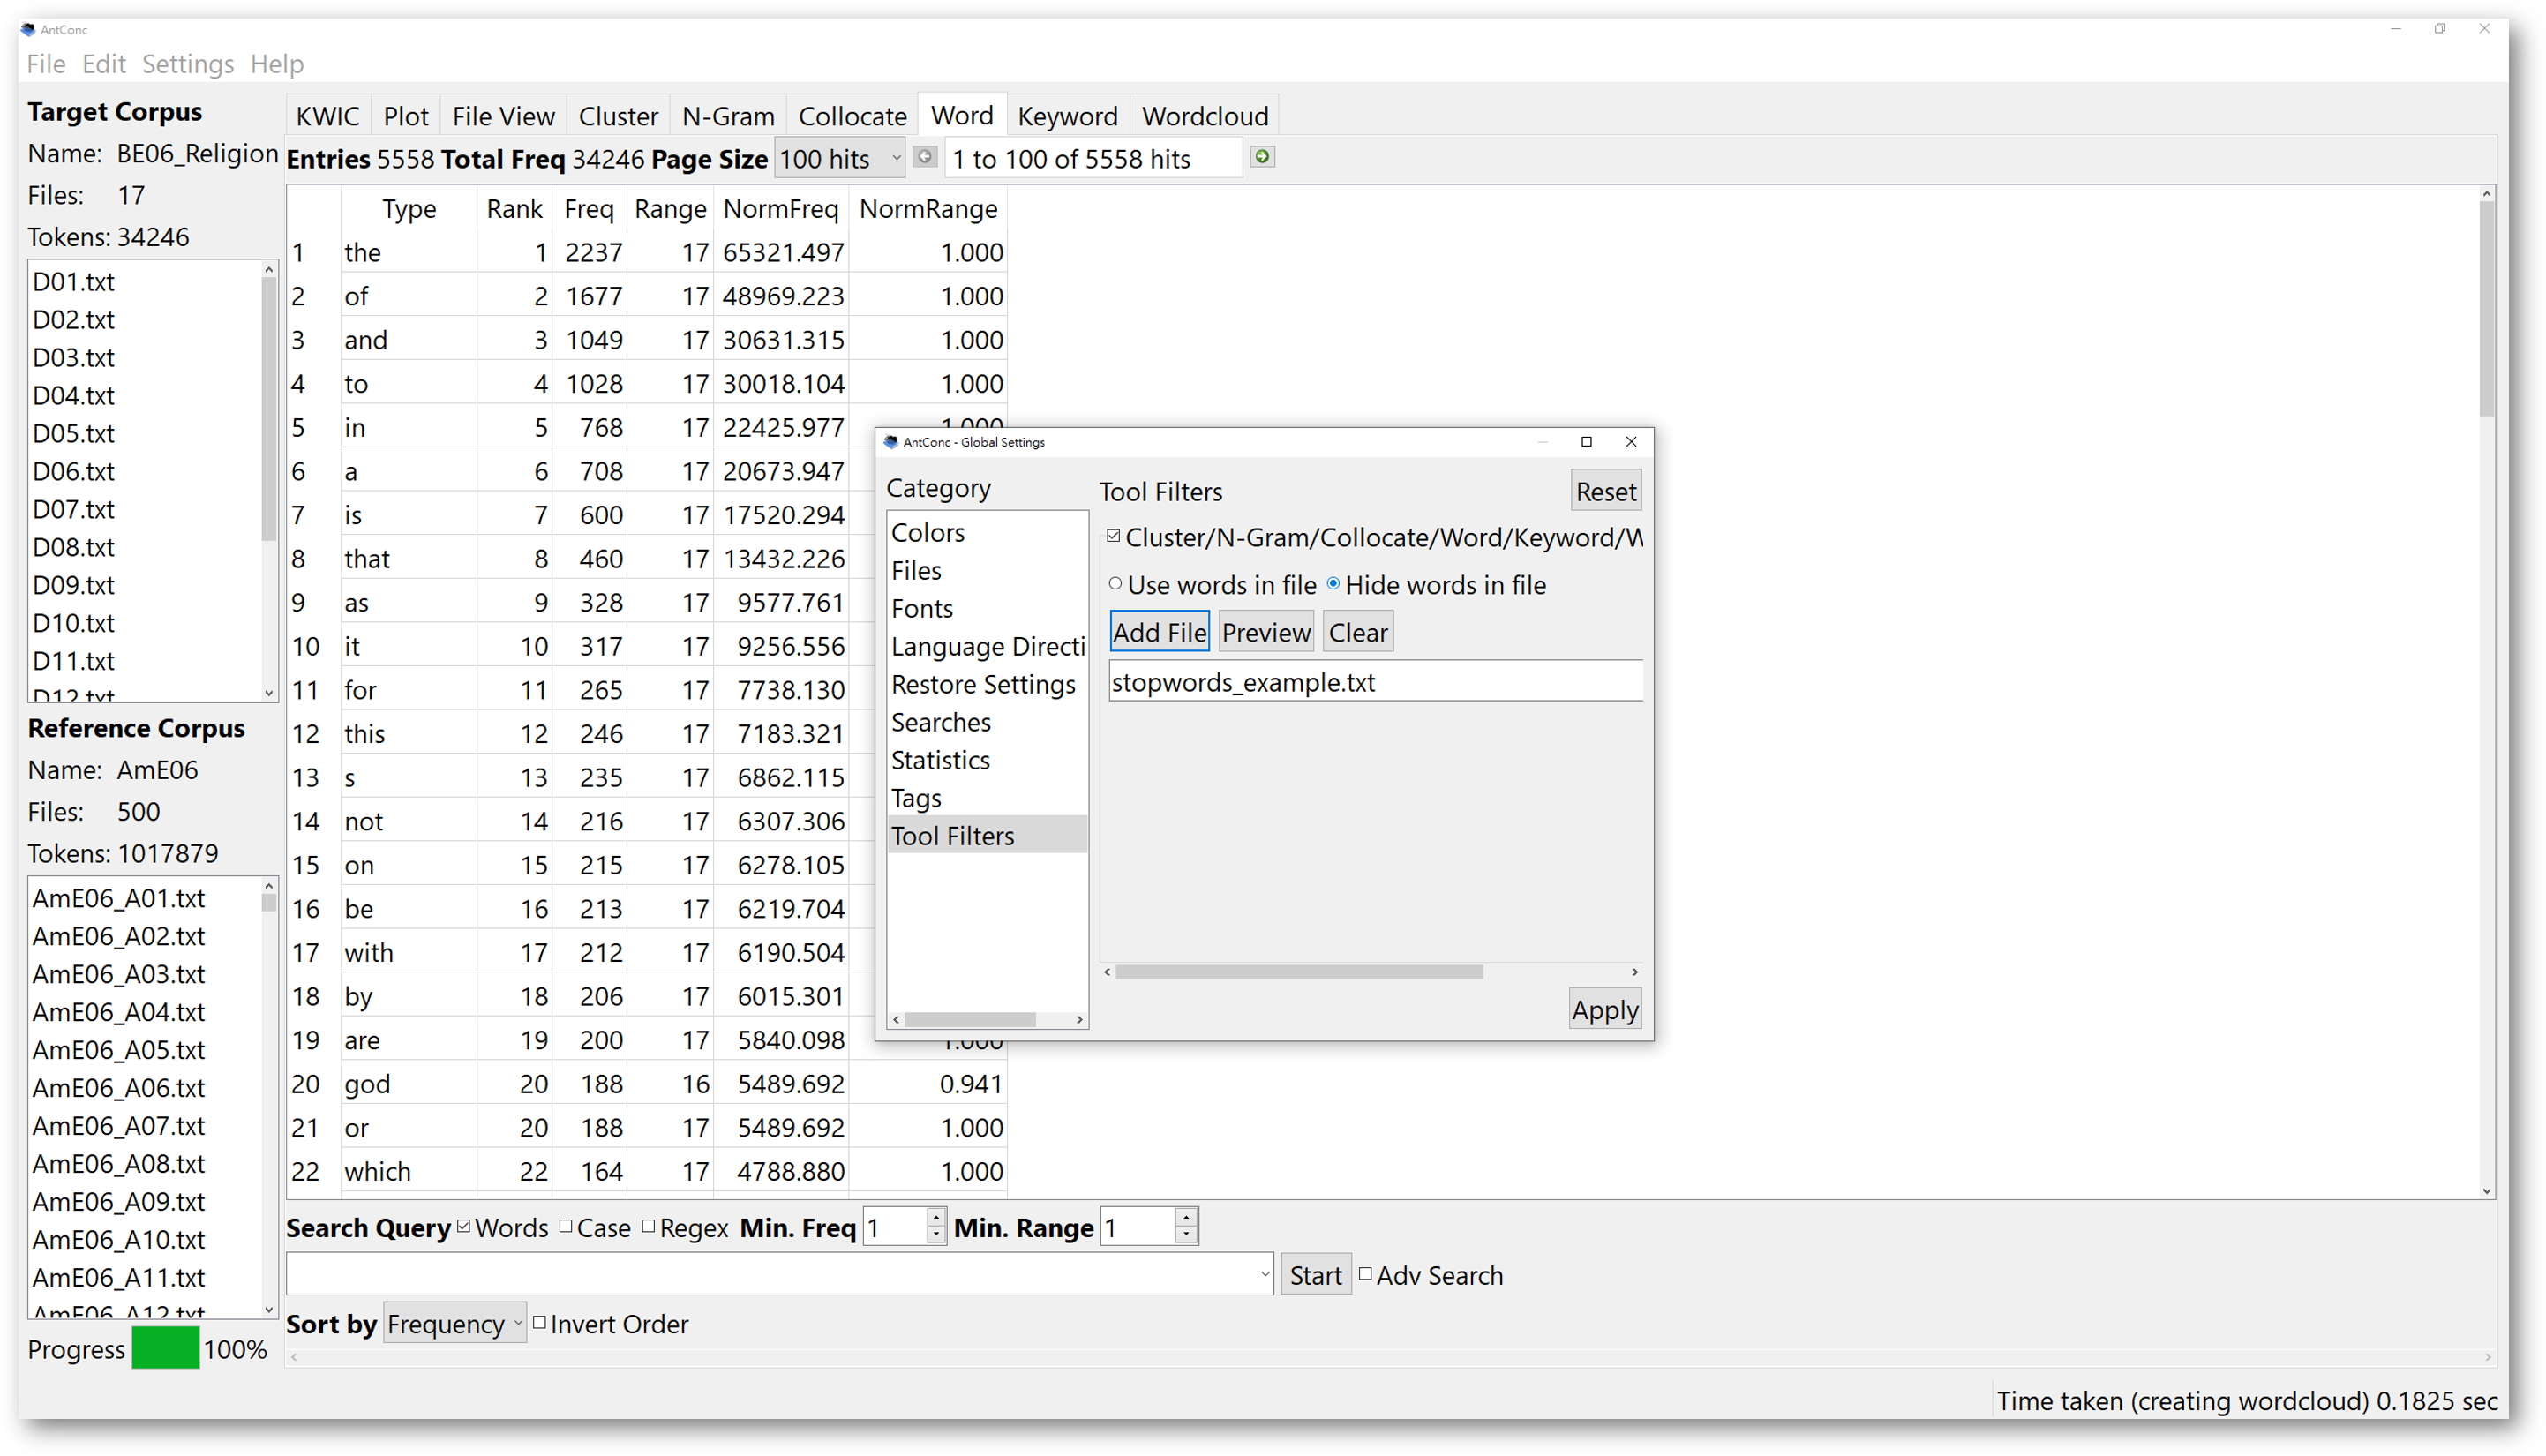
If you want to filter them out, applying a stopword list is a method.Users have to download or create a stopword list by themselves. Once you have the list, make sure it is in the plain text format, with the “.txt” extension, and encoded in UTF-8 format.
Then, in the “Settings” in the menu, choose “Global Settings”, and select “Tool Filters”.

Then, add the stopword list plain text file you just processed, and select “Hide words in file”. Finally, apply the tool filter settings
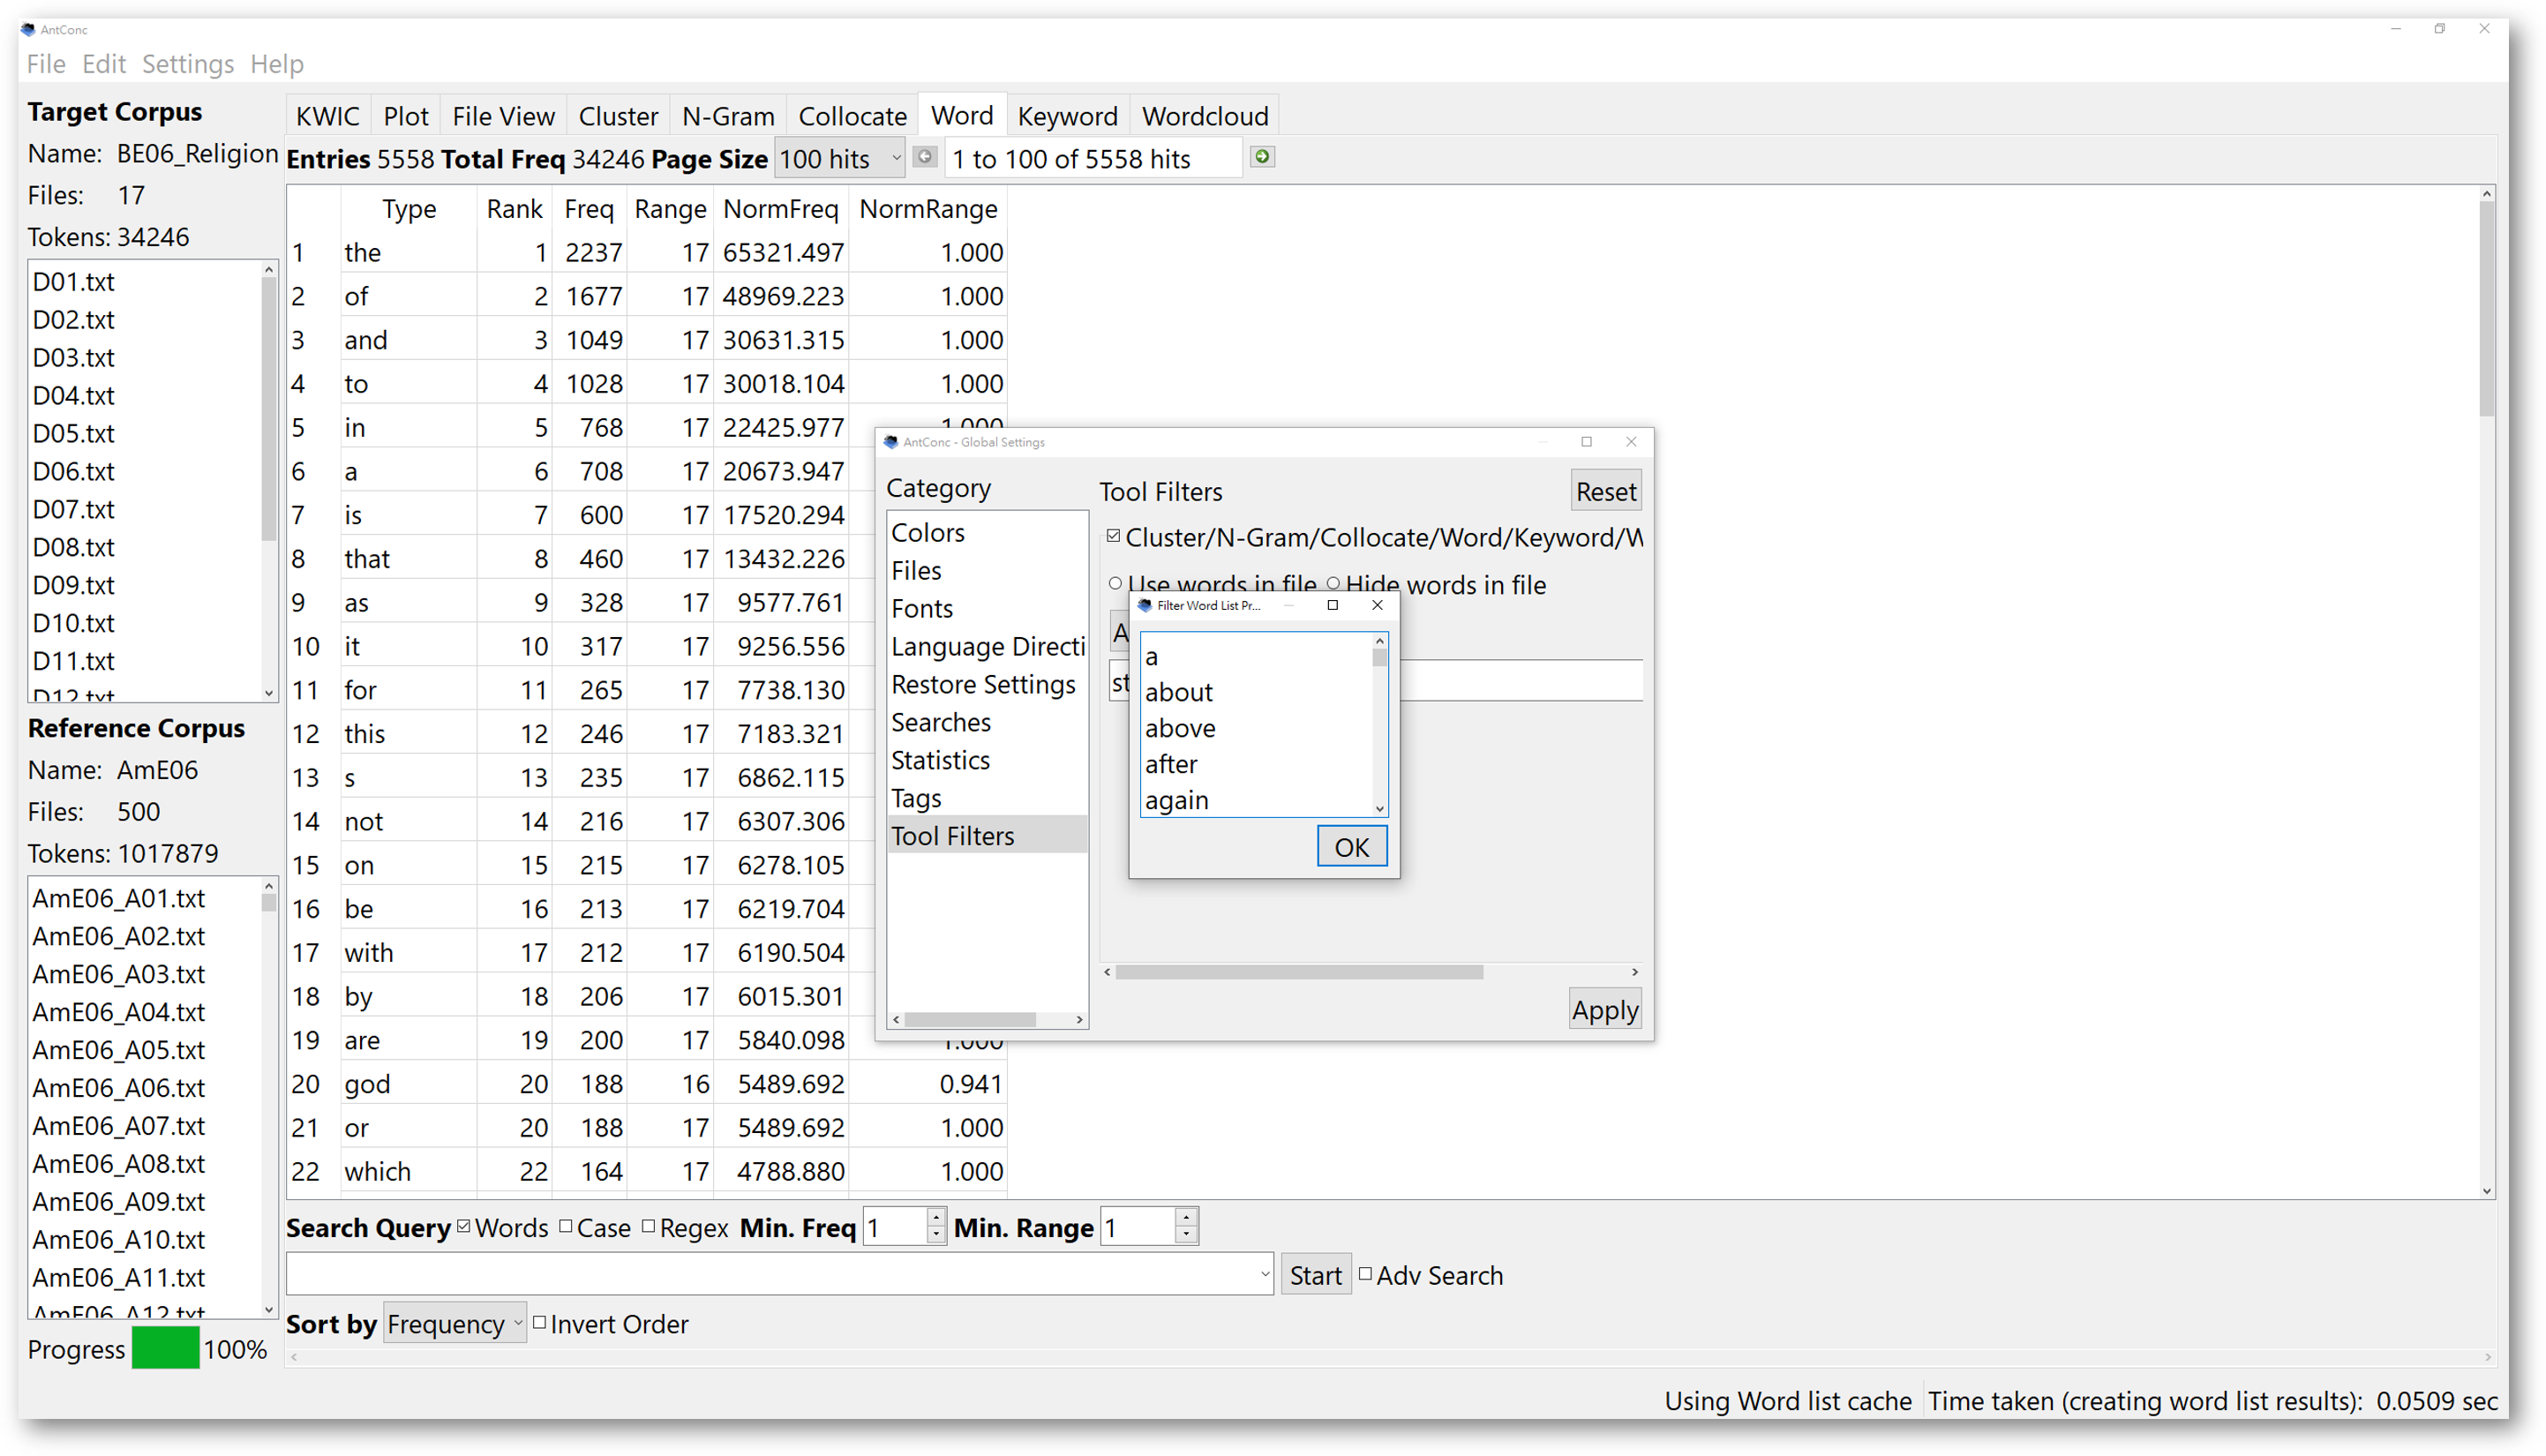
After applying the stopword list, return to the ‘Word’ tool or ‘Keyword’ tool to restart. From then on, the word list generated will filter the function words in the stopword list you loaded in.
In some cases, locating function words may be important because they can be useful search items when combined with content-driven terms. If we filter the function words out, it might interfere with your text analysis. So, it is recommended that when applying a stopword list, we should ensure the purpose of doing so.
5.2. Wordcloud tool
The ‘Wordcloud’ tool, is another very useful function of AntConc, which helps to visualise the search results in literally ‘a cloud of words’. In AntConc, the wordcloud will be generated by your previous searches, including KWIC, Cluster, N-Gram, Collocate, Word, and Keyword tools.

The wordclouds will reflect certain properties of the words, for instance, the frequencies, or the Keyness based on likelihood or effect. If you want to create a wordcloud with your own corpus, you should first load in a corpus, and get the results of any of the corpus searches mentioned above.
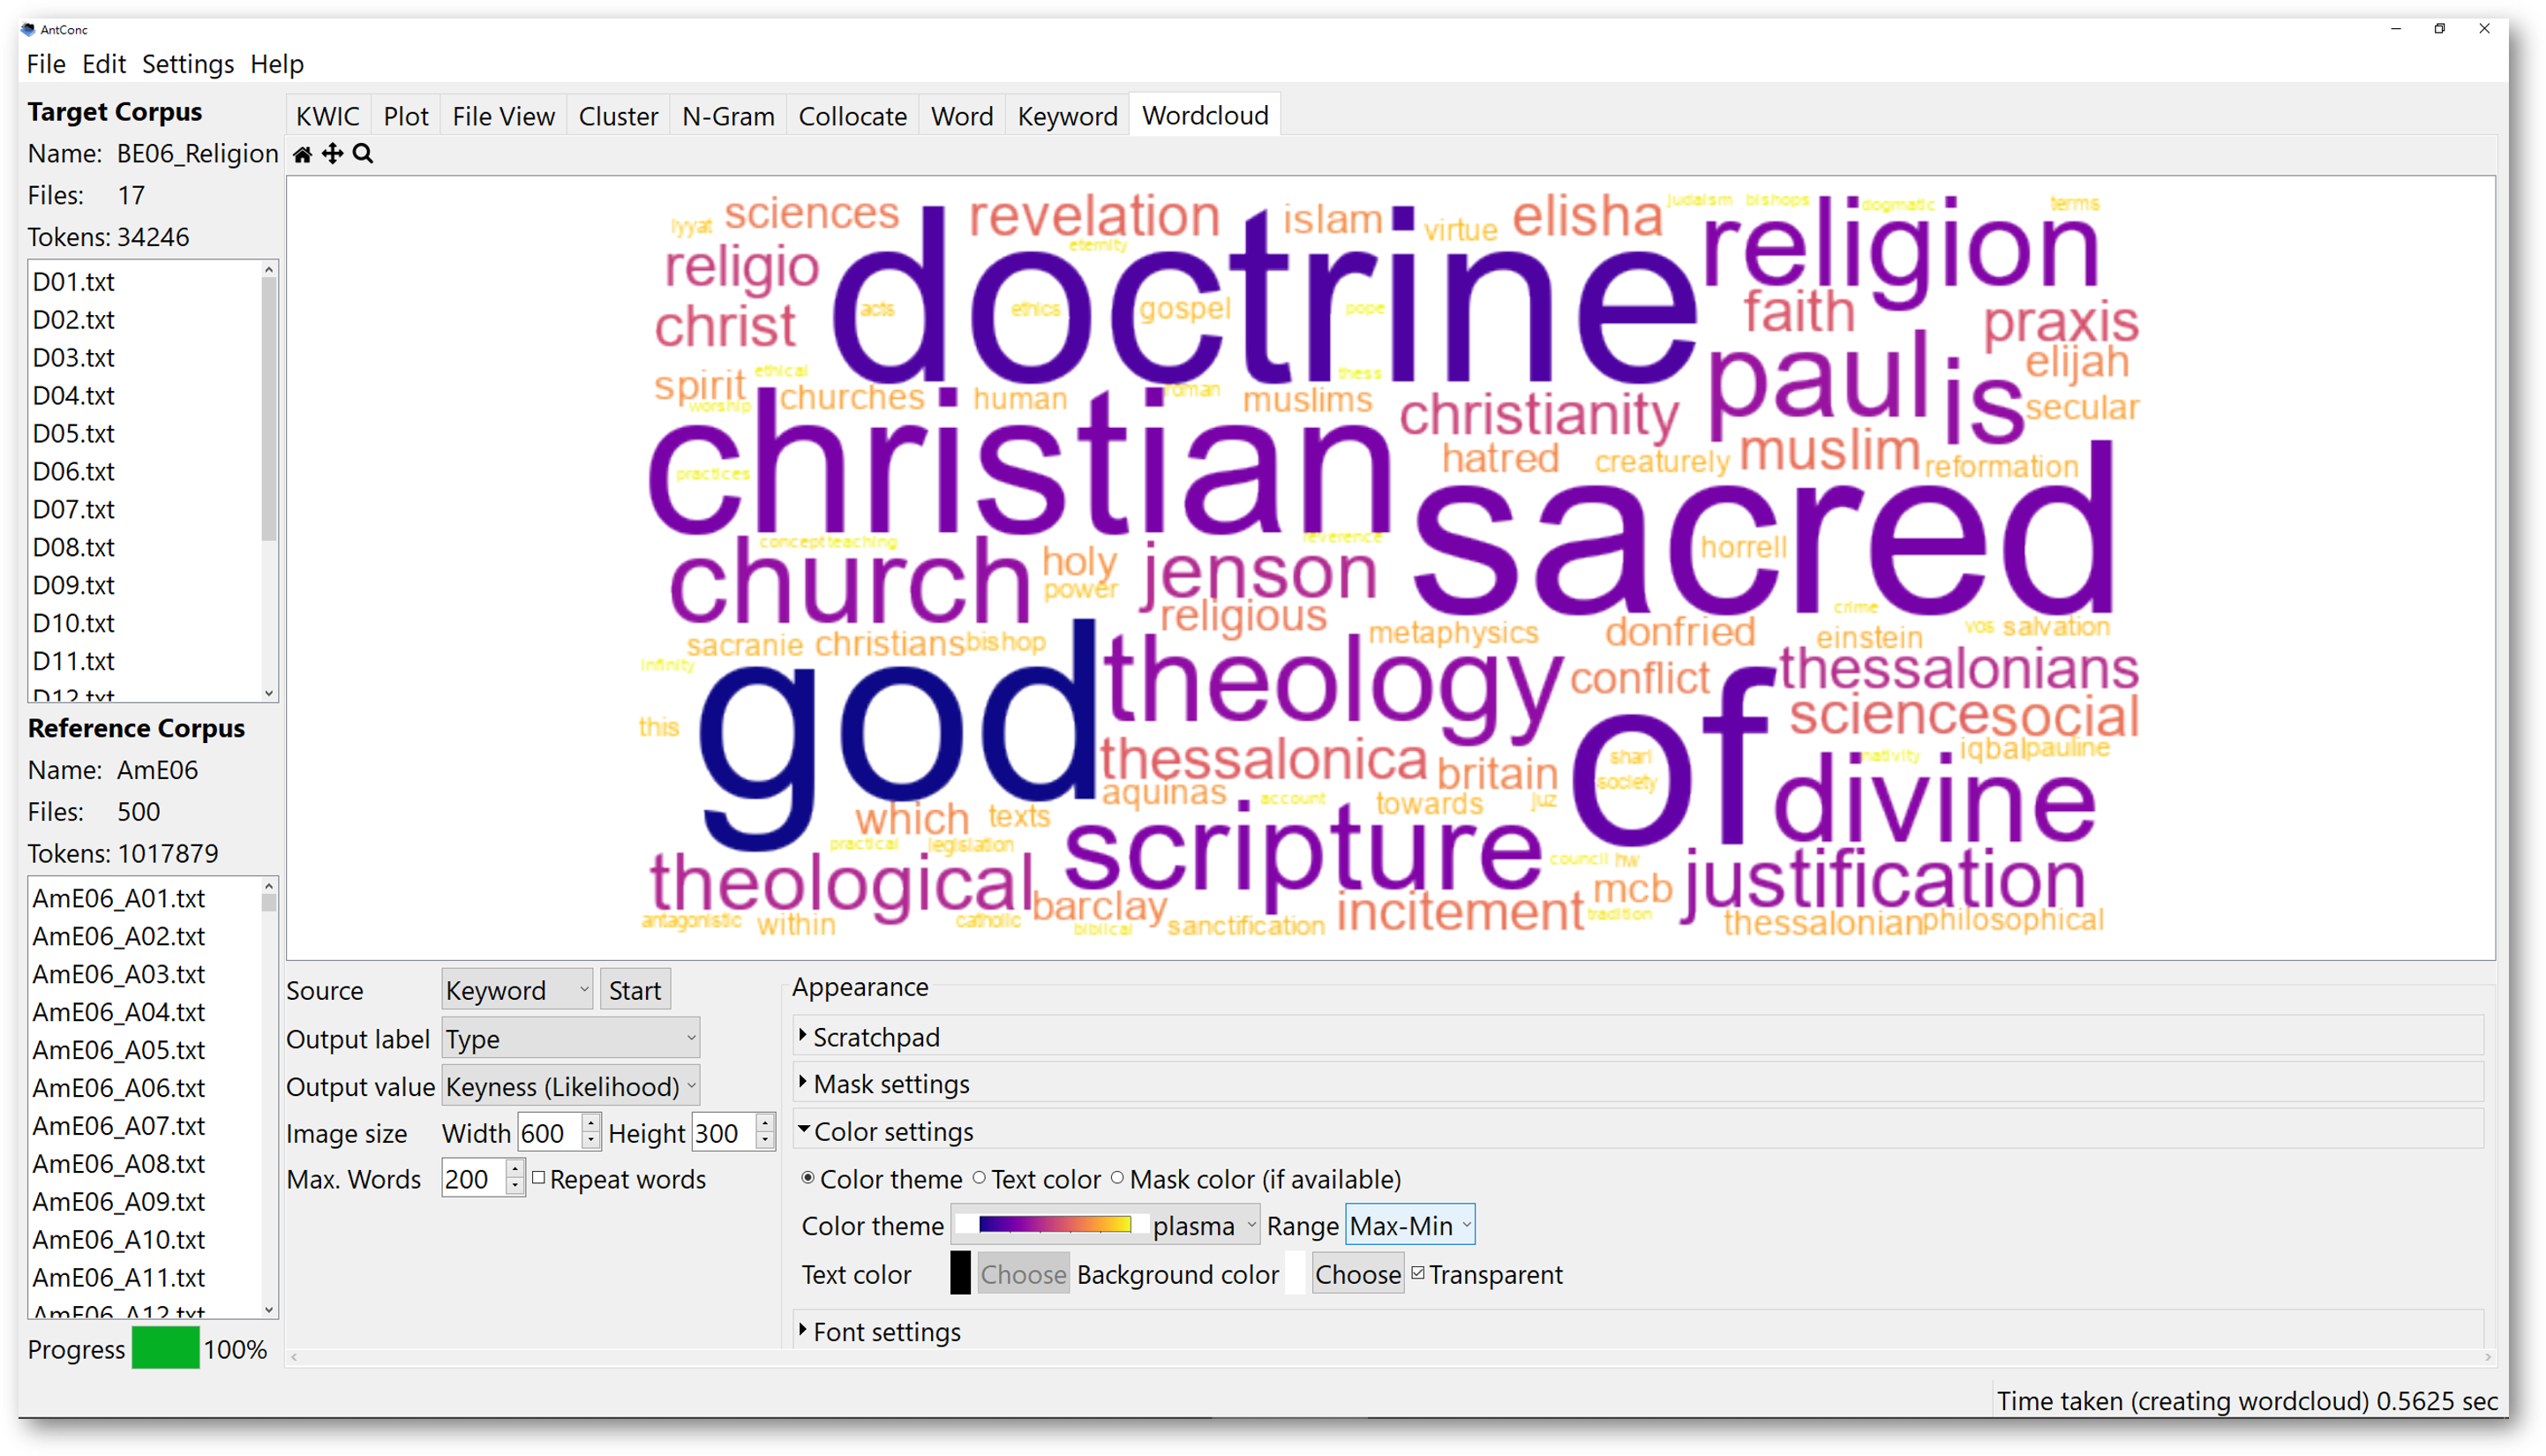
For example, we use the religion corpus “BE06_religion” we went through in part 5.1 again for demonstration. After you have the keyword list result shown below, you can then go to the ‘Wordcloud’ Tool.
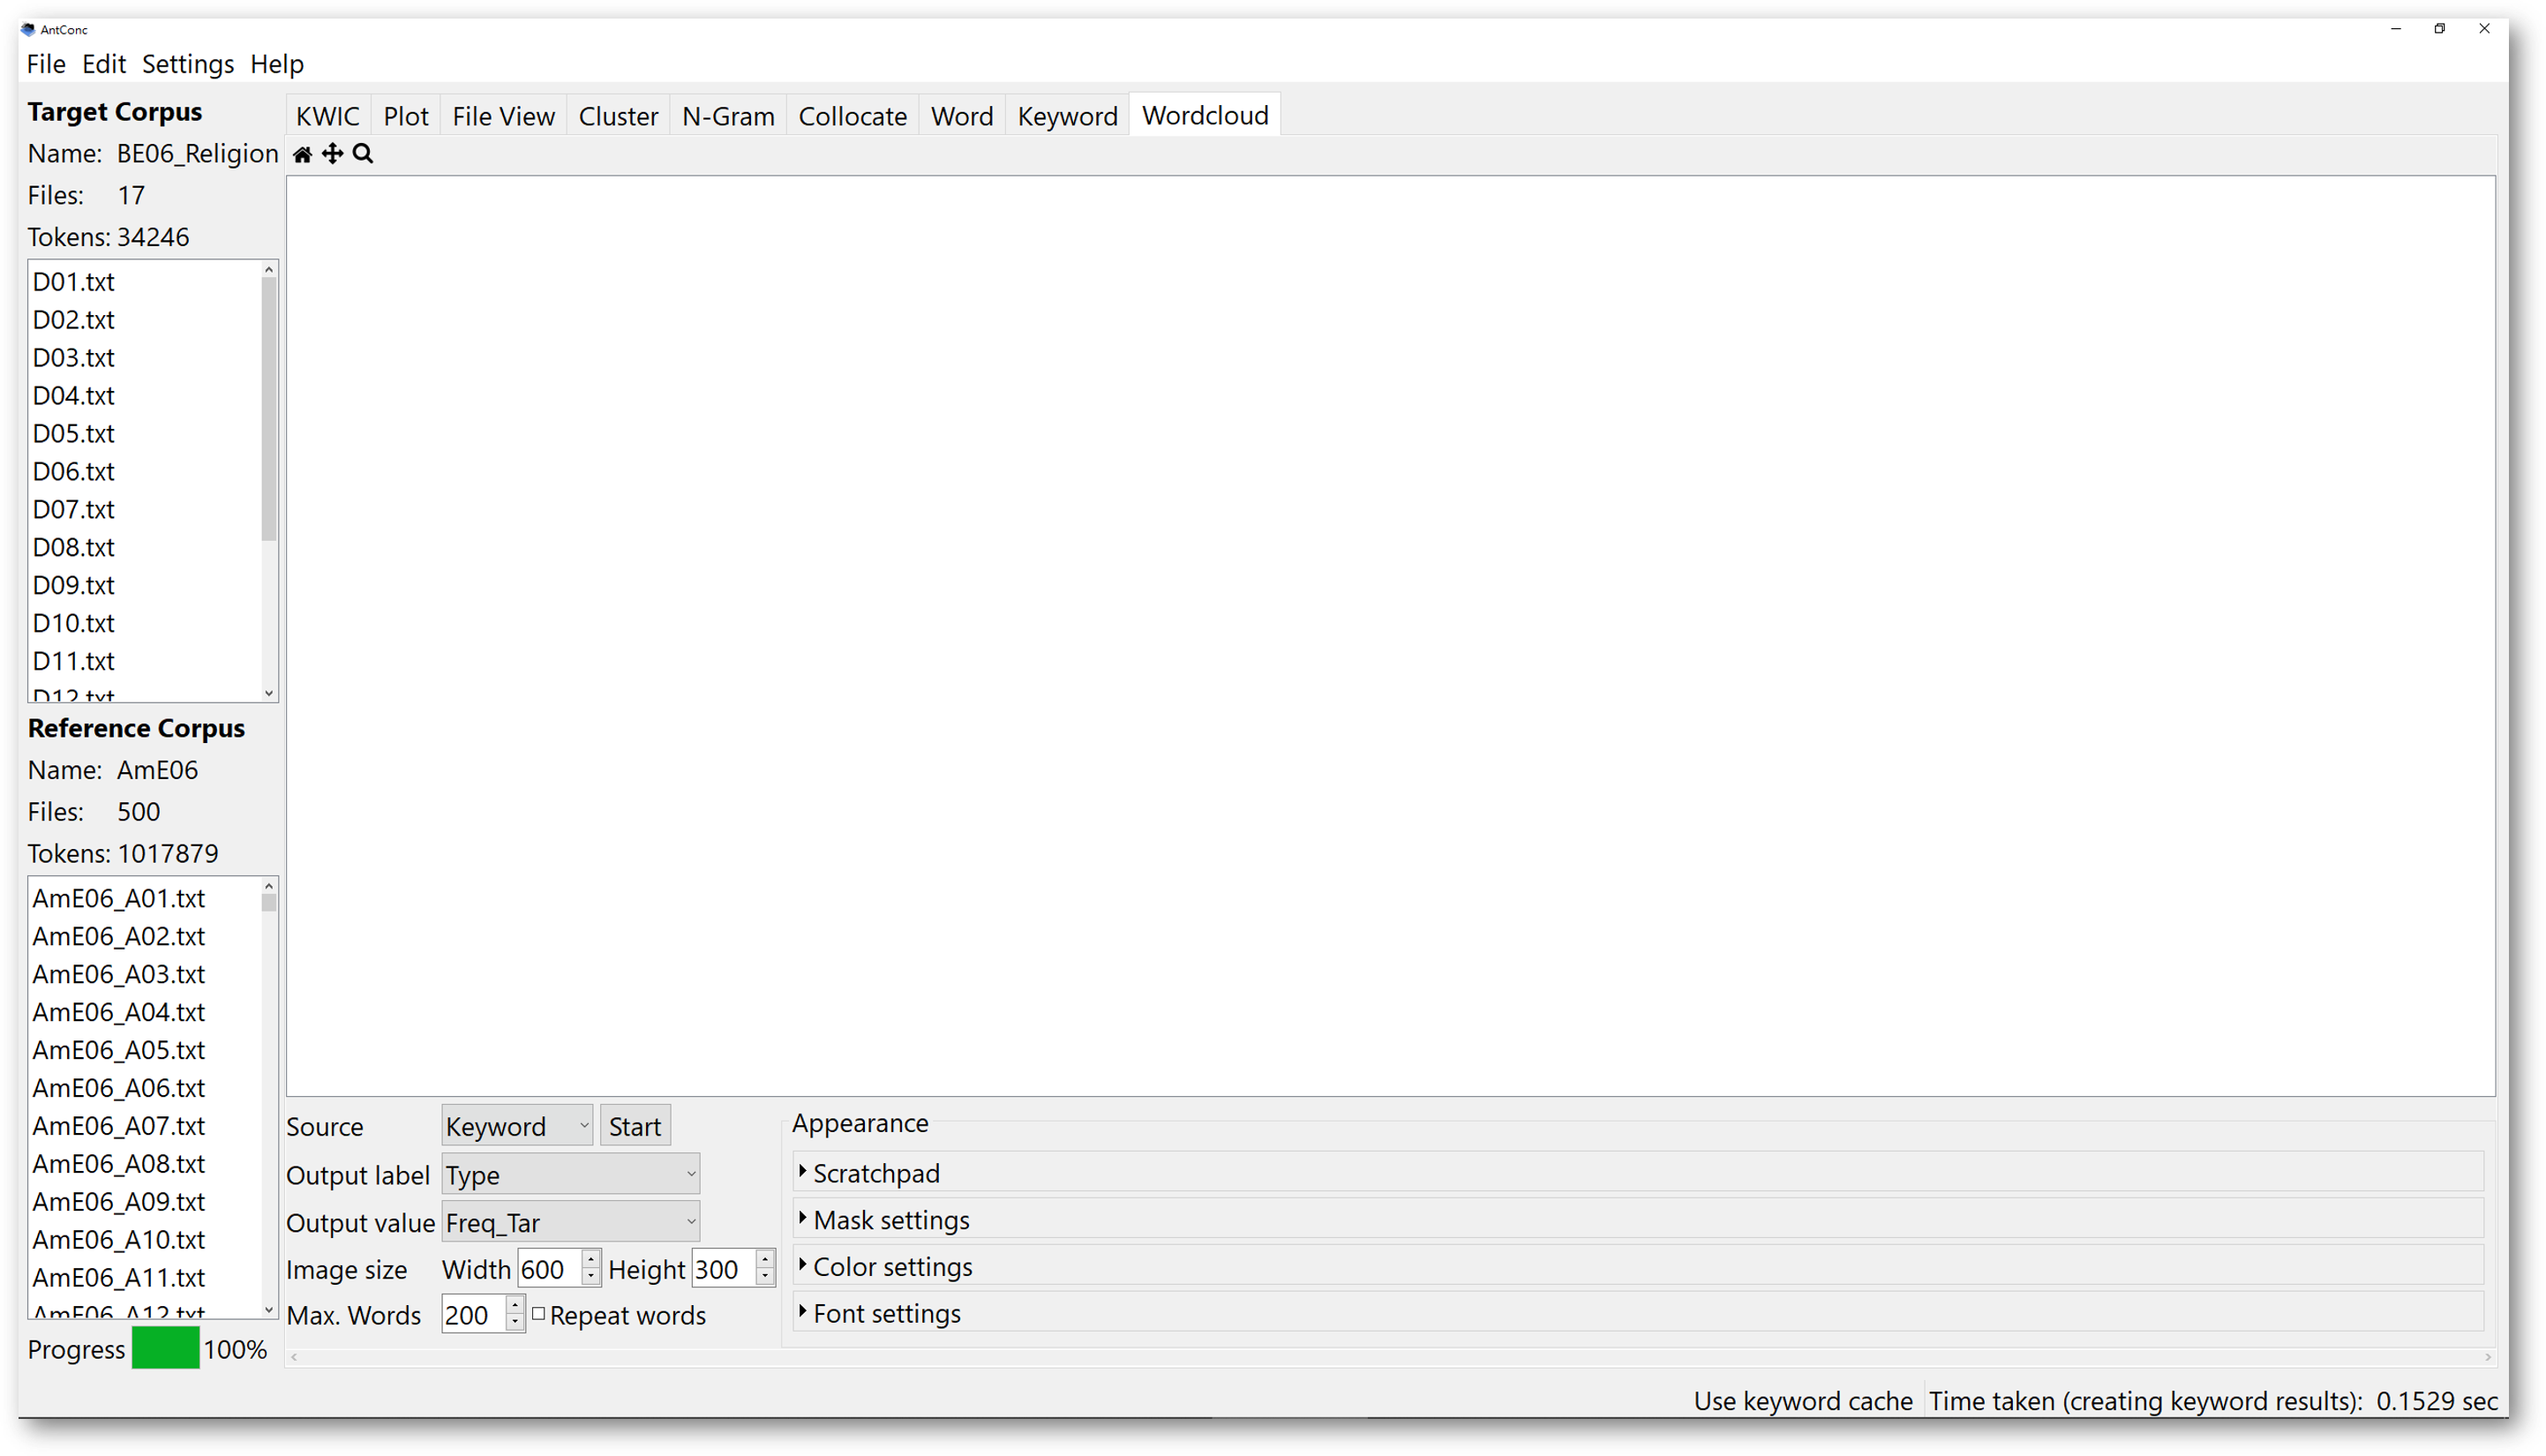
In the source, choose “Keyword”. This will ask AntConc to generate the wordcloud based on the keyword list you generated for the religion corpus. Then, determine the output value. The output value refers to how you want the words in the wordcloud to be arranged.
If you want to visualise a wordcloud based on the likelihood of the keyword list, choose “Keyness (Likelihood)”. Then the wordcloud is arranged according to the keyness data of the keyword list. The higher the value, the larger the word should be in the wordcloud.


You can either set the colours to monotone, or with contrastive colours.

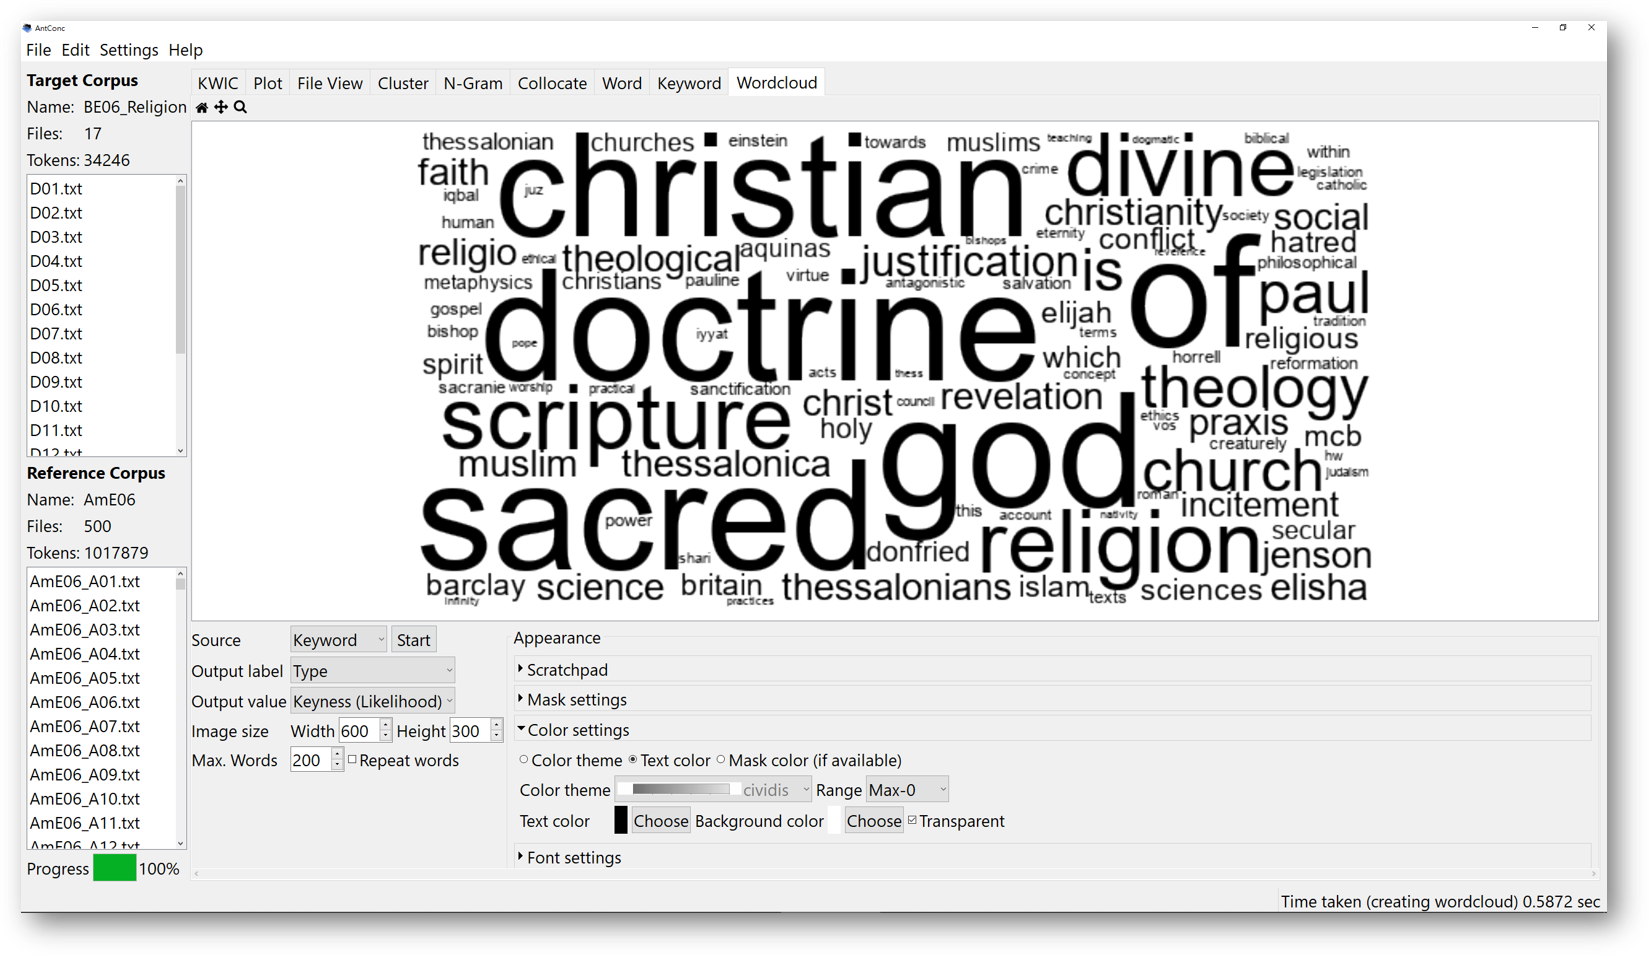
To make the colours even more distinguishable, go to the colour settings, and choose a particular theme. Set the range beside the colour theme to “Maximum to Minimum”. This might further contrast the colours. However, the results depend on the data source you selected. Larger and darker words might imply a higher output value. The less contrastive the colours might imply that the difference in the output value is smaller.