Aural Canal Irrigation
Step 1: Inspect aural canal and tympanic membrane
Do not perform irrigation in the presence of tympanic perforation, tubes in the ear, or an active ear infection.
Determine the purpose of the irrigation and rule out tympanic membrane rupture.
Insert the otoscope into the aural canal to observe the tympanic membrane, to look for foreign body, or cerumen impaction.
Step 2: Explain the procedure to the patient
Step 3: Set up equipment, wash hands, position patient
This procedure is non-sterile.
Have the patient sit up or lie with the head tilted toward the side of the affected ear. Gravity facilitates the irrigating solution to flow from the ear to the basin. Have the patient support a basin under the ear to receive the irrigating solution.
Protect the patient with a moisture proof pad.
Step 4: Clean the pinna and meatus at aural canal
Step 5: Fill the irrigating syringe with solution
Step 6: Straighten the aural canal
Straightening the aural canal aids in allowing solution to reach all areas easily.
Adults: pull the pinna up and back
Children: pull the pinna down and back
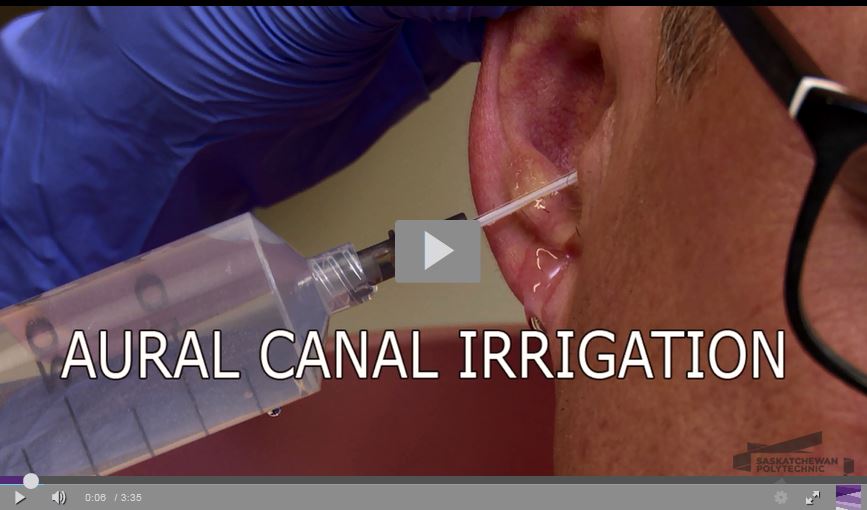
Step 7: Irrigate with steady, slow stream
Place the tip of the catheter at the opening of the canal, ensuring not to insert it past the lateral one third of the ear canal. Do not occlude the auditory canal with the irrigating nozzle.
Direct a steady, slow stream of solution against the roof of the aural canal to reduce risk of injury to the tympanic membrane. Use only sufficient force to remove secretions. Forceful instillation of the solution can rupture the tympanic membrane.
Allow solution to flow out freely. Continuous in and out flow of the irrigating solution helps prevent pressure in the canal. Continue irrigating the canal until the cerumen is removed or the patient expresses dizziness or discomfort.
Step 8: Absorb excess solution
Place a cotton ball loosely in the auditory meatus and have the patient tilt their head toward or lie on the side of the affected ear on a towel or absorbent pad to absorb residual moisture.
Step 9: Reassess aural canal
Insert the otoscope into the aural canal to assess the tympanic membrane for resolution of the condition.