10.6 Using Excel to set a Decision Tree
Using Excel to program a decision tree model is a moderate easy task. Using Excel provides the advantage of using equations and formulas to make the calculations and reduce any potential error. Although drawing a branch of a tree may take some time, using the Copy-Paste function of Excel may be practical to create the additional tree branches. Basic tools to draw the trees include (see Figure 10.8):
- Borders tool (to draw the branches)
- Insert shapes function (to draw nodes in the tree)
- Merge and center tool (to produce consistent format)
- Developer tools (adding additional functionality)

Figure 10.8 Excel tools to draw decision trees.
Building a decision tree in Excel is easier if first we give some thinking to the problem and sketch the tree in advance in a piece of paper. It is easier to draw the tree from right to left. Drawing a tree in Excel involves three basic tasks:
- Adding horizontal borders to a merged group of cells

- Adding diagonal borders to a merged group of cells (to see the diagonal border you will need to choose the option “More Borders”

- Combine diagonals, horizontals and shapes to produce decision or chance nodes

Figure 10.9 includes a tree model for the warming up exercise using Excel equations to make calculations.
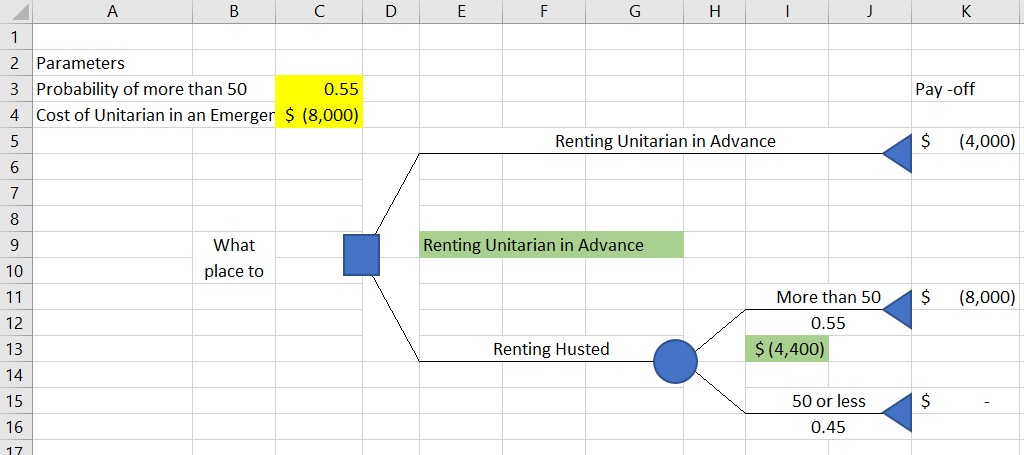
Figure 10.9 Tree model in Excel
Attribution
By Luis F. Luna-Reyes, Erika Martin and Mikhail Ivonchyk, and licensed under CC BY-NC-SA 4.0.
