Proper Use of the Microscope
The compound microscope is used often in Anatomy and Physiology Labs as an important technique to visualize the microscopic structures, cells, and tissues of the human body. It is important that you know the proper care and use of the microscope to be successful in this course.
Basic care and use of the compound light microscope
- When transporting the microscope, hold it in an upright position, with one hand on its arm and the other supporting its base. Do not swing the instrument during its transport or jar the instrument when setting it down.
- Clean all lenses before and after use. Use only special grit-free lens paper and the appropriate lens cleaner to clean the lenses. Use a circular motion to wipe the lenses.
- Always begin the focusing process with the scanning objective lens (4x) in position, changing to the higher-power lenses, as necessary. Use the coarse adjustment knob ONLY with the scanning objective (4x) and low (10x) objective power lens.
- Before putting the microscope in the storage cabinet, remove the slide from the stage, rotate the scanning objective lens into position, replace the dust cover, and return the microscope to the appropriate storage area. DO NOT wrap the power cord around the base.
- Never remove any parts from the microscope; inform your instructor of any mechanical problems
that arise. - If the light on your microscope is not working, check the following before informing your instructor:
- Make sure the cord is snuggly fit into the back of the microscope
- Check the light control as it may be turned all the way down
- If your light source is illuminated but when you look into the ocular lens it is dark, check to see if the iris diaphragm is open and that the objective lens is correctly aligned with the stage.
Using the compound light microscope to view a slide (Letter E)
For a printable version of the following activity click here: Proper Use of the Microscope
Check out our video on how to properly use the microscope as we examine the letter e slide: Video – Letter E Slide
Complete the following:
- Using a piece of lens paper, clean the ocular lens and each of the four objectives.
- If the 4X objective is not currently in line with the stage, rotate the 4X objective until it clicks into place. Raise your condenser with the condenser knob to the highest position, using the figure below for reference.
- Plug in the microscope and use the light control to increase the substage light if necessary. Ensure that your iris diaphragm is in the open position.
- Find a letter “e” slide from the box on the bench top. Open the spring clip of the mechanical stage and place the slide on the stage so that you can read the “e” as you look at the stage. Use the figure below as a reference for proper slide placement on the stage.
Figure 1: Stage, with slide properly positioned, of the Compound Light Microscope (Motic Panthera E2)
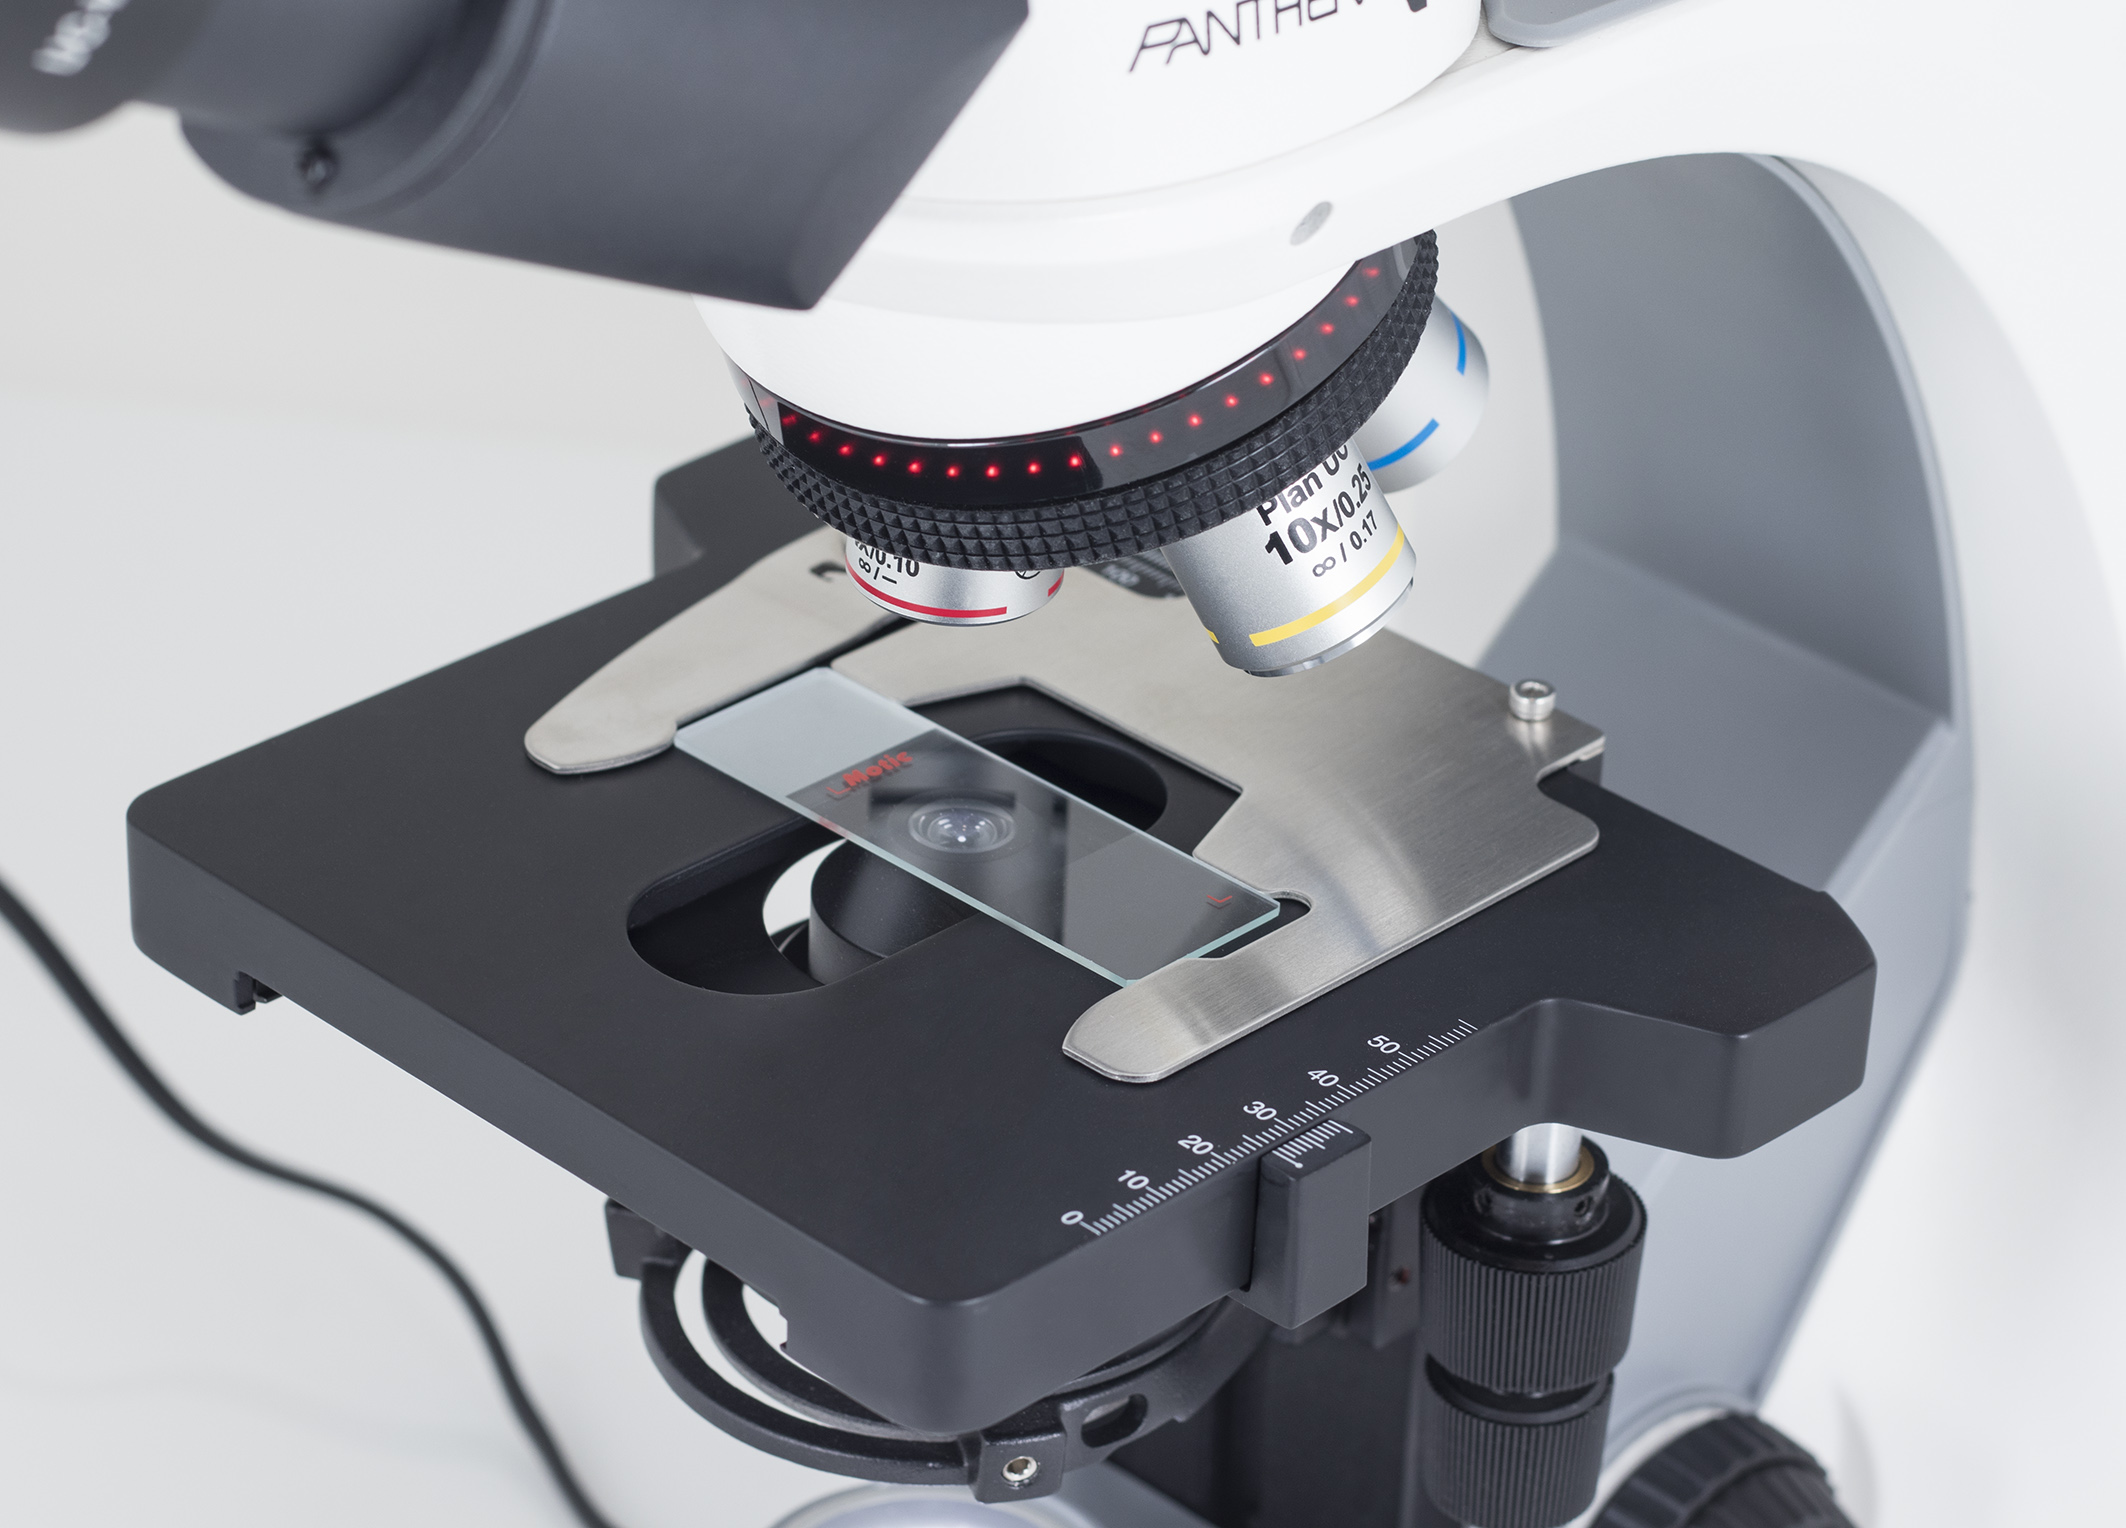
Corporate website: https://www.motic.com/
- Using the stage control knobs move the slide until the “e” is positioned over the opening of the stage above the condenser lens and is illuminated by the light.
- With your scanning objective lens (4x) lens in position, use the coarse adjustment knob to bring the objective lens and stage as close together as possible (The microscope has an automatic stop built in to prevent the slide from hitting the 4X objective).
- Look through the ocular and use the coarse adjustment knob to slowly move the stage away from the objective until the “e” is roughly in focus. If nothing comes into view after several turns of the coarse adjustment knob you will need to check for the following errors:
- The letter “e” was not positioned over the opening in the stage
- You lowered the stage too quickly and missed the letter “e”
- You have not lowered the stage far enough to see the letter “e”
- If necessary, use the mechanical stage control knobs to move the “e” into the center of your field of view (the area you see in the microscope). Complete focus using the fine adjustment knob.
- Look at the distance between the bottom of your objective lens and the slide when your “e” is in focus. This is your working distance. Take note of the distance.
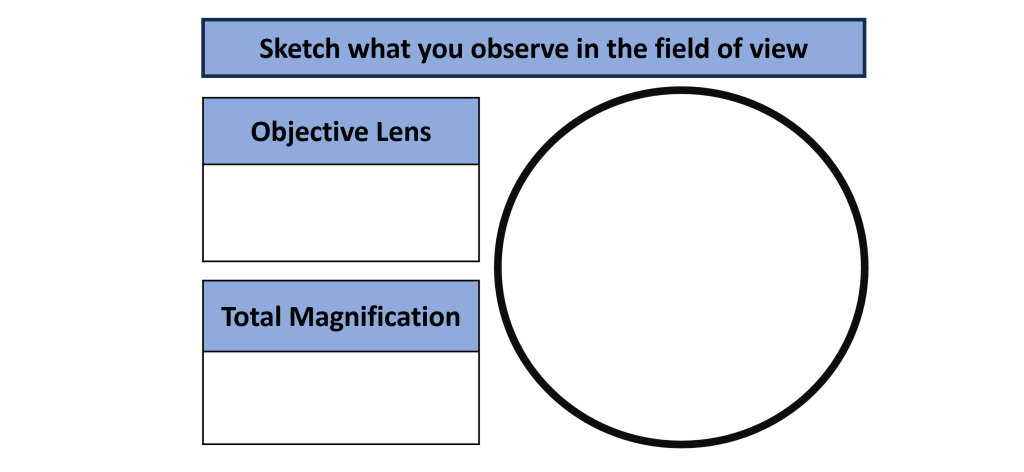
- Draw the letter “e” as it appears in your microscope field of view and as appears when you look at it on the stage (without the microscope).
- Is the letter larger or smaller when viewed through the microscope? __________________
- While looking through the ocular lenses, move the slide away from you using the mechanical stage controls.
Which way did the letter move in your field of view? ______________________ - While looking through the ocular lenses, move the slide to the right using the mechanical stage controls.
Which way did the letter appear to move in the field of view? ________________________ - Now move the low power (10x) objective lens into line with the stage. Do not lower your stage, simply move the 10x objective into place and use the fine adjustment knob to focus. If you are having trouble with the field of view being too dark, you may need to adjust the iris diaphragm.
- Use the fine adjustment knob to bring the “e” into focus. If necessary, use the mechanical stage knobs to move the “e” into the center of your field of view.
- Is your working distance larger or smaller compared to the scanning objecting working distance? _______________________
- Draw the letter “e” as it appears in your microscope field of view
- Is the field of view smaller or larger compared to the scanning objective field of view? __________________
- Now move the high power (40x) objective lens into line with the stage. Do not lower your stage, simply move the 40x objective into place and use the fine adjustment knob to focus. If you are having trouble with the field of view being too dark, check to make sure your iris diaphragm lever is in the open position.
- Use the mechanical stage knobs to move the “e” so that you can see a portion of it in your field of view. Use the fine adjustment knob to bring the “e” into focus.
- Is your working distance larger or smaller compared to the low power objecting working distance? ______________
- Draw the letter “e” as it appears in your microscope field of view.
- Is the field of view smaller or larger compared to the low power objective field of view? __________________
IMPORTANT NOTE: We will NOT be using the oil immersion (100x) objective lens. If you are having trouble focusing, double check to make sure you do not have the 100x objective lens over the stage. This objective requires the use of oil to focus and is unnecessary for many of the slides in this book.
